Configure Customer User Settings per Customer
You can configure JIT provisioning of customer users per customer or customer user invitations globally and per organization, website, customer group, and customer. The customer-level setting overrides the settings configured at the higher levels.
To configure customer user settings per customer:
Navigate to Customers > Customers in the main menu.
For the necessary customer, hover over the More Options menu to the right of the necessary customer and click the Configuration icon to start editing the configuration.
Select Commerce > Customer > Customer Users in the menu to the left.
Note
For faster navigation between the configuration menu sections, use Quick Search.
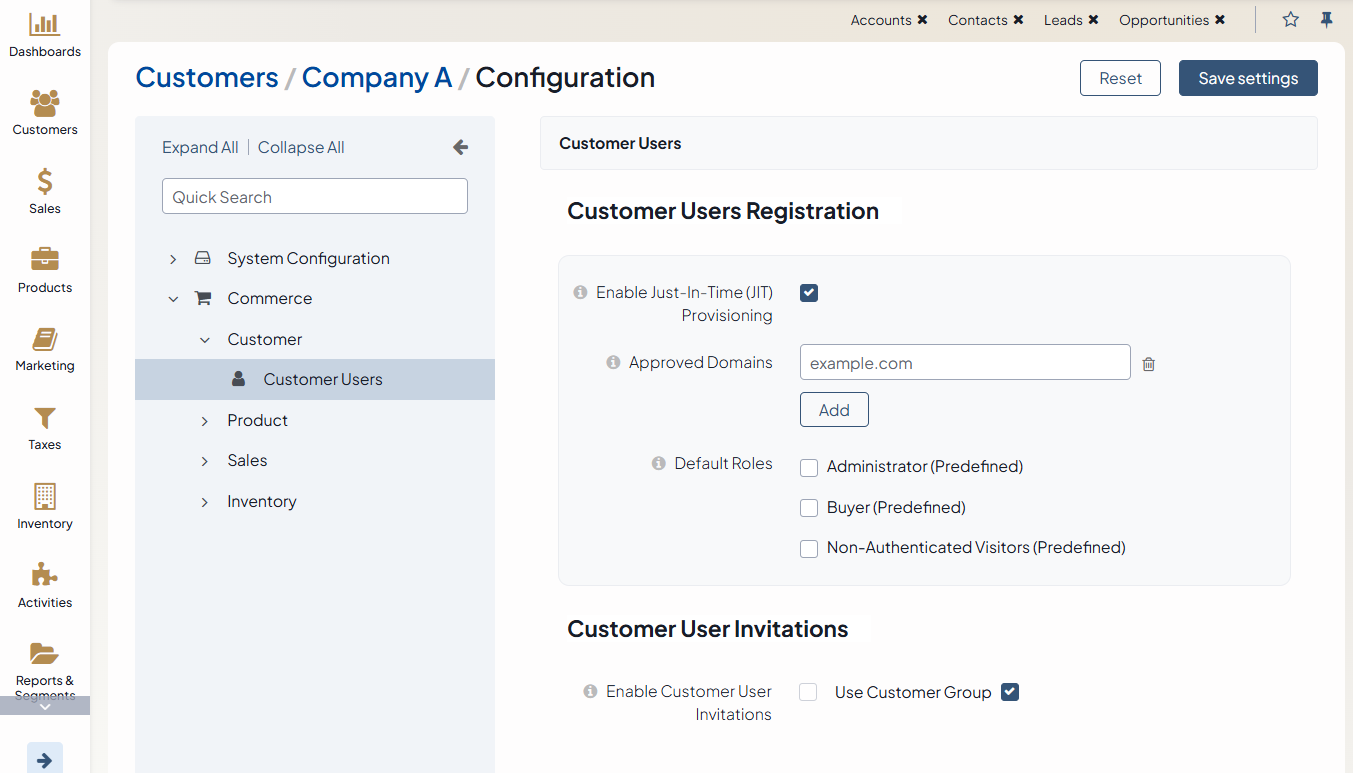
In the Customer Users Registration section, configure the following options:
Note
JIT provisioning of customer users is available as of OroCommerce version 7.0.3.
Enable Just-In-Time (JIT) provisioning — Enable the feature for the customer. The feature automatically approves registration and single sign-on (SSO) requests from users whose email domains match the approved domains. The system assigns the default roles to these users and does not require a manual invitation. When you enable the feature, the Approved Domains and Default Roles options become available. The setting is available only when JIT provisioning is enabled in the system configuration.
Approved Domains — Specify the email domains whose customer users the system registers automatically. Registration and single sign-on (SSO) requests from these domains are approved without manual review. Requests from all other domains are blocked.
Default Roles — Select the customer user roles that the system assigns to every newly provisioned customer user.
In the Customer User Invitations section, clear the Use Customer Group checkbox and configure the following option:
Enable Customer User Invitations — Enables/disables customer user invitations for the customer in the back-office and the storefront. When invitations are disabled, the invitation pages and actions are hidden. Enabled by default.
Click Save Settings.
Related Topics