Important
You are browsing the documentation for version 4.2 of OroCommerce, OroCRM and OroPlatform, which is no longer maintained. Read version 5.1 (the latest LTS version) of the Oro documentation to get up-to-date information.
See our Release Process documentation for more information on the currently supported and upcoming releases.
Configure Authorize.Net Integration in the Back-Office
To set up integration with Authorize.Net, complete the following:
Navigate to System > Integrations > Manage Integrations in the main menu.
On the Manage Integrations page, click Create Integration on the top right.
In the Basic Information section, provide the following information:
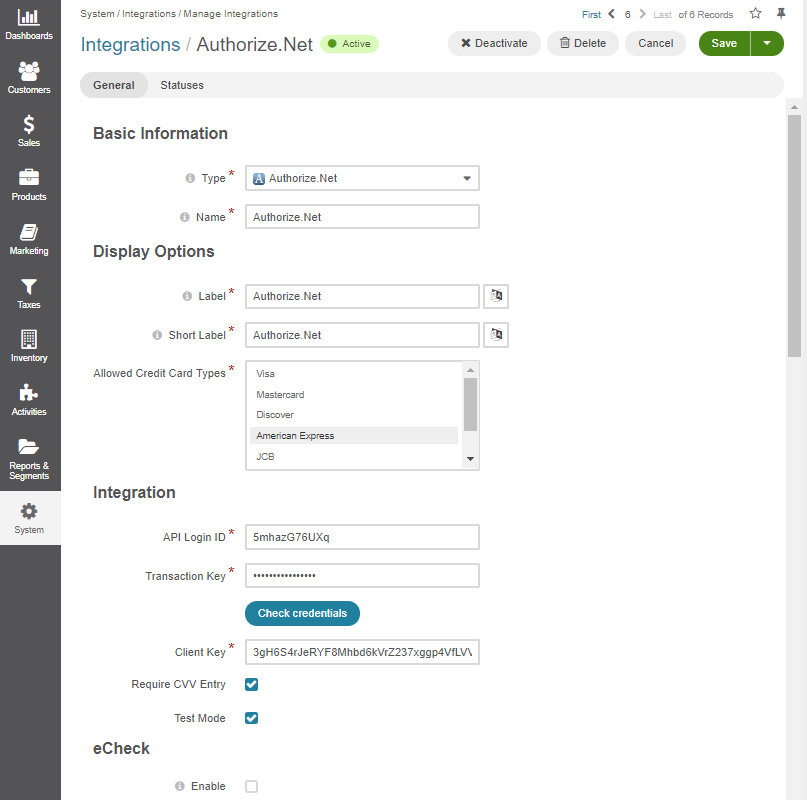
Type — Select Authorize.Net.
Name — The payment method name that is shown as an option for payment configuration in the OroCommerce back-office.
In the Display Options section, provide the following information:
Label — The payment method name/label displayed as a payment option for the buyer in the OroCommerce storefront during the checkout. To translate the label into other languages, click the icon next to the field.
Note
It doesn’t have to include the payment processor name if you want to hide it from the buyers. For example, you can enter ‘Credit Card Payments’ if you have a single payment method configured for processing credit cards.
Short label — The payment method name/label that is shown in the order details in the OroCommerce back-office and storefront after the order is submitted. To translate the label into other languages, click on the icon next to the field.
Allowed Credit Card Types — Select one or more items from the list of the credit card types. Supported types are Visa, Mastercard, Discover, American Express, JCB, Diner’s Club, and China Union Pay. Press and hold the Ctrl or Shift key and click on the items to select multiple card types.
In the Integration section, provide the following information:
Note
For more information on IDs and keys, see the Get Authorize.Net Credentials Required for Integration with OroCommerce topic.
No Account? Sign up here — Click the link to create a merchant account with Authorize.Net (if you have not set up an account yet).
API Login ID — An identifier that helps authenticate your account on the Authorize.Net payment gateway.
Transaction Key — A secret key that helps secure transactions to and from the Authorize.Net payment gateway.
Check Credentials — Click the button to make sure that the provided credentials are valid.
Client Key — A public key that helps secure transactions to and from the Authorize.Net payment gateway.
Require CVV Entry — When this check box is selected, a buyer is prompted to enter a CVV code during checkout.
Important
Select this check box only if you turned on the Card Code Verification (CCV) security feature on your Authorize.Net merchant interface. If a card code is not required, hiding the CVV field from buyers helps them keep their card code safe.
Test Mode — Select this check box to use Authorize.Net in the test mode that enables you to use the connection to the gateway without sending transaction information to a processing institution. See Using Authorize.Net in Test Mode for more information.
In the eCheck section, provide the following information:
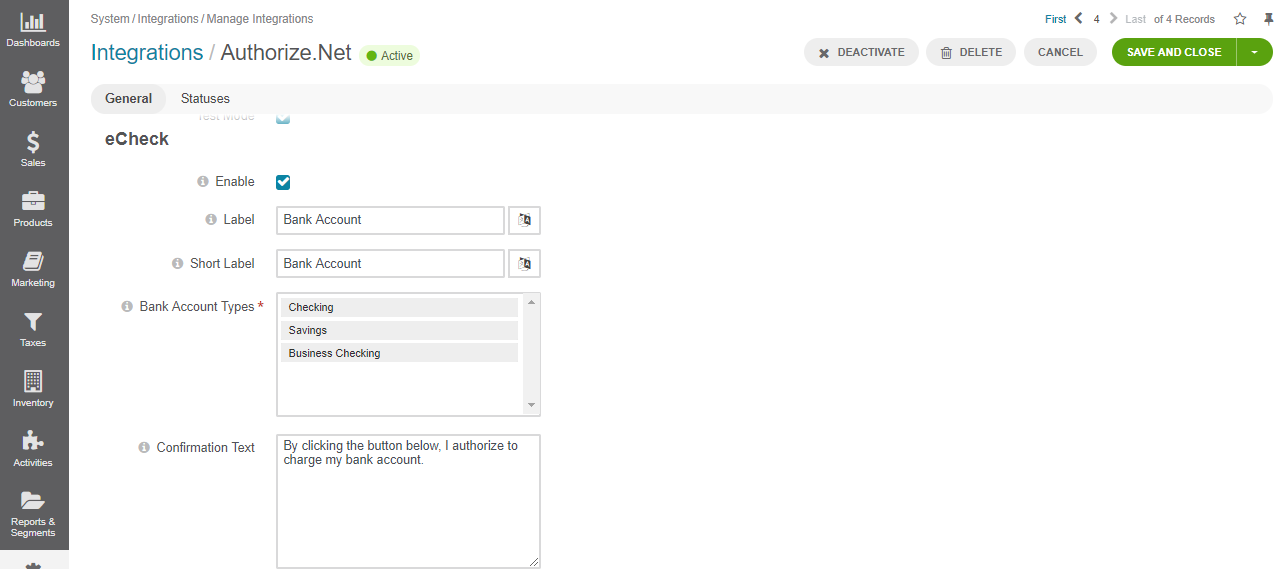
Enable — Click this check box to enable eCheck payments.
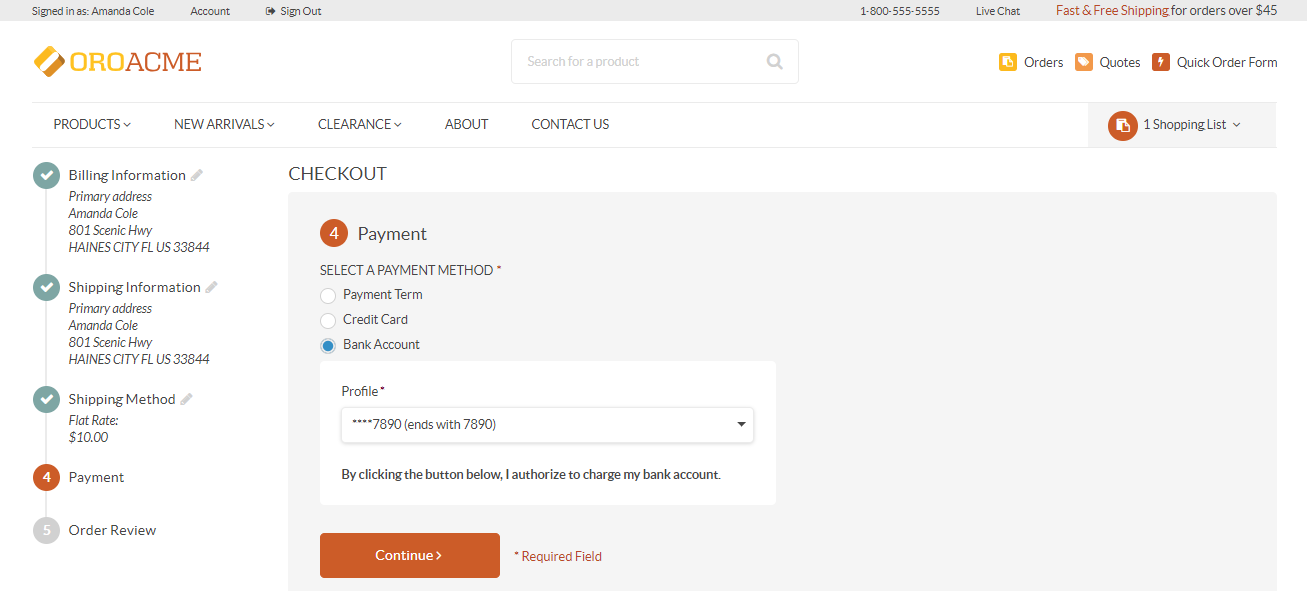
Label — This payment method name/label is displayed as a payment option for the buyer during the checkout in the OroCommerce storefront.
Short Label — This payment method name/label is displayed in the order history.
Bank Account Types — Bank account types to be available for the eCheck checkout (e.g., a savings or checking account).
Confirmation Text — The confirmation text provided in this field is displayed to the user when they choose eCheck as a payment option.
In the CIM section, provide the following information:
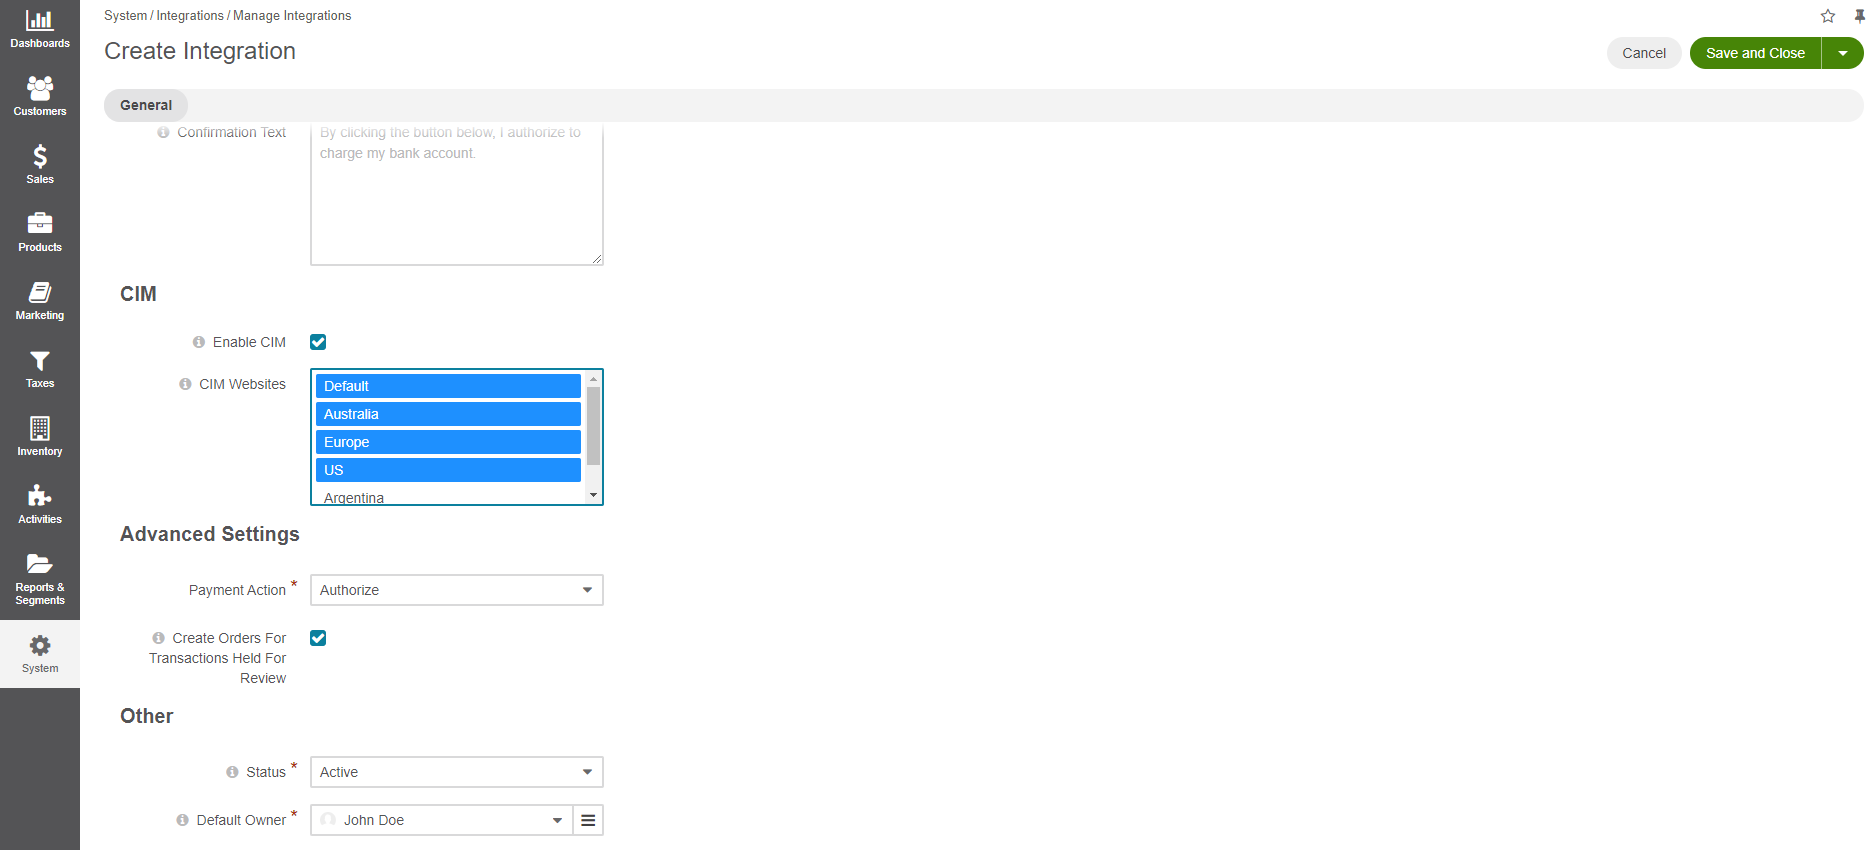
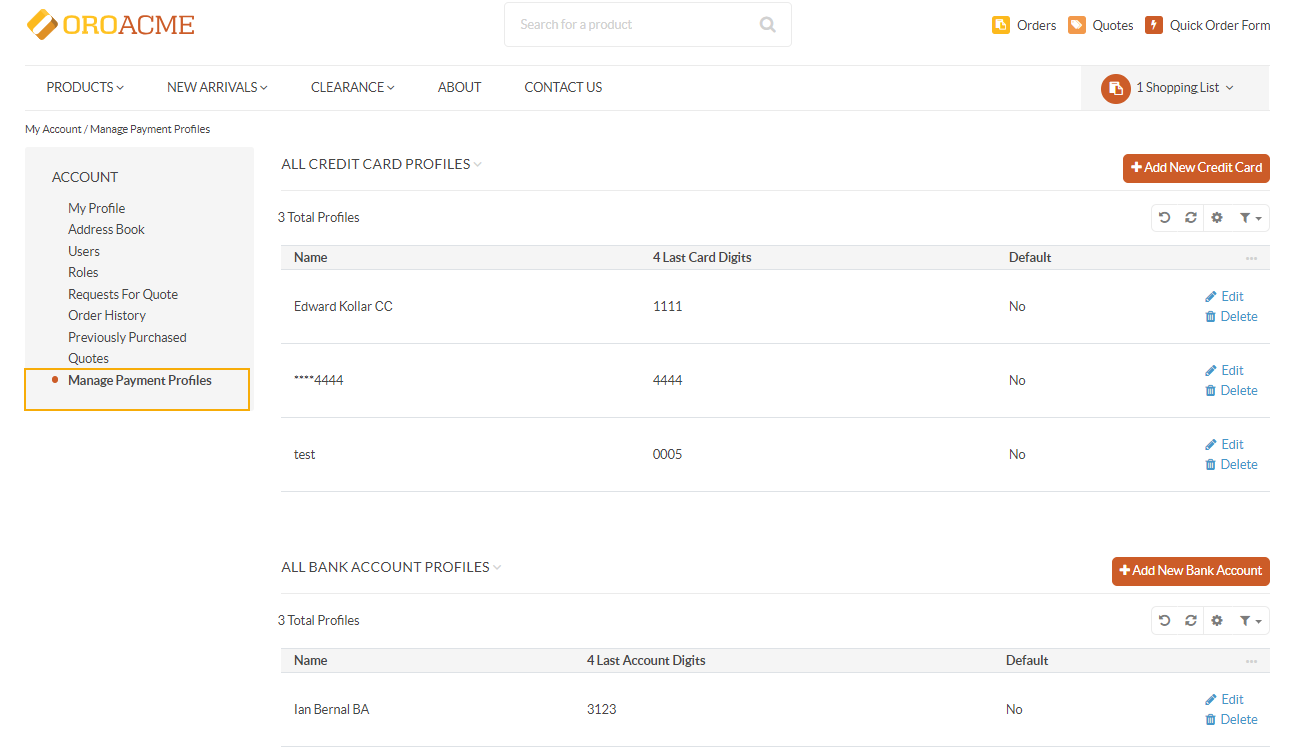
Enable CIM — Click this check box to enable Customer Information Manager Integration. When the integration is enabled, the Manage Payment Profiles section is added to the Account menu in the storefront.
CIM Websites — Select the websites for which you wish to enable Customer Information Manager integration.
In the Advanced Settings section provide the following information:
Payment Actions — Select one of the options for credit cards:
Authorize — The payment gateway checks with the cardholder’s issuing bank that the submitted card is valid and that there are sufficient funds to cover the transaction. The required amount is placed on hold on the card but not yet charged. To charge the amount, you must perform the capture action in the order details. This is usually done after the order is shipped or ready to be shipped.
Note
You have 30 days to capture the payment.
Authorize and Charge — The payment gateway checks the card with the cardholder’s issuing bank and, if everything is OK, initiates a money transfer from the card to your account. This payment action is recommended when the order is fulfilled immediately after the purchase (e.g. for digital goods sales).
Note
Authorize and Charge is the only payment action available for eCheck payments.
Create Orders for Transactions Held for Review — Use this option to enable order creation in OroCommerce if you configured fraud detection filters in your Authorize.Net account and set the filter action to Authorize and hold for review or Do not authorize, but hold for review. The created orders will be authorized only, regardless of the Payment Action selected above.
In the Other section, provide the following information:
Status — Set the status to Active to enable the integration.
Default Owner — A user who is responsible for this integration and manages it.
Click Save and Close.