Important
You are browsing documentation for version 5.0 of OroCommerce. Support of this version ended in January 2025. Read the documentation for version 6.1 (the latest LTS version) to get up-to-date information.
See our Release Process documentation for more information on the currently supported and upcoming releases.
Manage Tax Rules in the Back-Office
Hint
This section is part of the Tax Management concept guide that provides a general understanding of the tax configuration and management in OroCommerce.
Tax rules help OroCommerce find the correct tax rate that should be used for the products listed in the purchase order by matching the product tax code that indicates:
Tax status of the product
Customer tax code that indicates the tax status of the buying company
Tax jurisdiction where the tax is due
The sections below provide guidance on how to create and manage tax rules.
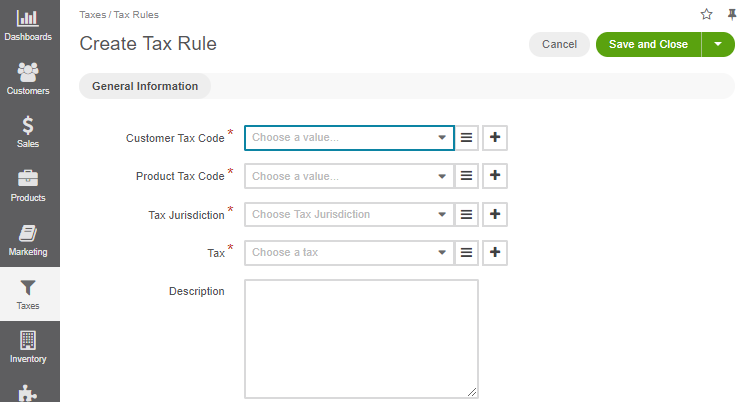
Create a Tax Rule
Note
See a short demo on how to create tax rules in OroCommerce or keep reading the step-by-step guidance below.
To create tax rules for a particular tax jurisdiction, you need to complete the configuration of the tax options described in the Tax Rule Prerequisites section.
Once all the necessary actions are performed, you need to create a tax rule for every valid combination of the tax rates, product types, and customer types to ensure that they are properly taxed at every checkout.
Manage Tax Rules
To view all tax rules, navigate to Taxes > Tax Rules in the main menu.

Note
To handle a big volume of data, use the page switcher, increase View Per Page or use filters to narrow down the list to just the codes you need.
In the tax rules list, you will find the information about customer and product tax codes, tax jurisdiction, and tax rates that are linked to the tax rules, detailed description, and the dates when the tax rule was created and updated.
Hover over the More Options menu to the right of the item and click to open its details page, to edit, or to remove the tax rule.
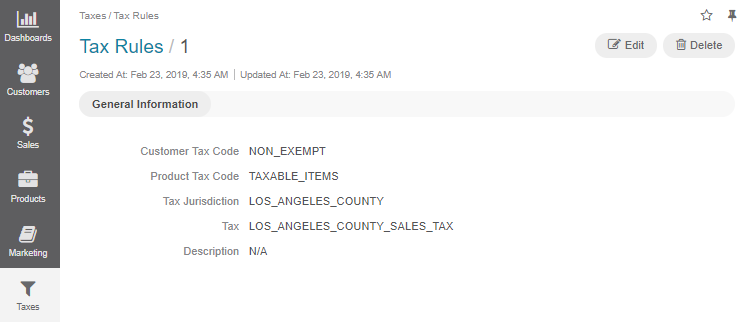
View Tax Rule Details
To view tax rule details:
Navigate to Taxes > Tax Rules in the main menu.
Find the line with the necessary tax rule and click on it to open its details page.

You can Edit or Delete the tax rule by clicking the required button on the top right.
Edit a Tax Rule
To edit the tax rule:
Navigate to Taxes > Tax Rules in the main menu.
Hover over the More Options menu to the right of the item and click to start editing its details.
Update the links between the tax rule and the tax rule components (a tax rate, a tax jurisdiction, a customer tax code, and a product tax code) to modify the tax rule.
Click Save and Close.
Export Tax Rules
You might need to export the necessary tax rule details, download it as a .csv file, and reuse it in the third-party systems.
Another scenario for using export is when you plan bulk data update that is easily automated in the spreadsheet software.
To export the tax rules in a .csv format:
In the main menu, navigate to Taxes > Tax Rules.
Click Export on the top right.
Once the export is complete, you will receive an email to download the .csv file.
Import Tax Rules
Import File option helps import a large bulk of tax rules information into the tax rules list using the .csv file.
Example of tax rules bulk import template
Customer Tax Code Code |
Product Tax Code Code |
Tax Jurisdiction Code |
Tax Code |
|---|---|---|---|
NON_EXEMPT |
TAXABLE_ITEMS |
LOS_ANGELES_COUNTY |
LOS_ANGELES_COUNTY_SALES_TAX |
To import a bulk of tax rules information:
In the main menu, navigate to Taxes > Tax Rules. The tax rule list opens.
Click Import File on the top right.
Prepare data for import: Create your bulk information in the .csv format. Once your file is ready, click Choose File, select the prepared comma-separated values (.csv) file, and click Import File.
Note
Ensure that your .csv file is saved in the Unicode (UTF-8) encoding. Otherwise, the content of the file can be rendered improperly.

Validate import results: Click Validate to check your import results. If there are any Records with errors, fix them in the .csv file before starting the import.
Launch import: After successful validation, click Import File.
Click Cancel to decline the import.
Important
Interactive status messages inform about the import progress, and once the import is complete, the changes are reflected in the list upon refresh. Additionally, an email message with the import status is delivered to your mailbox.
Follow the on-screen guidance for any additional actions. For example, for the inventory template, select one of the options: a) inventory statuses only or b) detailed inventory levels.
Related Articles
