Important
You are browsing upcoming documentation for version 7.0 of OroCommerce, scheduled for release in 2026. Read the documentation for the latest LTS version to get up-to-date information.
See our Release Process documentation for more information on the currently supported and upcoming releases.
Oro Devbox VM
Google Cloud Platform enables you to deploy your Oro Devbox instance in just one click without manually configuring the software and settings.
Detailed guidance is provided further in this article.
Deploy the Solution
Navigate to Google Cloud Marketplace, click Explore the marketplace and then search for the Oro Devbox solution provided by Oro Inc.
Click Launch on Compute Engine.
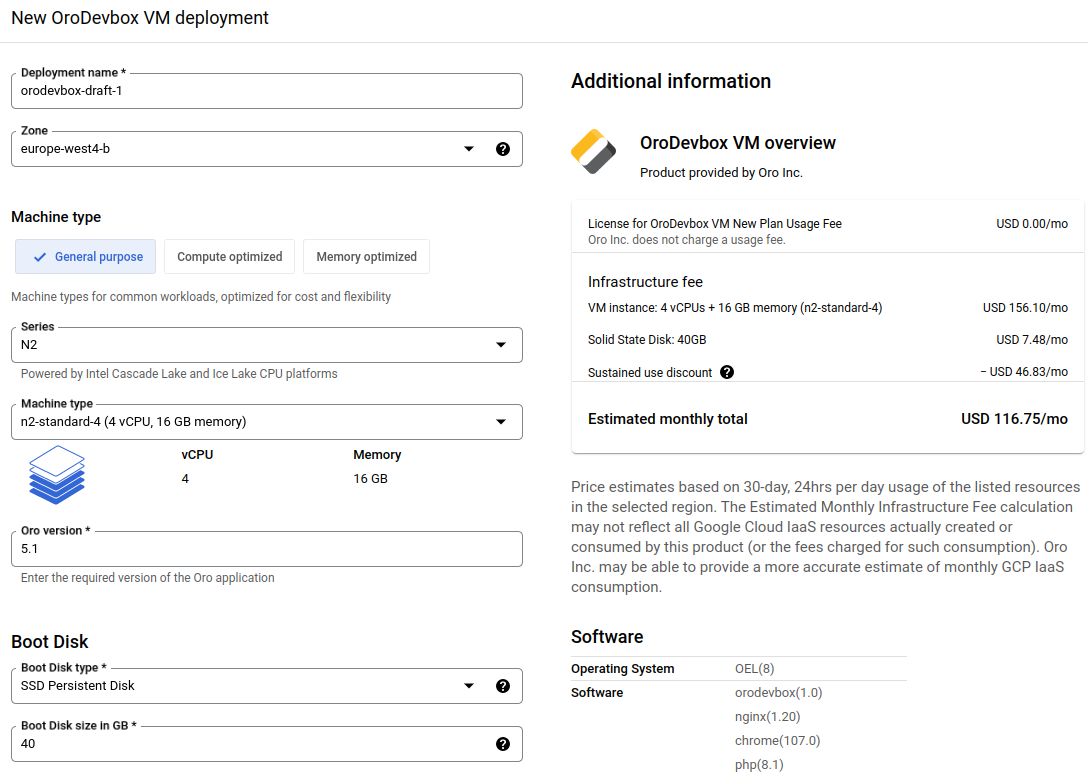
The Oro solution deployment page displays the default settings (e.g., name, zone, machine type, boot disk type, networking interfaces, etc.). You can accept or customize them if necessary.
When complete, click Deploy on the bottom left to launch the deployment process.
Access the Oro Application
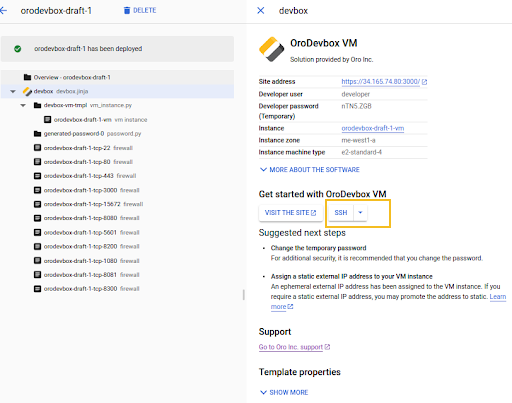
Use the generated credentials to access your Oro Devbox application:
Site Address — a link to your Oro Devbox application.
Developer user — a username used to log into the devbox application.
Developer password - a password used to log into the devbox application.
Also, you can access the VM instance using SSH by clicking SSH and selecting the required option from the dropdown.

You can delete the deployment by clicking Delete on the upper left, next to the solution name. Resources created by this deployment, including VM instances, disks, and firewalls will be deleted as well.

Launch the Environment
Once you have provided the credentials, you get access to the configuration settings of your Oro Devbox application. You can set up user authentication and SSL certificate here, select the Git repository to clone, and install the application. You can always Skip the configuration steps that are irrelevant to your particular business case.

To launch the environment:
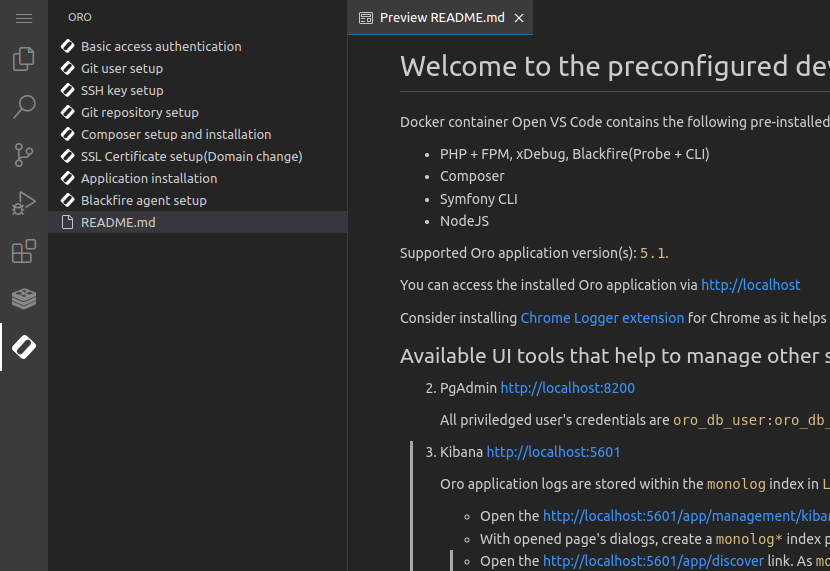
Click the
 Oro logo in the menu panel to your left to start configuring the application.
Review the README.md file that contains all information about the pre-installed software and UI tools that help run your Oro application and manage the services that the application supports.
Under Basic access authentication, change the pre-configured web access credentials that were initially provided.
Under Git user setup, provide a user name and an email for Git to associate commits with your identity.
Under SSH key setup, select the SSH key (public or private) to use on the Git side. SSH key is required for Git resources authentication.
Under Git repository setup, provide the link and branch of the Oro application’s Git repository you want to clone. The fields are pre-defined by default.
Under Composer setup and installation, provide Git tokens to improve the retrieval performance of the composer package. You can also provide GitLab’s and/or GitHub’s resource (domain) to the token setup. Once you save the configuration, the system will start setting up the tokens and installing packages into the application’s folder. You can always reinstall the composer at any point after the initial installation of the application should any issues occur. Composer reinstallation does not require application reinstallation.
Under SSL Certificate setup, provide a domain name and an email for the Devbox server to send an SSL certificate bind request. Once submitted and confirmed, the application URL will be replaced with the provided domain name.
Under Application installation, select whether to install the production or development mode of the application. Provide credentials for the back-office admin user and decide whether to install the application with or without sample data. Click Install. All the installation-related notifications will appear on the bottom left. If you wish to clear the application data after the installation, you can reinstall the application.
Under Blackfire agent setup, provide the server ID and token of your Blackfire account. It is an optional setting.
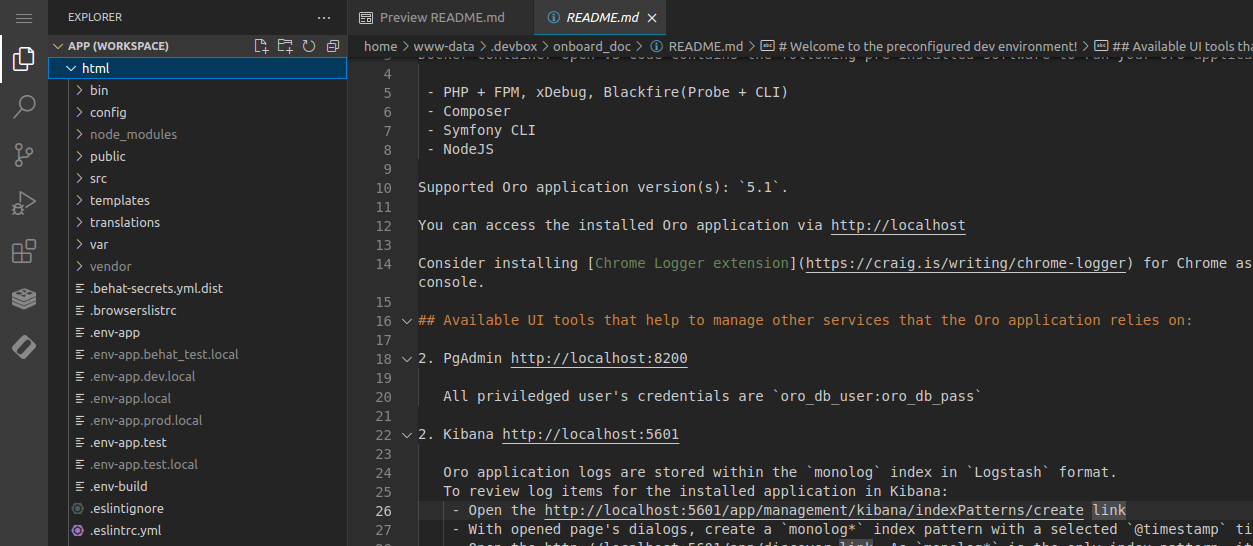
All application files are located under the Workspace menu on the left. You can manage, clone, add, or delete them there.

Once the installation is complete, you can start working with your Oro application.
