Important
You are browsing the documentation for version 1.6 of OroCommerce, OroCRM and OroPlatform, which is no longer maintained. Read version 5.1 (the latest LTS version) of the Oro documentation to get up-to-date information.
See our Release Process documentation for more information on the currently supported and upcoming releases.
Manage Entity Fields
In your Oro applications, you can manage the already existing and newly added entity fields. Specifically, you can edit and delete them, as well as import fields in bulk. To make sure that the new or updated fields are successfully added to entities, you update the schema.
Edit Custom Entity Fields
Warning
If the Show on Form value has been set to No when creating the field, you cannot create or update its values from the Oro application. This is only reasonable for the field values uploaded to the system during synchronization.
To edit a custom entity field:
Navigate to System > Entities > Entities Management.
On the All Entities page, click the required entity to select it.
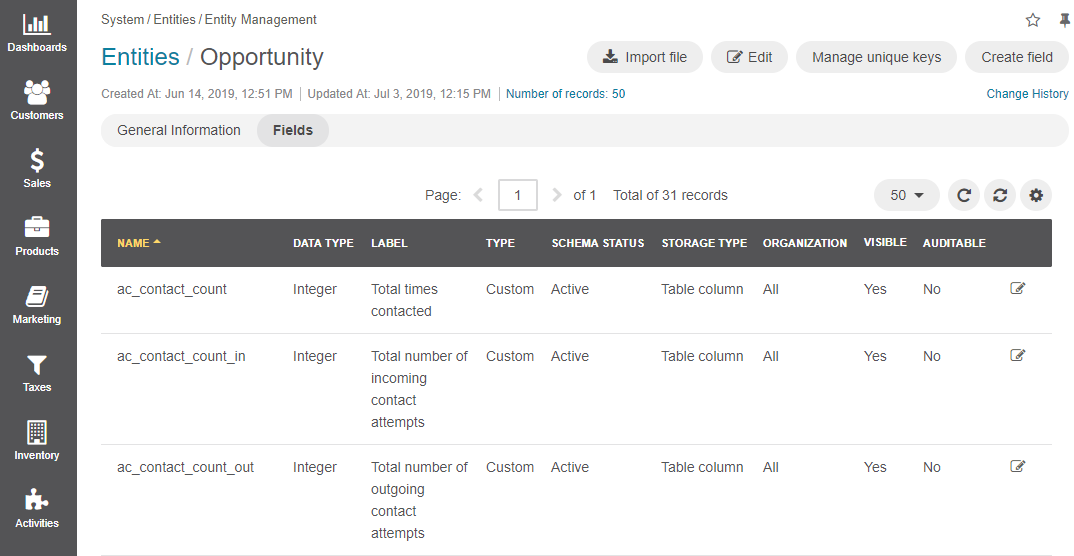
On the page of the selected entity, click Fields.

In the Fields section, click the required field.
Update the field, as described in the Create Entity Fields topic.
Click Save.
Note
Alternatively, you can edit an entity field from the page of the selected entity by clicking the Edit icon at the right end of the corresponding row.
Delete Custom Entity Fields
To delete a custom entity field:
- Navigate to System > Entities > Entities Management.
- On the All Entities page, click the required entity to select it.
- On the page of the selected entity, click Fields.
- In the Fields section, choose the required entity field and click the Delete icon at the right end of the corresponding row.
- In the Deletion Confirmation dialog box, click Yes.
- Update the schema (if the storage type for the field is set to Table Column).
Import Fields
To simplify creation of entity fields, you can import a .csv file with a list of properties and their fields.
Important
You can only import data saved in the .csv (comma separated values) format.
Navigate to System > Entities > Entity Management.
In the grid on the All Entities page, click the required entity.
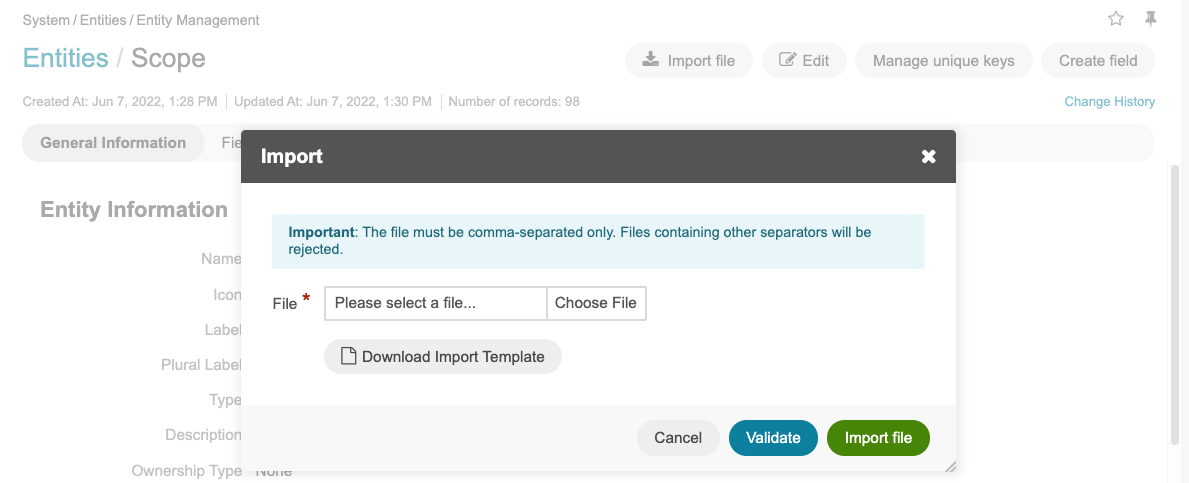
On the page of the entity, click Import File on the top right.

In the dialog that opens, you can:
- Export Template — Enables you to download a .csv file with sample data.
- Validate — Enables you to check the file for errors before uploading it. Validation results are sent to your email. If there are any records with errors, you can fix them in the .csv file before importing to the application.
- Upload the file — Click Choose File to select the .csv file you prepared, and click Submit.
Update the schema to apply the changes if the storage type for the field is set to Table Column.
Update Schema
Every time you create or delete entity fields with the storage type set to Table Column, you need to update the schema (i.e. the internal structure) to apply your changes. This has to be done so that the system knows how the existing fields are interconnected and where to find them in the database.
Important
Schema update is not required for entity fields with the Serialized field storage type.
Click Update Schema on the page of the selected entity.
In the Schema update confirmation dialog box, click Yes, Proceed. Keep in mind that schema update may take some time to finish.

Related Topics

