Important
You are browsing documentation for version 5.0 of OroCommerce. Support of this version ended in January 2025. Read the documentation for version 6.1 (the latest LTS version) to get up-to-date information.
See our Release Process documentation for more information on the currently supported and upcoming releases.
Configure Google Integration Settings in the Back-Office
To configure Google integration-related settings in the back-office:
Navigate to System > Configuration in the main menu.
In the panel to the left, click System Configuration > Integrations > Google Settings.

Before you begin, check out the instructions on obtaining credentials on the Google side. Make sure that your Oro domain is included into Authorized JavaScript origins and Authorized redirect URIs.
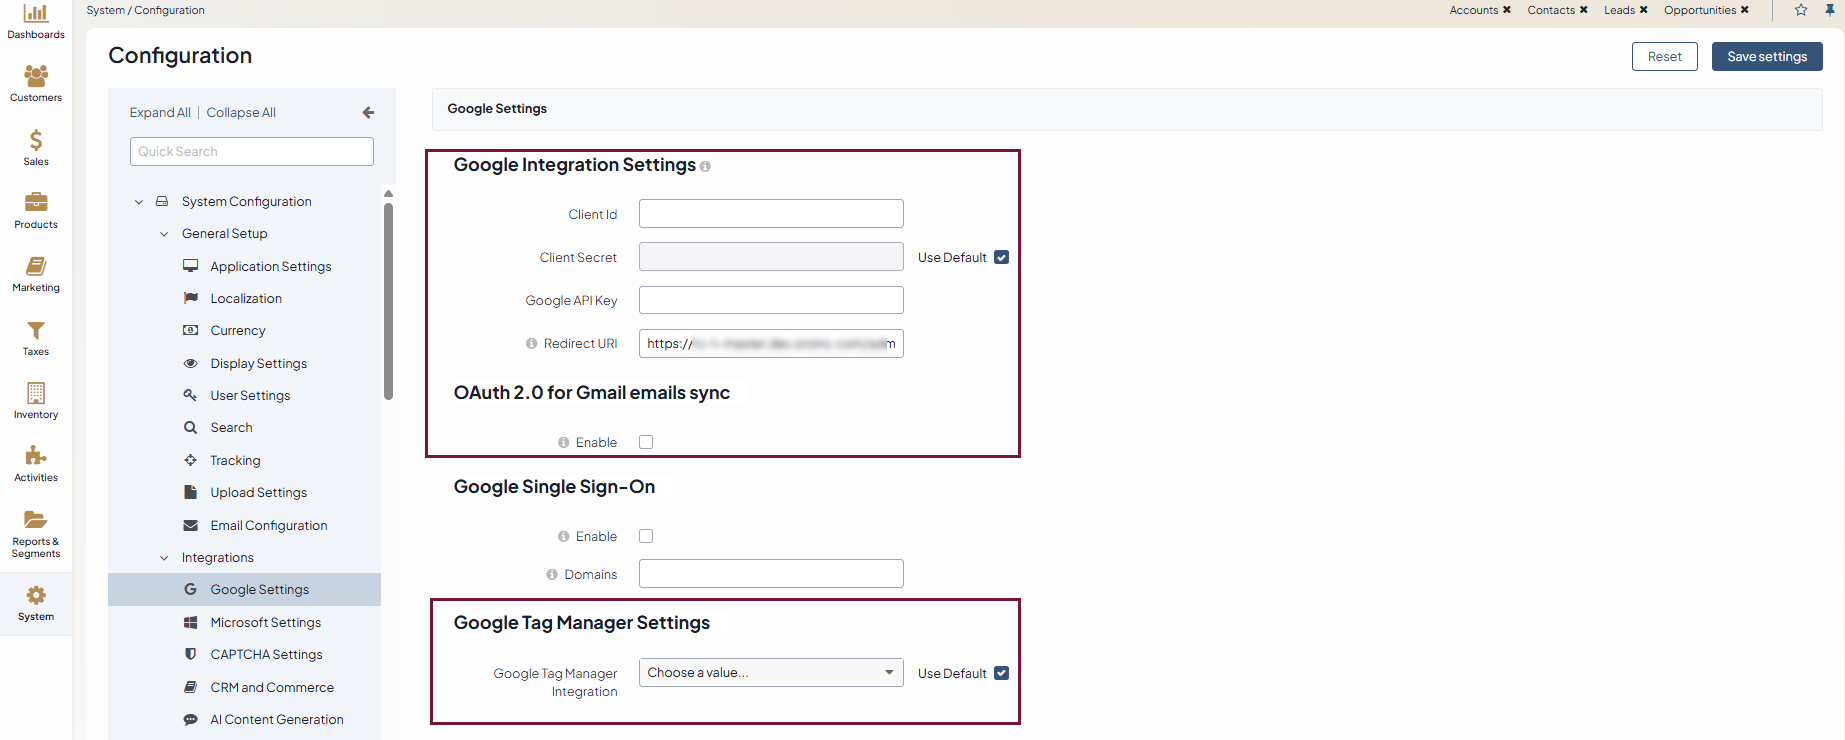
In the Google Integration Settings section, provide the following details:
Client ID — The Client ID generated in the API console.
Client Secret — The Client Secret generated in the API console.
Google API Key — The API Key generated in the API console. Provide a valid Google API key to activate maps for addresses in the system.
Redirect URI — READ-ONLY field, the value is auto-generated and should be added to the Authorized Redirect URIs configuration as described in the Configure Google Single Sign-On section (Configure Consent Form > step 7).
In the OAuth 2.0 for email sync section, check Enable to activate synchronization with emails. Please, make sure that Gmail API is enabled in Google Developers Console.
In the Google Tag Manager Settings section:
Clear the Use Default checkbox.
For the Google Tag Manager Integration filed, select the GTM integration you have configured for the application. Click Save to display an additional option.
For Data Collection For, select the Google Analytics type (Universal, GA4, or both) that connects to your GTM account to enable data mapping.
Related Topics