Important
You are browsing documentation for version 5.0 of OroCommerce. Support of this version ended in January 2025. Read the documentation for version 6.1 (the latest LTS version) to get up-to-date information.
See our Release Process documentation for more information on the currently supported and upcoming releases.
Configure Data Audit in the Back-Office
Data Audit enables you to see the full history of changes made to any entity and its fields that have been marked as auditable, and create out-of-the-box reports based on these changes.
Mark an Entity as Auditable
Marking a particular entity as auditable defines whether the system logs the actions performed to this entity and who performed these actions.
To mark an entity as auditable:
Navigate to System Configuration > Entities > Entity Management in the main menu.
Locate the required entity and open its edit page.
Hint
To save time looking for the entity, use filters at the top of the record table.
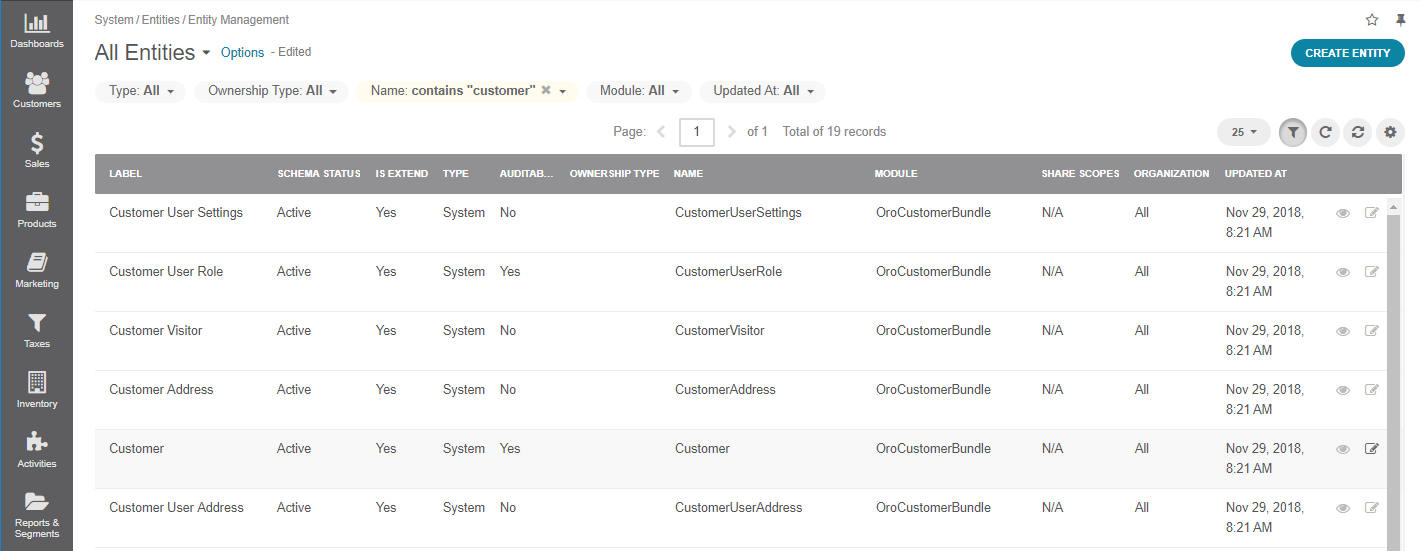
In the Other section, set the Auditable field to Yes.

Hint
For more information on entities, see the Create an Entity topic.
Click Save and Close.
View Entity Change History
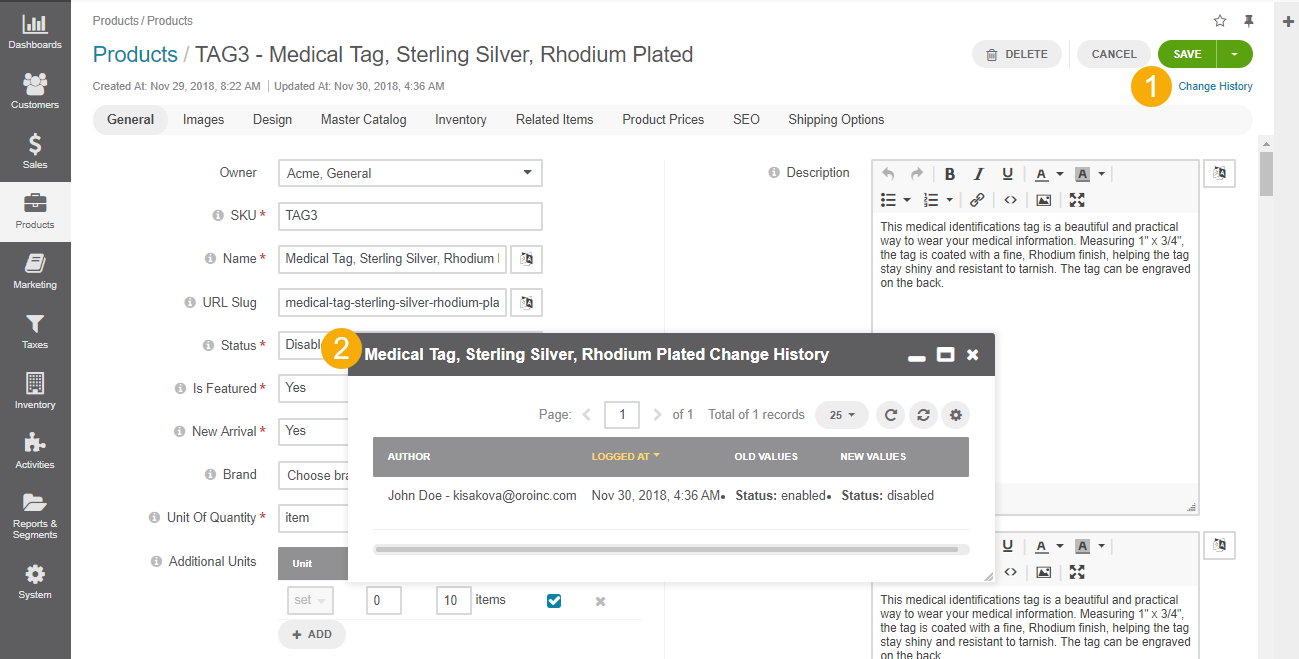
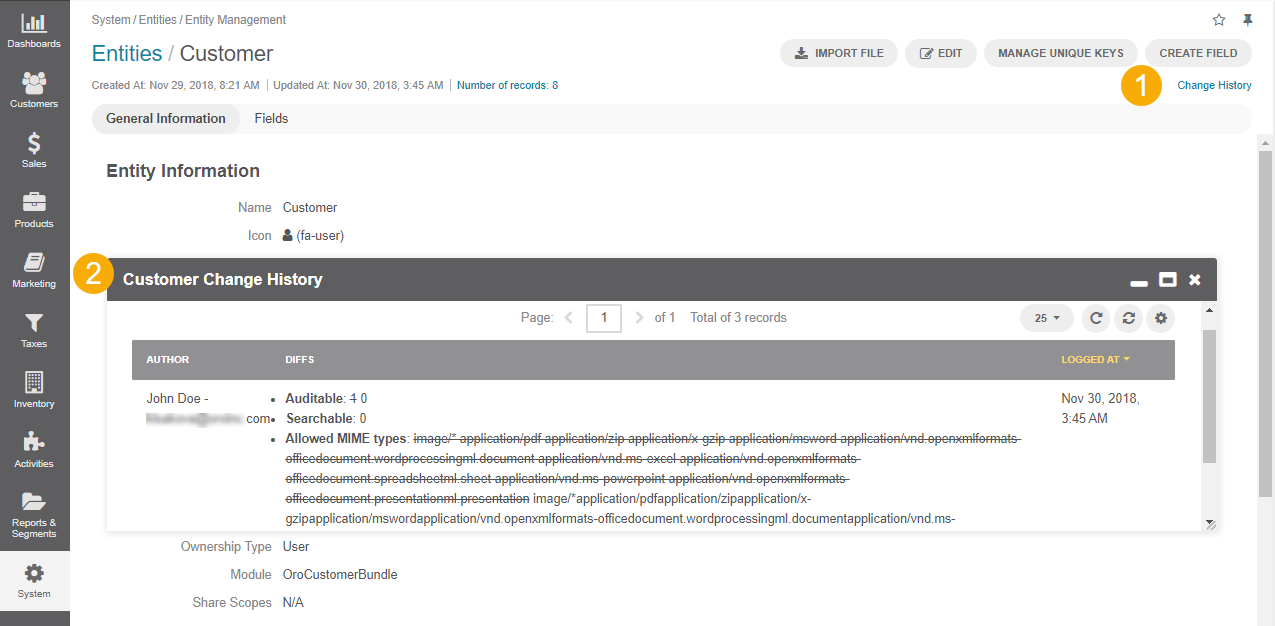
You can monitor changes to auditable entities on their view and edit pages by clicking on the Change History link on the top right.
The history includes the author and the time of the change, and the difference between the previous and the new version.
Make sure that the entity field of the entity are also marked as auditable if you want to track the history of its changes. For instance, if the newArrival entity field of the Product entity has the Auditable field set to No, then no changes made to this field are going to be tracked.
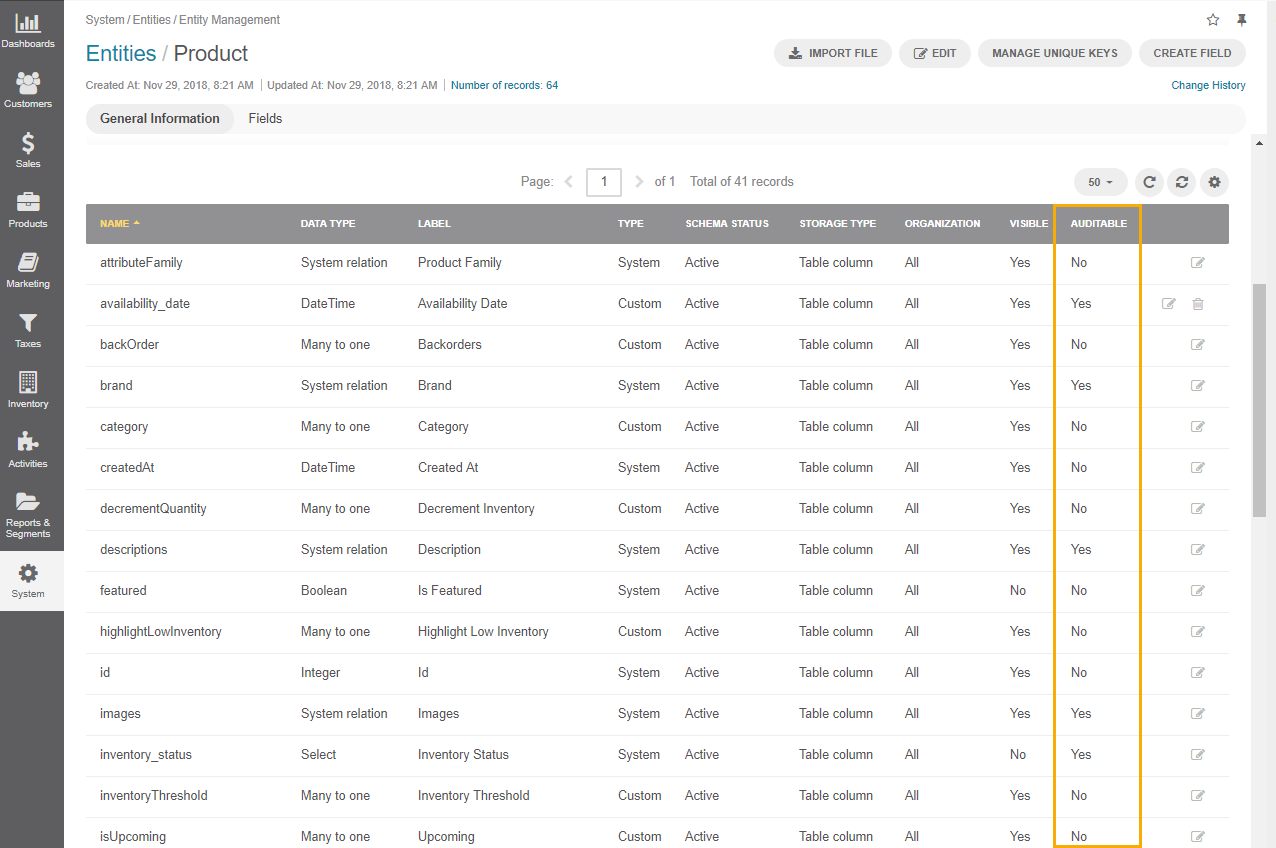
To set an entity field as Auditable:
Create a Data Audit Report
You can create reports based on the changes that have taken place in auditable entities.
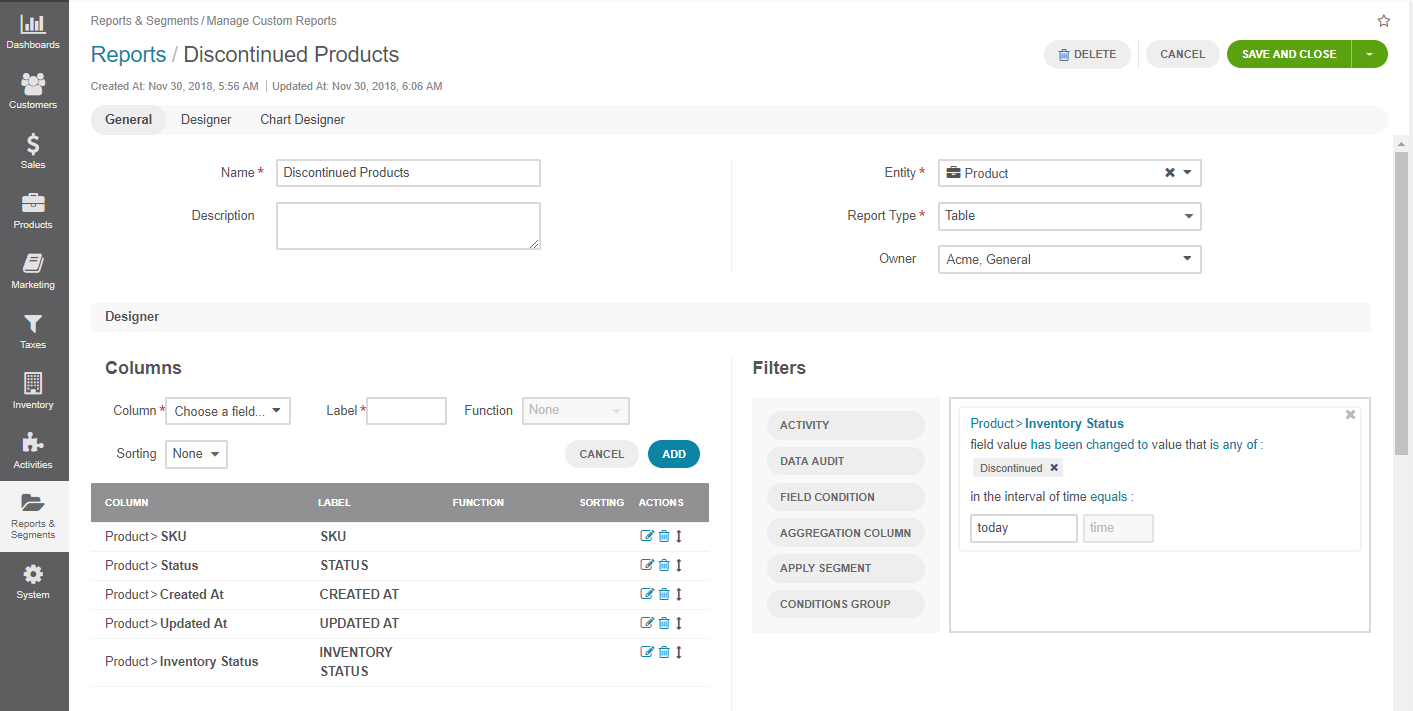
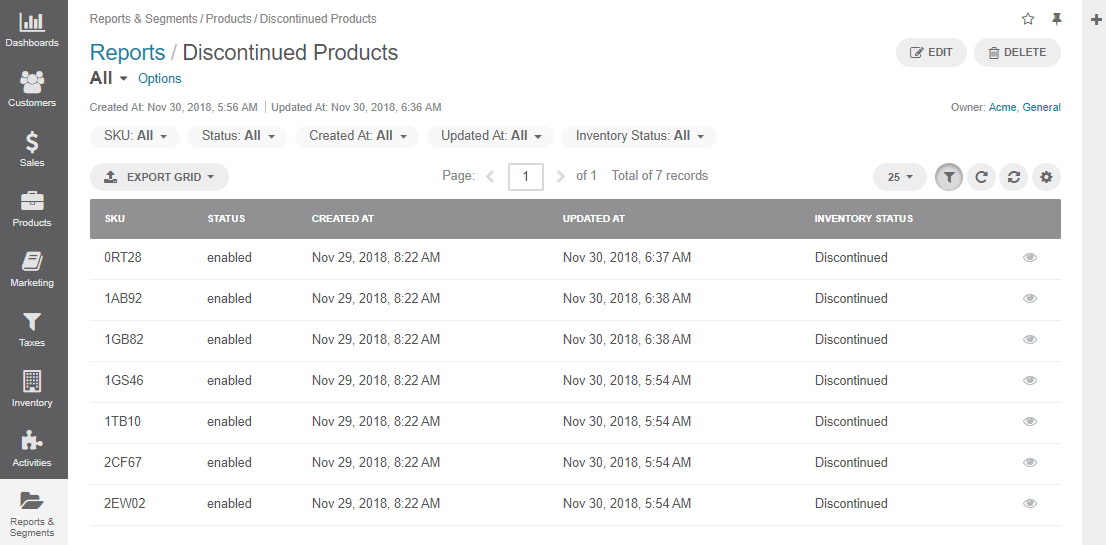
As an illustration, we are going to create a report of products that have been discontinued this year, i.e., the items that have Inventory Status changed to Discontinued.
Hint
First, make sure that the Inventory Status entity field is auditable.
Navigate to Reports & Segments > Manage Custom Reports.
Click Create Report
Provide the following key details in the General section:
Name — Give the report a name.
Entity — Select Product for entity type.
Report Type — Select Table.
In Filters, drag and drop the Data Audit field to the area on the right.
Set the following conditions:
Product > Inventory Status
Has been changed to > is any of > Discontinued
Interval between > 1.01.2018-31.12.2019
Add the following columns to the table:
SKU
Inventory Status
Created At
Update At
Click Save and Close.
View Changes of Auditable Entities
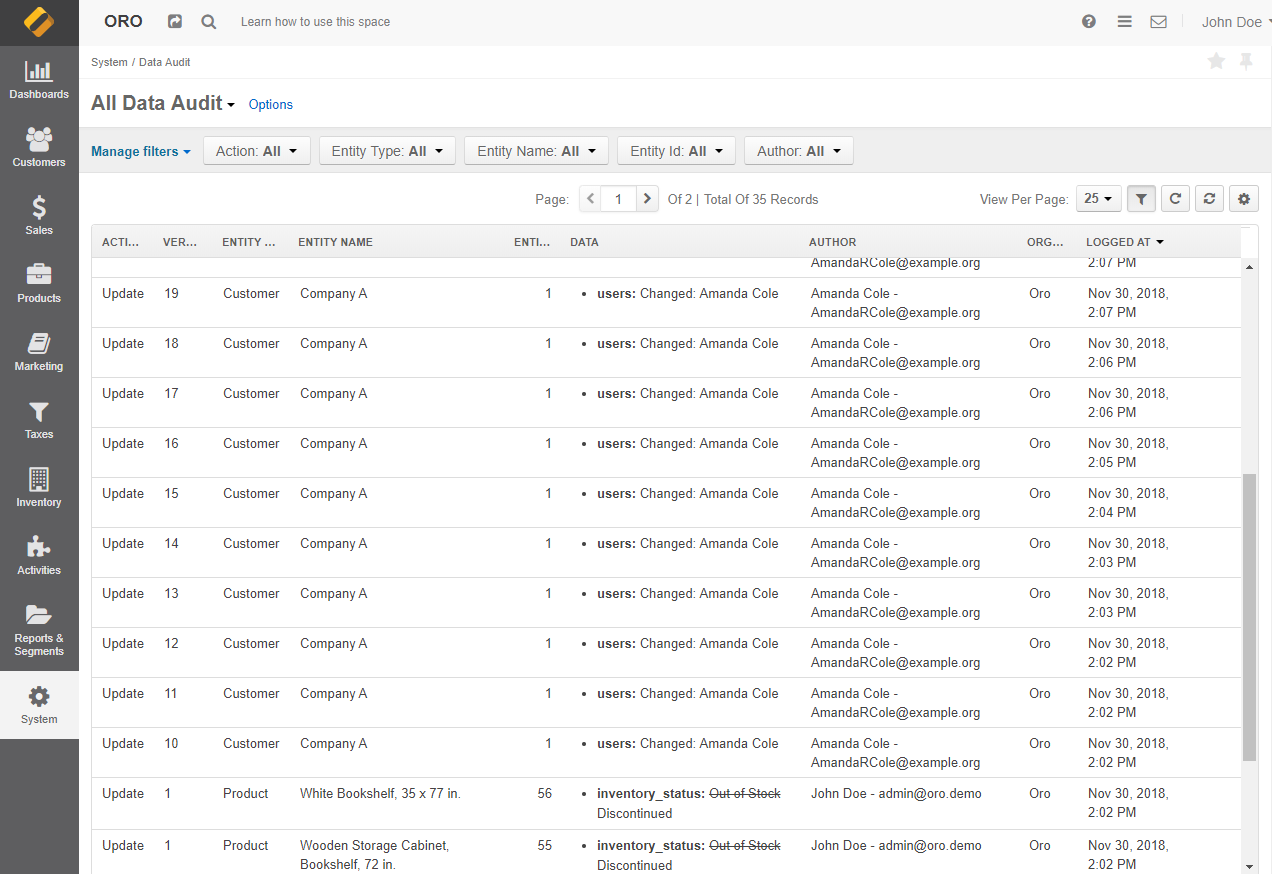
All changes made to auditable entities and fields are logged into the system and saved under System > Data Audit. You can filter the table by required parameters and save the filtered page for future reference.
The report grid contains the following columns:
Name |
Description |
|---|---|
ACTION |
Defines the action that has been performed with the record. You can see if the record has been created, updated or removed. |
VERSION |
Corresponds to the consecutive number of changes performed with the specific record. |
ENTITY TYPE |
Type of the entity to which the record belongs. |
ENTITY NAME |
Name of the specific record tracked. |
ENTITY ID |
ID of the entity to which the record belongs. |
DATA |
Details of the change. |
AUTHOR |
Name and email of the user that has performed the change. |
ORGANIZATION |
Organization, within which the change has been performed. |
LOGGED AT |
Date and time when the event was logged. |
Audit of Login Attempts
Note
This is a Platform Enterprise feature.
To simplify investigation of any security-related incidents, the application keeps track of all back-office login attempts and the following related security events:
Successful login
Unsuccessful login
Account is locked
Autodeactivation email has been sent
Reset password email has been sent
The log is stored in the security log channel.
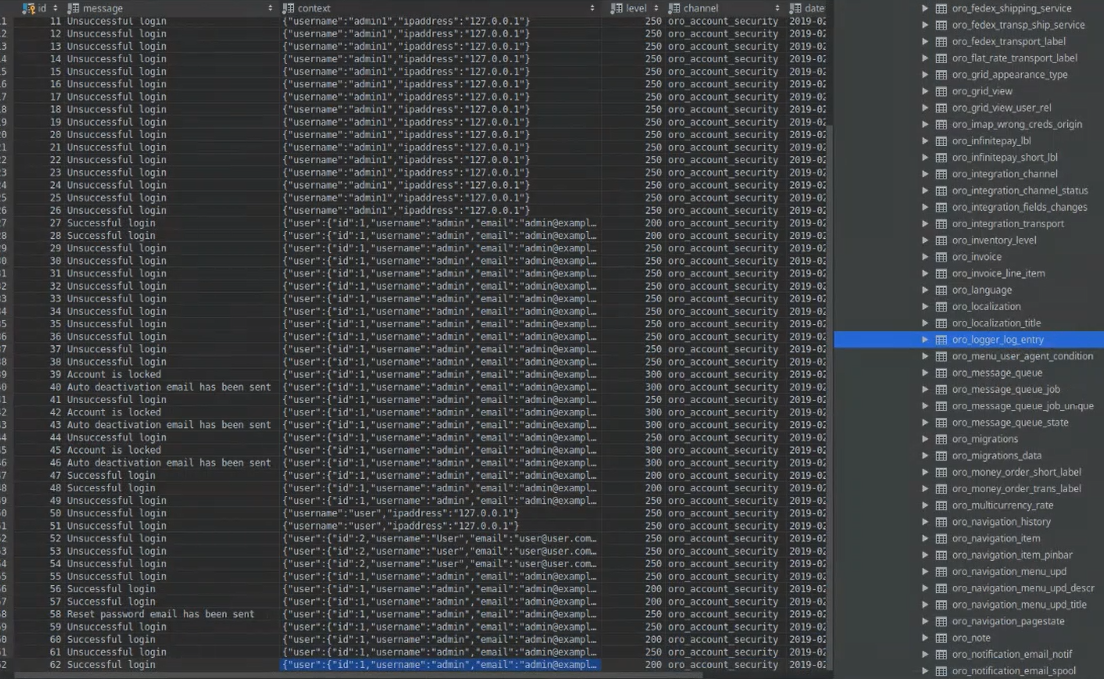
In addition to the type of the security event, the following details are recorded in the table:
user ID
username
email
full name
user status (enabled or disabled)
last login date and time
user creation date and time
IP address
Login attempts can be accessed from the back-office UI. See Login Attempts UI for more information.
Related Topics

