Important
You are browsing documentation for version 5.0 of OroCommerce. Support of this version ended in January 2025. Read the documentation for version 6.1 (the latest LTS version) to get up-to-date information.
See our Release Process documentation for more information on the currently supported and upcoming releases.
Manage Users in the Back-Office
Enable/Disable a User
To enable or disable a user in the Oro application:
Navigate to System > User Management > Users.
In record table, click once on the name of the selected user to open their page.
On page of the selected user, click Enable User/ Disable User on the top right.


Note
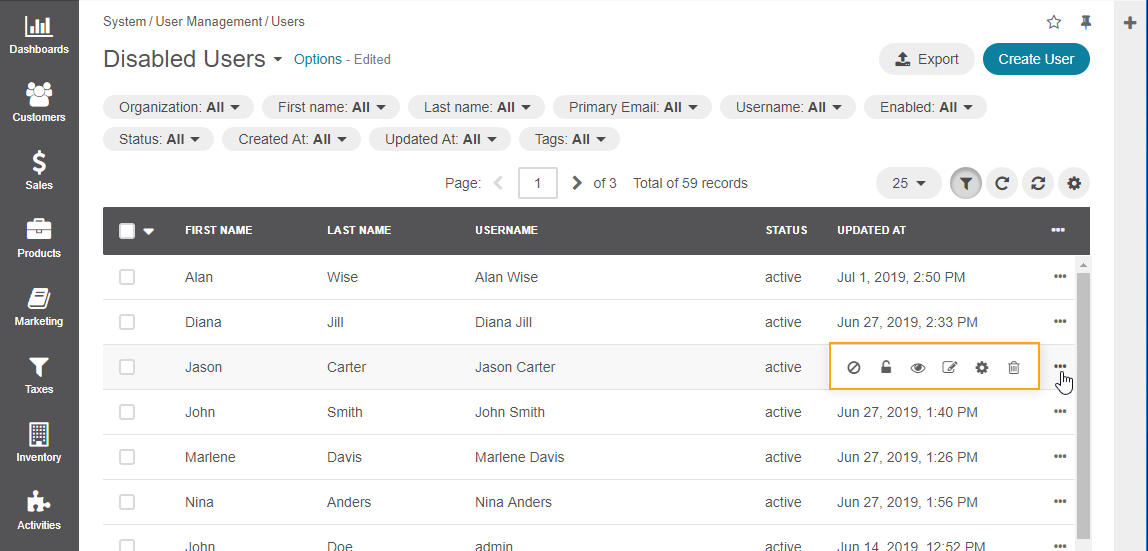
Alternatively, you can enable and disable users from the record table. Hover over the ellipsis menu at the end of the row of the selected user and click on the corresponding icon.
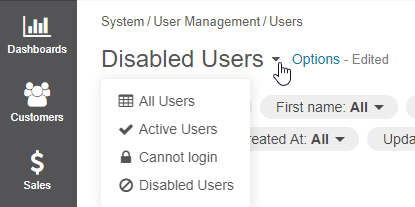
Keep in mind that besides the page with all users, you can get to the pages of only active or disabled users, or those who cannot log in.
Enable/Disable Multiple Users
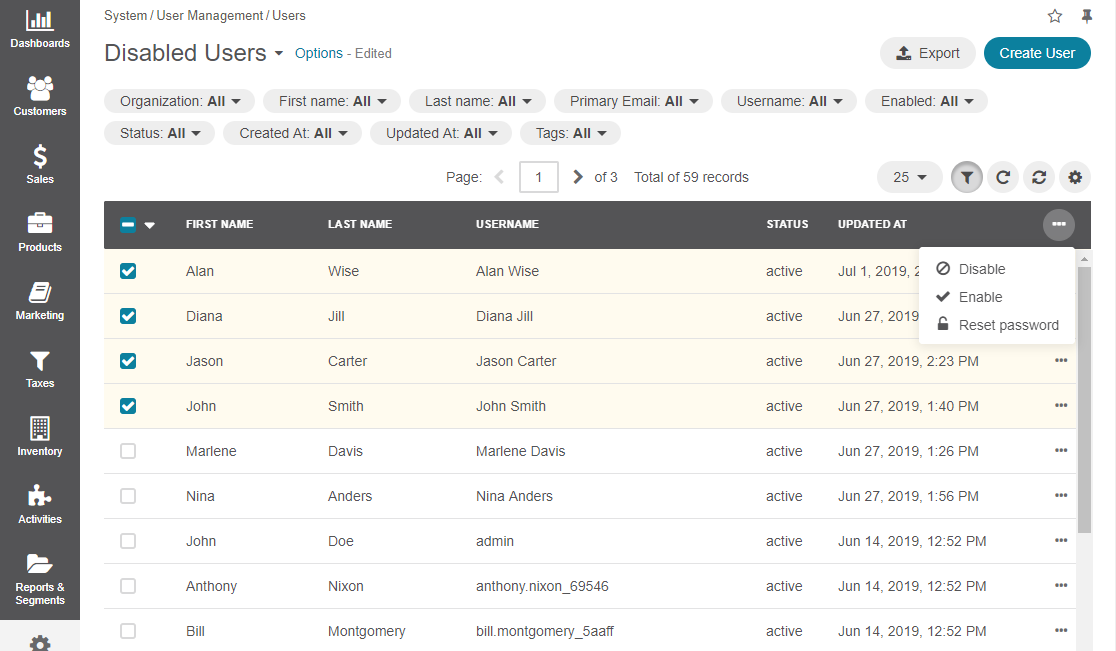
To enable/disable several users at the same time, use mass actions:
Activate a User
When a user exceed the allowed number of failed login attempts, the system automatically locks them out. User authentication status changes to Locked, and the Activate button appears on the user page.
To activate a user:
Delete a User
To delete a user from the system:
Navigate to System > User Management > Users.
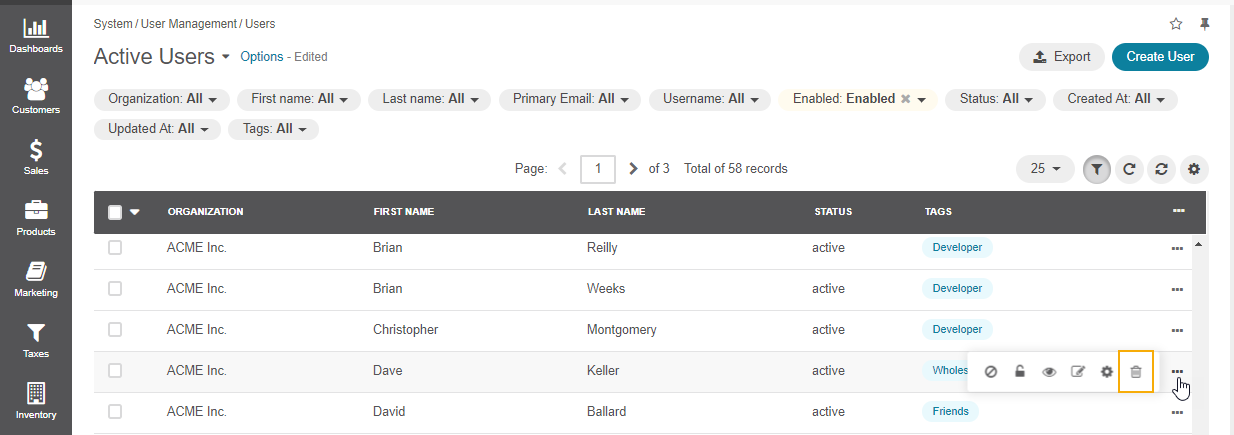
In the table of all users, hover over the ellipsis menu at the end of the row of the selected user and click Delete.
Important
Keep in mind that you can delete only those users who have no records assigned to them.
In the Deletion Confirmation dialog box, click Yes, Delete.
Note
Alternatively, you can delete a user from their user page by clicking the Delete on the top right.

Export Multiple Users
You can export all user records into a .csv file. The exported file will contain all user record fields marked to be exported in the User entity settings. For more information about configuring which fields will be exported, see the Entity Fields topic.
Note
All existing user records are exported at once. Passwords are stored and exported in the hashed form.
To export user records:
Generate an API Key for a User
Integration with third-party software sometimes requires API access to the Oro application. A user can generate an API key to grant access to the required API while protecting their password from being disclosed to the third party.
Navigate to System > User Management > Users in the main menu.
On the page of all users, click once on the selected user to open their page.
In the General Information, click Generate Key next to the API Key field.

Once the API key is generated, the user can execute API requests via the sandbox, Curl command, any other REST client, or use the API via the custom application.
Important
Only one key can be generated for one user within one organization.
Change User Passwords
You can change the password for a specific user on their profile page in the More Actions menu:
Navigate to System > User Management > Users.
On the page of all users, click once on the selected user to open their page.
On the user page, click More Actions on the top right.
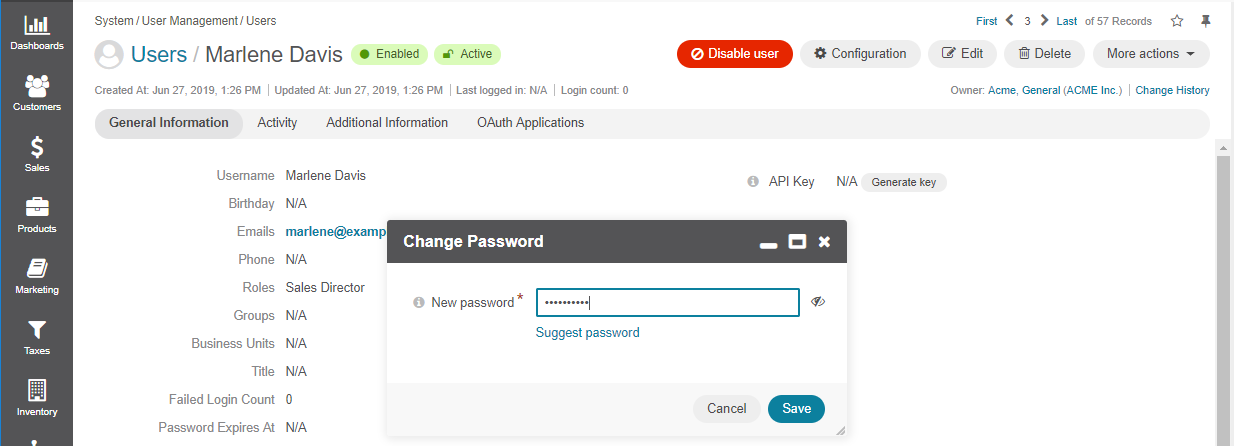
Click Change Password to open a new dialog and provide a new password. Alternatively, you can click the Suggest Password link to generate a secure random password. To see / hide the entered password, click the Show/ Hide icon next to the New password field. Once a new password is provided, a reset password email is sent to this user.
Reset User Passwords
An administrator can request the customer user to change their password by clicking the More Actions menu on user profile page and selecting the Reset Password option:

The confirmation dialogue will be shown to confirm the reset of the user password.
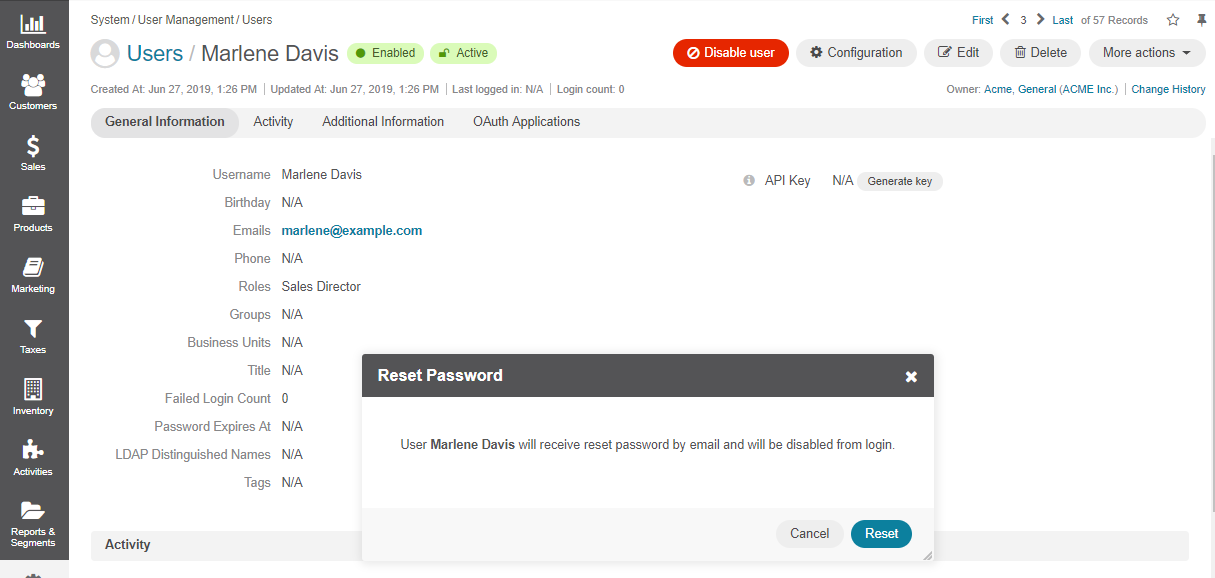
By clicking on the Reset button, a user will receive an email with a link to update their password. Users can only log into the application once their password is changed, in which case their password status changes to Reset in the back-office. The status switches to Active as soon as the customer user changes the password.

Note
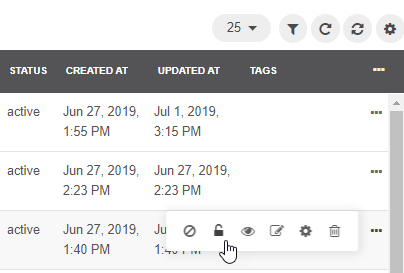
Alternatively, you can reset password for a specific user from the grid of all users. For this, hover over the ellipsis menu at the end of the row of the selected user, and click Reset Password.
You can change the email contents by updating the force_reset_password email template of the User entity.
The link in the email will have a refresh token to enable password change for a user. By default, this token and the reset password link in the email are valid for 24 hours from the moment the reset request is thrown.
An administrator can change this ttl in the configuration of the User bundle.
Reset Multiple Passwords
When you suspect a security breach, you can reset passwords for multiple users at the same time:
Navigate to System > User Management > Users.
In the table of all users, select the checkboxes in front of the names of those users whose passwords you want to reset.
Click the ellipsis menu at the right end of the table header row and then click Reset Password.
In the Reset Password dialog box, click Reset. The password reset links are sent to the primary email addresses of the selected users.
Add OAuth Applications to a User
Oro applications support OAuth 2.0 credentials authorization grant type to enable connection of third-party applications to the web API. To connect a third-party application, you need to add it and configure its pre-generated credentials in the back-office of your Oro application. These credentials are managed on user level which enables generation of different credentials for various applications across multiple organizations (the multi-org functionality is only available in the Enterprise edition).
Starting Conditions
To be able to create an OAuth application, make sure that you generate private and public encryption keys and add them to the /var directory of the installed Oro application. Although the path to the keys is predefined, you can change it by providing your custom location in the config.yml file.
Note
If no keys are found, the following warning message will be displayed in the back-office:
OAuth authorization is not available as encryption keys configuration was not complete. Please contact your administrator.
Add an Application
To add a new OAuth application in the back-office:
Navigate to System > User Management > Users in the main menu.
Click on a user name that you want to add an OAuth application to.
In the OAuth Applications section, click Add Application on the top right and provide the following details in the pop-up dialog:

Organization — If you are adding an application within the organization with global access, you can select which other available organization to add the application to. This field is displayed to users with access to multiple organizations. Keep in mind that the multi-org functionality is only available in the Enterprise edition.
Application Name — Provide a meaningful name for the application you are adding.
Active — Select the Active checkbox to activate the new application.
Click Create.
A corresponding notification is sent to the user’s primary email address, the owner of the OAuth application. You can change the default recipient, localization, or email contents if needed by updating the OAuth email templates and the related notification rule set out-of-the-box in the system configuration.
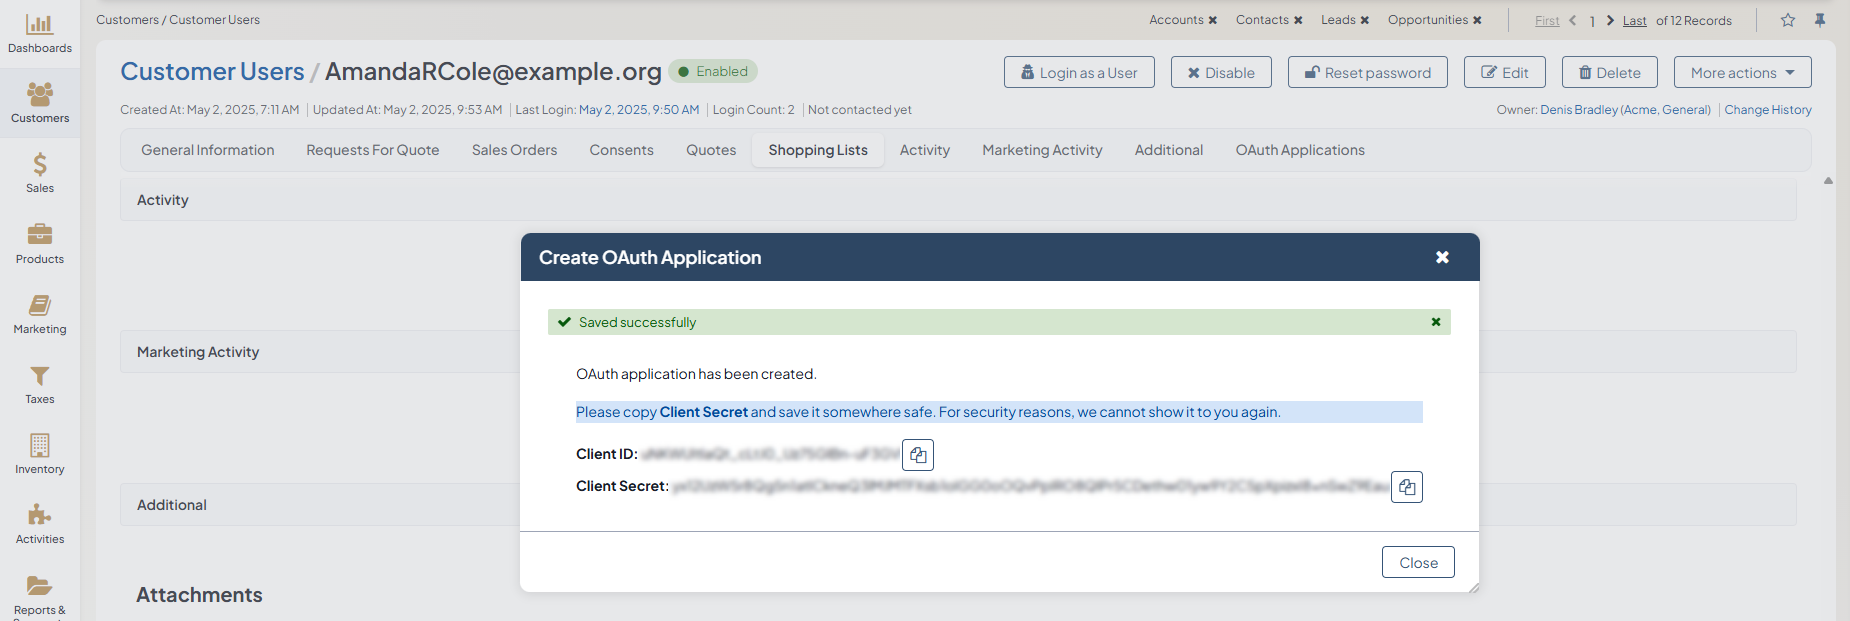
Once the application is created, you are provided with a Client ID and a Client Secret. Click on the icon to copy the credentials to the clipboard.
Important
For security reasons, the Client Secret is displayed only once – immediately after you have created a new application. You cannot view the Client Secret anywhere in the application once you close this dialog, so make sure you save it somewhere safe to access it later.
You can add as many applications as you need for any of your existing organizations. All added applications are displayed in the grid, and you can filter them by name, organization, and status.
Use the generated Client ID and Client Secret to retrieve an access token to connect to your Oro application.
Note
For the aggregated information on all OAuth applications created by users in the back-office, refer to the general OAuth Applications topic.
Related Articles
