Important
You are browsing upcoming documentation for version 7.0 of OroCommerce, scheduled for release in 2026. Read the documentation for the latest LTS version to get up-to-date information.
See our Release Process documentation for more information on the currently supported and upcoming releases.
OroConnector Add-on for Google Workspace
Note
OroConnector Add-on for Google Workspace is available for Enterprise Edition only.
The OroConnector add-on is a valuable tool for users of the Enterprise Oro applications. It allows users to interact with Oro applications from within Gmail through a Google Apps Script-based addon. It offers OAuth authentication, data synchronization, and UI integration with the Oro platform. The OroConnector eliminates the need for time-consuming switching between applications, streamlining workflow processes, and improving productivity. Its seamless integration with your email client makes it a game-changer for Oro users, providing a more convenient and streamlined workflow.
Requirements
Ensure you have the following installed on your system before proceeding:
npm install -g pnpm
Google Apps Script CLI (clasp) Install via:
npm install -g @google/clasp
Set Up the Project
Follow the steps below to set up a project:
1. Clone the Google Workspace add-on repository code to your project folder (for Enterprise customers only).**
2. Log in to your Google Account:
Before proceeding, log in to your Google Account and authorize clasp to access the necessary resources:
clasp login
Next, grant the following permissions:
See, edit, configure, and delete your Google Cloud data.
Manage your Google API service configuration.
Publish this application as a web app or a service that may share your data.
View log data for your projects.
Create and update Google Apps Script deployments.
Create and update Google Apps Script projects.
3. Enable the Apps Script API:
You need to enable the Apps Script API for your project. Visit the following URL to do so: Enable Apps Script API. If you have enabled this API recently, please wait a few minutes for the action to propagate and then retry the previous step.
4. Create a new project in Google Apps Script
To create a new project in Google Apps Script, run the following command:
clasp create --title "[your title]" --type standalone
This command creates a new project with the specified title and type. The project will be created in the current directory.
5. Configure the project:
Open the
.clasp.jsonfile and add/buildto the end of therootDirpath.Copy the
.clasp.jsonfile to theconfig/developmentandconfig/productiondirectories.Create a
.envfile by copying the.env.examplefile.Run the following command to download all the required packages:
pnpm install
Generate the images object in base64 format inside the
assets-config/images.tsfile by running:
pnpm run build:images
Build the project for production by running:
pnpm run build:prod
Push the code to Google Apps Script by running:
pnpm run sync
Configure the OAuth Application
Create OAuth Application
To create a new OAuth application in Oro:
Navigate to System > User Management > OAuth Applications in your Oro application. Create a new OAuth application with the following settings:
Grant Type: Authorization Code
Redirect URL: Enter the required URL in the
https://script.google.com/macros/d/{Script ID}/usercallbackformat. For {Script ID}, use your Google Workspace Script ID. To locate the script ID, go to Google Apps Script and open your project “[your title]” > Project Settings > IDs.
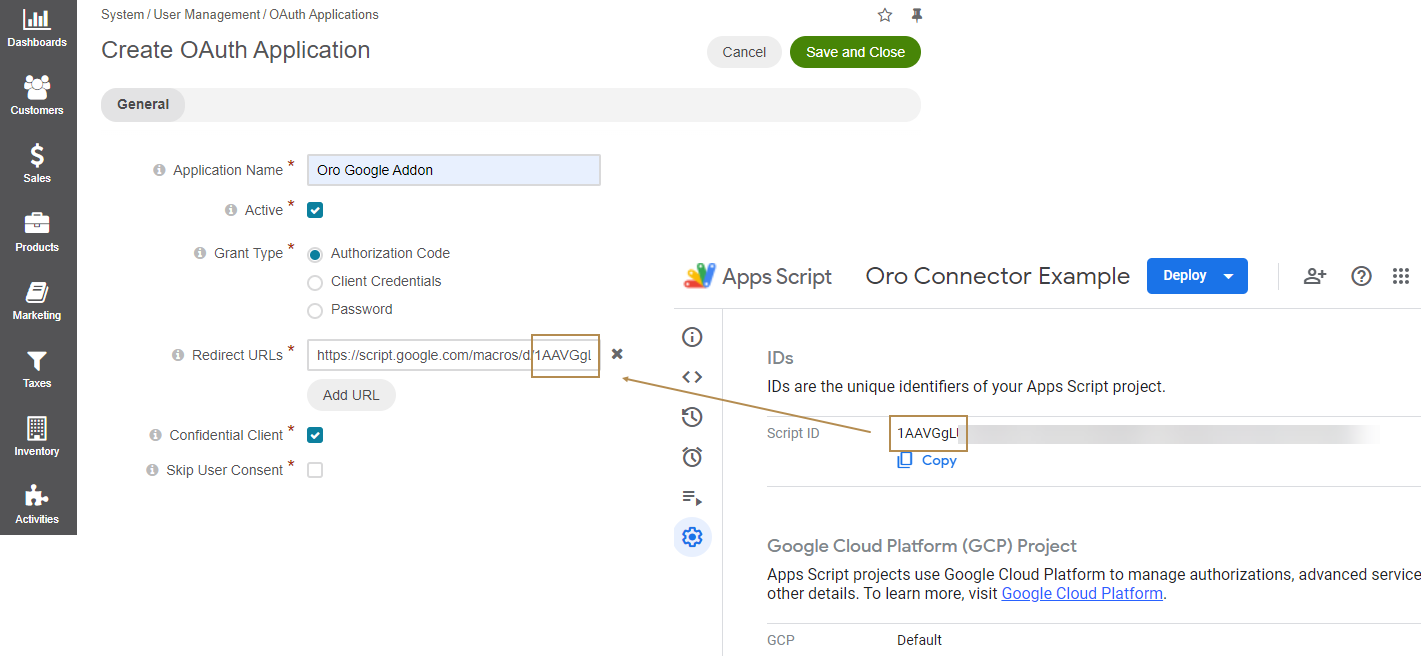
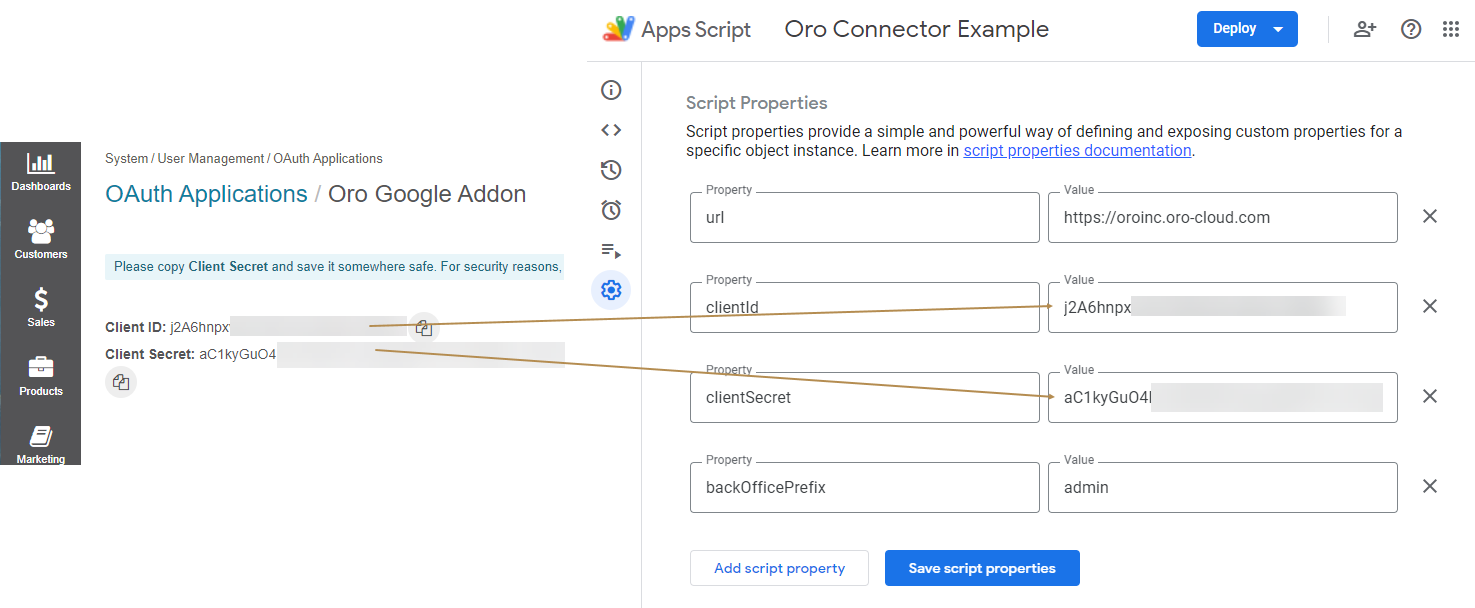
Once saved, the system will generate the Client ID and Client Secret for the OAuth application. Save it somewhere safe as we will need it in the next step of configuring the Goggle Workspace.
Note
For more details on OAuth application configuration, refer to the related documentation.
Configure Google Workspace
Navigate to Google Apps Script and open your project > Project Settings > Script Properties:
Create new script properties with the following keys:
url: Your Oro application URL (e.g.,
https://oroinc.oro-cloud.com)clientId: The OAuth client ID from the Oro application
clientSecret: The OAuth client secret from the Oro application
backOfficePrefix: Back-office prefix in Oro application (optional) (e.g., admin)
isHardReset: Set to
true/falsefor resetting storage without redeployment (optional)
Deploy the Project
Test Deployments
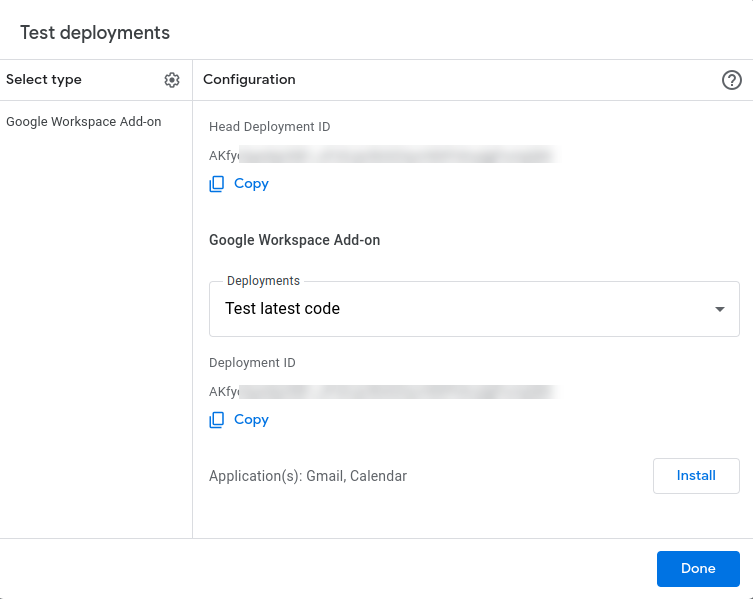
To check and verify the project, you can install its test version:
Navigate to Google Apps Script and open your project.
Click Deploy > Test deployments next to the project name.
Click Install for applications: Gmail, Calendar.
Open Gmail and verify that the add-on is available on the side panel.
Note
For more detailed instructions, refer to the public documentation.
Deploy Production and Publish on the Internal Marketplace
Step 1: Configure OAuth Consent Screen
Go to Google Cloud Console > APIs & Services > OAuth Consent Screen.
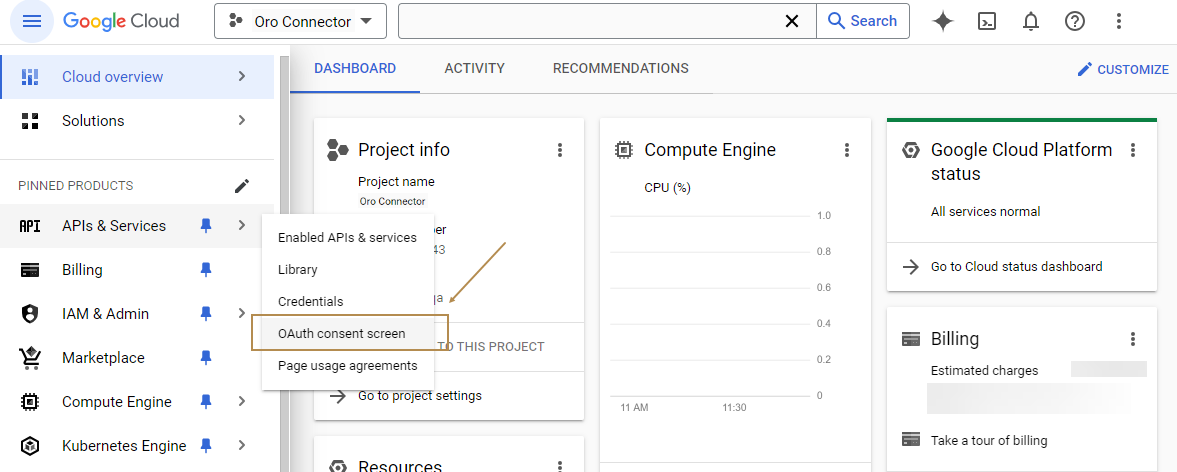
Select Internal for the user type (only available for Google Workspace accounts) and click Create.
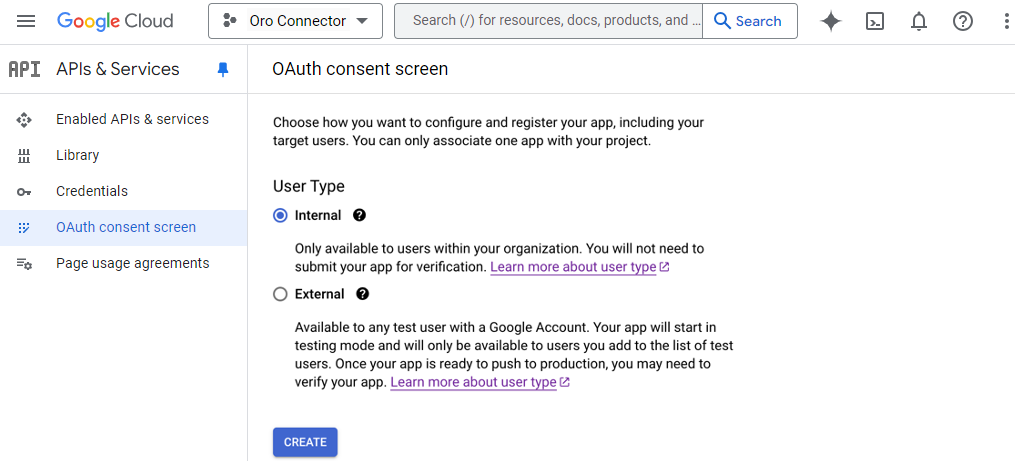
Fill in the required fields, including:
App Name
User Support Email
Developer Contact Information
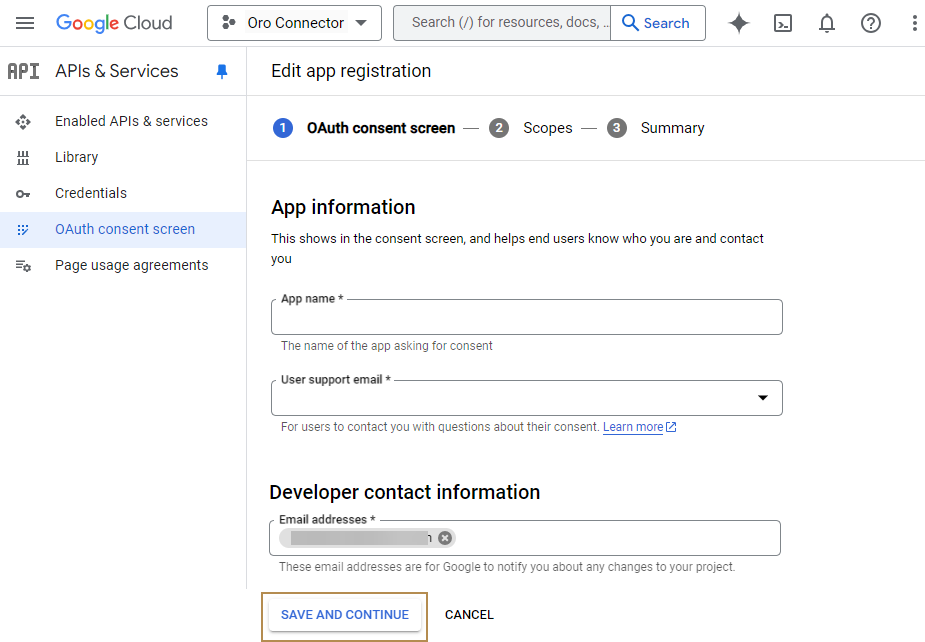
Click Save and Continue.
You can skip the Scopes step by clicking Save and Continue.
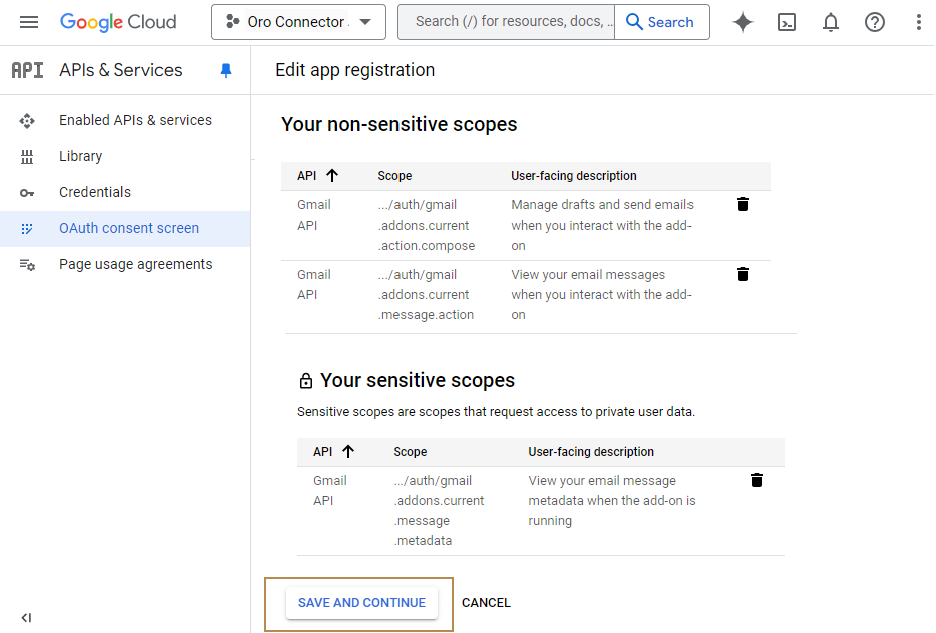
Review and confirm your configuration, then go to Cloud Overview > Dashboard in the navigation menu.
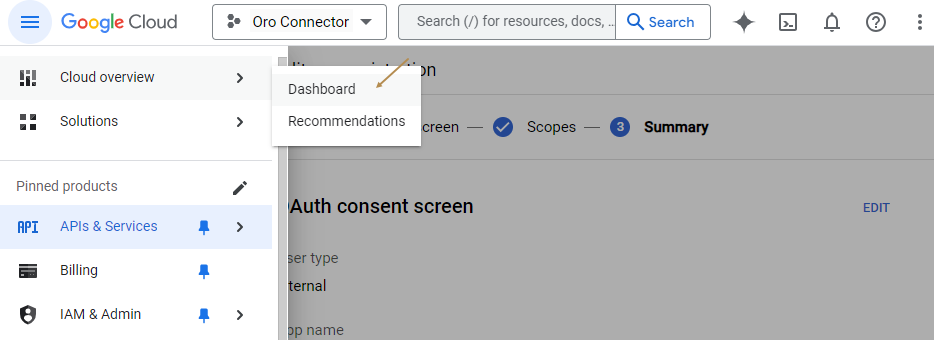
Step 2: Link Google Cloud Project to Apps Script
In the Google Apps Script page, open your project.
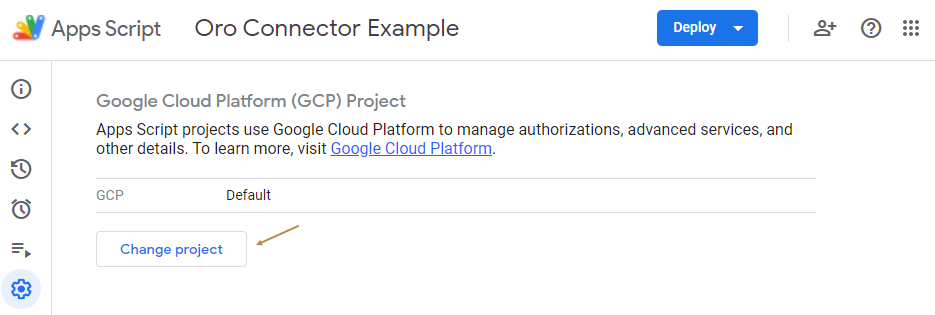
Go to Settings and click Change Project.
Copy the Project Number from your Google Cloud Console (found in the Google Cloud Console Dashboard).
Paste this Project Number into the GCP project number field in the Settings page in Apps Script.
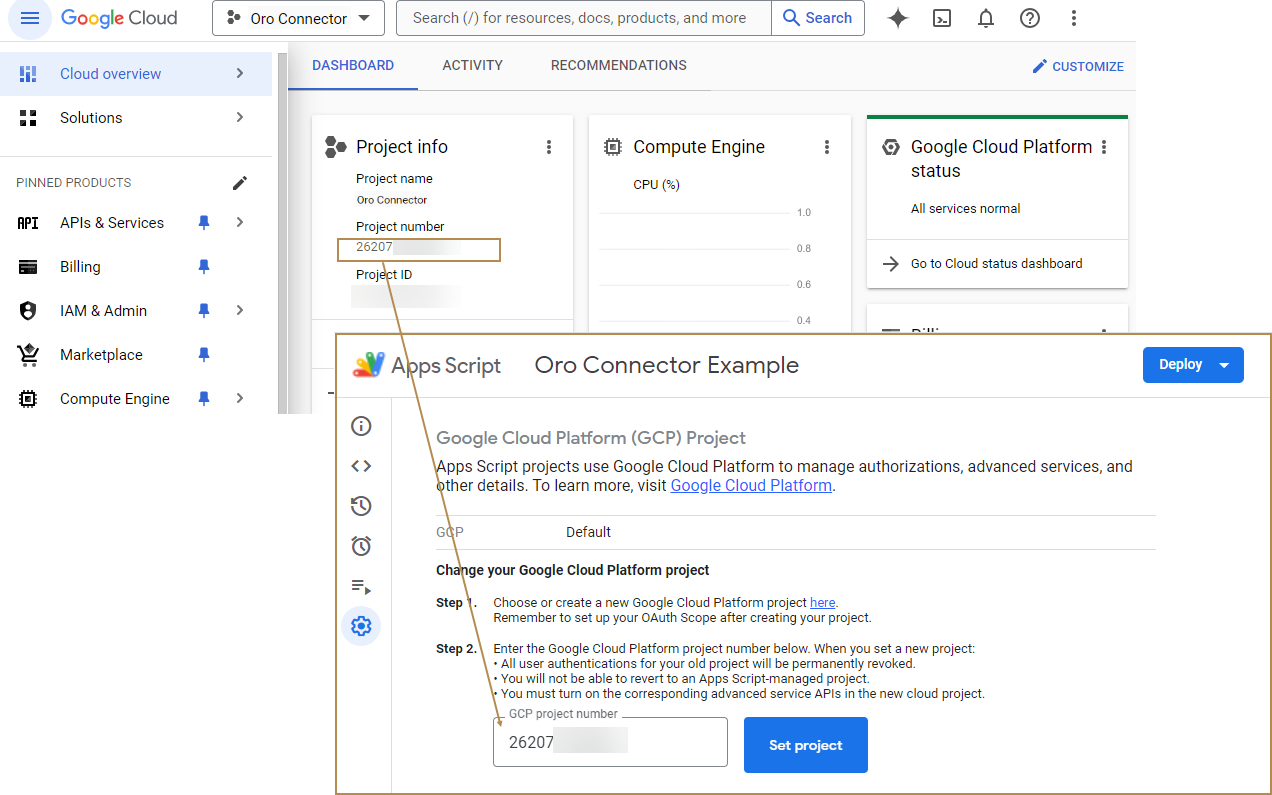
Click Set project to save the GCP project number.
Step 3: Deploy the Add-on
In the Google Apps Script page, open your project.
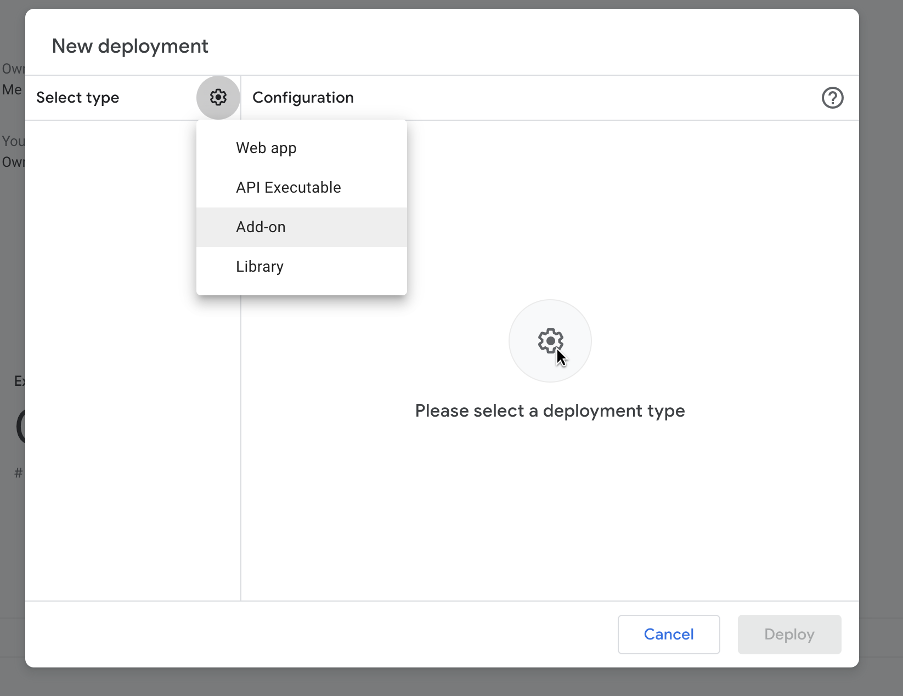
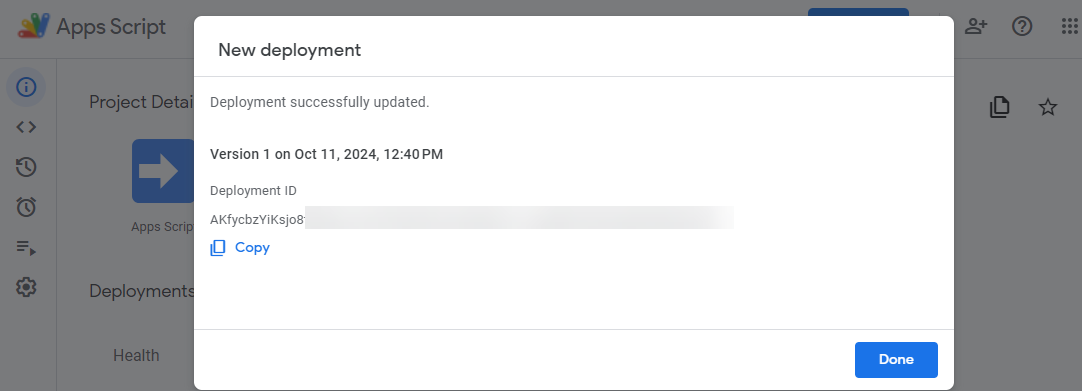
Click Deploy > New deployment next to the project name.

Select Add-on as the deployment configuration type.
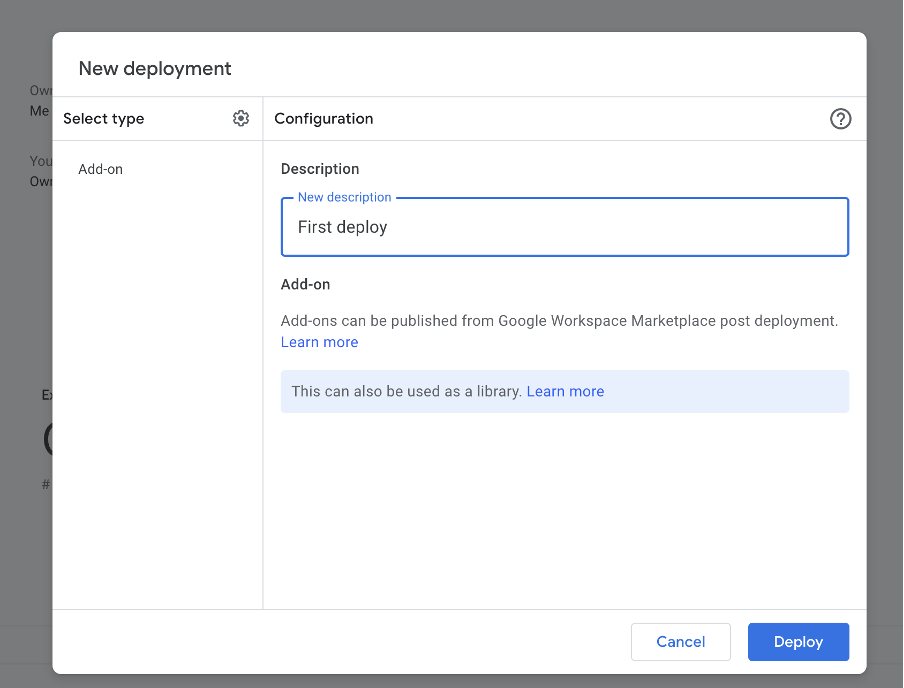
Fill in the description.
Click Deploy to complete the deployment.
Copy the Deployment ID (you’ll need this in later steps).
Step 4: Enable Google Workspace Marketplace SDK
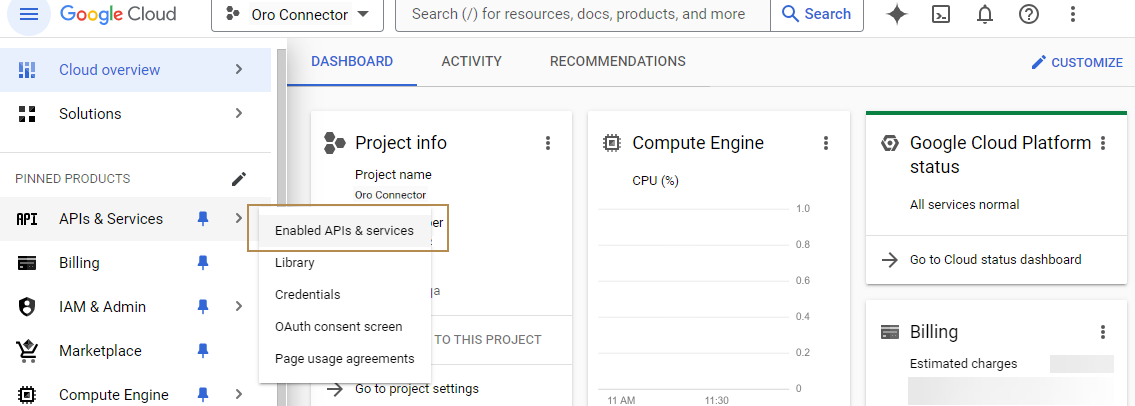
Go to Google Cloud Console > your project > APIs & Services.
Click Enabled APIs & services.
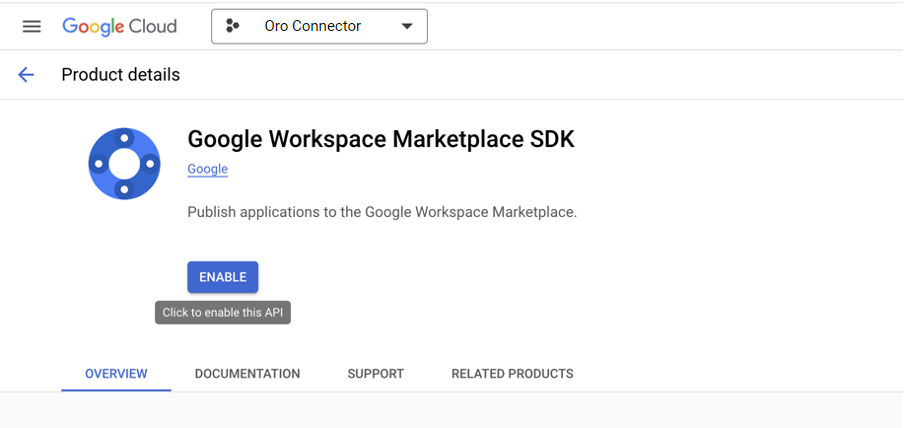
Search for Google Workspace Marketplace SDK and enable it for your project.
Step 5: Configure the App for Marketplace
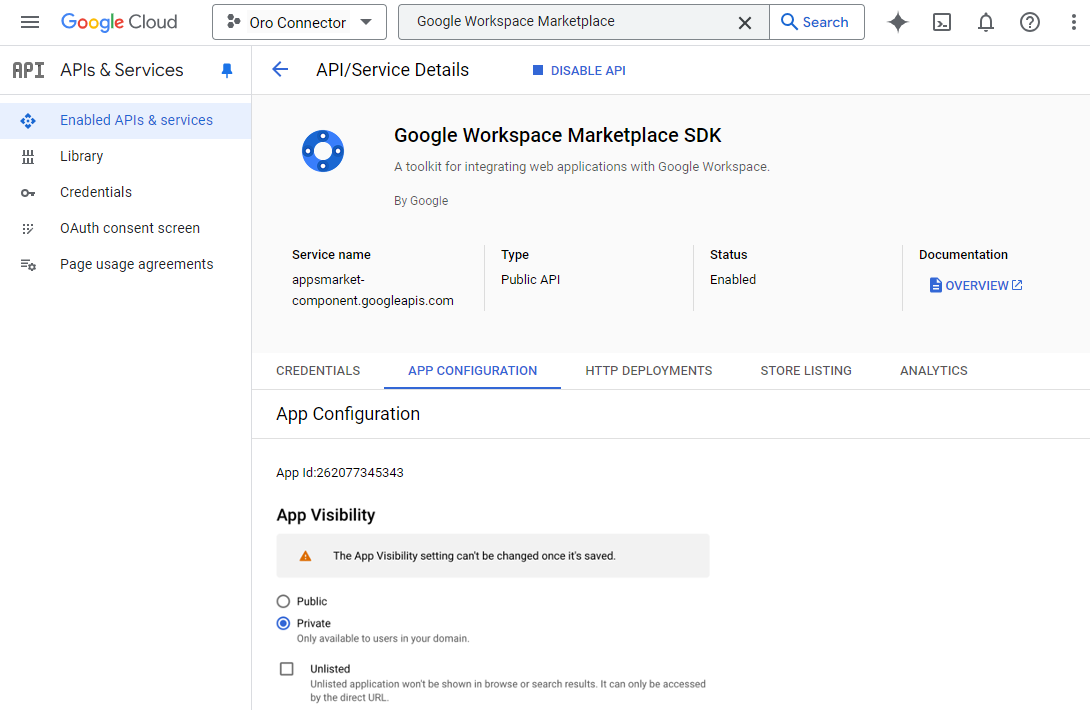
Go to the Google Workspace Marketplace SDK configuration page in the Google Cloud Console.
Click the App Configuration tab and set App Visibility to Private.
In the App integration section, select Google Workspace Add-on as the app type.
Choose Deploy using Apps Script deployment ID.
Paste the Deployment ID from Step 3 into the Deployment ID field.
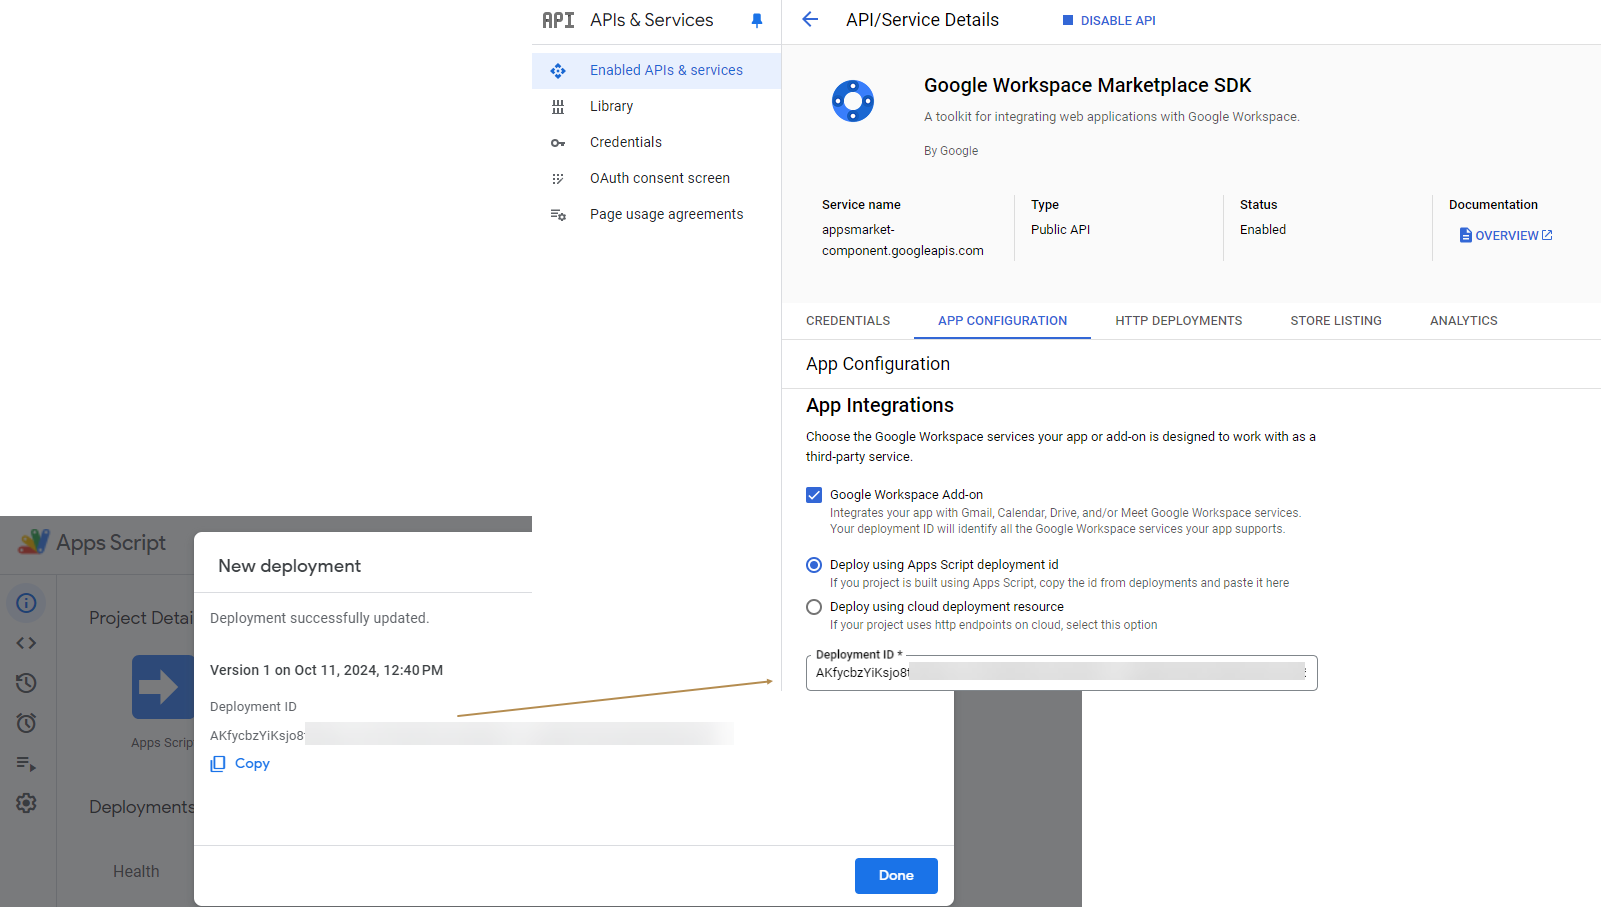
Complete the required fields and click Save.
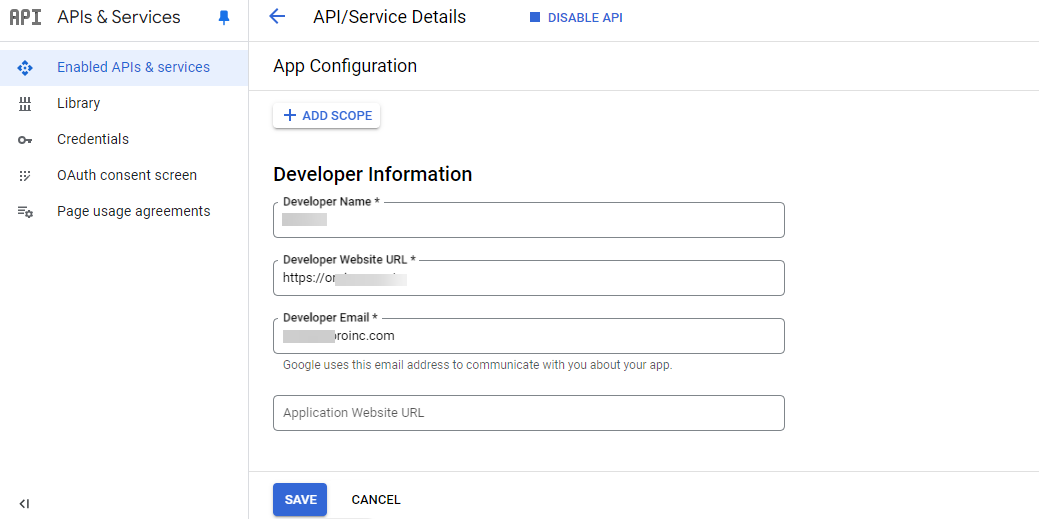
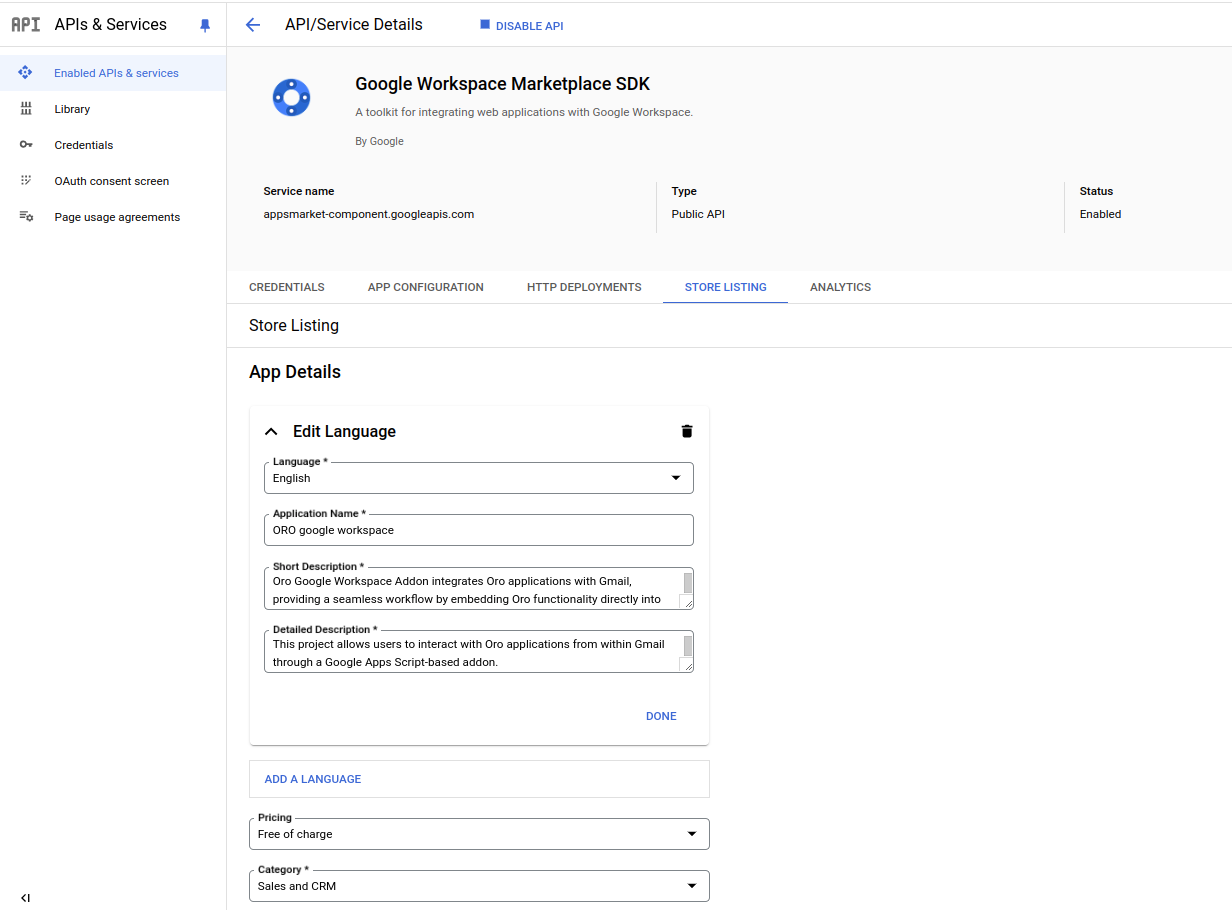
Step 6: Store Listing
Navigate to the Store Listing tab.
Provide all required information for your app, including:
App name
Short description
Detailed description
Upload the icons for different screen sizes as required (e.g., 128x128, 256x256).
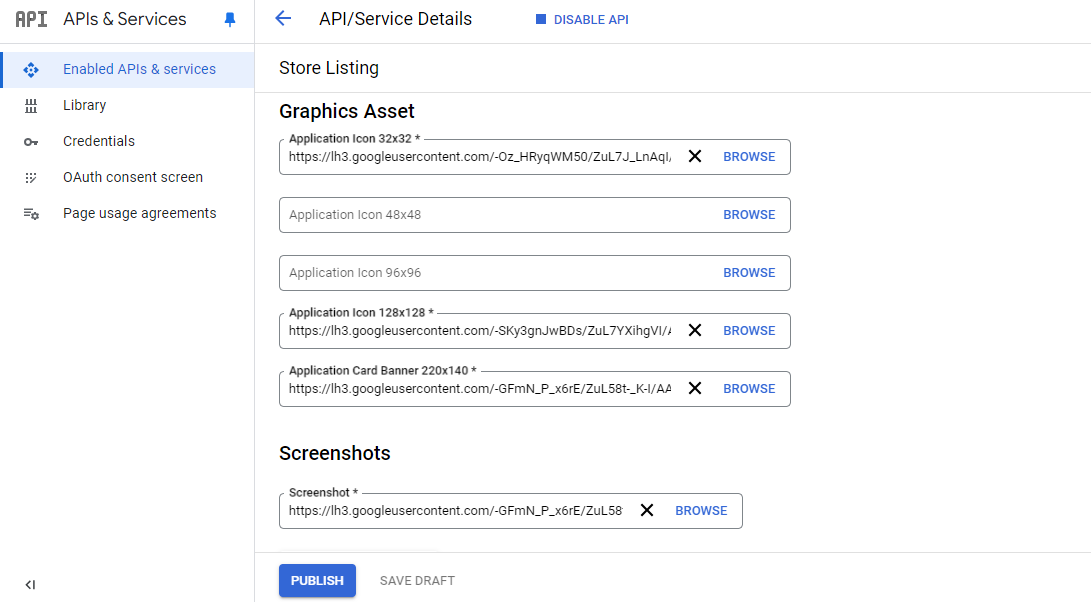
Complete any remaining fields.
Click Publish to submit the add-on.
Step 7: Install the Add-on
Once published, open the published link from the Google Workspace Marketplace.

Install the app as an admin for your Google Workspace domain.
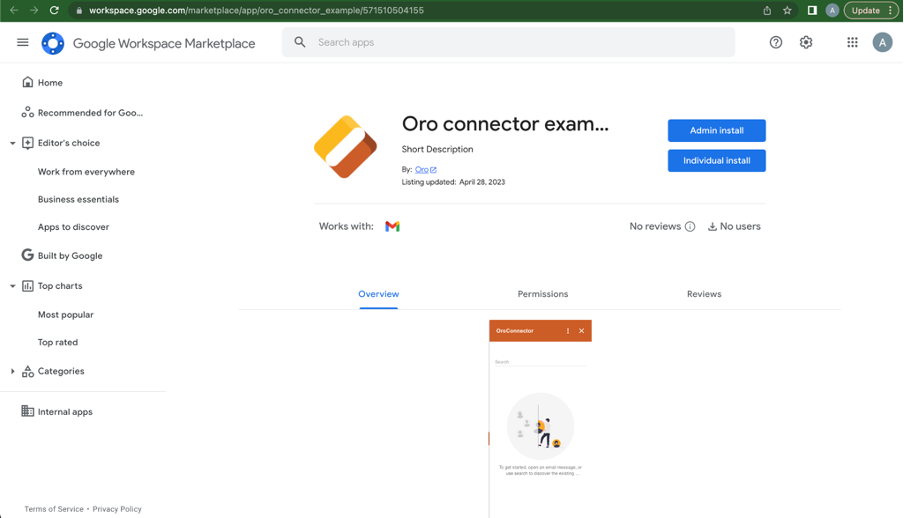
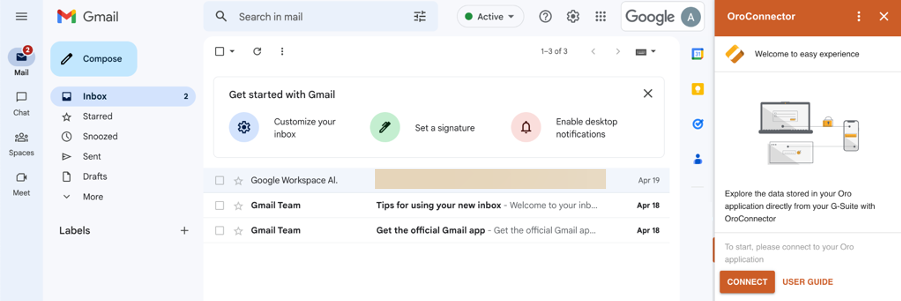
Open Gmail or the desired Google Workspace app and verify that the add-on is available on the side panel.
Note
For more detailed instructions, refer to the public documentation.
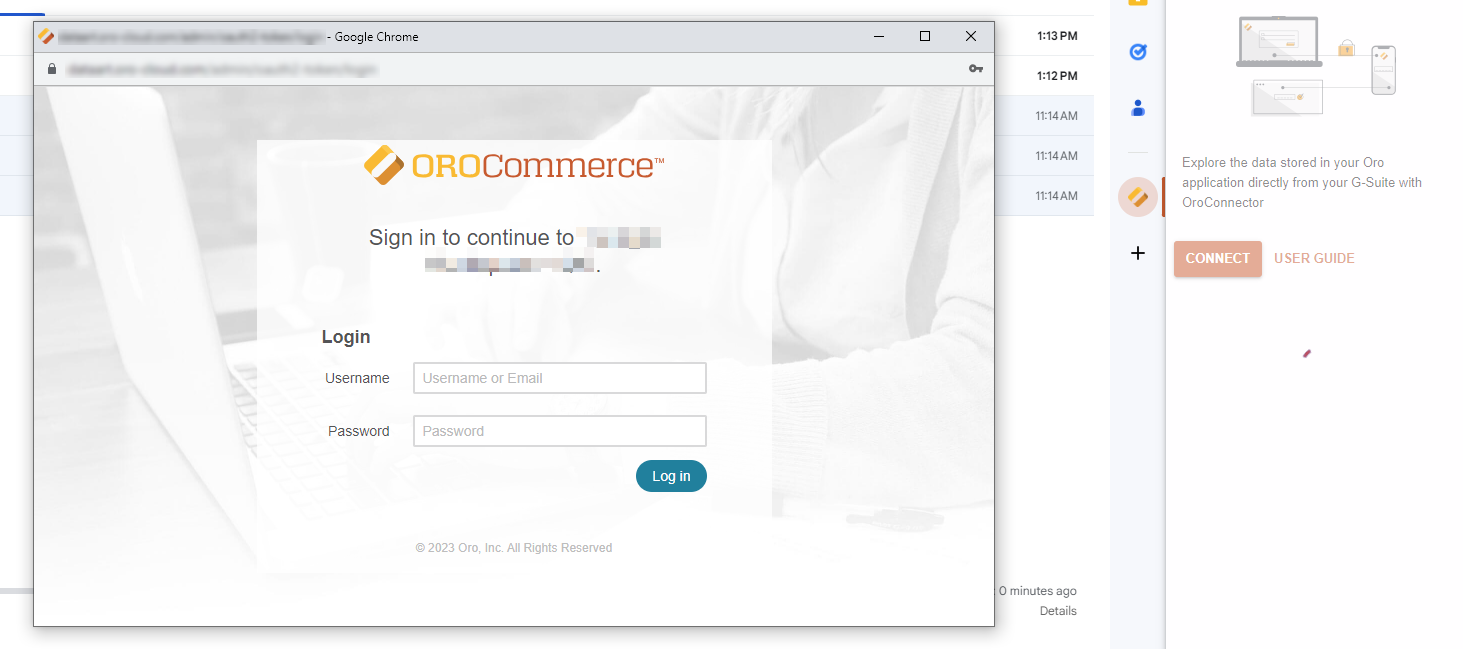
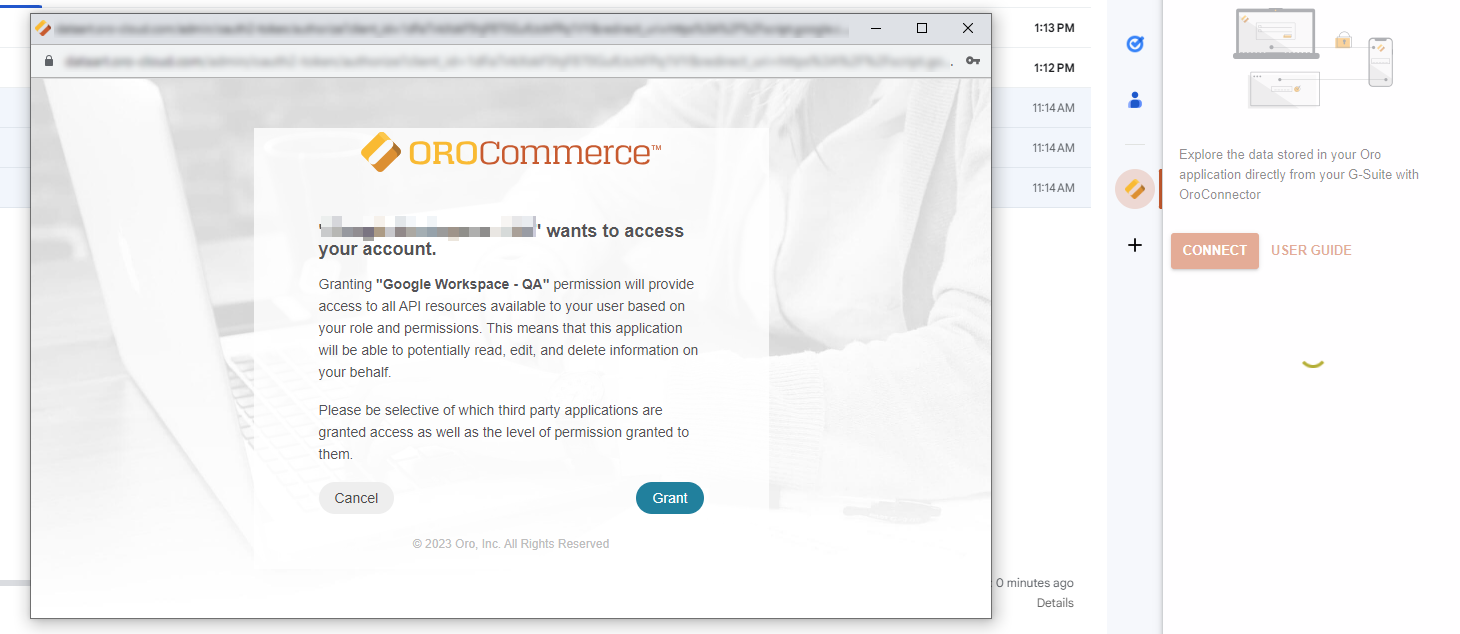
Connect
Once OroConnector has been installed in your mail client, a new icon will appear in the side panel, indicating that the add-on is ready for use.
To connect the add-on to your Oro application:
Search & Context
Once you have completed the setup process, OroConnector is available for you to start your search for the necessary information and add or remove context from the add-on.
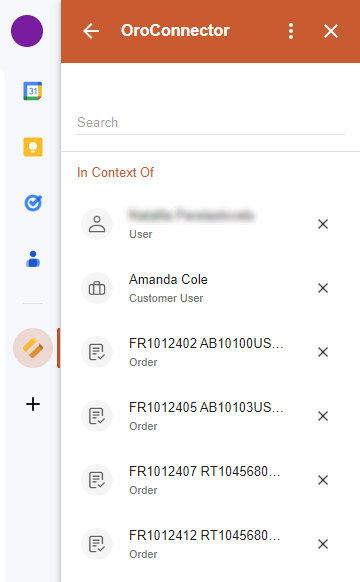
In Oro applications, context is a piece of information relevant to a particular user, task, or process within the application. When an OroConnector user opens an email thread in their mail client, they can see Oro entities related to that particular email and retrieve the latest context of the conversation. Context search is performed by the From/To/CC/BCC fields of the email being viewed.
By default, the following data is passed from your Oro application to the connector and vice versa:
Accounts
Contacts
Customer users
Leads
Opportunities
Orders
Users
Customers
Tasks
Cases
Requests for quotes.
To begin your search, type a query into the search bar and click Enter. If the search returns many entities, click Load More to view all available search results.
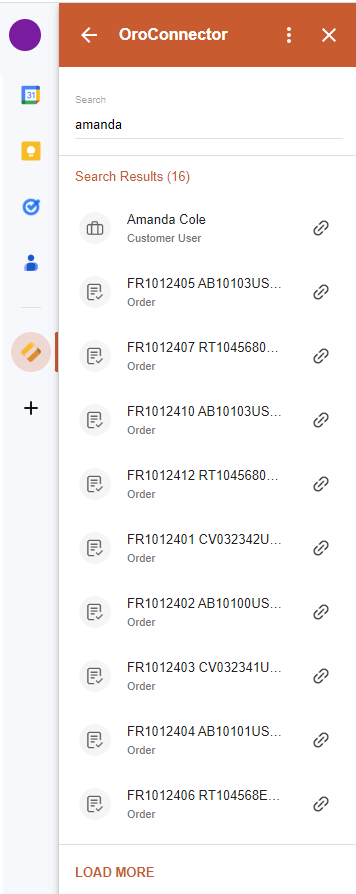
Manage Context
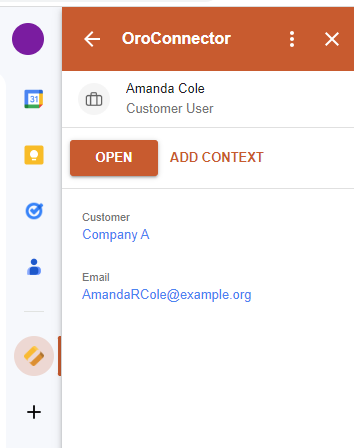
Click on the desired entity from the search results to view its details. Here, you can perform the following actions:
Open.
To view an entity you found in the OroConnector in the Oro application, click Open. You will be redirected to the view page of this entity on the Oro side.
Add Context.
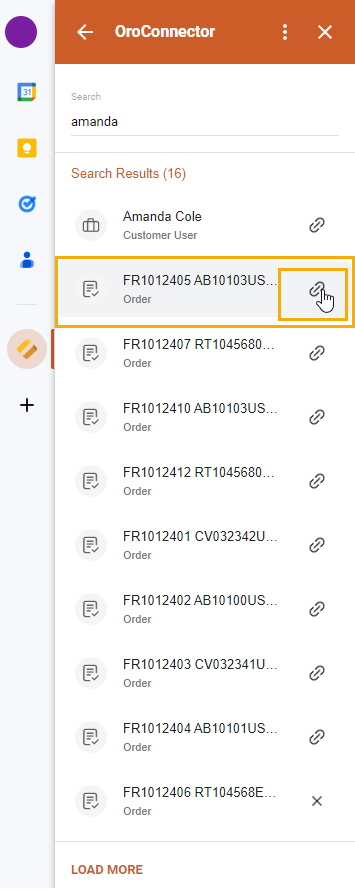
You can connect any relevant entities to an email thread as context. When the connector and Oro application are synchronized, you can easily view the added context on both the email and Oro application side. You can add multiple entities as necessary to provide additional context to the email.
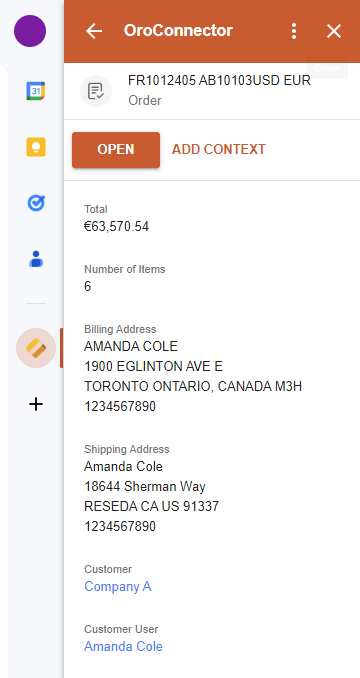
To add an entity as context, click Add Context on its details page. Alternatively, you can click on the chain icon next to the required entity in the search results.
Remove Context.
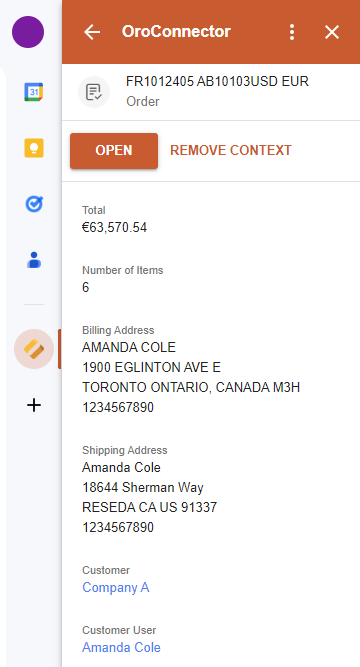
Removing context in the OroConnector removes it on the Oro application side as well. To disconnect entities from the email thread as its context, click Remove Context on the details page of the entity.
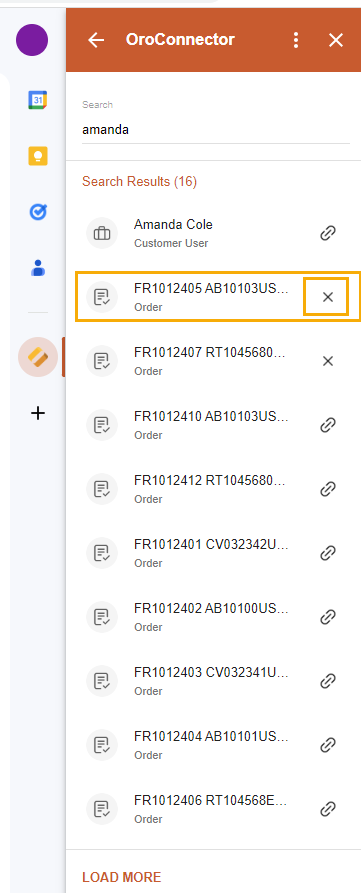
Alternatively, click X next to the required entity in the search results.
Update the Project
To update the project, follow these steps:
Update the local development branch:
git pull origin main
Modify the environment variables (if necessary) by updating the .env file.
Reinstall dependencies:
pnpm install
Rebuild the images (if necessary):
pnpm run build:images
Rebuild the project for production:
pnpm run build:prod
Push the updated code to Google Apps Script:
pnpm run sync
