Important
You are browsing upcoming documentation for version 7.0 of OroCommerce, scheduled for release in 2026. Read the documentation for the latest LTS version to get up-to-date information.
See our Release Process documentation for more information on the currently supported and upcoming releases.
Manage Shopping Lists in the Back-Office
Shopping lists are similar to shopping carts in most online stores. However, shopping lists have additional features. These include the ability to:
Manage multiple shopping lists simultaneously.
Request quotes from a shopping list.
Submit orders from a shopping list.
Create as many shopping lists as needed.
Via the back-office, you can access any shopping list created and saved by the customers in the OroCommerce storefront.
Important
See a short demo on creating orders from the shopping list.
View Shopping List Details
To view a specific shopping list in the back-office:
Navigate to Sales > Shopping Lists in the main menu.

Find the required shopping list and click on it to open its details page.
In the General section, you can find the shopping list ID, the customer user who has created the shopping list, and the comments, if any.
In the Shopping List Line Items section, you can review the details of line items added to the shopping list (products, quantity, unit) and notes to the line items, if any.

You can perform the following actions to the items by hovering over the more options menu:
View complete details of the product that is added to the shopping list.
Modify details of the product added as a line item to the shopping list.
Note
To handle a significant volume of data, use page switcher, increase View Per Page, or use filters to narrow down the list to the information you need.
The Totals section displays the aggregated amounts, like subtotal, tax, discount, and the total amount due for payment of the items in the shopping list. OroCommerce automatically recalculates these amounts when new items are edited in, added to, or removed from the shopping list.
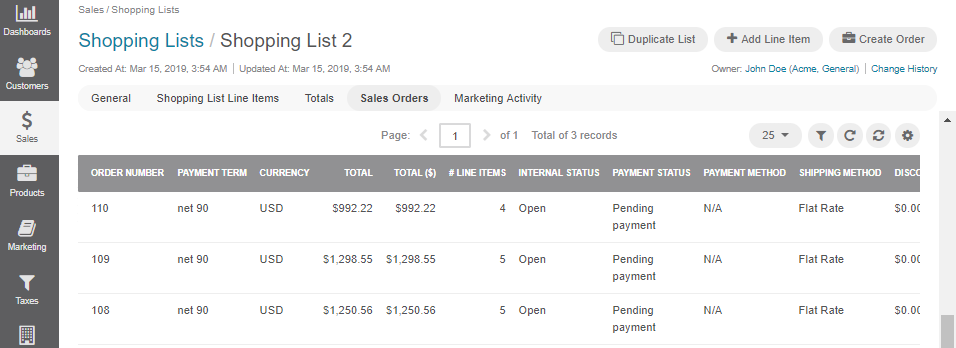
The Sales Orders section displays all orders converted from this shopping list. Click a required order to get redirected to the order details page.

The Marketing Activity section shows any marketing activity associated with the shopping list.
Manage Shopping Lists
From the shopping list view page, you can perform the following actions for the shopping list:

1. Duplicate List
2. Add line Item
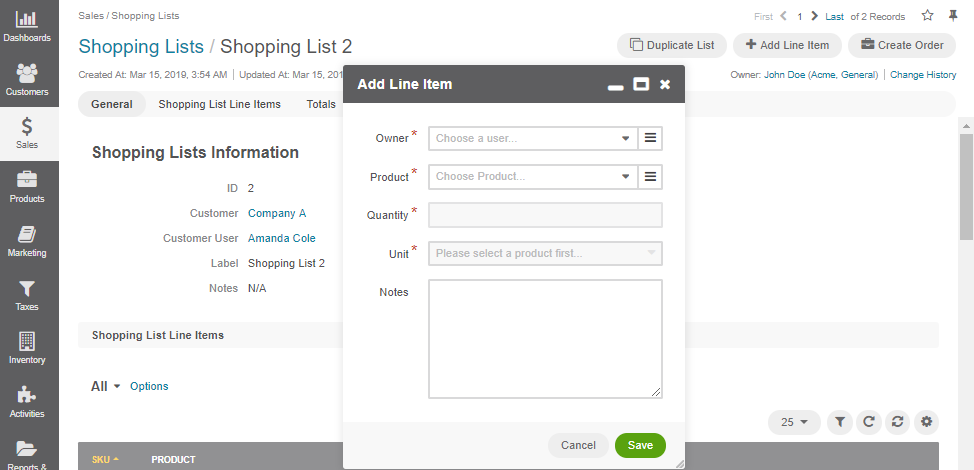
Click Add Line Item to open a popup dialog that prompts to add details of the new item:
Owner: Choose a user as the product owner.
Product: Choose the product from the list, or click and select the item from the list of all products.
Quantity: Enter the number of product units to be purchased.
Unit: Select whether the product quantity is specified for items, sets, or kilograms. More units may be available depending on your system customization.
Notes: Enter additional information for the product, if necessary.

3. Create Order
See Create an order from the shopping list for detailed guidance.
Business Tip
Betting big on the growing digital commerce trend? Discover more about the business to business marketplace, its features, and how you can benefit from it.
