Important
You are browsing upcoming documentation for version 7.1 of OroCommerce, scheduled for release in 2027. Read the documentation for the latest LTS version to get up-to-date information.
See our Release Process documentation for more information on the currently supported and upcoming releases.
Manage Entities
In your Oro application, you can update existing entities, delete custom entities with no records, and manage unique keys to avoid duplication of existing information.
Edit an Entity
Important
The configuration of each specific entity defines which of its properties are available for editing.
To edit an entity:
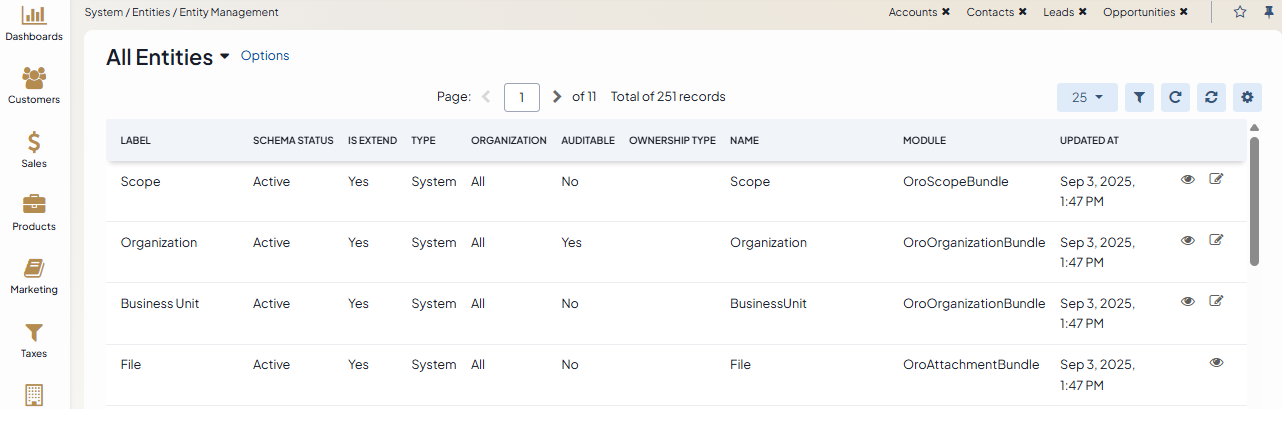
Navigate to System > Entities > Entity Management in the main menu.
On the All Entities page, select the entity you want to edit and click the Edit icon.
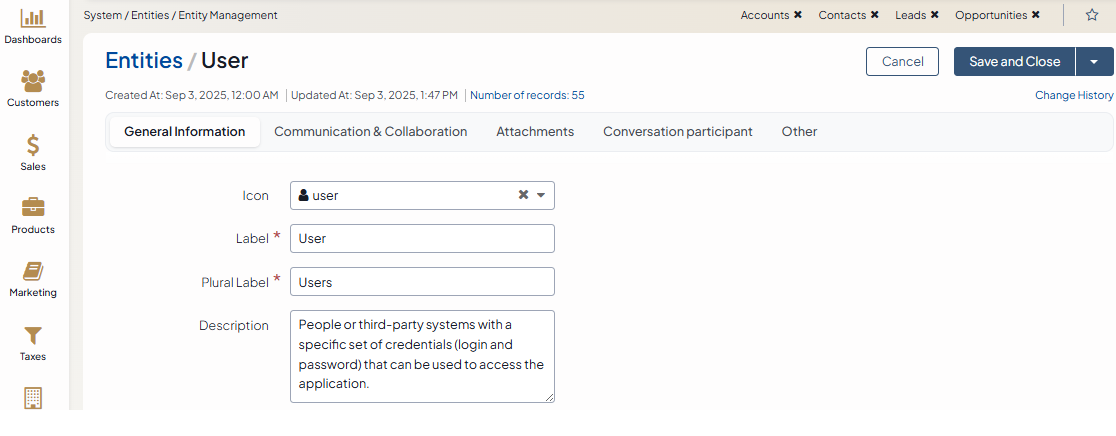
In the General Information section, update the following information:
Icon — Select the icon from the list that will denote all entity records.
Label — Type the label used to refer to the entity on the interface. The label must be at least 2 symbols long. Make sure that labels are unique and avoid duplicating them as this makes distinguishing between labels on the interface impossible.
Plural Label — Type the plural form of the label. It is used in titles of the menu items and grids related to the entity. The plural label must be at least 2 symbols long.
Description — Type a short but meaningful description that can help you and other users understand the purpose and the specifics of the created entity in future.
In the Communication & Collaboration section, update the following information:
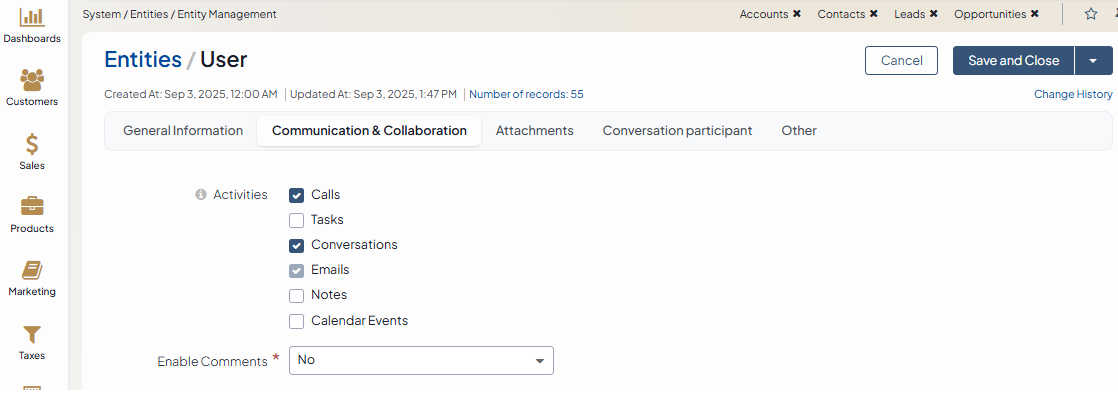
Activities — Defines which activities users can add from the page of an entity record. When you add an activity from the entity record page, the entity record appears as a context for this activity. For more information about the activities, see the Activities topic.
Calls — Select this checkbox to enable logging calls from the page of an entity record. Calls are logged via the More actions dropdown and are displayed in the Activity section on the page of an entity record.
Tasks — Select this checkbox to enable adding tasks from the page of an entity record. Tasks are added via the More actions dropdown and are displayed in the Activity section on the page of an entity record.
Conversations — Select this checkbox to enable starting conversation from the page of an entity record. To use the conversation feature, enable it in the system configuration first. Conversations can then be started via the More actions dropdown and are displayed in the Activity section on the page of an entity record.
Emails — Select this checkbox to enable sending emails from the page of an entity record.
Notes — Select this checkbox to enable adding notes to an entity record. Notes are added via the More actions dropdown and are displayed in the Activity section on the page of an entity record.
Calendar Events — Select this checkbox to enable adding calendar events from the page of an entity record.
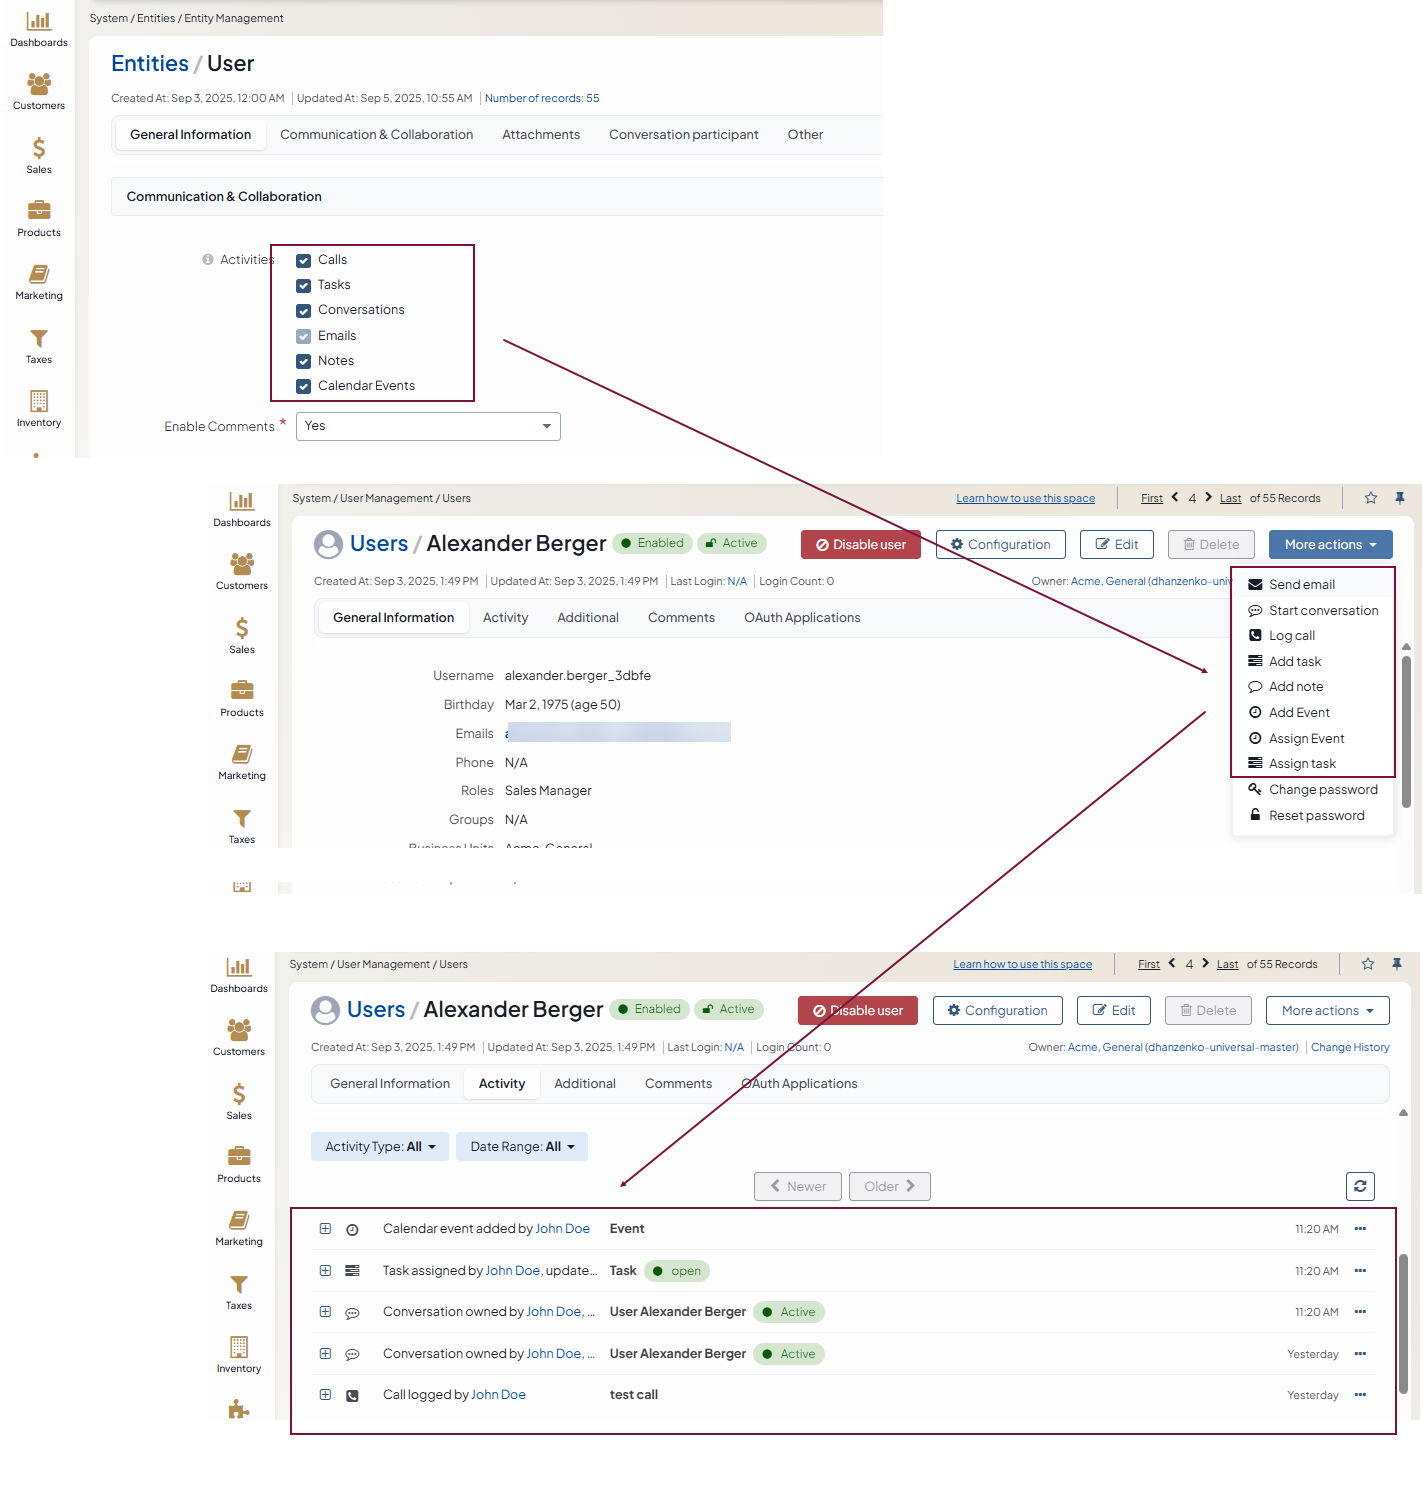
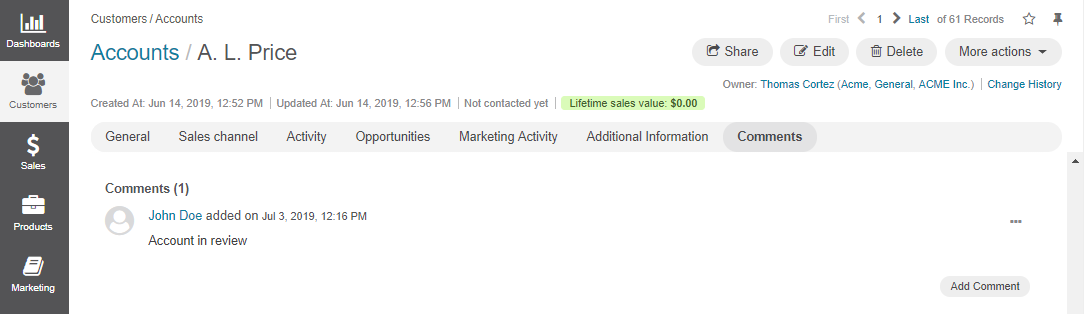
Enable Comments — Defines whether it is possible to leave comments on entity records. Select Yes from the list to enable adding comments to entity records. Select No from the list to restrict adding comments to entity records. The default value is No. Comments are displayed in the corresponding section on the page of an entity record. For more information on comments, see the topic on Adding Comments.
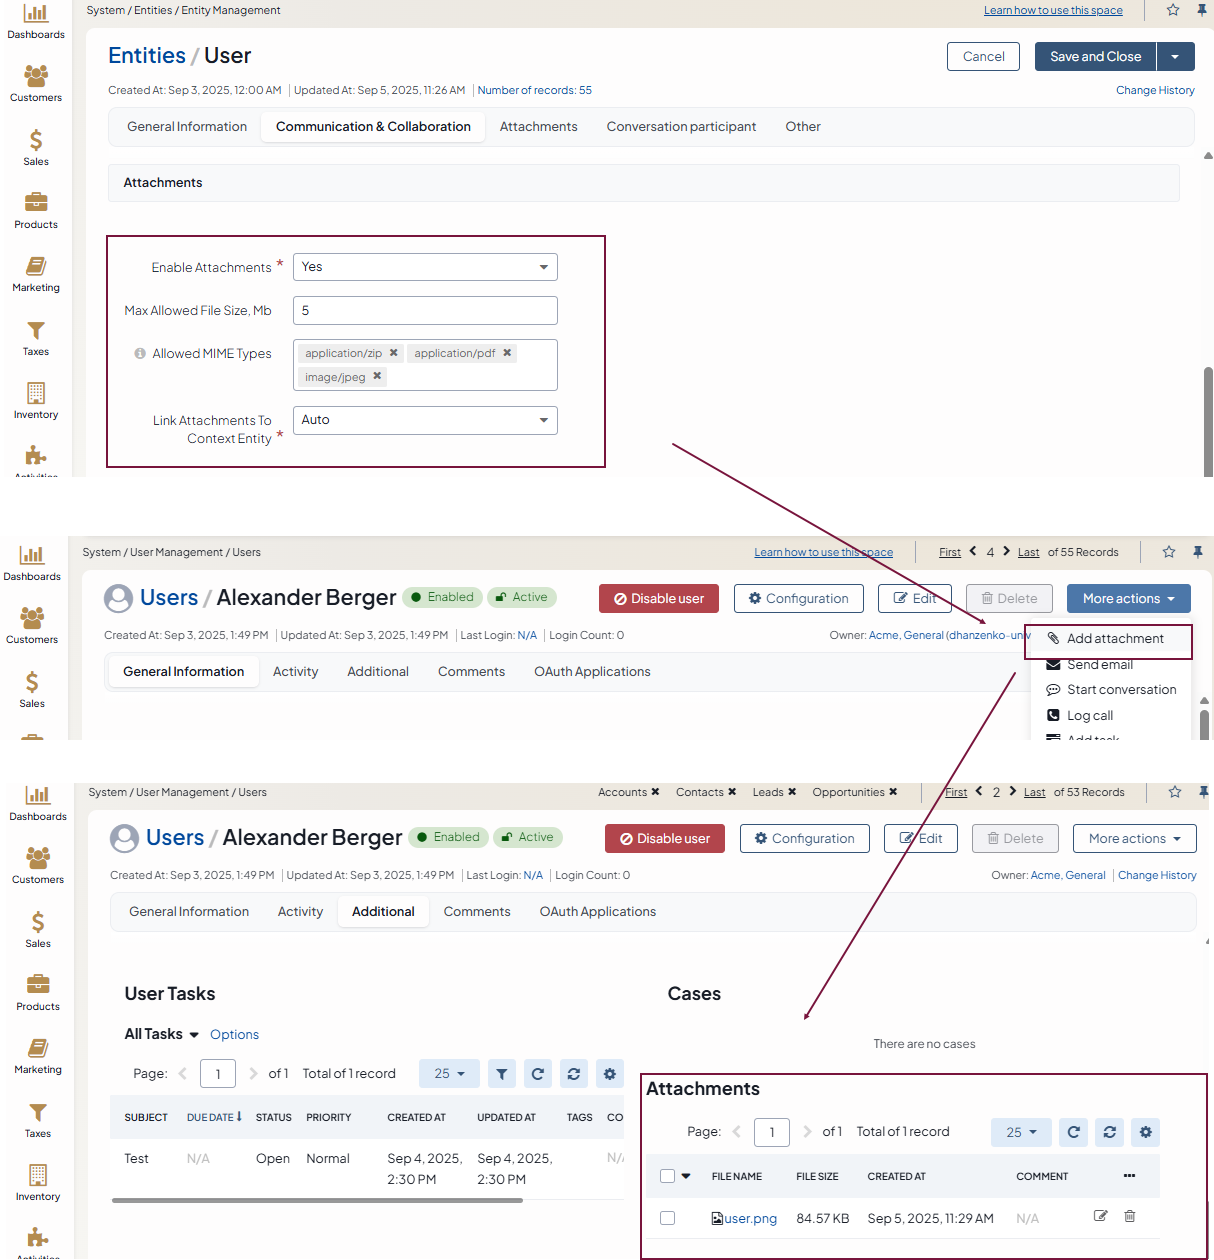
In the Attachments section, specify the following:
Enable Attachments — Defines whether it is possible to attach files to the entity records. Select Yes from the list if you want to enable adding attachments to entity records. Select No from the list if you want to disable adding attachments to entity records. The default value is No. Attachments are added via the action button and are displayed on the page of an entity record in the corresponding section. For more information on comments, see the topic on attachments.
Max Allowed File Size, Mb — Type the upper limit of attachment size. Attachments whose size exceed the specified value will not be allowed.
Allowed Mime Types — Enter the list of supported MIME types. If this field is left empty, the list of MIME types defined in the system configuration will be applied. The format of MIME types must follow these examples: application/pdf, image/*
Link Attachments To Context Entity — If an entity record is mentioned as a context in an email, this email appears in the Activity section of the entity record view page. When the email contains a file as an attachment, it is possible to reattach the file to the entity record itself. You can define whether the user will reattach the file manually when required or the system will reattach it automatically.
Manual — Select this value from the list if users are to reattach files from emails to the entity record manually.
Auto — Select this value from the list if the system is to reattach all the attachments from emails to the entity record automatically.
This field is available only when Enable Attachments is set to Yes. The default value is Manual.
In the Other section, update the following:
Ownership Type — Defines who the owner of the entity can be (none, user, business unit, or organization). The ownership type is fixed and cannot be changed once created. For more information, see the Ownership Type topic.
Field Level ACL — Select this checkbox to define that permissions can be set on individual fields of this entity. For more information about field level ACLs, see the Entity Fields topic.
Show Restricted — Select this checkbox if you enabled Field Level ACL and are going to disable editing of some fields of the entity records but still want users to review the disabled fields on the interface. Fields disabled for modifying will appear dimmed on the interface. For more information about field level ACLs, see the Entity Fields topic.
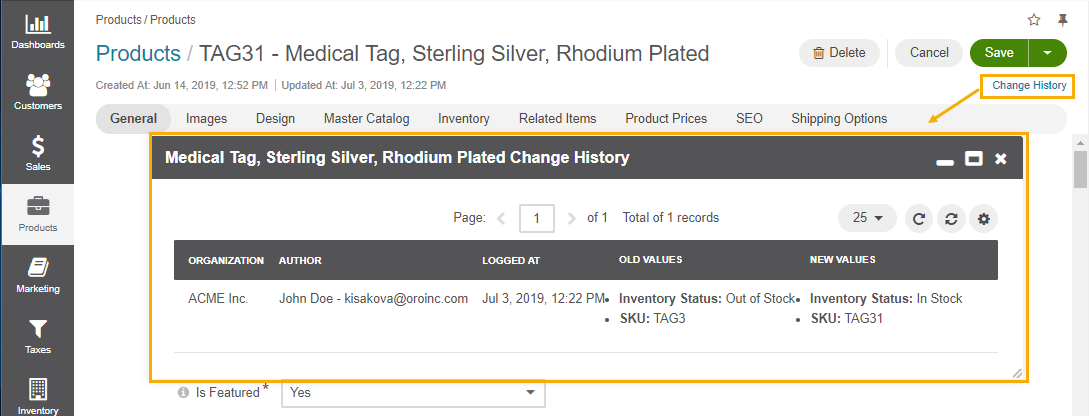
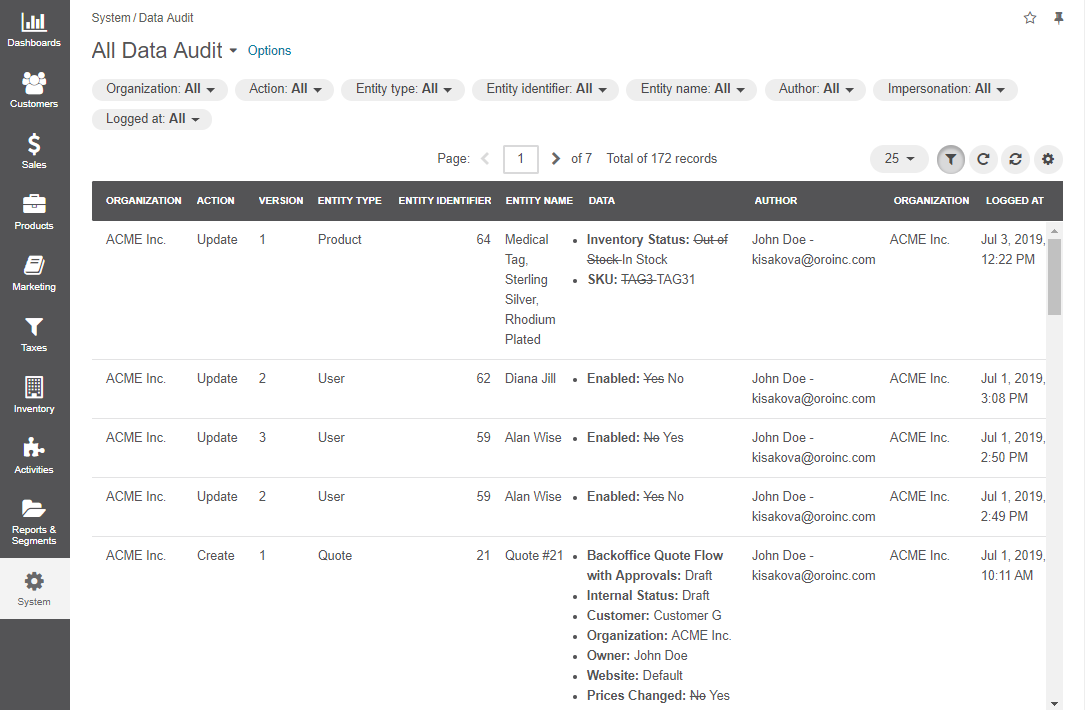
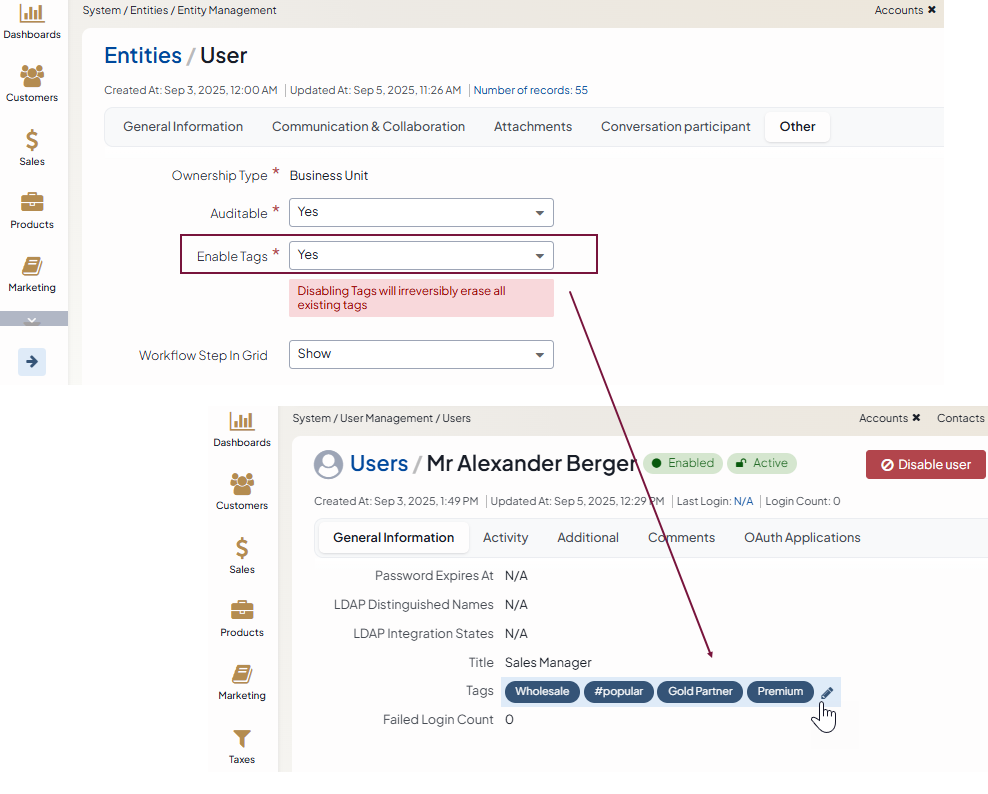
Auditable — This subsection defines whether the system will log what actions are performed with the entity records and who performed them, and users with the corresponding permissions will be able to check it in the Change History and Data Audit sections of the system. Select Yes to enable audit of records of the entity. Select No to disable audit of records of the entity. The default value is No. For more information about the data audit, see the Data Audit topic.
Enable Tags — Defines whether it is possible to assign tags to entity records. Select Yes to enable adding tags to entity records. Select No to disable adding tags to entity records. The default value is No. For more information on tag management, see the Tags topic.
Workflow Step in Grid — Defines whether to show the column with information about the current workflow step in the grid that contains all entity records. For more information on workflows, see the Workflow Management topic.
Show — Select this value from the list to show the column with the workflow step in the grid on the All <Entity Name> page. This is the default value.
Hide — Select this value from the list if you do not want to show the column with the workflow step in the grid.

Include in Smart Insights — When set to Yes, this entity will be considered in OroIQ Smart Insights to generate analytics, trends, and contextual recommendations.
Click Save and Close on the top right.
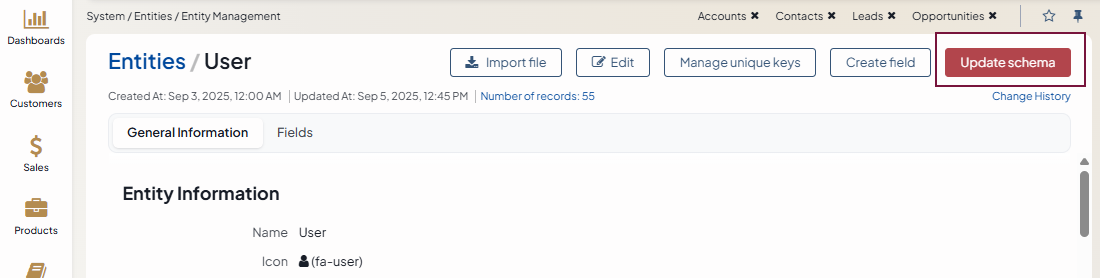
Once you saved the entity, you must update the schema to apply the changes.
Warning
Schema changes are permanent and cannot be easily rolled back. We recommend that developers back up data before any database schema change if changes have to be rolled back.
You can also add and import fields to the entity.
After you have added fields to the entity, update the schema again to apply the changes.
Warning
Schema changes are permanent and cannot be easily rolled back. We recommend that developers back up data before any database schema change if changes have to be rolled back.
You can view all entities under System > Entities > Entity Management.
Manage Unique Keys
Unique keys are a set of fields by which the system matches new information with an existing entity record to determine whether this record is distinct or not. Use unique keys to avoid duplication of existing information.
For example, by default you can create two contacts with the same information:
Jane Roe, born 1985-01-15, sales@example.com
The system assigns them different IDs and treats them as different records, but they look the same on the interface and actually represent the same person.
Now imagine that before adding contacts you have defined two sets of unique keys:
First Name+Last Name+Birthday
First Name+Last Name+Email
You create a contact:
Jane Roe, born 1985-01-15, sales@example.com
And your colleague Roger tries to add Jane as a contact too:
Jane Roe, sales@example.com
The system checks:
The first names and the last names are the same, but the birthday is different (not specified in the second case), maybe these are different contacts.
The first names and the last names are the same, but the email is the same too, so it must be the same contact.
As a result, the system informs Roger that this contact already exists in the system.
To manage unique keys:
Navigate to System > Entities > Entity Management in the main menu.
In the grid on the All Entities page, click the required entity.
Click Manage Unique Keys in the upper-right corner of the page.
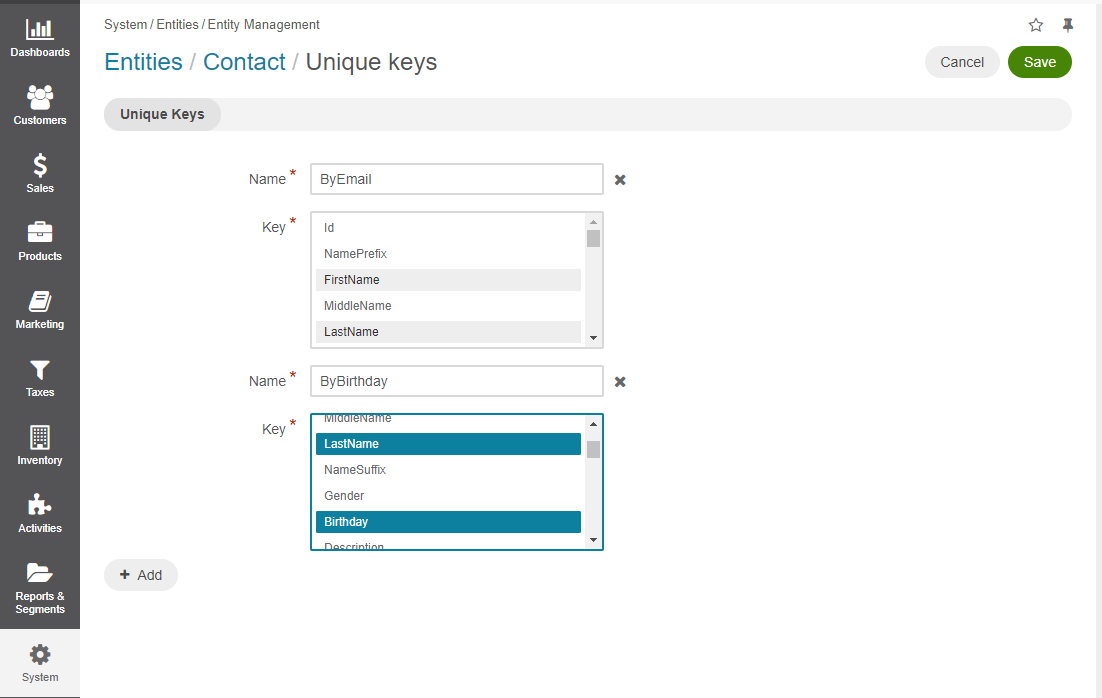
On the Unique Keys page, click +Add.
Specify the required information:
Name — The set name on the interface. It is used just for reference.
Key — The fields that will be included in this set. Hold the CTRL key to select several fields.
If you need to add another set, repeat steps 4–5.
If you need to delete a set, click the x icon next to the set name.
Click Save.