Important
You are browsing upcoming documentation for version 7.1 of OroCommerce, scheduled for release in 2027. Read the documentation for the latest LTS version to get up-to-date information.
See our Release Process documentation for more information on the currently supported and upcoming releases.
Manage System Settings in the Back-Office
The System menu of the back-office contains post-install configuration settings of your Oro application. This is the starting point for setting up your application, from application display settings to payment integrations. Before proceeding with application configuration, please review the topics listed below to get a full understanding of general and domain-specific settings, and available configuration levels.
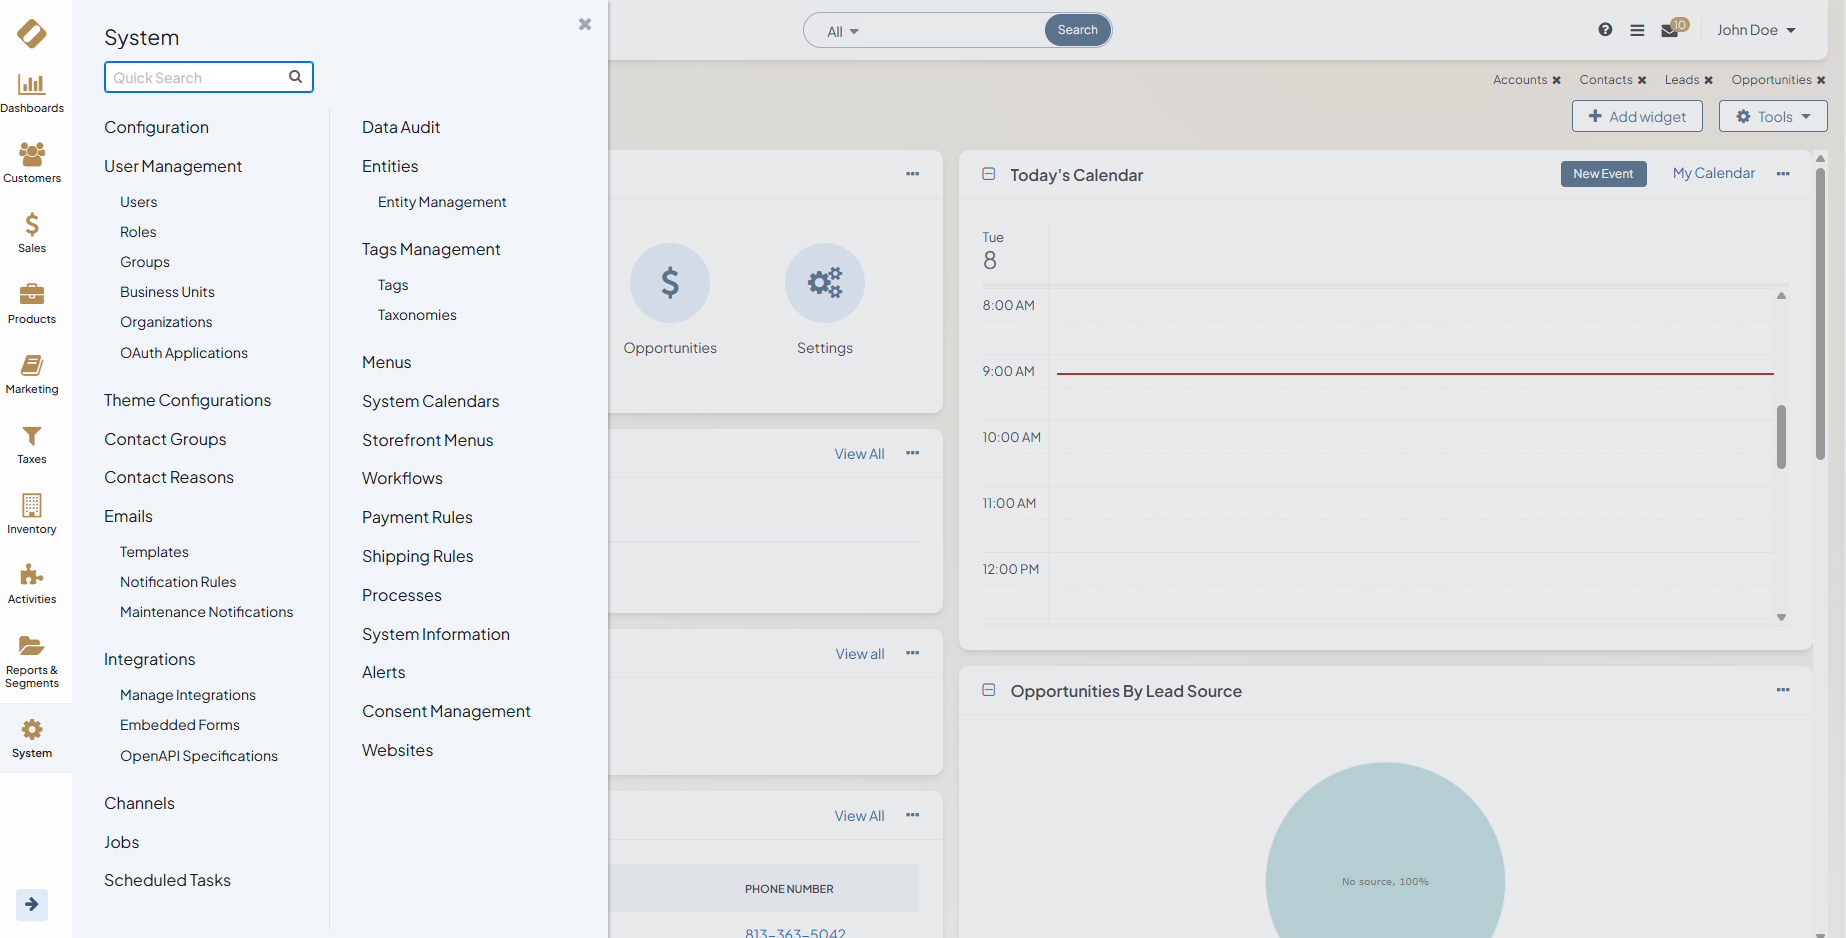
Configuration — Manage system settings and settings specific for CRM, Commerce and marketing features.
User Management — Configure user, role and access management in the application and determine levels of access to data.
Theme Configuration — Configure and customize storefront look and feel.
Contact Reasons — Manage contact reasons used to categorize contact requests submitted through your website.
Contact Groups — Create and manage contact groups.
Emails — Create and manage templates, notification rules and maintenance notifications.
Integrations — Create and manage pre-implemented integrations and integrations with third-party systems.
Channels — Create and manage multiple web and sales channels to aggregate data from different data sources.
Jobs — Monitor tasks executed in the background.
Data Audit — See the full history of changes made to any record of an auditable entity.
Scheduled Tasks — View recurring tasks executed on schedule.
Entities — Create and manage entities and entity fields.
Tags Management — Create tags and taxonomies to organize data in the application.
Menus — Customize default back-office menus.
Storefront Menus — Configure default storefront menus.
System Calendars — Create system and organization calendars and add events to them.
Shipping Rules — Add shipping rules to bind customers to specific shipping prices based on the shipping locations and the products they purchase.
Payment Rules — Add payment rules to make payment options visible to buyers in the storefront.
Workflows — Use system workflows and create custom workflows.
Processes — View and activate/deactivate processes in the application.
System Information — Review system information on oro and third-party packages.
Consent Management — Create and manage consents to comply with General Data Protection Regulations.
Websites — Create multiple individually configured websites in the same application instance.
Localization — Translate and adapt products for a specific country or region.
Alerts — System notification alerts.
Oro applications enable you to configure system settings on four configuration levels (or scopes): global (system), organization, website and user.
Global: To set up and manage settings globally, navigate to System > Configuration in the main menu, and locate the options you need to configure in the panel to the left.
Organization: To configure settings per organization, navigate to System > User Management > Organizations, and select the one that you wish to toggle the options for. Hover over the ellipsis menu to the right of the necessary organization and click Configuration to start editing it. Organization settings can fall back to system (or global) settings. Clearing the Use System checkbox next to the required option and changing its value means that you are configuring this option specifically for the selected organization.
Website: To configure settings per website, navigate to System > Websites, hover over the ellipsis menu to the right of the necessary website, and click Configuration. When Use Organization checkbox is enabled, organization settings override the global ones. Clear the Use Organization checkbox next to the required option, and change the default value to introduce changes at website level.
User: To configure settings per user, navigate to System > User Management > Users, hover over the ellipsis menu to the right of the necessary user, and click Configuration. When Use Organization checkbox is enabled, organization settings override the global ones. Clear the Use Organization checkbox next to the required option, and change the default value to introduce changes at user level.
Customer Group: To configure settings per customer group, navigate to Customers > Customer Groups, hover over the ellipsis menu to the right of the necessary group and click Configuration. When Use Website checkbox is enabled, website settings override the customer group ones. Clear the Use Website checkbox next to the required option, and change the default value to introduce changes at customer group level.
Customer: To configure settings per customer, navigate to Customers > Customers, hover over the ellipsis menu to the right of the necessary customer and click Configuration. When Use Customer Group checkbox is enabled, customer group settings override the customer ones. Clear the Use Customer Group checkbox next to the required option, and change the default value to introduce changes at customer level.