Important
You are browsing upcoming documentation for version 7.1 of OroCommerce, scheduled for release in 2027. Read the documentation for the latest LTS version to get up-to-date information.
See our Release Process documentation for more information on the currently supported and upcoming releases.
Configure Tags in the Back-Office
The following guide describes how you can configure tags in your Oro application. Tags are located under System > Tags Management in the main menu.
Note
See a short demo on how to create tags or continue reading the guidance below.
Enable Tags for Entity
Prior to starting your work with tags, ensure that tagging is enabled for the required entity.
To enable tags for entities:
Navigate to the main menu and click System > Entities > Entity Management.
Click at the end of the required entity’s row to open its edit form.
In the Other section, select Yes in the Enable Tags field.
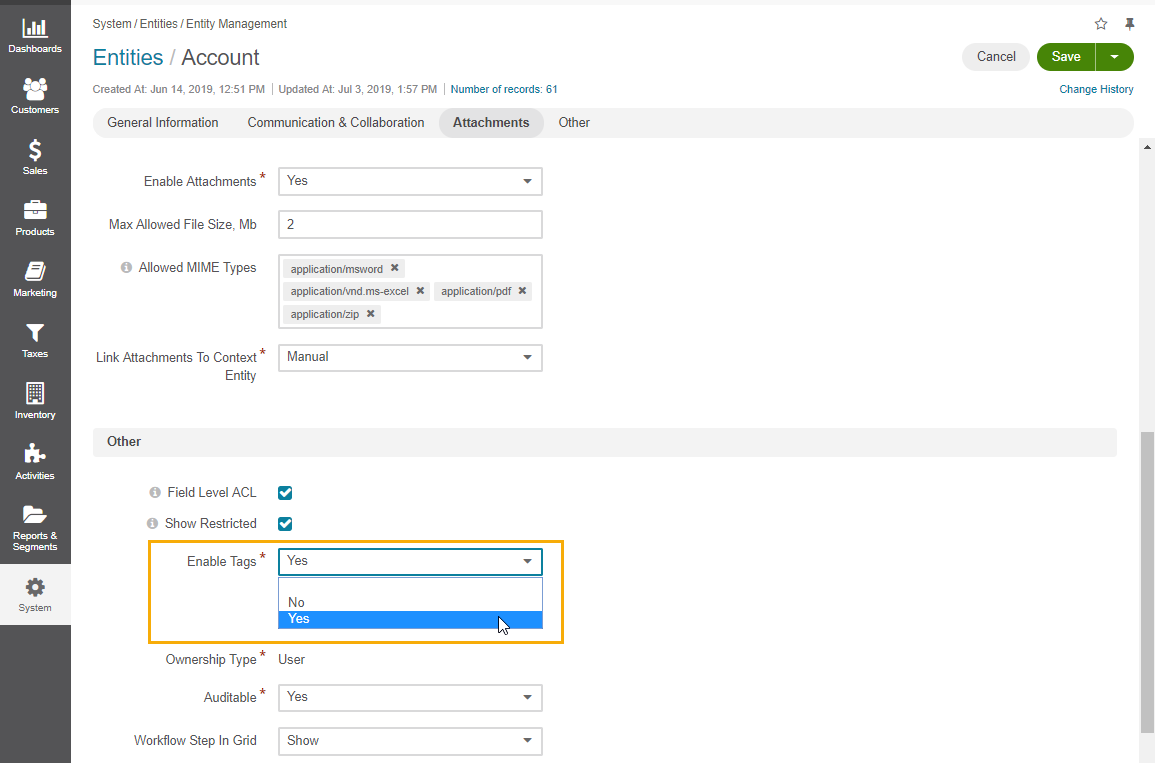
Click Save and Close.
Note
Please note that if you wish to disable tags for an entity, this will irreversibly erase all its existing tags.
Create Tags
Tags can be created in a number of ways:
From the Tag Page
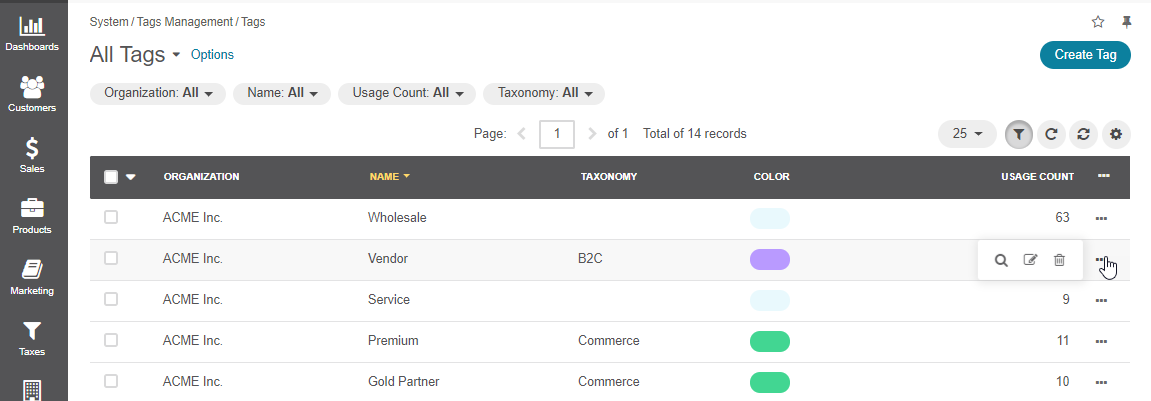
Navigate to the Tag page under System > Tags Management > Tags.
Click Create Tag to create a new tag.
Define the following fields:
Owner — Limits the list of users who can manage the tag.
Name — Specify the name for your tag.
Taxonomy — Select the taxonomy to which the tag will be assigned.
Click Save and Close.
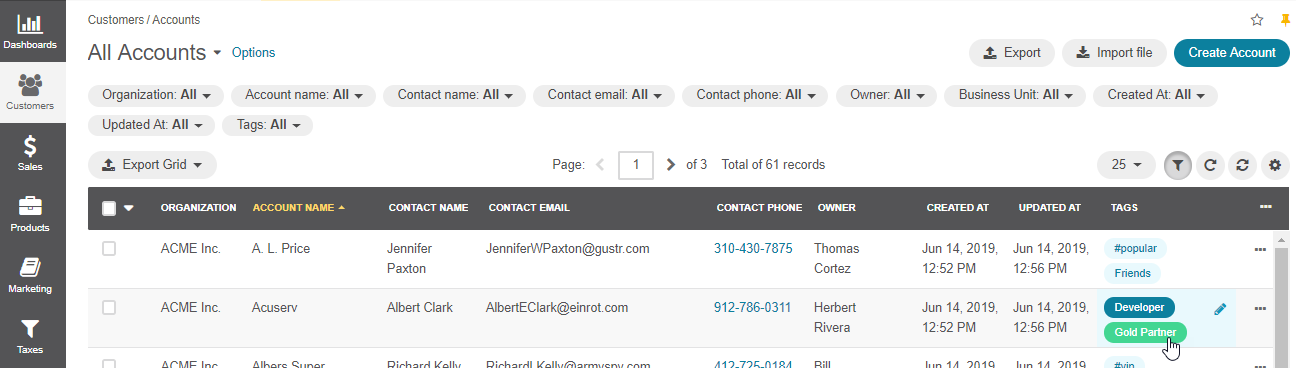
From the Grid Page
Navigate to a grid page for an entity that supports tag creation. For example, open Customers > Accounts from the main menu. Tags will be available from the grid of that entity.
Click
 edit next to the selected entity record.
Start typing in the tag name. If it does not yet exist in the system, (New Tag) will appear next to it in the drop down.

Alternatively, select an existing tag from the list. You can add multiple tags.
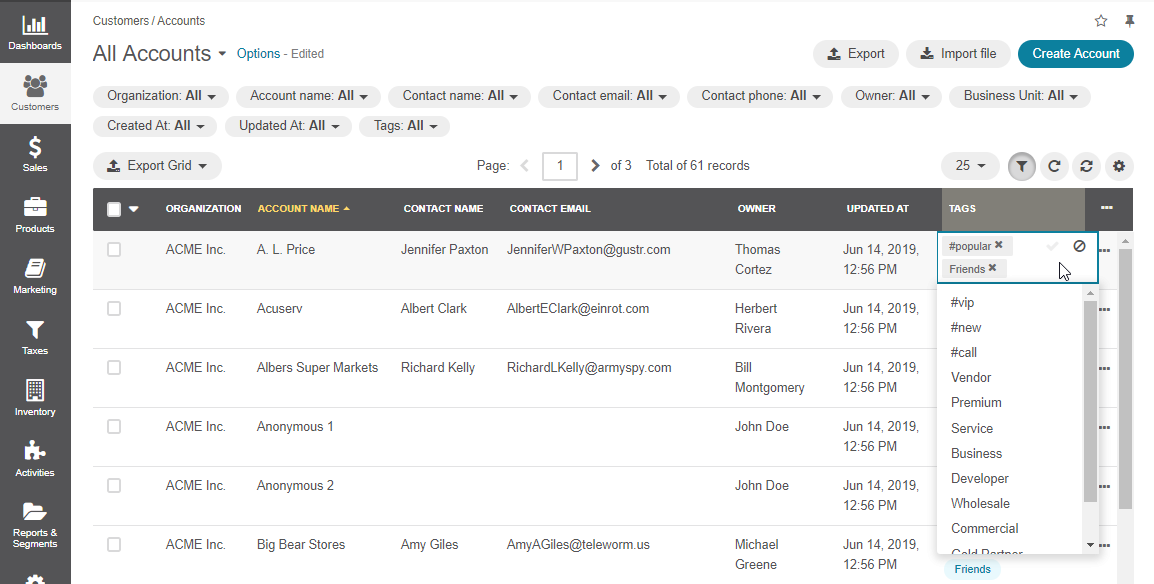
Click to save the tag(s).
From the Details Page of an Entity
Navigate to a grid page for an entity that supports tag creation. For example, open Customers > Accounts in the main menu.
Click the required entity to open its details page.
Click
edit in Tags.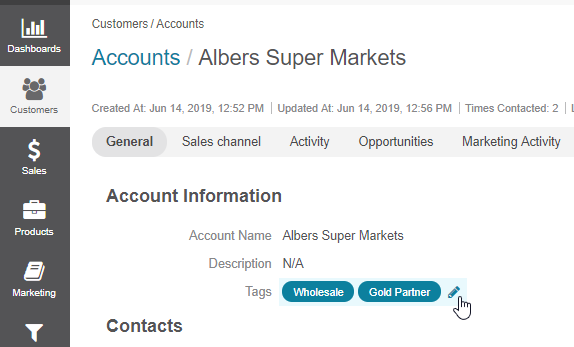
Specify one or more tags for the entity.
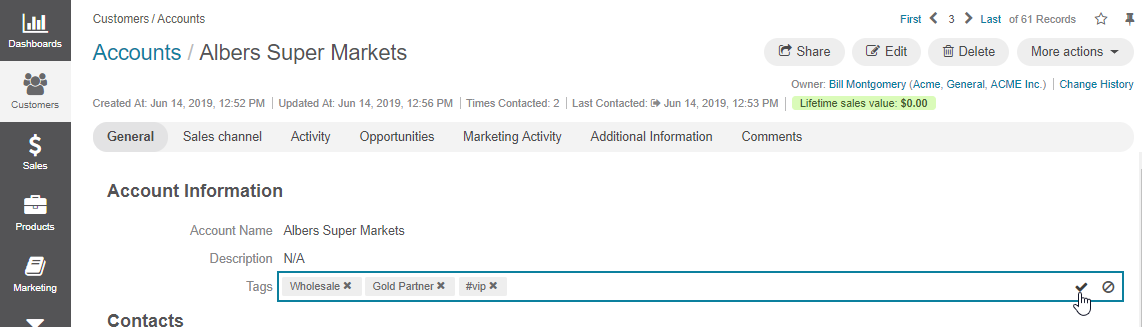
Click to save the tags.
Manage Tags From the Grid
Navigate to System > Tags Management > Tags.
Within the tags list, you can:
Search records by a tag:

Edit the selected tag:
Delete a tag from the system:

Filter tags:
Configure grid settings for tags:
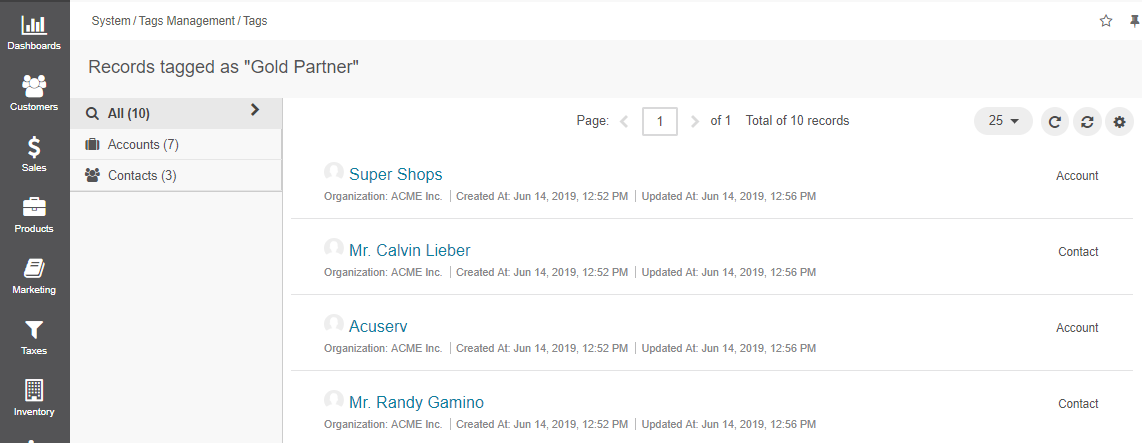
View Tagged Content
Clicking the selected tag will redirect you to a page where you can view all the records that have been assigned to your selected tag. This way you can search for any required tag within the system.
For instance, clicking Gold will redirect you to the page with a list of all records that have Gold as a tag.
The number in brackets indicates the how many records within the group are assigned to the selected tag.
Tags in Reports
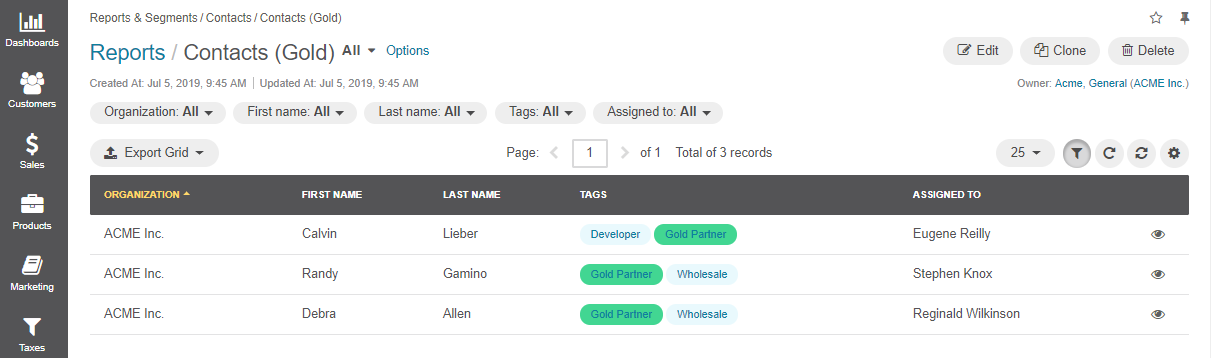
It is possible to filter your reports by tags. For instance, we can create a report that will show contacts tagged as Gold. To do that:
Navigate to Reports&Segments > Manage Custom Reports.
Click Create Report and fill all the required information in the General, Designer and Chart Designer sections as described in the Create a Custom Report guide.
Within the Filters section, add the Field Condition by dragging it to the right.
Select Contact > Tags.
Enter is any of Gold.
Click Save and Close.

You can create any reports of your choice and filter them by tag in a similar manner.