Important
You are browsing the documentation for version 4.1 of OroCommerce, OroCRM and OroPlatform, which is no longer maintained. Read version 5.1 (the latest LTS version) of the Oro documentation to get up-to-date information.
See our Release Process documentation for more information on the currently supported and upcoming releases.
Manage Customer Users in the Back-Office
Hint
This section is a part of the Customer Management topic that provides the general understanding of accounts, contacts, customers and customer hierarchy available in Oro applications.
Customer users act on behalf of the company (i.e. customers in Oro context) and may have a limited set of permissions in OroCommerce, depending on their function in the customer organization.
For customer user management, navigate to Customers > Customer Users in the main menu.
In Customer Users section, you can:
View, edit, and create new customer users.
Select their roles in OroCommerce to define their level of permissions and access to the actions and data in OroCommerce storefront.
Manage customer user information (name, birthday, billing and shipping address, and phone number, etc).
View requests for quotes, quotes, sales orders, and shopping lists created by the customer user.
View communication with the customer that happened using email, notes or scheduled events.
View additional information attached to customer user.
Enable and disable the customer.
Reset the customer user password.
Add OAuth applications
Note
You can delegate this function to the customer who will access user and role management in the OroCommerce storefront (see the Delegating Users and Role Management to the Customer section for more information).
Customer Account Confirmation
Upon registration, a customer user receives an email confirmation request. Once they follow up with the requested action, their account is marked as confirmed.
Hover over the More Options menu to the right of the necessary customer user to perform the following actions:
View customer user details. Alternatively, click on the item to open its details page.
Edit customer user details.
Delete existing customer users.
Create a Customer User
To create a new customer user:
Navigate to Customers > Customer Users in the main menu.
Click Create Customer User.

Select the Enabled check box to enable the user to log into the system and to do their work within it upon creation.
Fill in the customer Name and other personal information.
Select a customer this user represents.
If you are adding a subsidiary of the existing customer, select a parent customer.
Assign a sales representative who will be assisting this customer user. By default, the customer sales representative applies to the customer user.
Select the Generate Password and Send Welcome Email check boxes.
Select the website of customer user registration. While the customer user may have access to other websites within the same organization, the email notifications concerning their user account will point to this website. See Managing Websites for more information.
Select a Preferred Localization for the customer user. This field is displayed if more than one localization is enabled for any of the websites of the current organization. If you change the website for the customer user, you will need to select a new preferred localization.
Add billing and shipping address as described in the Address Book section.
In the Roles section, select the roles that should apply to the customer user. When several roles are selected, granted permissions are accumulated from all the assigned roles. See Managing Customer User Roles for more information.
Important
At least one role must be assigned if the Enabled check box is selected. Disabled customer users can be saved without roles, but you will need to assign roles to them later before enabling.
Click Save on the top right.
View Accepted Consents
When at least one consent to process personal data has been accepted by a customer user in the storefront, you can view this information in the dedicated Consents section on the page of a particular customer user under Customers > Customer Users.
You can read more information on consent management in the following related topics:
Delegate Account Management to a Customer User
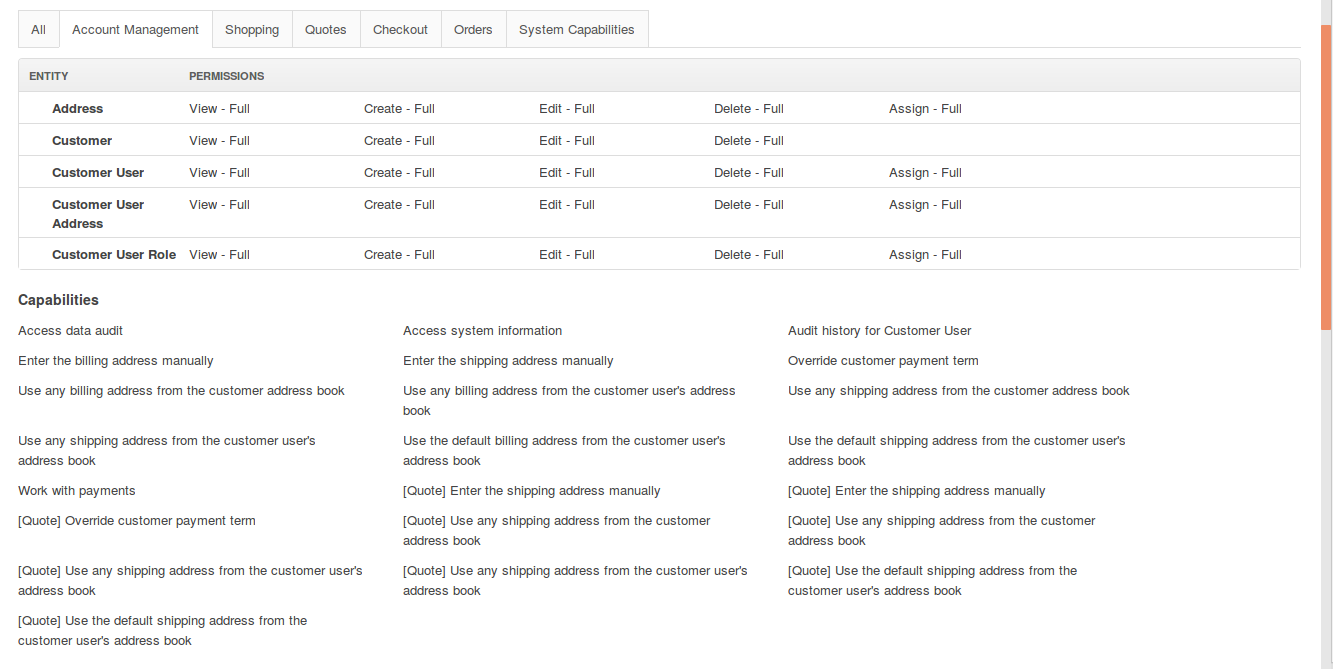
You may want to delegate some of the customer user management capabilities to the customer users with administrator role by enabling Account Management permissions and capabilities. See the Customer User Roles section for more information about permissions and capability management.

Impersonate a Customer User
Hint
This feature is available in the Enterprise edition since OroCommerce v4.1.0. To check which application version you are running, see the system information.
For troubleshooting purposes, user impersonation allows back-office users with the Impersonate User role capability to access and operate the OroCommerce storefront as if they were logged in as a specific customer user. Such back-office user is redirected to the website assigned to the customer user that they are impersonating (i.e. the website where the customer user registered).
Hint
Before proceeding, make sure this feature is enabled in the system configuration globally or per organization.
You can perform impersonation from the customer user grid, or from the view page of the selected customer.
To impersonate a customer user from the customer user grid, hover over the More Options menu to the right of the selected customer user and click .
To impersonate a customer user from the customer user view page, click Log in as a User on the top right.

The storefront session in impersonation mode opens in a new browser tab.

To exit impersonation mode, click Log out in the blue banner.
Add OAuth Applications
Oro applications support OAuth 2.0 credentials authorization grant type to enable connection of third-party applications to the web API. To connect a third-party application, you need to add it and configure its pre-generated credentials in the back-office of your Oro application. These credentials are managed on user level which enables generation of different credentials for various applications across multiple organizations (the multi-org functionality is only available in the Enterprise edition).
Starting Conditions
To be able to create an OAuth application, make sure that you generate private and public encryption keys and add them to the /var directory of the installed Oro application. Although the path to the keys is predefined, you can change it by providing your custom location in the config.yml file.
Note
If no keys are found, the following warning message will be displayed in the back-office:
OAuth authorization is not available as encryption keys configuration was not complete. Please contact your administrator.
Add an Application
To add a new OAuth application for a customer user in the back-office:
Navigate to Customers > Customer Users in the main menu.
Click once on the name of your selected customer user to open their details page.
In the OAuth Applications section, click Add Application and provide the following details in the pop-up dialog:
Organization — If you are adding an application within the organization with global access, you can select which other available organization to add the application to.
Application Name — Provide a meaningful name for the application you are adding.
Active — Select the Active check box to activate the new application.
Click Create.
A corresponding notification is sent to the primary email address of the user, the owner of oauth application. You can change the default recipient, localization, or an email content if needed by updating the OAuth email templates and the related notification rule set out-of-the-box in the system configuration.
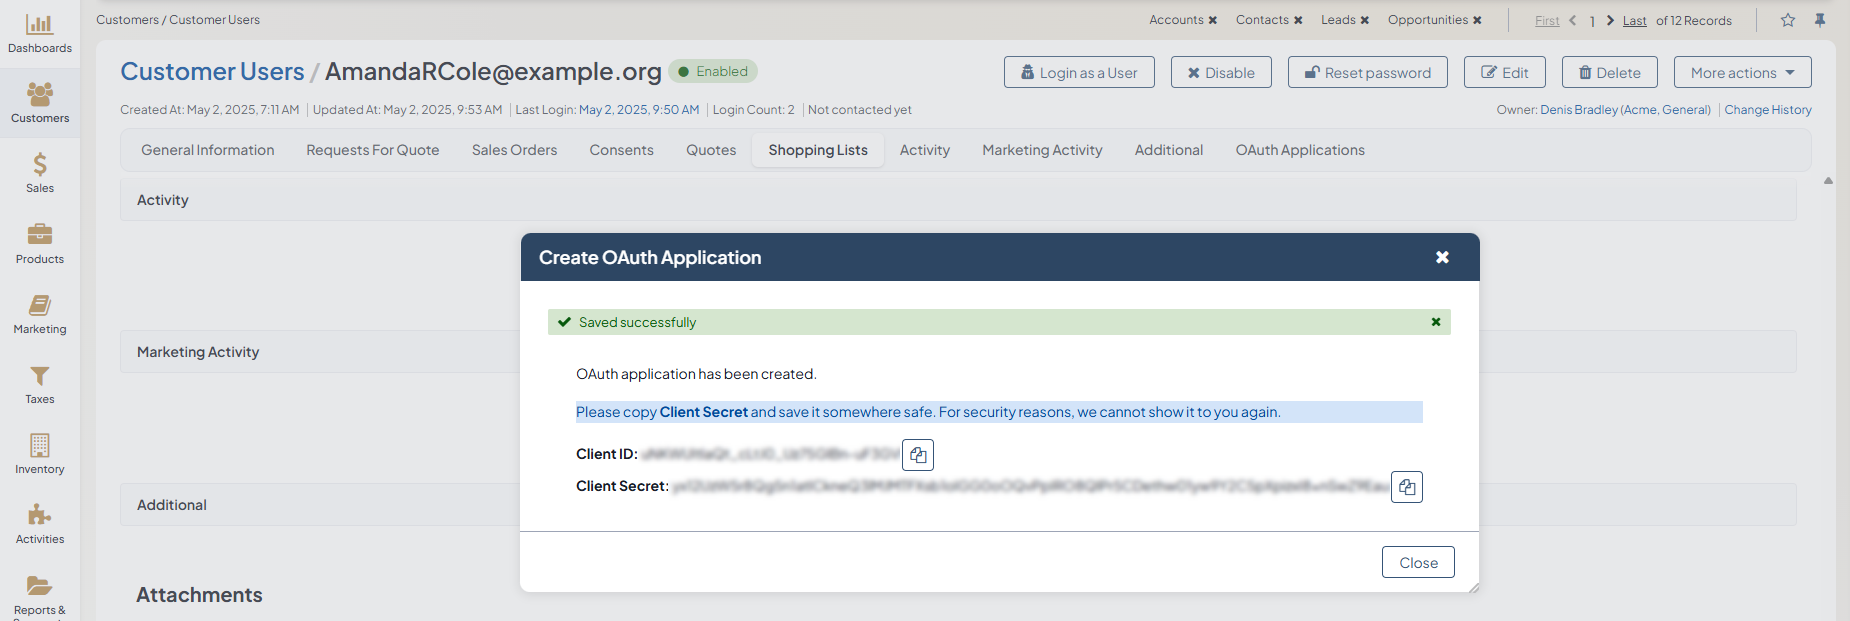
Once the application is created, you are provided with a Client ID and a Client Secret. Click on the icon to copy the credentials to the clipboard.

Important
For security reasons, the Client Secret is displayed only once – immediately after you have created a new application. You cannot view the Client Secret anywhere in the application once you close this dialog, so make sure you save it somewhere safe so you can access it later.
You can add as many applications as you need for any of your existing organizations. All added applications are displayed in the grid, and you can filter them by name, organization, and status.
Hint
Use the More Options menu to edit, deactivate or delete an application.

Use the generated Client ID and Client Secret to retrieve an access token to connect to your Oro application.
Note
For the aggregated information on all OAuth applications created by customer users in the back-office, refer to the general Storefront OAuth Applications topic.
