Important
You are browsing documentation for version 5.1 of OroCommerce, supported until March 2027. Read the documentation for the latest LTS version to get up-to-date information.
See our Release Process documentation for more information on the currently supported and upcoming releases.
Manage Contact Requests in the Back-Office
Contact requests are used to track contact with individuals who are requesting information such as product information, support, partnership information, or any other types of assistance. Oro has a standard embedded contact form out-of-the-box for you to add to your websites. Contact requests are automatically generated and added to the page of all contacts in your Oro application when your customers use this form.
Additionally, contact requests are used for consent management purposes when a customer declines a consent in the OroCommerce storefront. When the Declined Consent Notification option is enabled for a specific consent, a notification is created in the back-office as a contact request to inform that the consent has been declined. Read more information on consents in the relevant Data Protection and Consent Management topic.
See a short demo in our media library on how to create and manage contact requests or keep reading the guidance below.
Create a Contact Request
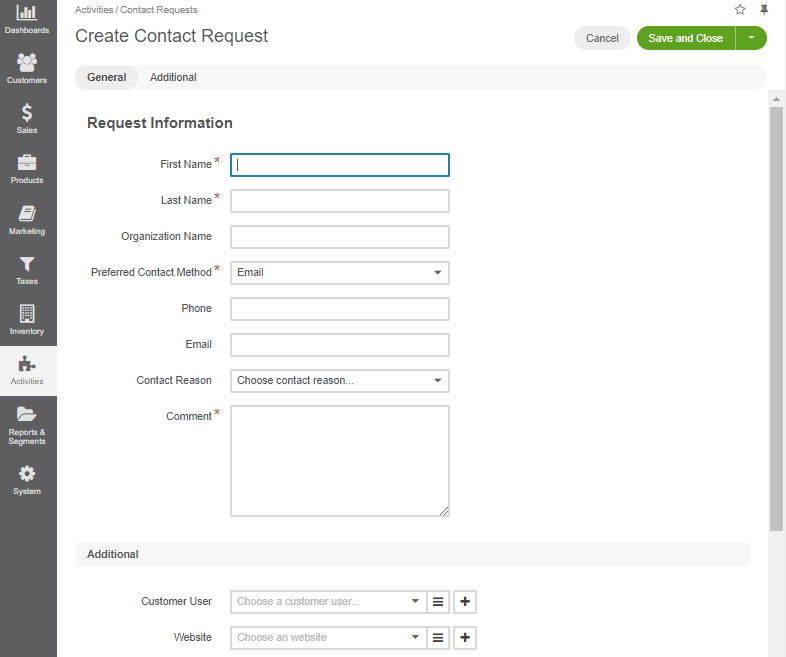
If you need to register a particular request received from a customer by phone or email, you can manually create a contact request within your Oro application.
Navigate to Activities > Contact Requests in the main menu.
Click Create Contact Request on the top right.
Provide the following details on the page that appears:
Name
Description
First Name
The first name of the person who requested support.
Last Name
The last name of the person who requested support.
Organization Name
The name of an organization, on behalf of which the request has been filed, if any. This field is for information and search purposes only.
Preferred Contact Method
Choose the contact method to be used on the list. The possible values are:
Both phone and email
Phone
Email
By default, the field is set to Email.
Phone and Email
Contact details related to the request. The values are determined by the Preferred Contact Method and must be defined.
Contact Reason
Choose a contact reason from the list to simplify request analysis. By default, the field is set to Other. To create a new contact reason that can be assigned to a certain contact request, refer to the Contact Reasons topic for more details.
Comment
The text of the request.
Click Save on the top right.
Create a Contact Request from a Third-Party Application
Add the code for the form to your website, as described in the Embedded Forms guide topic. Every time a customer completes the form, the information is automatically synced to your Oro application.
Note
Use the Contact Request form type for your website. Other contact request types can be developed in the course of integration according to your specific business needs.
View and Manage Contact Requests
The ability to view and edit contact requests depends on the specific roles and permissions defined in the system.
All contact requests can be viewed from the page of all contact requests under Activities > Contact Requests in the main menu. From this page, you can view, edit, and delete contact requests.
