Important
You are browsing documentation for version 5.1 of OroCommerce, supported until March 2027. Read the documentation for the latest LTS version to get up-to-date information.
See our Release Process documentation for more information on the currently supported and upcoming releases.
Manage Orders
Manage Orders in the Order Grid
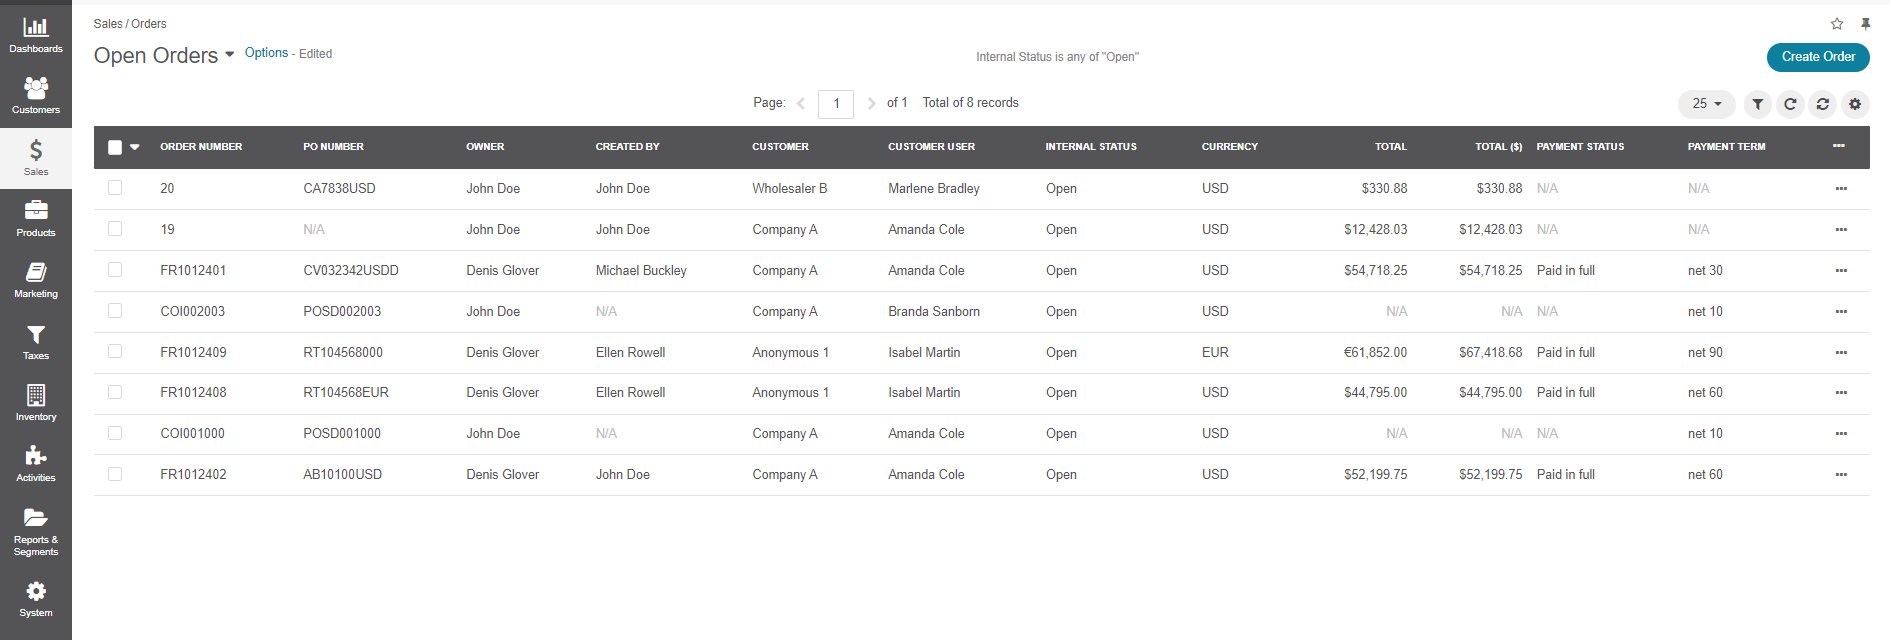
To view the list of existing orders, navigate to Sales > Orders in the main menu.

The following information about orders is available:
Order Number — The unique order reference number. It is generated automatically for new orders.
PO Number — Another order reference number. It is usually defined by the buyer and used by the buyer’s side to match the invoice and the received goods with the purchase.
DNSLT (Do not ship later than) — The date on which the order expires.
Currency — The currency in which the order is made.
Subtotal — The amount due for items included in the order. Does not include additional costs, taxes, or discounts.
Total — The final amount due for the order. Includes all the additional costs (like shipping costs), taxes or discounts.
Customer — The customer that made the order.
Customer User — The customer user that made an order on behalf of the customer.
Internal Status — The order status is visible only in the back-office. See the description of internal statuses.
Owner — The back-office user who is responsible for the order.
Payment Status — Whether the order is already paid in full, the payment for the order is authorized, etc.
Payment Method — The payment method selected to pay for the order.
Shipping Method — The shipping method selected for the order delivery.
Source Document — If the order has been created from an RFQ, quote, or another order, this field contains a link to the corresponding record. If the order has been created from scratch (in the back-office) or the quick order form (in the storefront), the field shows ‘N/A’.
Discount — The total of all discounts applied to the order.
Created At — The date and time the order was created.
Updated At — The date and time when the order was last updated.
Payment Term — The terms and conditions for order payment. For more information, see Payment Terms Integration.
Warehouse — The warehouse that the goods are shipped from.
Hint
To manage the columns displayed within the grid, click on the right of the grid and select the information you wish to be displayed.
To handle the significant volume of data, use page switcher, increase the ‘view per page’ value, or use filters to narrow down the list to the needed information.
At the top right, you can see the name of the view. The views are defined by default:
Open Orders — Shows only orders with the status ‘Open’.
All Orders — Shows all existing orders regardless of their statuses.
To change the view, click the drop-down next to the view name and select the required view.

You can also create and save new views for future use.
Edit Order Details
To edit an order:
Navigate to Sales > Orders in the main menu.
Choose an order in the list, hover over the More Options menu to the right of the item, and click to start editing its details.
Alternatively, click the order to open its details. On the order details page, click the Edit button on the top right.
Update the required information. See Create an Order from Scratch and Manage Promotions in Orders topics for detailed information on the available options.
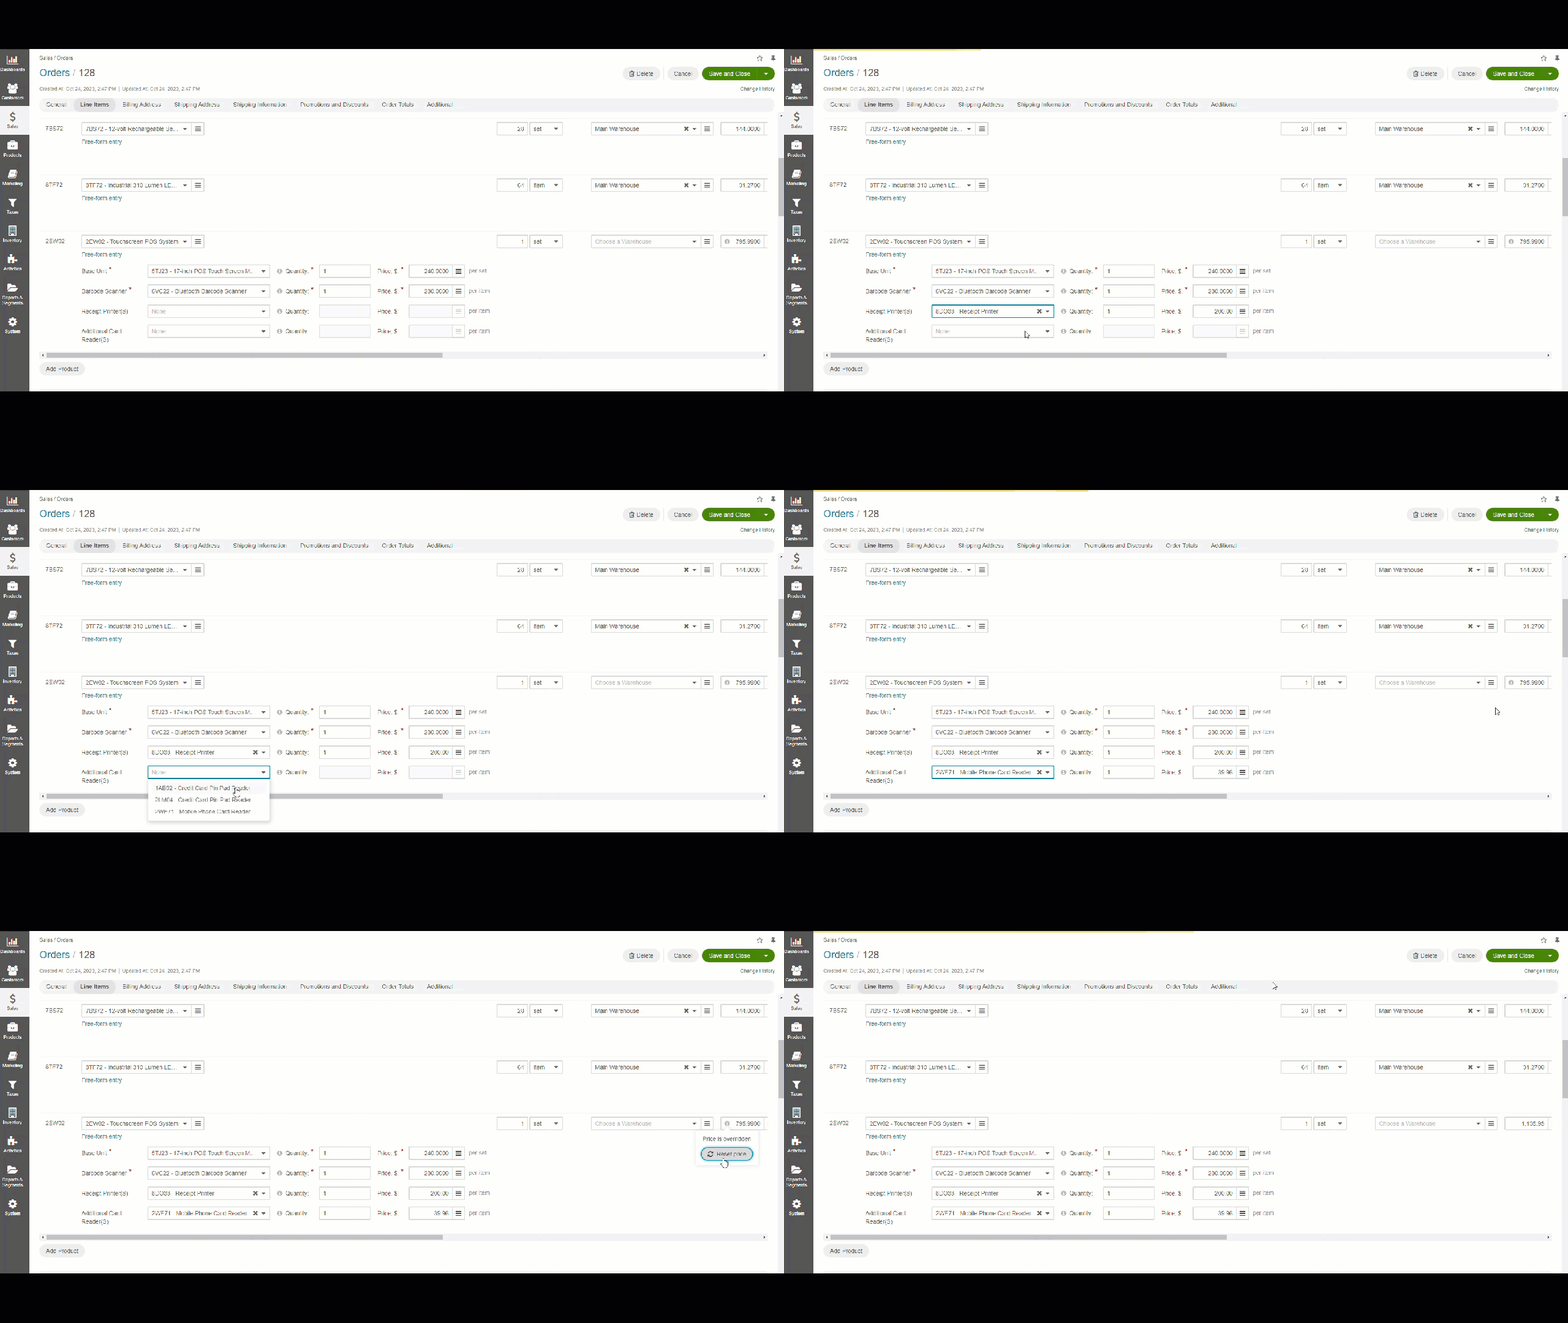
If the order contains product kit(s), you can add items that qualify for it to the order. Additionally, you can amend the price for kit items, as well as the kit on the whole. You can still reset the price back to the original value even if it has been overriden. For this, click on the i icon next to the price of the whole kit, and select Reset Price.

Click Save on the top right of the page.
Delete an Order
Delete an Order from the Order Grid
In the main menu, navigate to Sales > Orders.
Select the order you need to delete, click the More Options menu at the end of the row, and then click the Delete icon.
In the confirmation dialog, click Yes, Delete.
Delete an Order from the Order View Page
In the main menu, navigate to Sales > Orders. The order list opens.
Click the order that you need to delete. The order view page opens.
Click Delete on the top right.
In the confirmation dialog, click Yes, Delete.
Delete Multiple Orders
In the main menu, navigate to Sales > Orders. The order list opens.
Select the checkboxes in front of the orders you need to delete, click the More Options menu at the end of the list header, and then click Delete.
Tip
To select a bulk of items quickly, click next to the checkbox at the beginning of the table header and then select one of the following options:
All — Select all orders.
All Visible — Select only orders that are visible on the page now.
To clear the selection, select None.
In the confirmation dialog, click Yes, Delete.