Important
You are browsing documentation for version 5.1 of OroCommerce, supported until March 2027. Read the documentation for the latest LTS version to get up-to-date information.
See our Release Process documentation for more information on the currently supported and upcoming releases.
Configure System Calendars in the Back-Office
In your Oro application, you can add calendars with tasks and events related to a specific user, other users in the system (subject to the roles and permissions defined), as well as events defined for the whole organization or system.
Events in the system and organization calendars can be viewed by all the users within the system/organization. The ability to create, edit, and delete events depends on the user’s roles and capabilities.
Note
See a short demo on how to create and manage calendars or keep reading the step-by-step guidance below.
Create System and Organization Calendars
You can create as many calendars as you need under the System menu in your Oro application.
To create a system or an organization calendar:
Navigate to System > System Calendars in the main menu.
Click Create System Calendar.
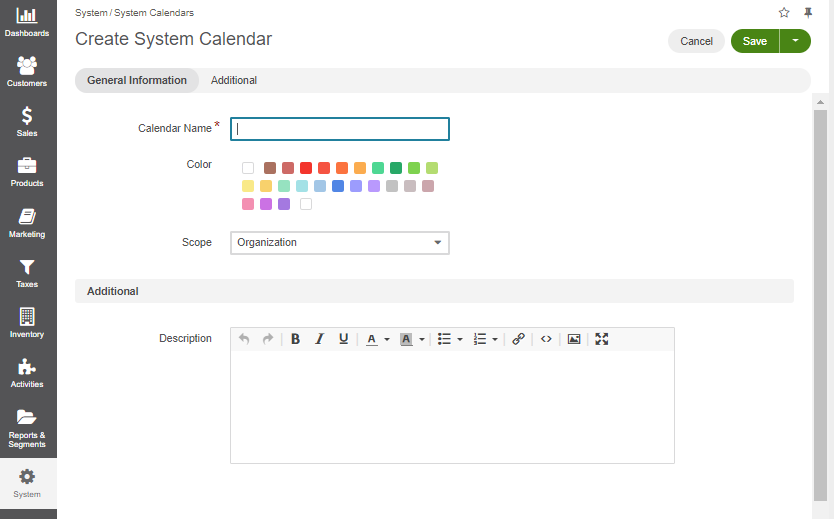
In the creation page, define the following fields:
Calendar Name — This is the only mandatory field. Defines the name used to refer to the calendar in the system.
Color — Choose the color used to highlight events in the calendar by default.
Scope — Define if this is a system or organization calendar (meaningful for the Enterprise edition only).
Click Save.
Add Events to a System Calendar
You can add event to system calendars in two ways:
From the page of the system calendar under System > System Calendars.
From My Calendar under your user name on the top right.
You can find detailed information on adding calendar events to user calendars in the Calendar Events topic.
Related Topic:
