Important
You are browsing documentation for version 5.1 of OroCommerce, supported until March 2027. Read the documentation for the latest LTS version to get up-to-date information.
See our Release Process documentation for more information on the currently supported and upcoming releases.
Configure Checkout Settings per Website
Hint
This section is part of the Checkout Configuration Concept Guide topic that provides a general understanding of single-page and multi-page checkout concepts.
Navigate to System > Websites in the main menu.
For the necessary website, hover over the More Options menu to the right of the necessary website and click to start editing the configuration.
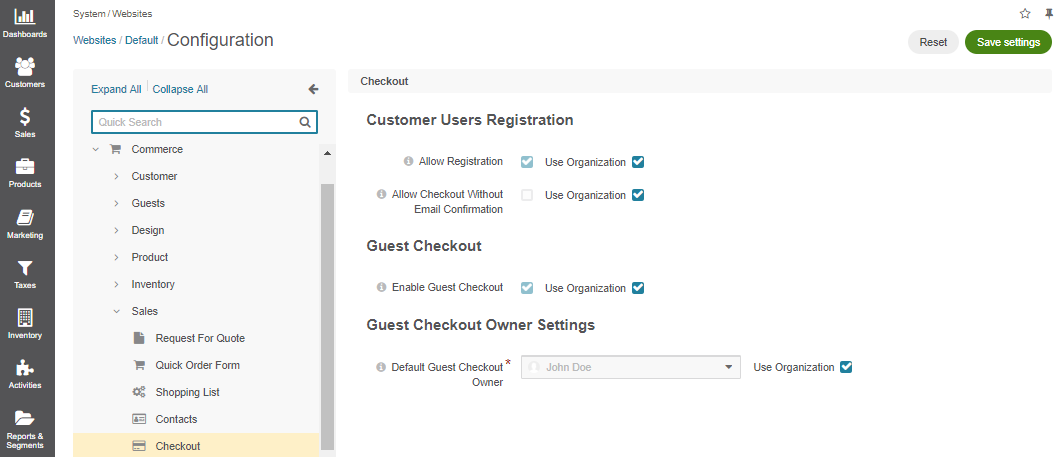
Select Commerce > Sales > Checkout in the menu to the left.
Note
For faster navigation between the configuration menu sections, use Quick Search.

Clear the Use Organization checkbox to change the organization-wide setting.
In the Customer Users Registration section, you can:
Allow Registration — when the option is enabled, registration is allowed for customers on the checkout page.
Allow Checkout without Email Confirmation — when the option is enabled, customers proceed to the checkout immediately once registration details are provided. When this option is disabled, the checkout does not start until the user confirms their email address.
Note
By default, both options are enabled. However, they are only relevant when guest checkout is enabled.
In the Guest Checkout section, set whether guest checkout should be enabled or disabled.
By default, guest checkout is disabled.
In the Guest Checkout Owner Settings section, select the default owner of the guest checkout. Depending on the roles and permissions of the owner, guest data (e.g. shopping lists) may or may not be viewed and managed by the users who are subordinated to the owner.
Note
To enable users from the same business unit or organization (that the owner belongs to) to view and manage guest checkout data, adjust permissions for the checkout entity in their roles accordingly.
In the Checkout Options section, set the following option:
Maximum Line Items per Page — Set the number of line items to display on the checkout page. The provided value will be used as the implied maximum number of checkout line items to display at once. If the number of checkout line items exceeds this value, the “Show All Items” will no longer be available and this number will be shown as the maximum pager value.
Apple Pay Domain Verification (available starting from OroCommerce v5.1.4) — Apple Pay in offered as part of the integration with Stripe. Domain verification is one of the required prerequisites for Apple Pay to work. Whether Apple Pay will be offered as a payment option during checkout depends on what payment integrations are allowed on a specific website by the payment rules.
Click Save Settings.