Important
You are browsing upcoming documentation for version 7.0 of OroCommerce, scheduled for release in 2026. Read the documentation for the latest LTS version to get up-to-date information.
See our Release Process documentation for more information on the currently supported and upcoming releases.
OroConnector Add-in for Microsoft 365
Note
OroConnector Add-in for Microsoft 365 is available for Enterprise Edition only.
The OroConnector add-in is a valuable tool for users of the Enterprise Oro applications. It allows users to interact with Oro applications from within Outlook through an Outlook add-in. The OroConnector eliminates the need for time-consuming switching between applications, streamlining workflow processes, and improving productivity. Its seamless integration with your email client makes it a game-changer for Oro users, providing a more convenient and streamlined workflow.
Requirements
Ensure you have the following installed on your system before proceeding:
npm install -g pnpm
Set Up the Project
Set Up the Project Manually
Clone the MS365 Mailbox add-in repository code to your project folder (for Enterprise customers only).
Install node_modules:
pnpm i
Add a new .env file and set up environment variables following the example in the .env.example file.
Run the following command to generate a manifest file:
pnpm run generate-manifest
Run the following command to create a build folder:
pnpm run build
Deploy dist folder on [your-addin-domain] (for example on Azure server).
Set Up Individual Local Environment
Generate certificates for local environment.
Install office-addin-dev-certs lib:
npm i -g office-addin-dev-certs
Generate certificates:
office-addin-dev-certs installOpen your Get add-ins window.
Navigate to Add-Ins for Outlook > My add-ins > Custom Addins > + Add a custom add-in > Add from file.
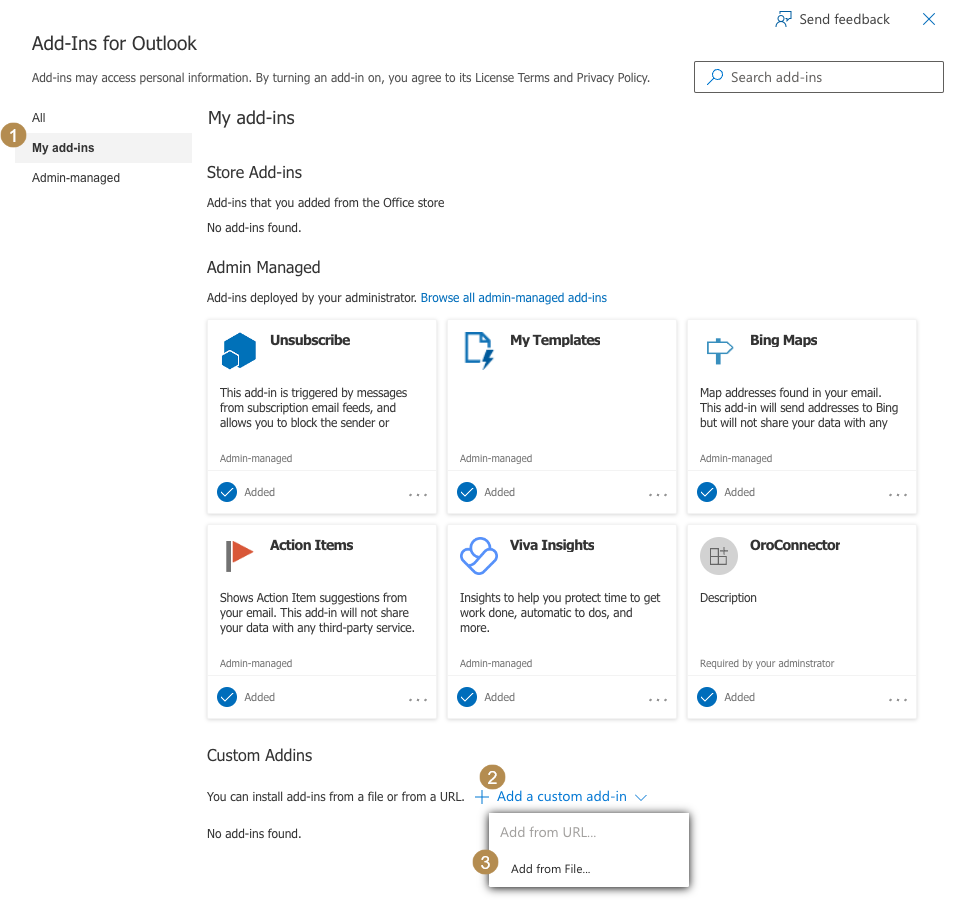
Choose the generated manifest file.
Run the following command:
pnpm run dev
Open your Outlook client. Open any email and find the OroConnector add-in.
Configure the OAuth Application
To create a new OAuth application in Oro:
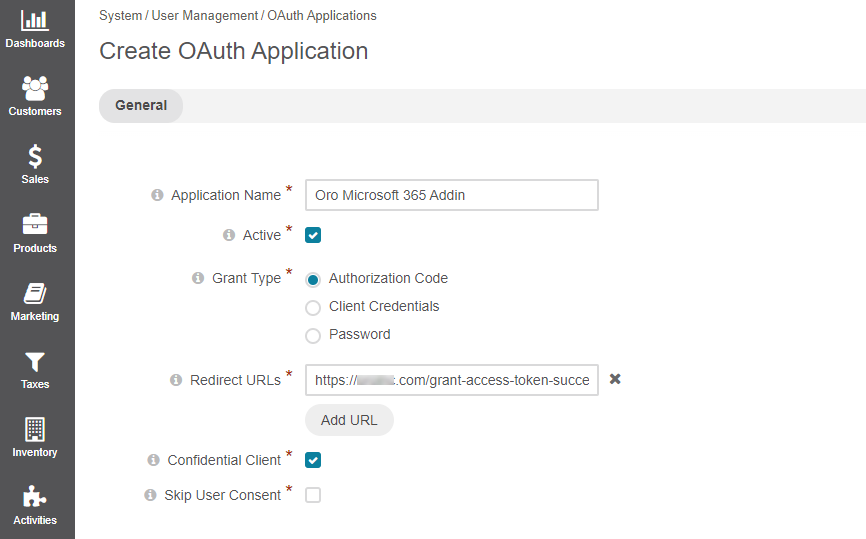
Navigate to System > User Management > OAuth Applications in your Oro application. Create a new OAuth application with the following settings:
Grant Type: Authorization Code
Redirect URL: Enter the required URL in the
https://[your-addin-domain].com/grant-access-token-successformat. For local setup it should be:https://localhost:3000/grant-access-token-success.
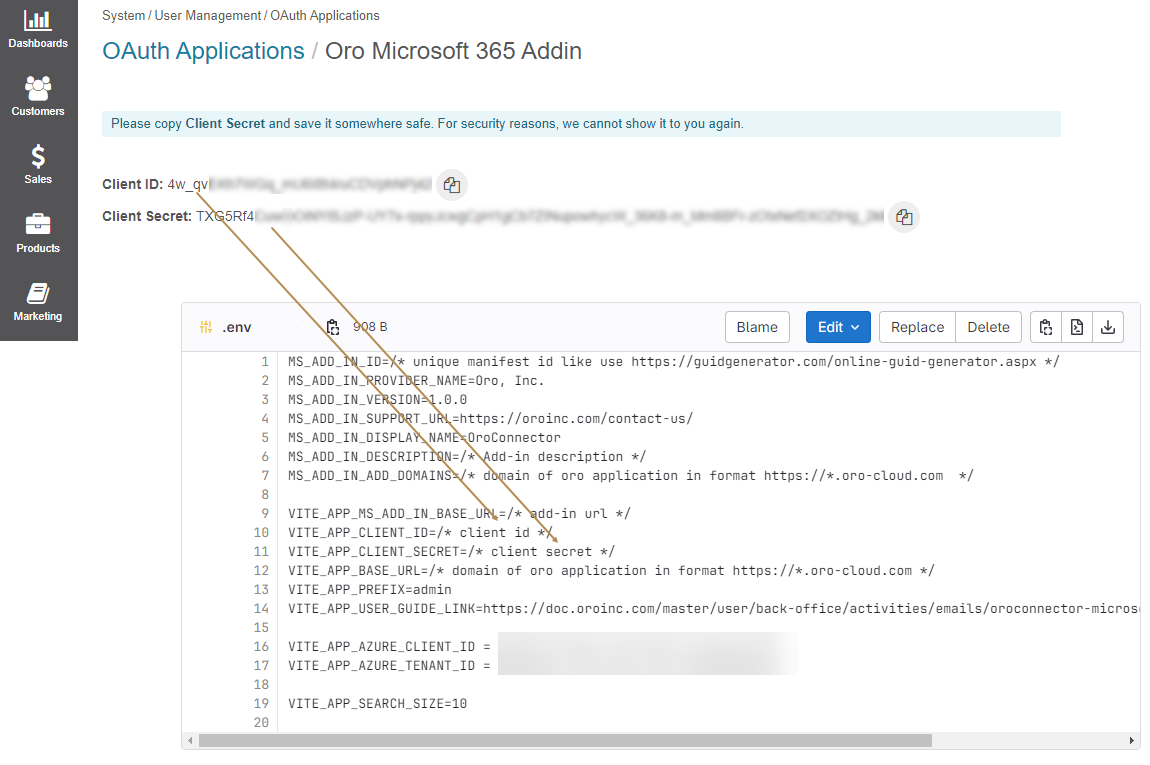
Once saved, the system will generate Client ID and Client Secret for the OAuth application. Update your .env file with the generated credentials, where:
VITE_APP_CLIENT_ID = Client ID
VITE_APP_CLIENT_SECRET = Client Secret
Note
For more details on OAuth application configuration, refer to the related documentation.
Deploy Production and Publish on the Internal Marketplace
Log in to Azure Service.
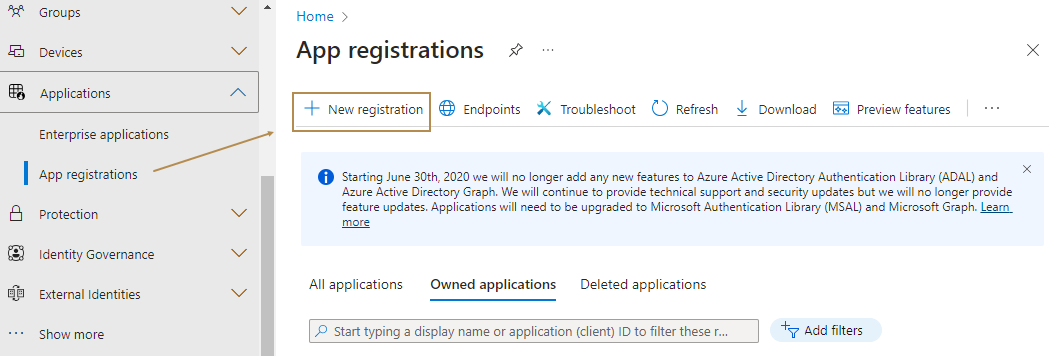
Navigate to Applications > App registrations and click + New registration to create a new registration.
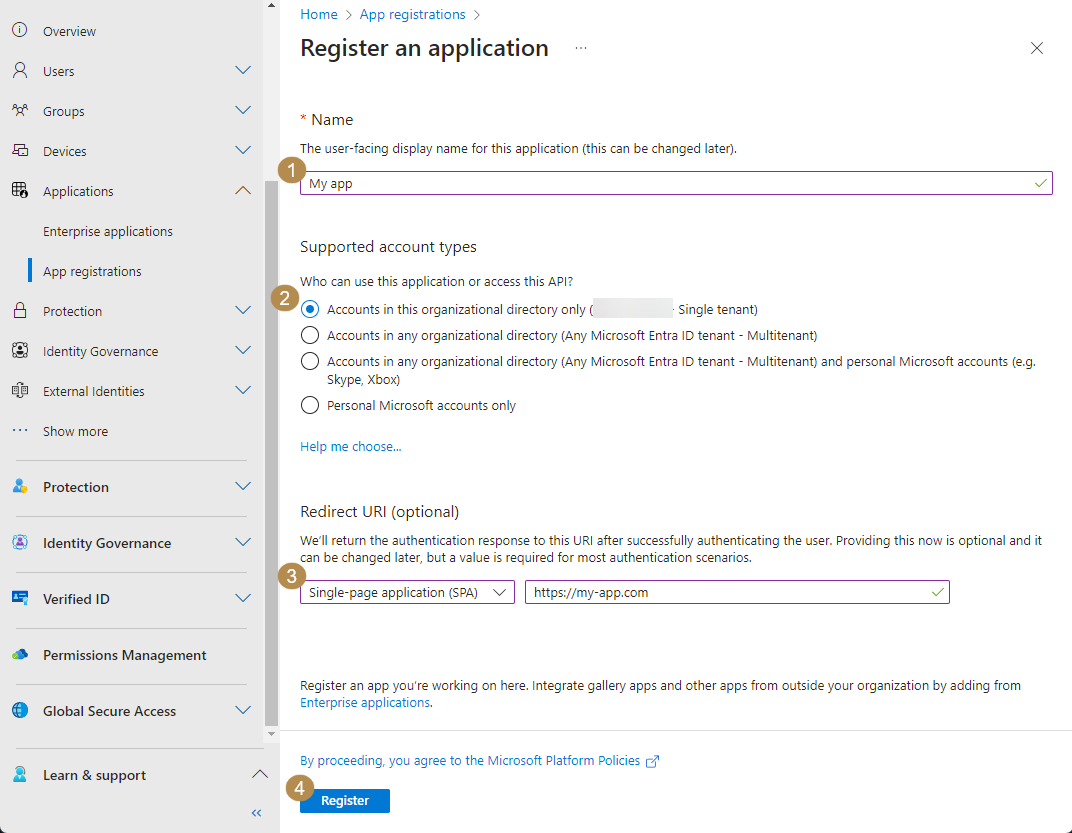
Fill in the app name, choose a supported account type, and select the Single-page application (SPA) option from the dropdown menu under Redirect URI. Click Register.
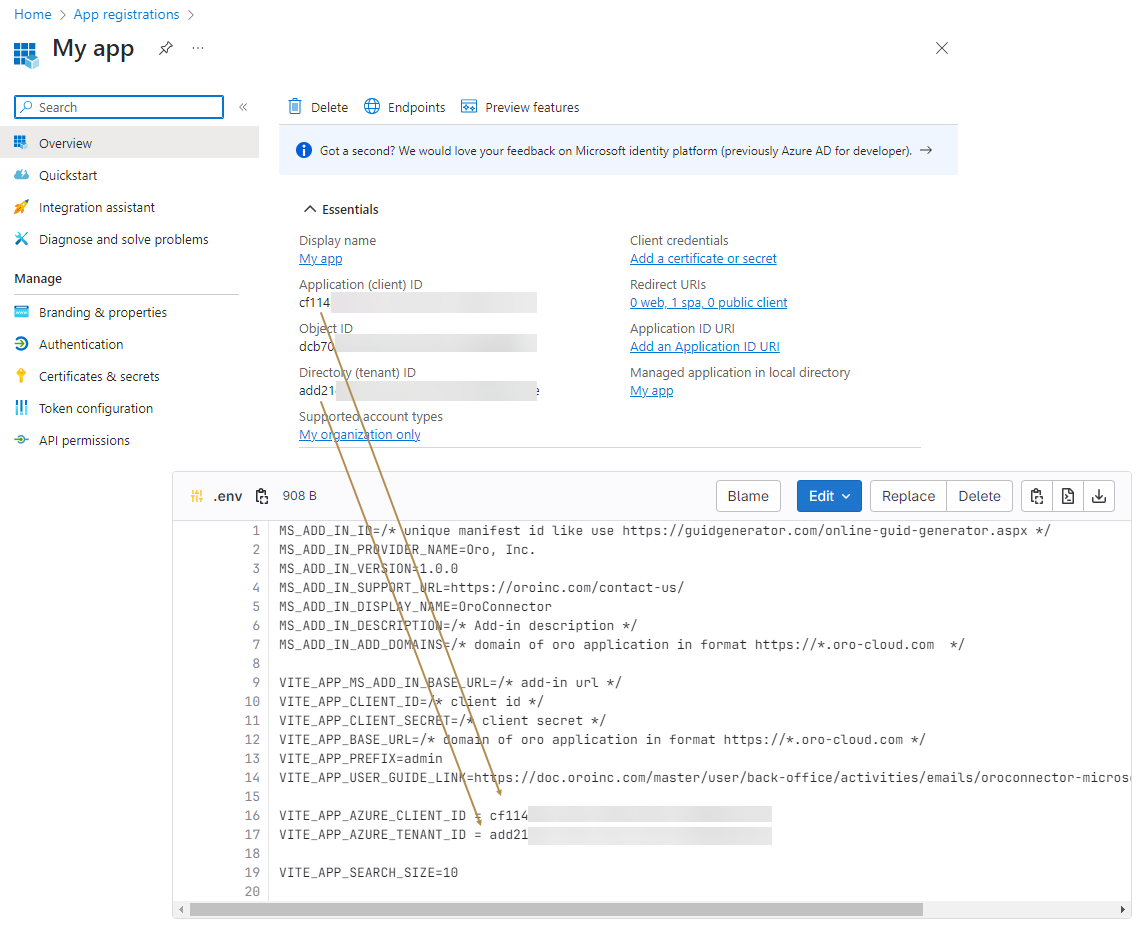
The system will generate Application (client) ID and Directory (tenant) ID for your application. Update your .env file with the generated credentials, where:
VITE_APP_AZURE_CLIENT_ID: Application (client) ID
VITE_APP_AZURE_TENANT_ID: Directory (tenant) ID
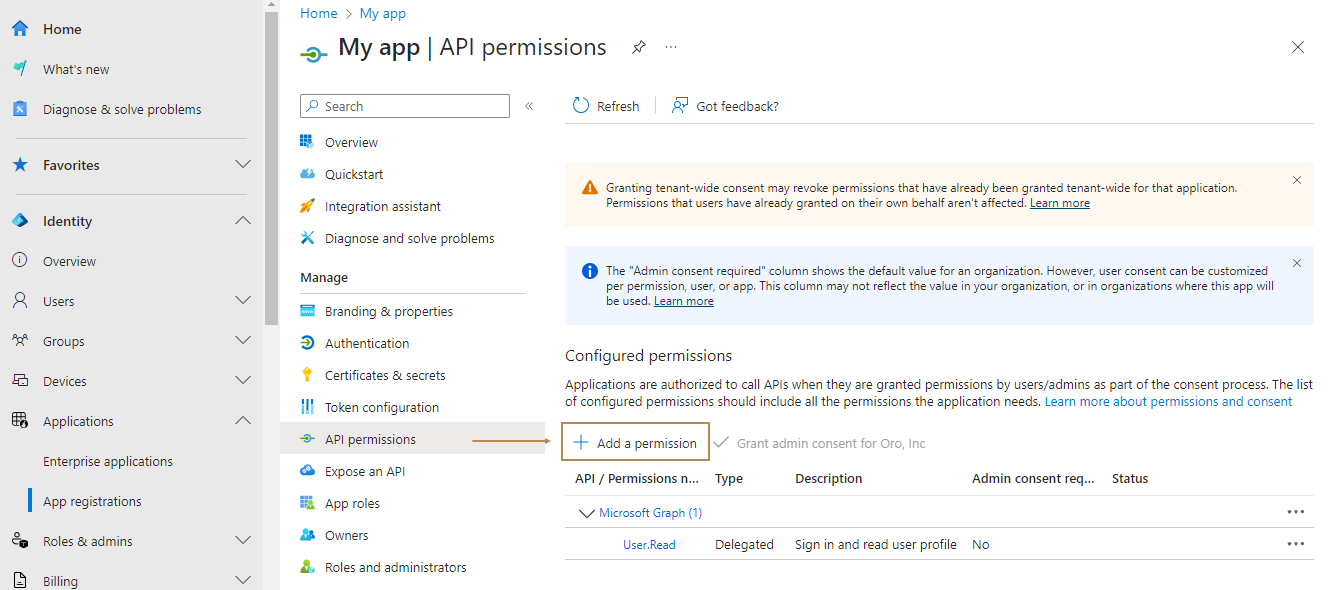
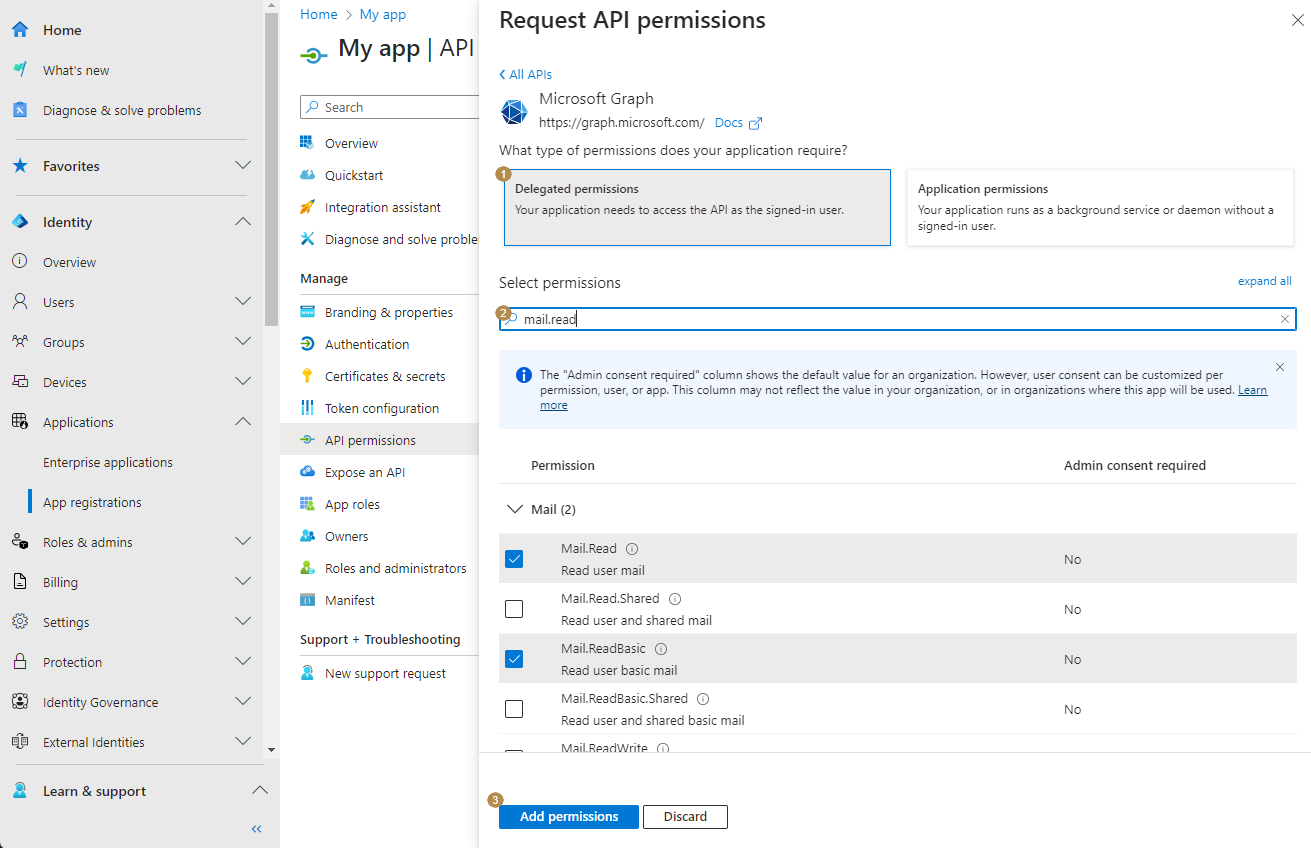
Navigate to the API permissions subsection and click + Add a permission.
Click Microsoft Graph > Delegated permissions and select the following permissions:
Mail > Mail.Read
Mail > Mail.ReadBasic
OpenId permissions > Openid
OpenId permissions > Profile
OpenId permissions > Email
User > User.Read
Click Add permissions to save the request.
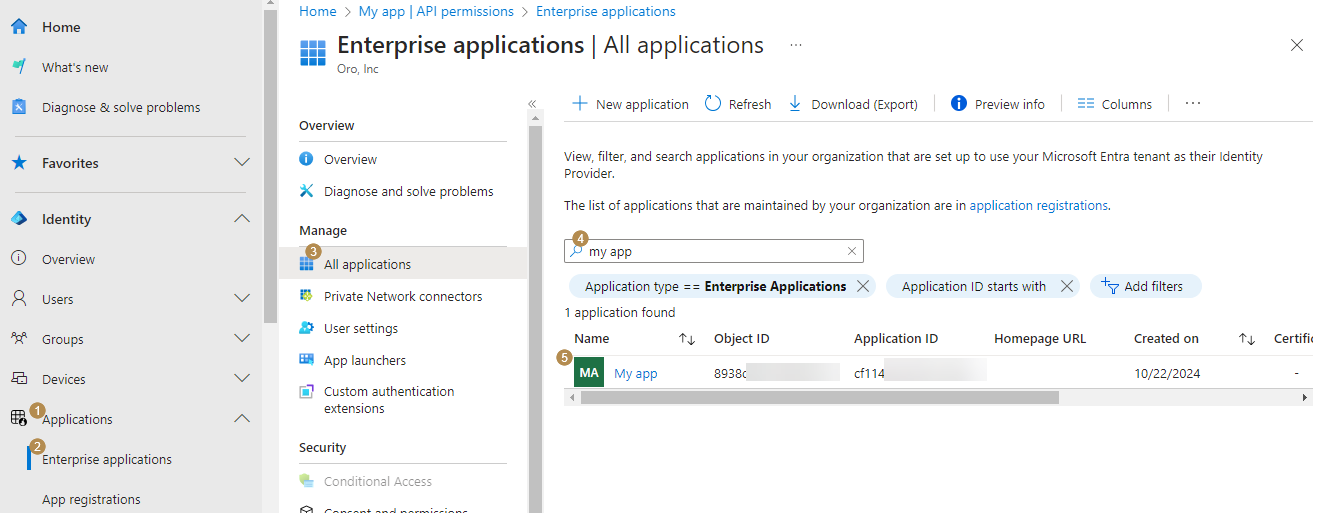
Navigate to Applications > Enterprise applications in the main menu, then Manage > All applications in the submenu. Search by your application name (from Step 3) via the search field and click it.
Go to Users and groups submenu and click the + Add users/group button.

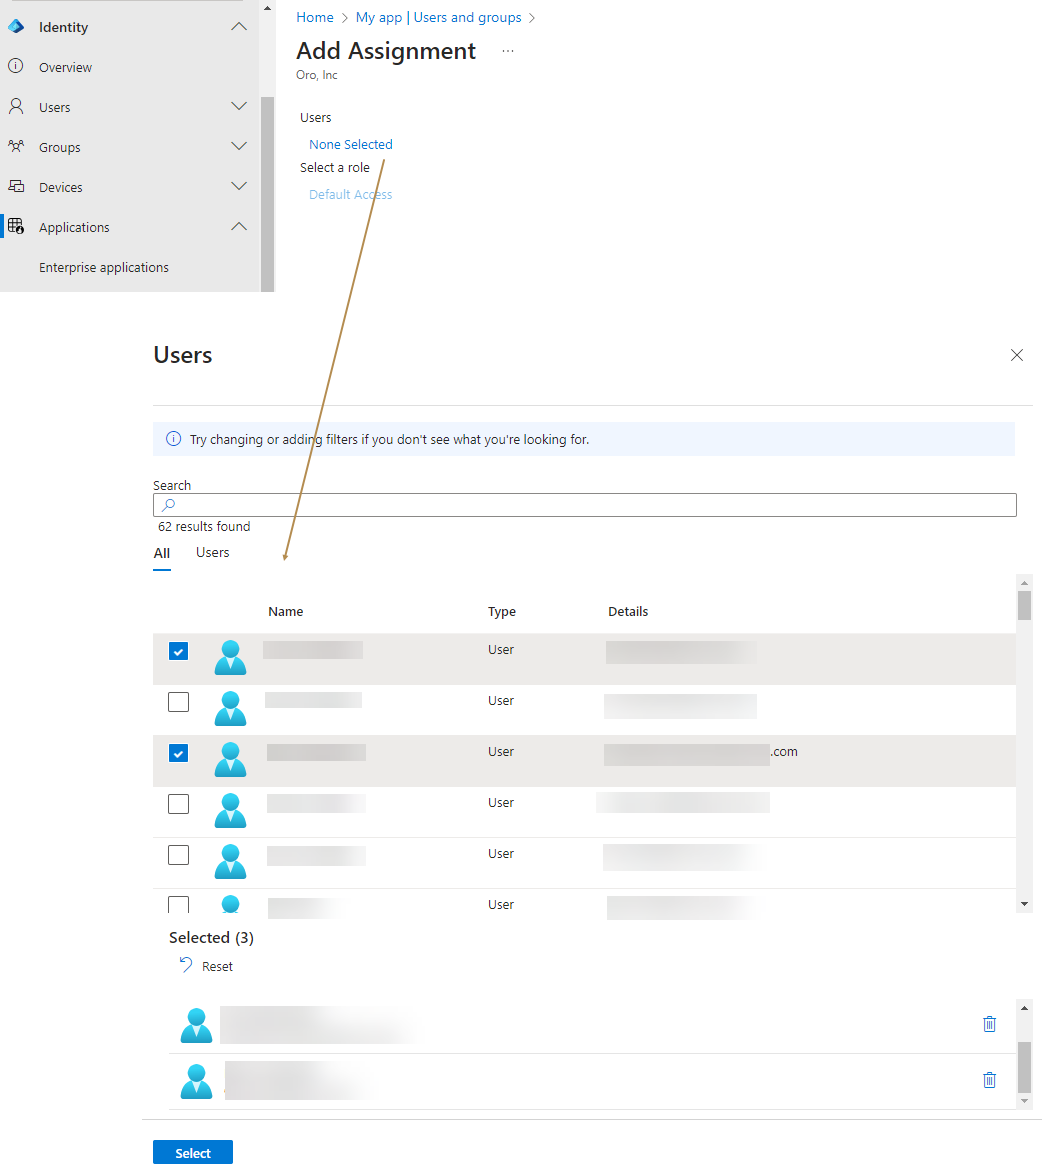
On the Add Assignment page, click None Selected under Users to add all required users.
Choose the users or groups to be added to your application and click Select.
Click Assign to save the list.
Set Up Add-in to Your Organization
Create an OAuth Application.
Follow the Set Up the Project Manually flow.
Navigate to MS Admin Panel.
Go to Settings > Integrated Apps in the menu to the left.
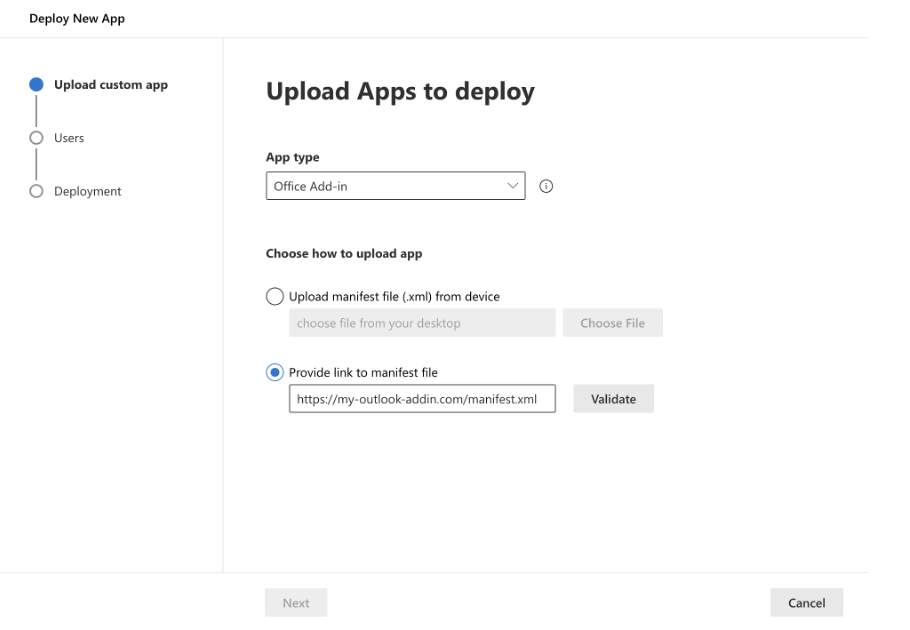
Click Upload custom apps.
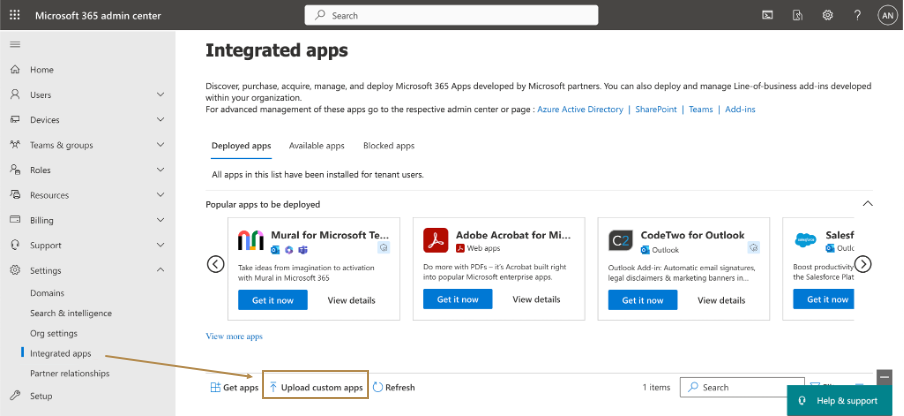
For App type select Office Add-in and provide the URL to your manifest file. Click Next.
On the Users step, select users with whom you want to share the OroConnector Add-in. Click Next.
Complete the details on the Deployment step and click Finish Deployment.
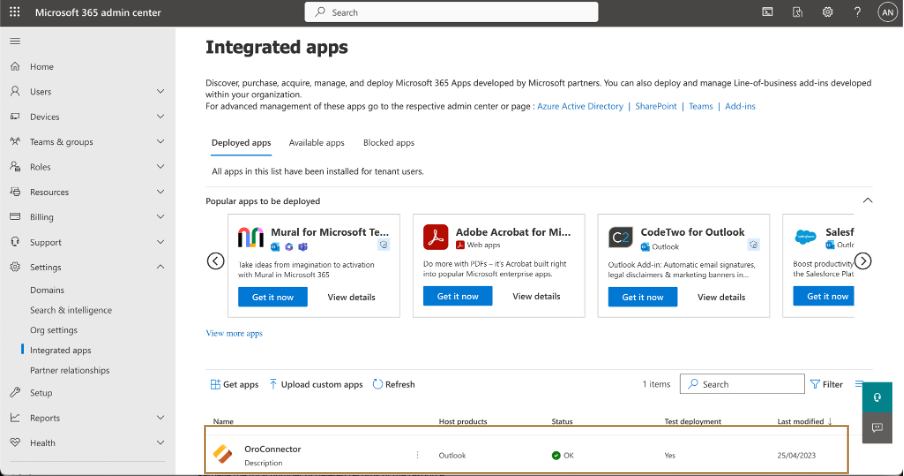
The OroConnector Add-in should now be available at the bottom of the Integrated Apps page.
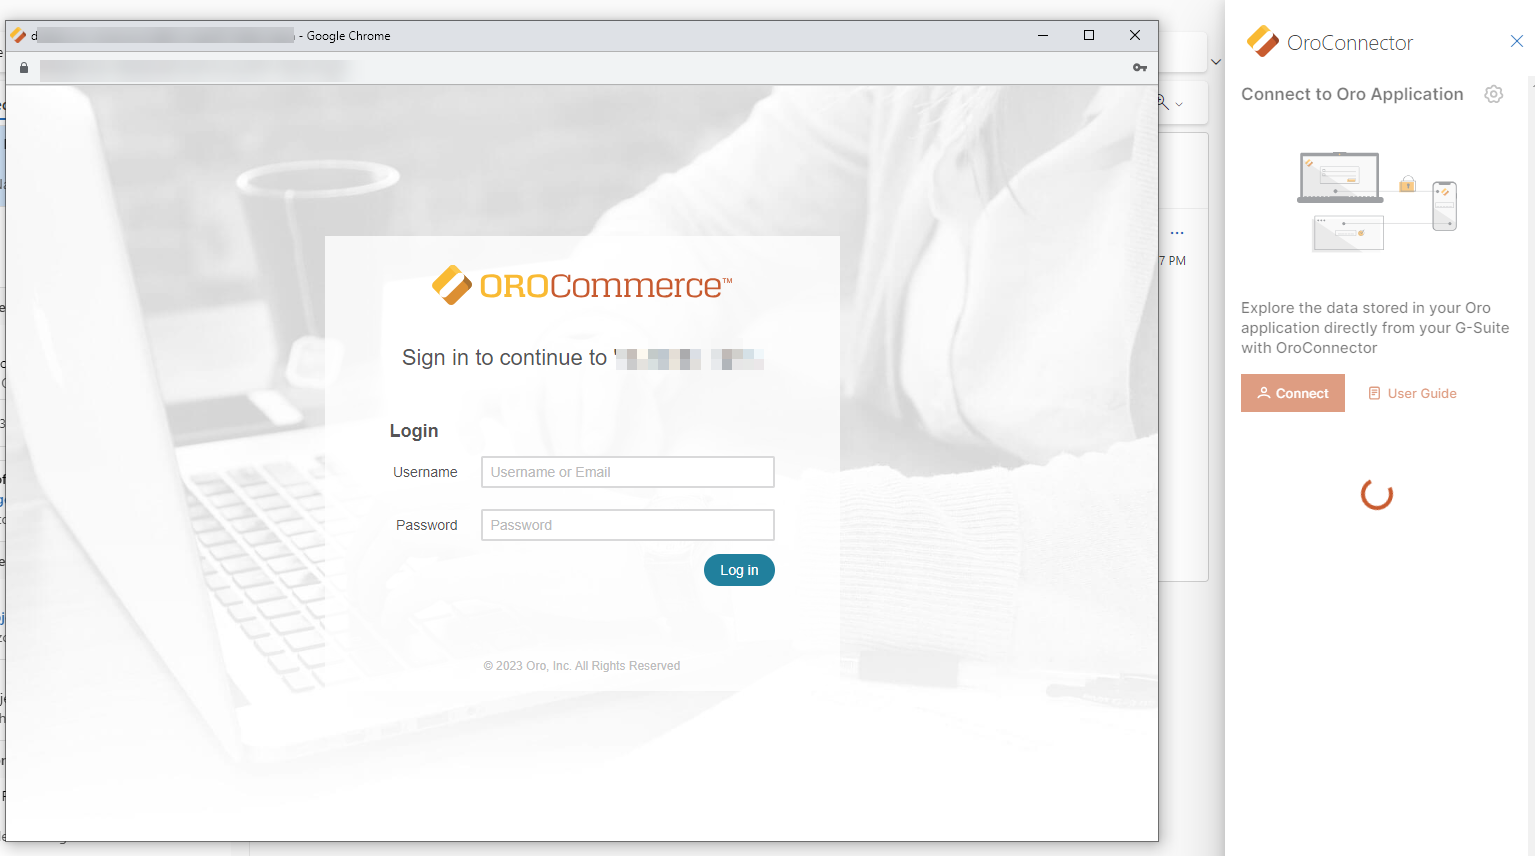
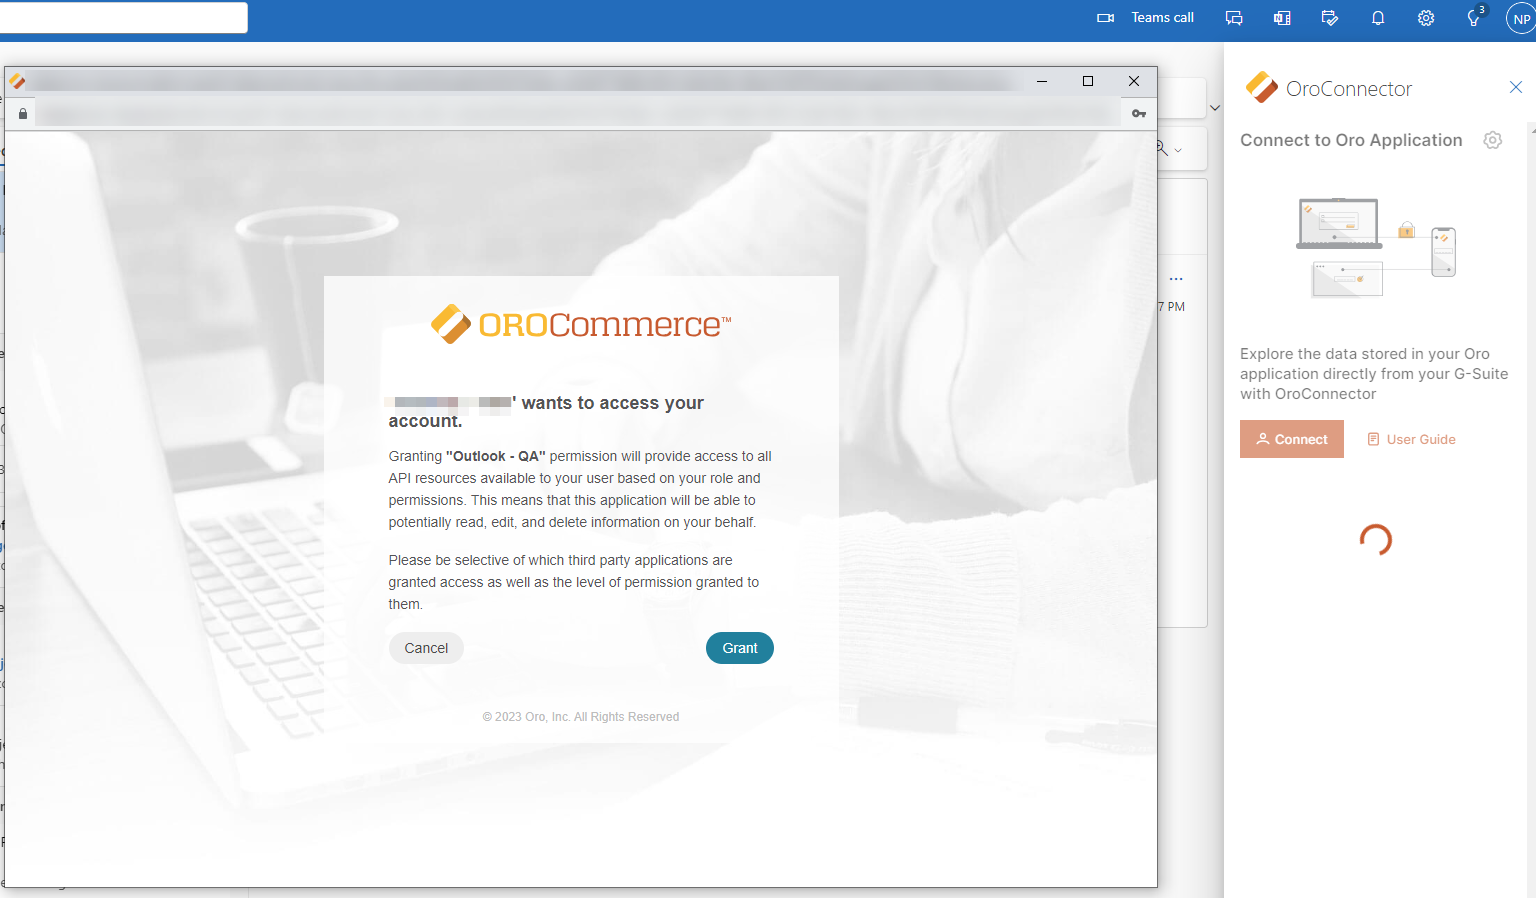
Connect
Once OroConnector has been installed in your mail client, a new icon will appear in the side panel, indicating that the add-in is ready for use.
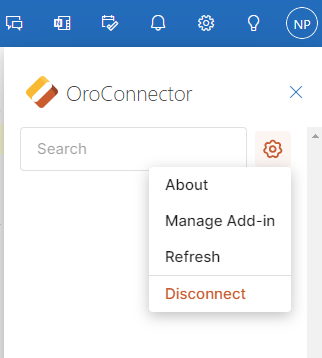
To connect the add-in to your Oro application:
Search & Context
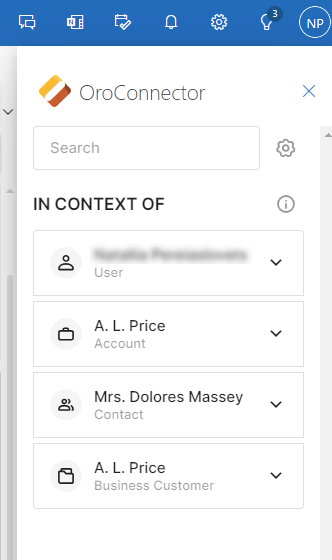
Once you have completed the setup process, OroConnector is available for you to start your search for the necessary information and add or remove context from the add-in.
In Oro applications, context is a piece of information relevant to a particular user, task, or process within the application. When an OroConnector user opens an email thread in their mail client, they can see Oro entities related to that particular email and retrieve the latest context of the conversation. Context search is performed by the From/To/CC/BCC fields of the email being viewed.
By default, the following data is passed from your Oro application to the connector and vice versa:
Accounts
Contacts
Customer users
Leads
Opportunities
Orders
Users
Customers
Tasks
Cases
Requests for quotes.
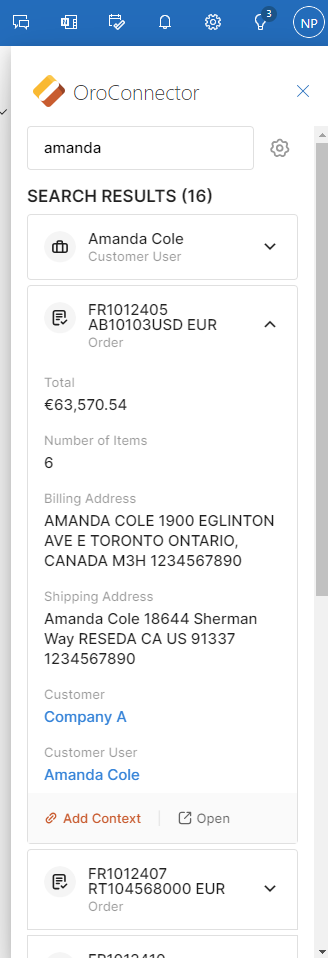
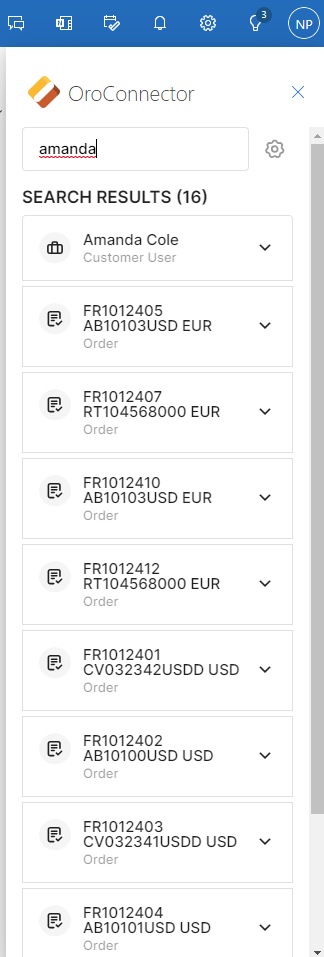
To begin your search, type a query into the search bar and click Enter. If the search returns many entities, click Load More to view all available search results.
Manage Context
Click on the desired entity from the search results to view its details. Here, you can perform the following actions:
Open.
To view an entity you found in the OroConnector in the Oro application, click Open. You will be redirected to the view page of this entity on the Oro side.
Add Context.
You can connect any relevant entities to an email thread as context. When the connector and Oro application are synchronized, you can easily view the added context on both the email and Oro application side. You can add multiple entities as necessary to provide additional context to the email.
To add an entity as context, click Add Context on its details page.
Remove Context.
Removing context in the OroConnector removes it on the Oro application side as well. To disconnect entities from the email thread as its context, click Remove Context on the details page of the entity.

