Important
You are browsing upcoming documentation for version 7.0 of OroCommerce, scheduled for release in 2026. Read the documentation for the latest LTS version to get up-to-date information.
See our Release Process documentation for more information on the currently supported and upcoming releases.
Manage Tax Jurisdictions in the Back-Office
Hint
This section is part of the Tax Management concept guide that provides a general understanding of the tax configuration and management in OroCommerce.
Tax Jurisdiction is a geographical address of the area that is governed by the same tax laws and regulations, and that requires a dedicated set of tax calculation rules in OroCommerce: the tax rates for taxable/tax-exempt types of customers and products.
The sections below provide guidance on managing tax jurisdictions and assigning dedicated tax rules for these tax jurisdictions.
Create a Tax Jurisdiction
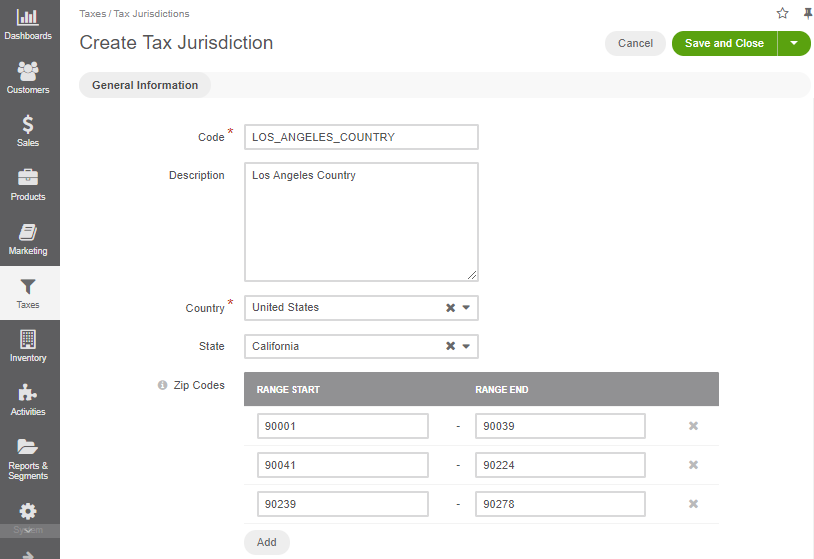
To create a new tax jurisdiction:
Navigate to Taxes > Tax Jurisdictions in the main menu.
Click Create Tax Jurisdiction.
Fill in Code, Description.
Select the country from the list.
Select the state from the list.
Type in the Zip code ranges that should be covered by this tax jurisdiction (click +Add to capture additional range).

Click Save and Close.
Manage Tax Jurisdictions
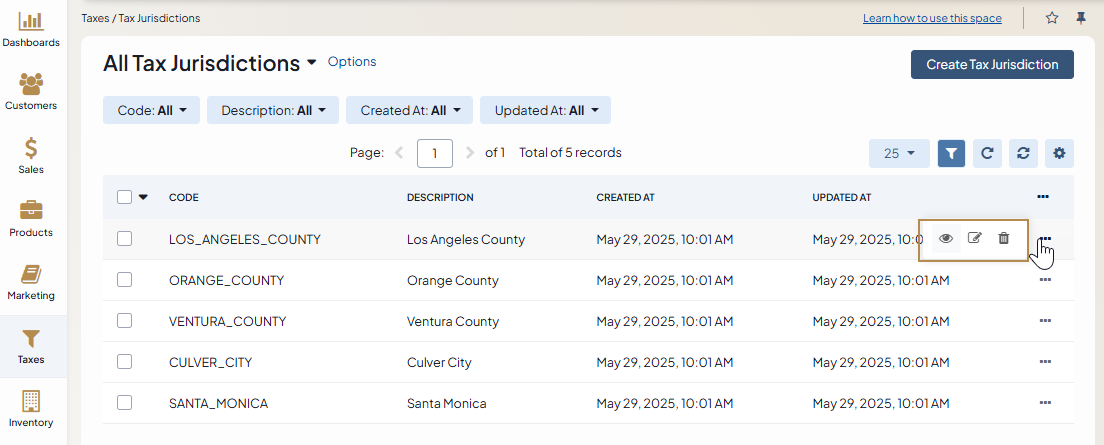
To view all tax jurisdictions, navigate to Taxes > Tax Jurisdictions in the main menu.

Note
To handle a big volume of data, use the page switcher, increase View Per Page or use filters to narrow down the list to just the codes you need.
In the tax jurisdictions list, you will find the information about the code (unique identifier), detailed description, and the dates when the tax jurisdiction was created and updated.
Hover over the More Options menu to the right of the item and click to open its details page, to edit, or to remove the tax jurisdiction.
View Tax Jurisdiction Details
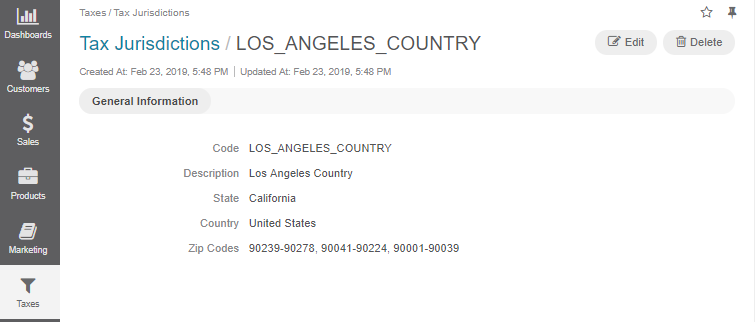
To view tax jurisdiction details:
Navigate to Taxes > Tax Jurisdictions in the main menu.
Find the line with the necessary tax jurisdiction and click on it to open its details page.

You can edit or delete the tax jurisdiction by clicking the required button on the top right.
Edit a Tax Jurisdiction
To edit the Tax Jurisdiction details:
Navigate to Taxes > Tax Jurisdictions in the main menu.
Hover over the More Options menu to the right of the item and click to start editing its details.
Update the Code, Description, and the covered addresses including zip codes.
Click Save and Close.
Link a Tax Jurisdiction to the Tax Rule
You can edit the association of the tax jurisdiction with other tax components when editing the tax rule details (see the respective topic for more information).
Related Articles