Important
You are browsing the documentation for version 3.1 of OroCommerce, OroCRM and OroPlatform, which is no longer maintained. Read version 5.1 (the latest LTS version) of the Oro documentation to get up-to-date information.
See our Release Process documentation for more information on the currently supported and upcoming releases.
Create a Bundle
New bundle can be created either manually, or automatically using standard Symfony console command.
Create a Bundle Manually
First you need to specify name and namespace of your bundle. Symfony framework already has best practices for bundle structure and bundle name and we recommend to follow these practices and use them.
Let us assume that we want to create the AcmeNewBundle and put it under the namespace Acme\Bundle\NewBundle
in the /src directory. We need to create the corresponding directory structure and the bundle file with the following content:
1<?php
2// src/Acme/Bundle/NewBundle/AcmeNewBundle.php
3namespace Acme\Bundle\NewBundle;
4
5use Symfony\Component\HttpKernel\Bundle\Bundle;
6
7class AcmeNewBundle extends Bundle
8{
9}
Basically, it is a regular Symfony bundle. The only difference is in the way it will be enabled (see chapter Enable a Bundle).
Enable a Bundle
Now you have all the required files to enable the new bundle. To enable the bundle:
Create Resources/config/oro/bundles.yml with the following content:
1# src/Acme/Bundle/NewBundle/Resources/config/oro/bundles.yml
2bundles:
3    - Acme\Bundle\NewBundle\AcmeNewBundle
This file provides a list of bundles to register — all such files will be automatically parsed to load required bundles.
Regenerate the application cache using the console command
cache:clear:1user@host:/var/www/vhosts/platform-application$ php bin/console cache:clear 2Clearing the cache for the dev environment with debug true
Note
If you are working in production environment, you have to use parameter
--env=prodwith the command.
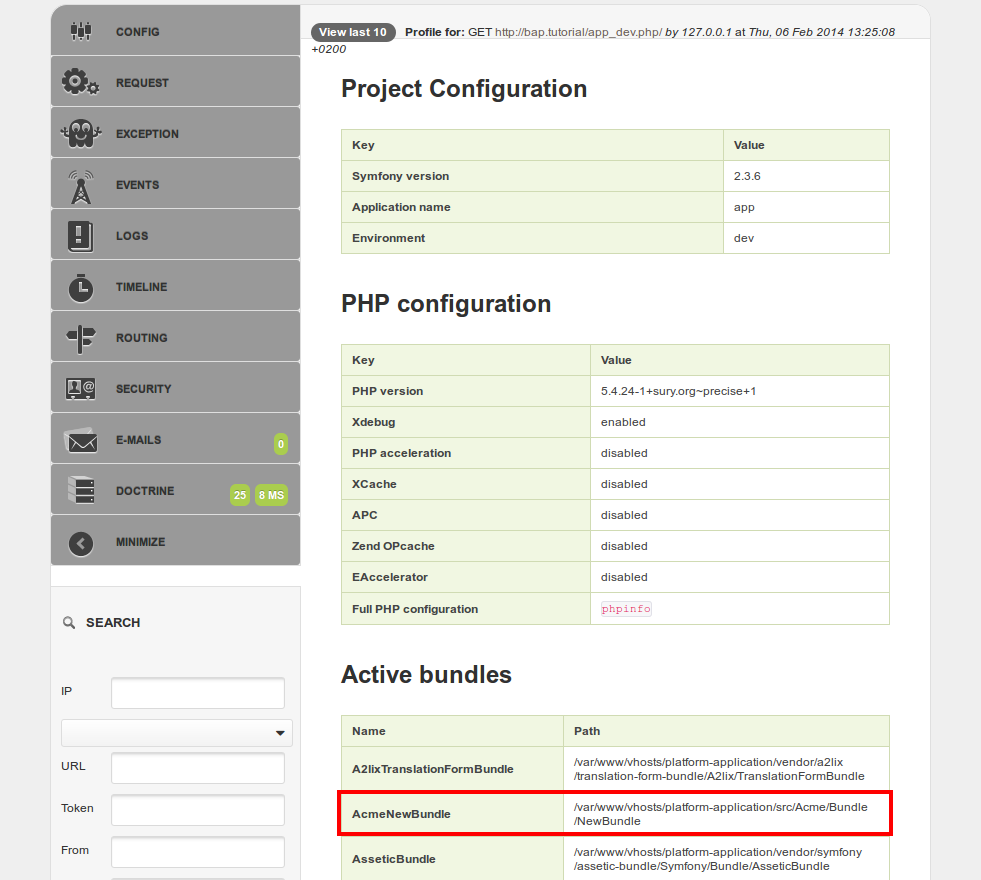
Now open the application user interface in development mode (use the link http://<oro-application-base-url>/app_dev.php/) and click the
Symfony profiler config icon:

Here you can find your new bundle in the list of active bundles:

That is all — your bundle is registered and active!
Generate an Installer for a Bundle
When you have implemented new entities, you want to be sure that upon installing the application, the entities are added to the database. For this, you need to create an installer. You can do it manually, however, it is more convenient to use a dump of the database as a template.
To create an installer for AcmeBundle:
Clear the application cache:
1bin/console cache:clear
Apply the changes that you defined in your code to the database:
1bin/console doctrine:schema:update
Generate an installer and save it to the AcmeBundleInstaller.php:
1bin/console oro:migration:dump --bundle=AcmeBundle > AcmeBundleInstaller.php
Hint
The generated installer may contain a lot of excessive information as the same database table might contain options related to different bundles and entities while the generator has no option to distinguish which entity ‘has added’ particular options. Delete the information unrelated to your entities from the output file.
Move AcmeBundleInstall.php to the AcmeBundle/Migrations/Schema directory.
Reinstall your application instance.
Check that the database is synced with your code:
1bin/console doctrine:schema:update --dump-sql
If the database is successfully synchronized, you will see the following message:
1Nothing to update - your database is already in sync with the current entity metadata.