Important
You are browsing documentation for version 5.1 of OroCommerce, supported until March 2027. Read the documentation for the latest LTS version to get up-to-date information.
See our Release Process documentation for more information on the currently supported and upcoming releases.
Lift Default Content Restrictions
Out-of-the-box, all OroCommerce users can enter only safe content in the WYSIWYG fields from the application UI. OroCommerce uses content restrictions to ensure that the content displayed in the UI is secure and that users cannot embed unsecure markup.
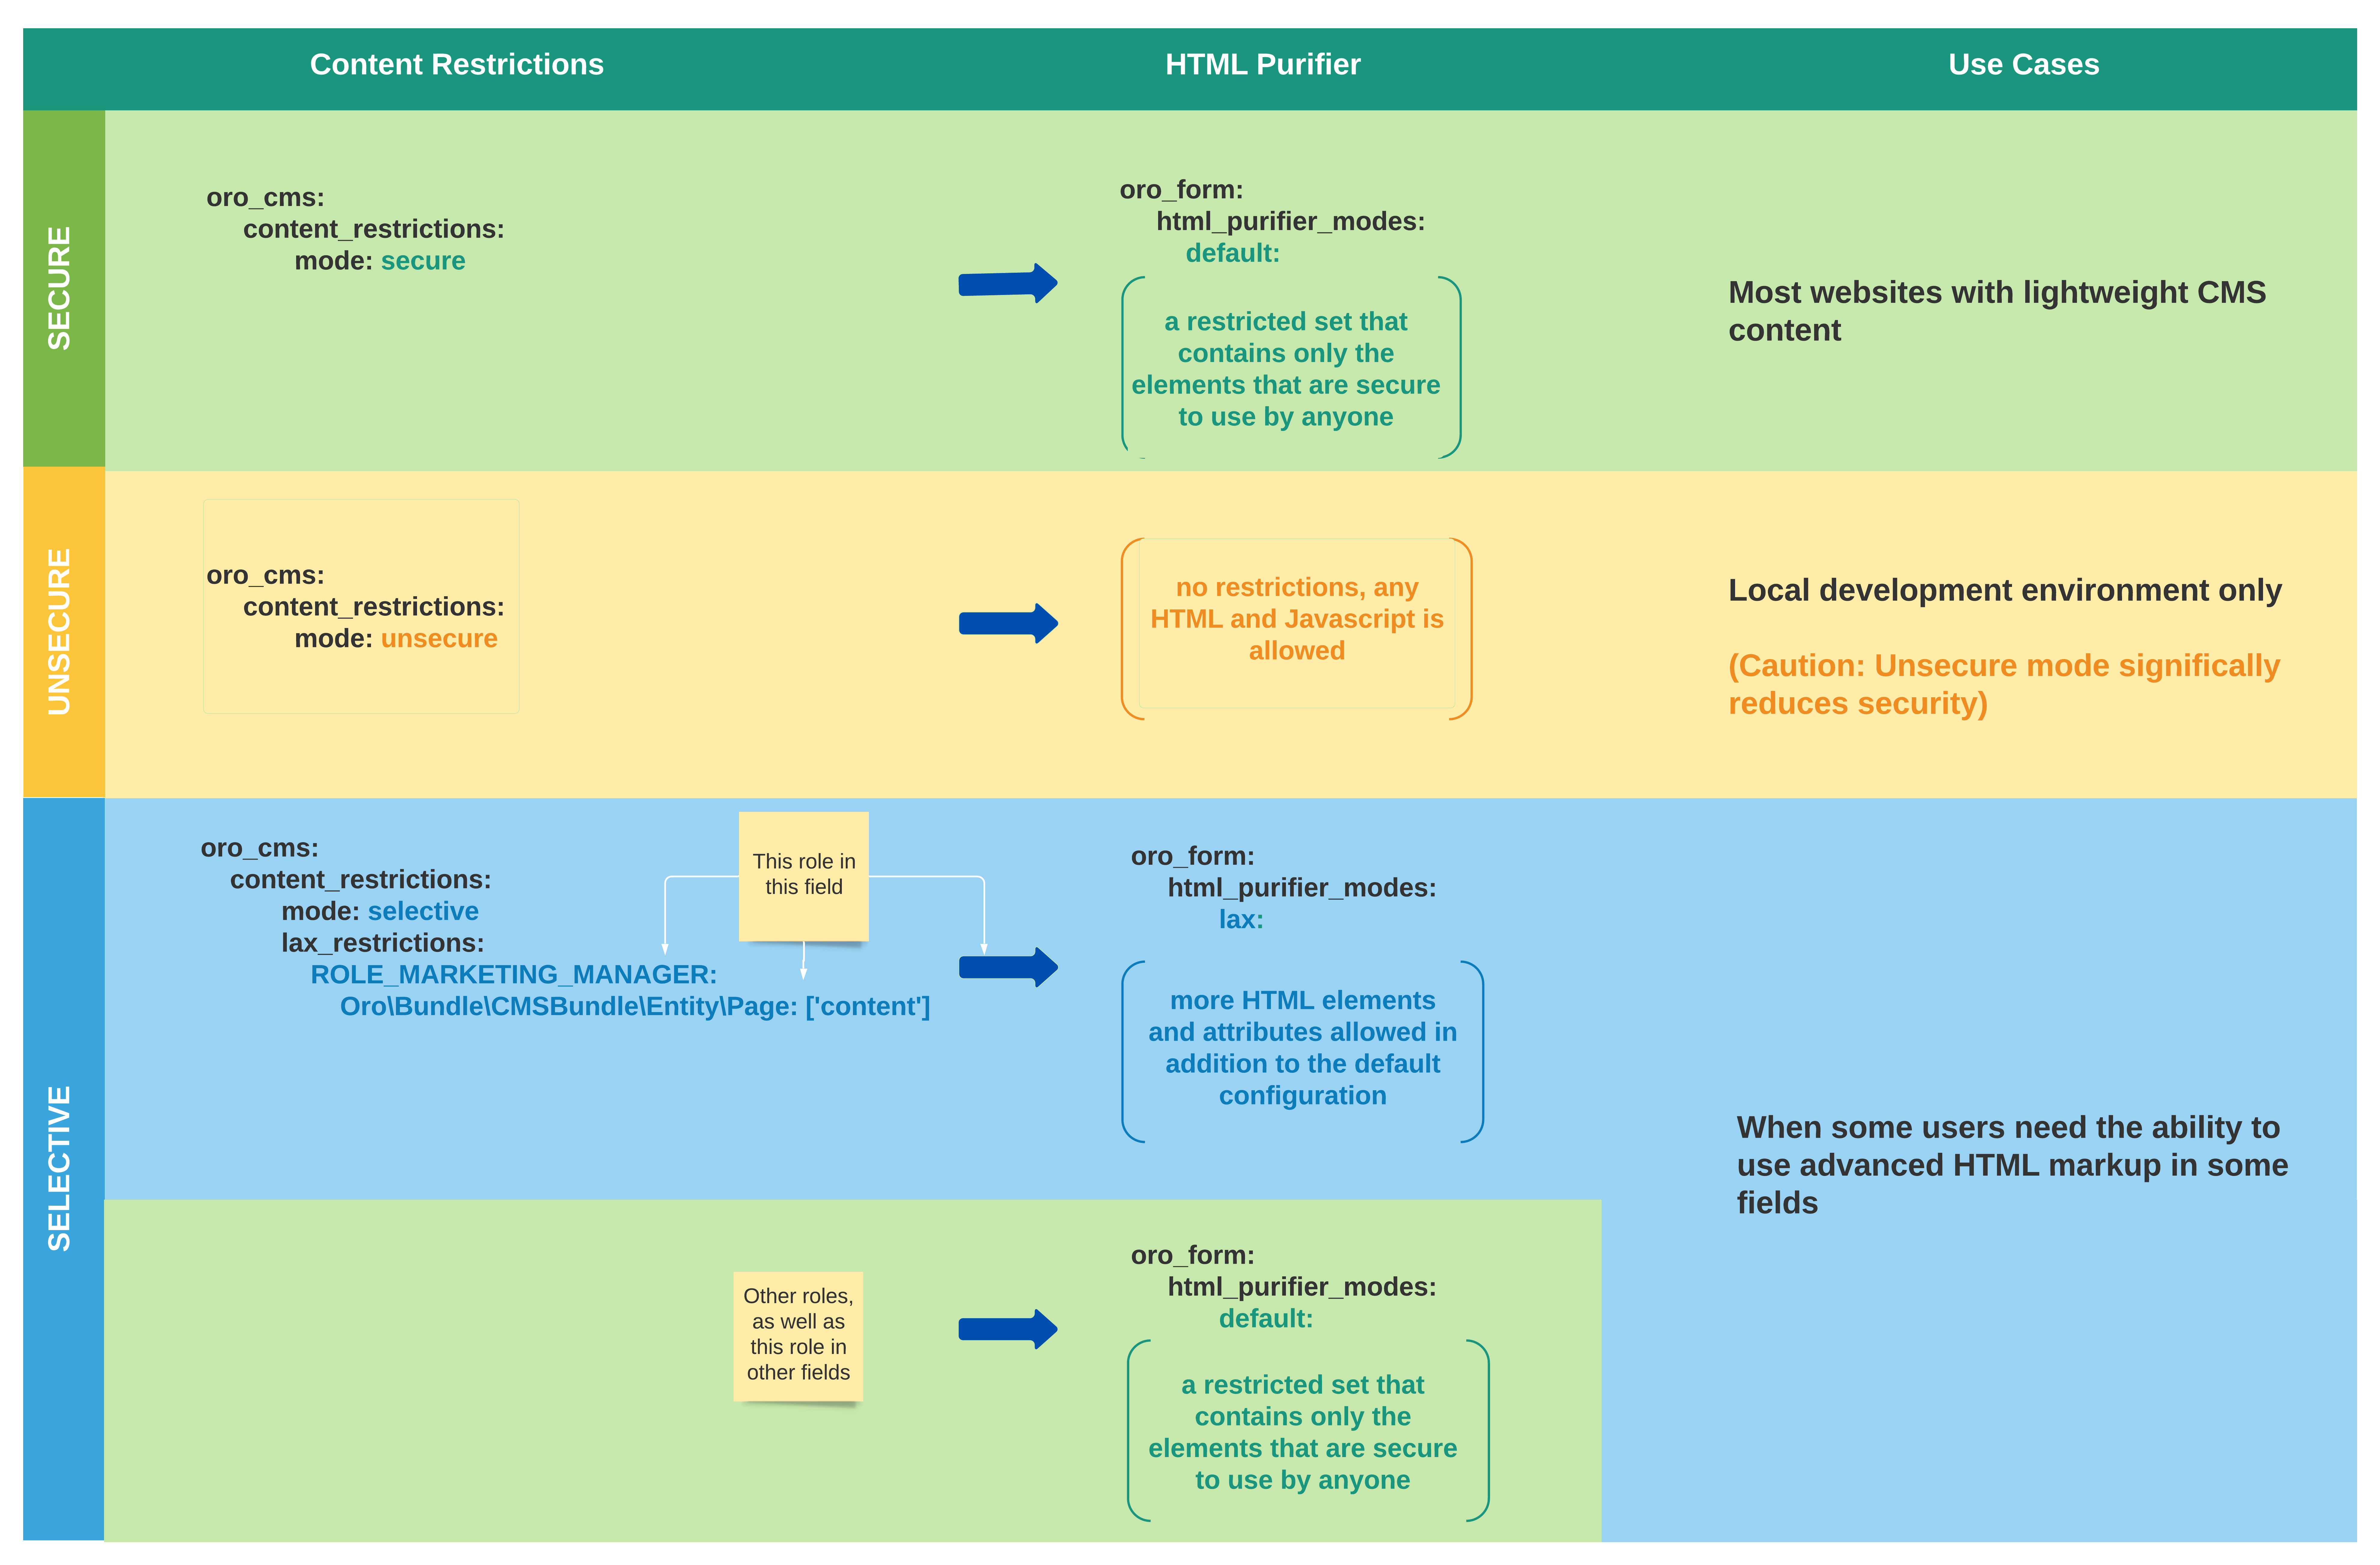
There are three content restriction modes: secure (the default mode), selective, and unsecure.
The secure content restriction mode is turned on by default. You may want to switch to the selective mode if you work in a production system and need to enable users with corresponding permissions to insert potentially unsafe content via the back-office UI into certain fields of specific entities. If you develop in the system that no one else has access to, you can enable unsecure mode to stop validating the content added to the WYSIWYG fields in the UI. In this mode, any content can be inserted via the application UI by any user with the edit permissions for the WYSIWYG field.
The default secure configuration is stored in the app.yml file of the OroFormBundle. The default configuration for the selective mode is stored in the app.yml file of the CMSBundle.
As it is not possible to change restrictions via the back-office application UI, you need to override the default configuration file if you want to lift the default secure content restrictions.
There are two ways to do it:
For developers:
Create an app.yml file in a bundle of your choice, and change the content restrictions’ mode.
Hint
See Add application configuration settings from any bundle for more information on adding settings to the application configuration from your bundle.
In the example below, secure mode has been changed to selective:
oro_cms:
    content_restrictions:
        mode: selective
For admins
Whichever mode you want to switch to and from (i.e., from selective to unsecure, from unsecure back to secure, etc.), add the same piece of code (with the desired mode) into the config/config.yml file. For example:
oro_cms:
    content_restrictions:
        mode: unsecure
You can add further configuration using the same method, such as allowed protocols, iframe domains, html tags and their attributes, etc. For example, if you add the following code into config/config.yml, then it would be possible to specify the sftp:// protocol in links (<a href=”…”>…</a>) in selective (lax mode):
oro_form:
    html_purifier_modes:
        lax:
            allowed_uri_schemes:
                - 'sftp'
Here is an example of how to allow attribute title for the img tag in secure (default) mode:
oro_form:
    html_purifier_modes:
        default:
            allowed_html_elements:
                img:
                    attributes:
                        - title
You can flexibly configure the use of modes. For example, you can allow the use of certain modes for certain roles in certain fields of entities. You can configure this in the same way as modes. For example, the following configuration will enable a marketing manager to use the selective mode (which means most of the tags are allowed) in the content of the landing pages (Marketing > Landing Pages in the main menu):
oro_cms:
    content_restrictions:
        mode: selective
        lax_restrictions:
            ROLE_MARKETING_MANAGER:
                Oro\Bundle\CMSBundle\Entity\Page: ['content']
Hint
Keep in mind that even if a user has the edit permissions for the certain entity field, they should not be able to insert insecure content unless they also have one of the roles that are configured to allow this and the specified entity field is in the list of the allowed entity fields.
You can flexibly configure the use of any mode in the same way.
The configuration above, or other configuration of you choice, will merge with the default configuration and your changes will be added to the appropriate mode.
You can use the following reference table that illustrates the three modes and when to use them:

Related Articles