API Sandbox
The API sandbox page enables you to perform API requests directly from the Oro application instance.
The sandbox page is available at http://<hostname_of_your_oro_application>/api/doc.
Note
For OroCommerce, the sandbox page for the storefront API is available at http://<hostname_of_your_oro_application>/api/doc, and for the back-office API at http://<hostname_of_your_oro_application>/admin/api/doc.
Please note that the admin prefix is used by default and can be changed by your administrator.
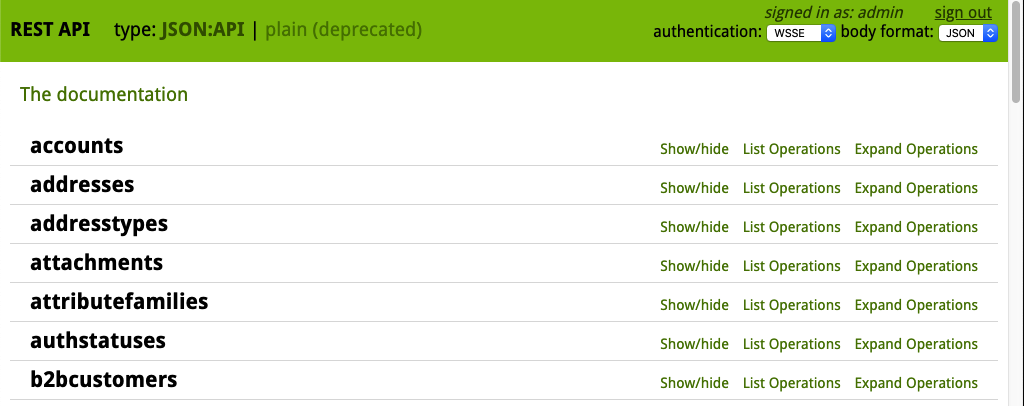
This page represents a list of available JSON:API resources.

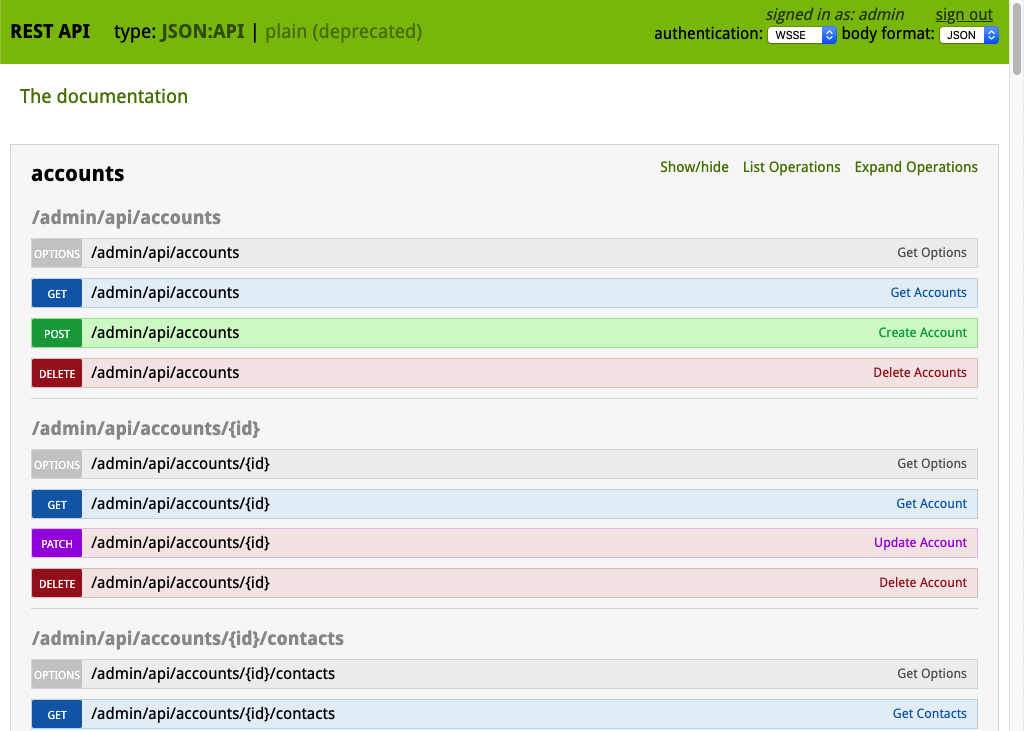
To review available methods for the resource, click the resource row or the List Operations link to the right of the row. You will see the list of available methods grouped in blocks by the resource URI.

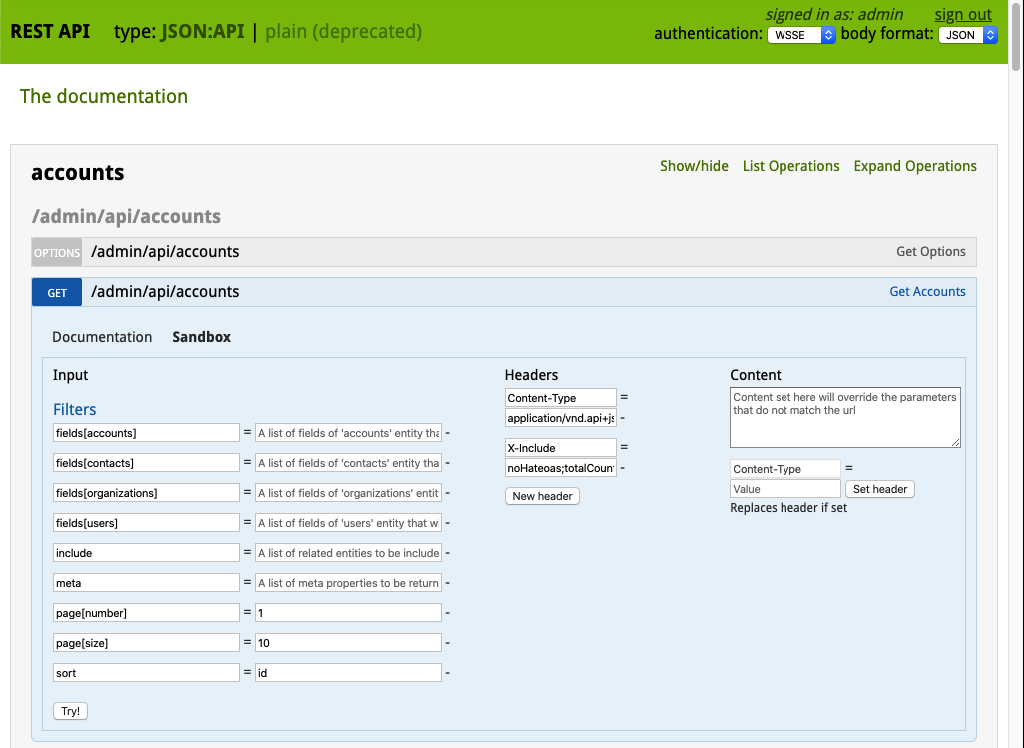
There is a documentation on how to use the method with different resource URIs and a sandbox containing a form that can be used to perform API requests.
To review the documentation and access the sandbox, click the method row for a specific resource URI. You will see the corresponding tabs in the expanded area.

To expand information about all methods available for the resource, click the Expand Operations link to the right of the selected resource row.
To switch between the collapsed list of available resources and the expanded state, click the Show/hide link to the right of the row.
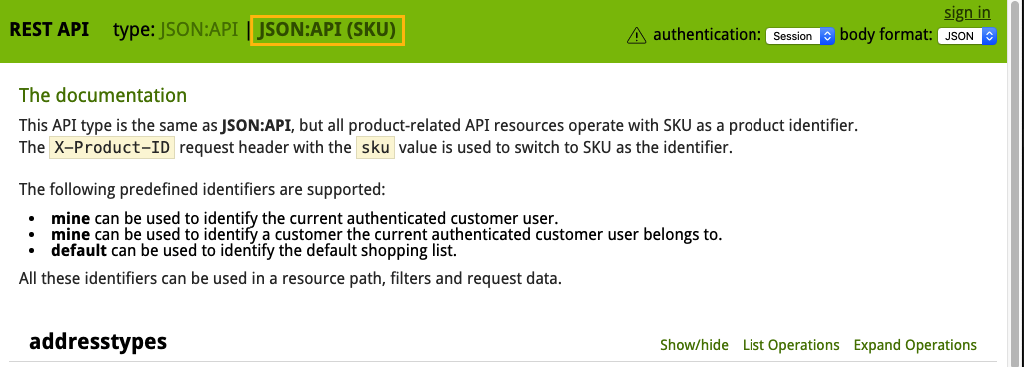
To switch between different API types, click the required type at the top of the page.

Note
On the OroCommerce sandbox page for the storefront API, you can select the JSON:API (SKU) type. It enables you to use the product SKU instead of the product ID.
To use the product SKU instead of the product ID, you need to send the X-Product-ID request header with the sku value in each API request.
Examples
Retrieve a Single Record
To retrieve a single record for a particular resource record with JSON:API, perform the GET method with the id parameter specified:
Click the API resource row on the API sandbox page to expand the methods block.
Find the /api/your_resource/{id} block.
Click the GET method row.
Click the Sandbox tab. You will see the request form.
If you want to retrieve a single record, specify the record id for the id field in the Requirements section.
Click the Try! button to send the request to the server.
As soon as the response from the server is received, the Request URL, Response Headers, Response Body and Curl Command Line sections appear at the bottom of the Sandbox tab.
The Request URL block contains the request URL sent to the server.
The Response Headers block contains the status code of the server’s response. If the request is successful, it contains the ‘200 OK’ string.
To see the list of headers which the server sent in the response, click the Expand link next to the section header.
If the request is successful, you should see the output data of the request in the Response Body section. In the given case, entity data will be in the JSON format. Find more information on this format on the JSON:API site.
The Curl Command Line section contains an example of the CLI command to perform the request with Curl. This command may help emulate the real request to the API.
Edit a Record
To edit a record for a particular resource record with JSON:API, perform the PATCH method with the specified id parameter:
Click the API resource row on the API sandbox page to expand the method block.
Find the /api/your_resource/{id} block.
Click the PATCH method row.
Click the Sandbox tab. You will see the request form.
If you want to edit a single record, specify the record id in the id field of the Requirements section.
In the Content section, specify how the resource that is currently residing on the server should be modified to produce a new version.
For example, if you want to change the firstName field to the ‘John’ value for the User entity with id 1, the requested content will look the following way:
{
  "data": {
    "type": "users",
    "id": "1",
    "attributes": {
      "firstName": "John",
    }
  }
}
Click the Try! button to send the request to the server.
Provided you have the edit permission to the record, you will see the updated data in the Response Body section after the response from the server is received.