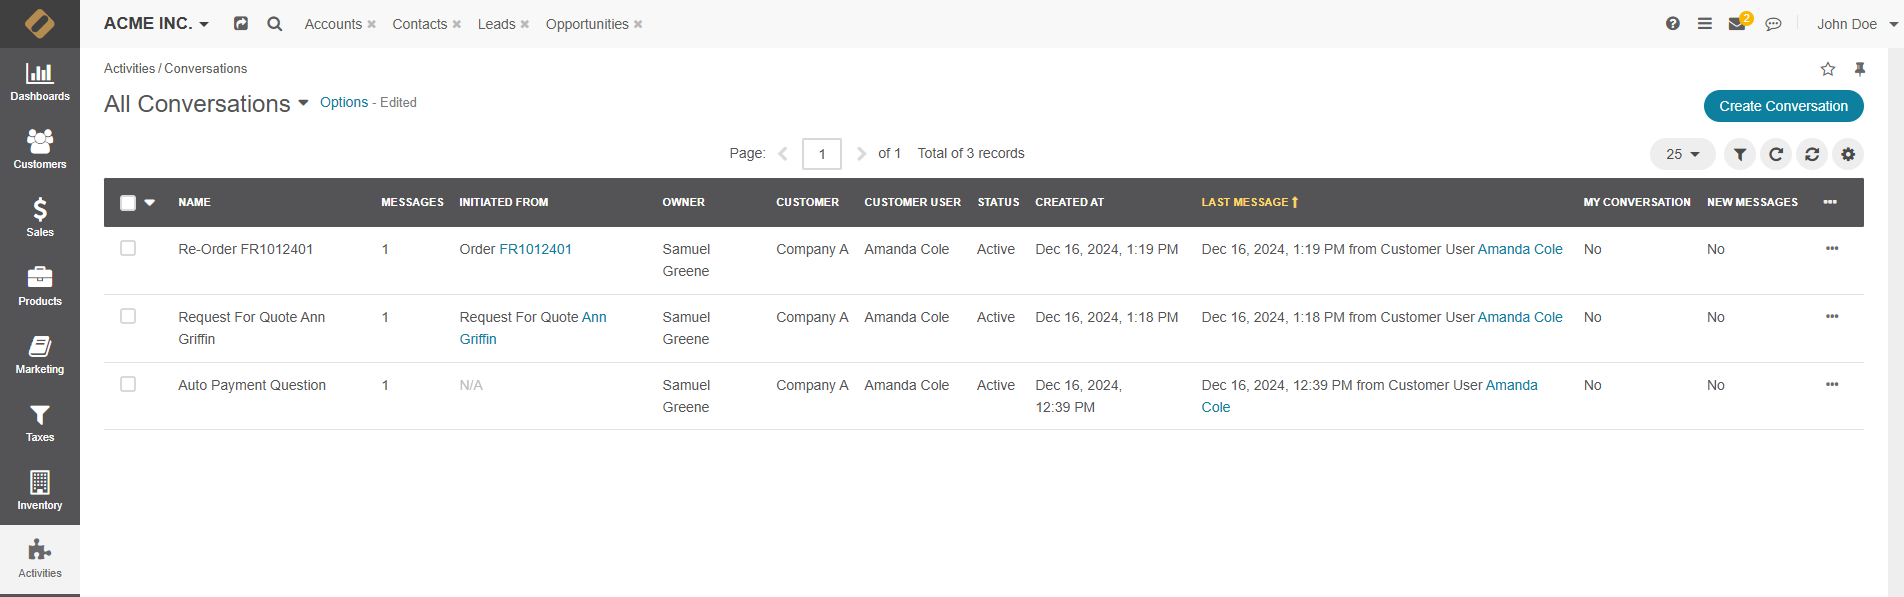
Manage Conversations in the Back-Office
Oro provides a conversation tool designed for communication both within the back-office and storefront environments. This tool enables communication between back-office and customer users, creating a cohesive and integrated environment for all stakeholders.
Each conversation consists of a set of messages that can be exchanged by back-office users and customer users.
Note
Before you begin using the conversations feature, ensure that it is enabled in the system configuration settings.
Start a New Conversation
To start a new conversation in the back-office, navigate to Activities > Conversations in the menu and click Create Conversation on the top right.
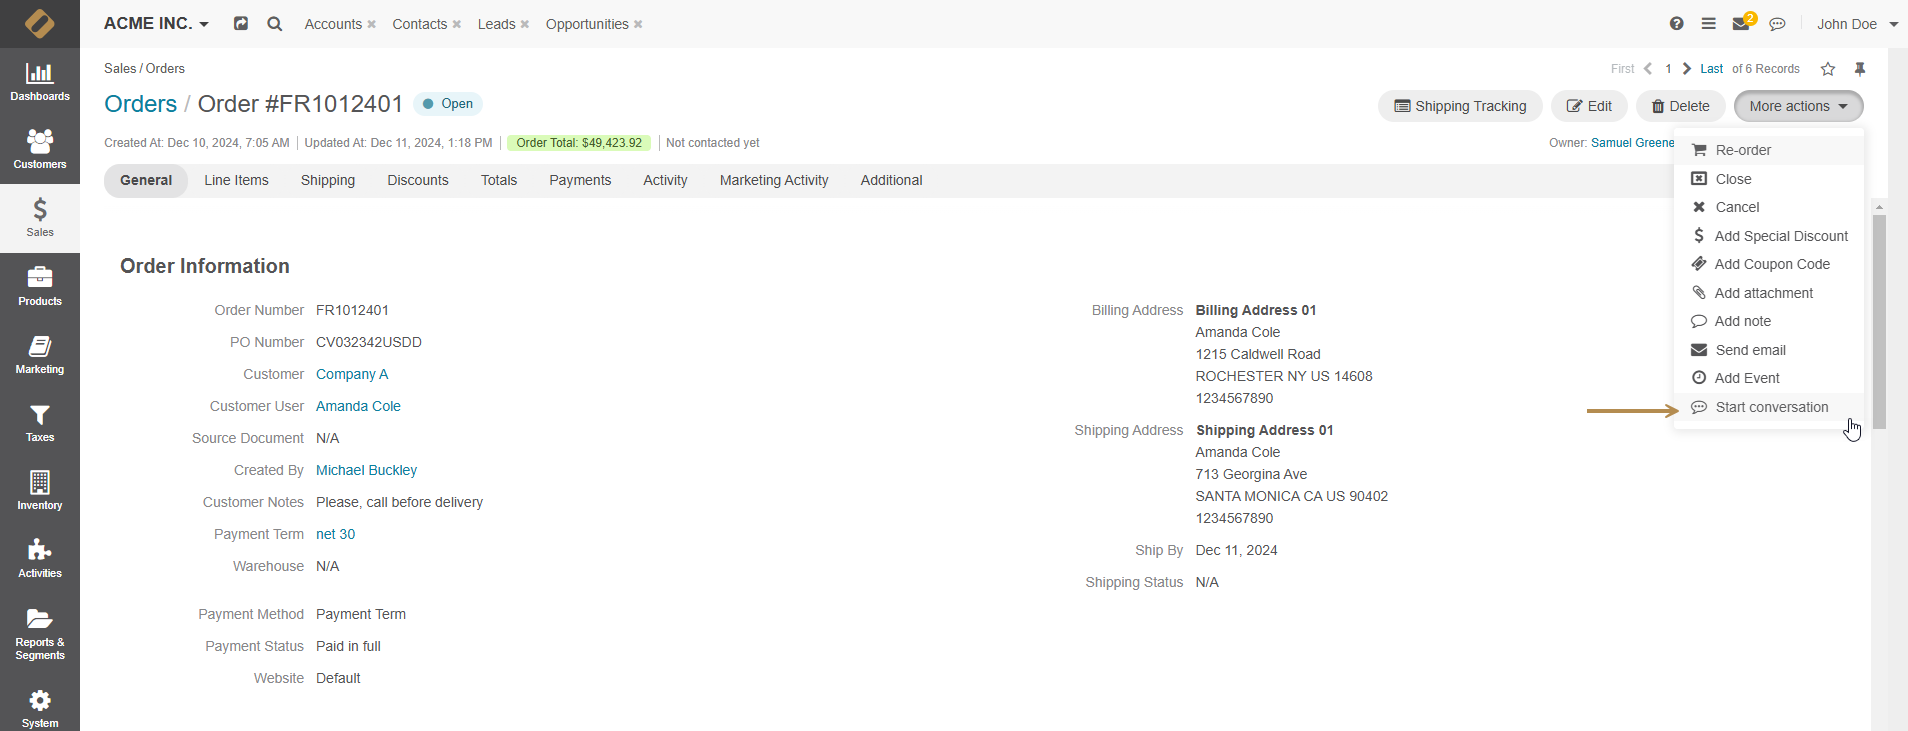
You can also click Start Conversation on the view page of a supported record under the More Actions menu on the top right. Supported records are:
Order
Request for Quote
Quote
Additionally, you can start a conversation from the page of your own conversations under your user name on the top right. For this, click My Conversations to be redirected to the page of conversations that you initiated or are involved in.
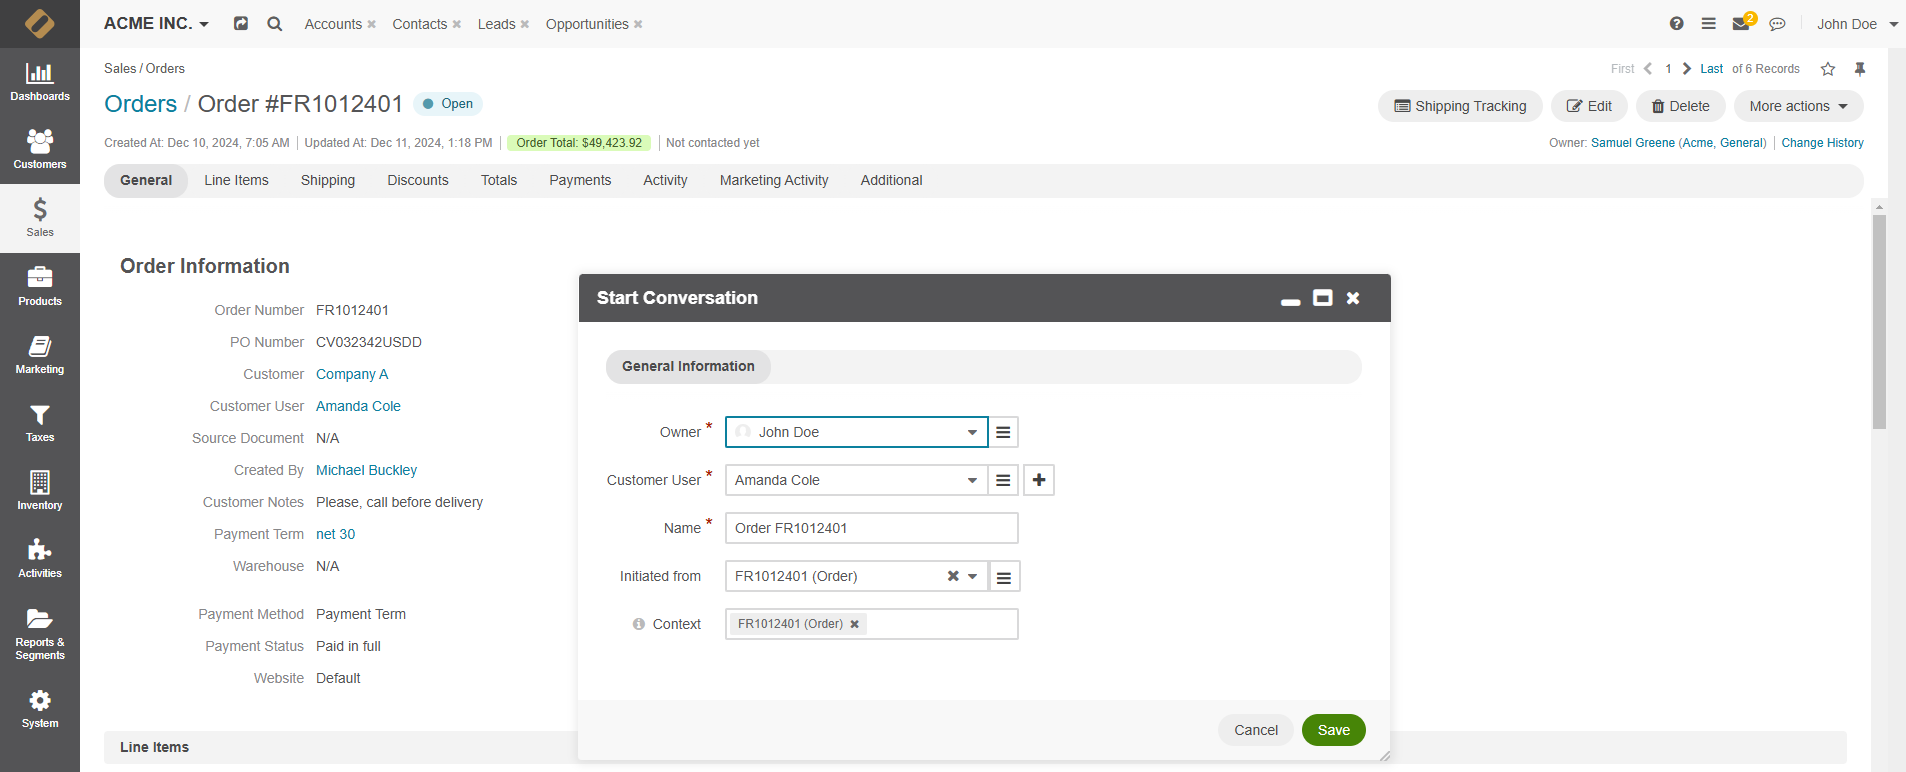
After you click Start Conversation, provide the following information:
Owner — A user to whom the conversation is assigned. By default, the name of the currently logged in user is pre-selected.
Customer User — A customer user to whom the conversation is assigned.
Name — The name of the conversation.
Initiated from — A source of the conversation can be a related entity, such as a order, an RFQ. This is an optional field and can be left empty.
Context — An entity related to the conversation, e.g., a customer user. You can add more than one context to the field. When you add context of a record to the activity, it will be displayed in the Activity section of that record’s view page. This field is optional and can be left empty.
When a conversation is created, it is automatically set to status Active, as configured in the Conversations workflow.
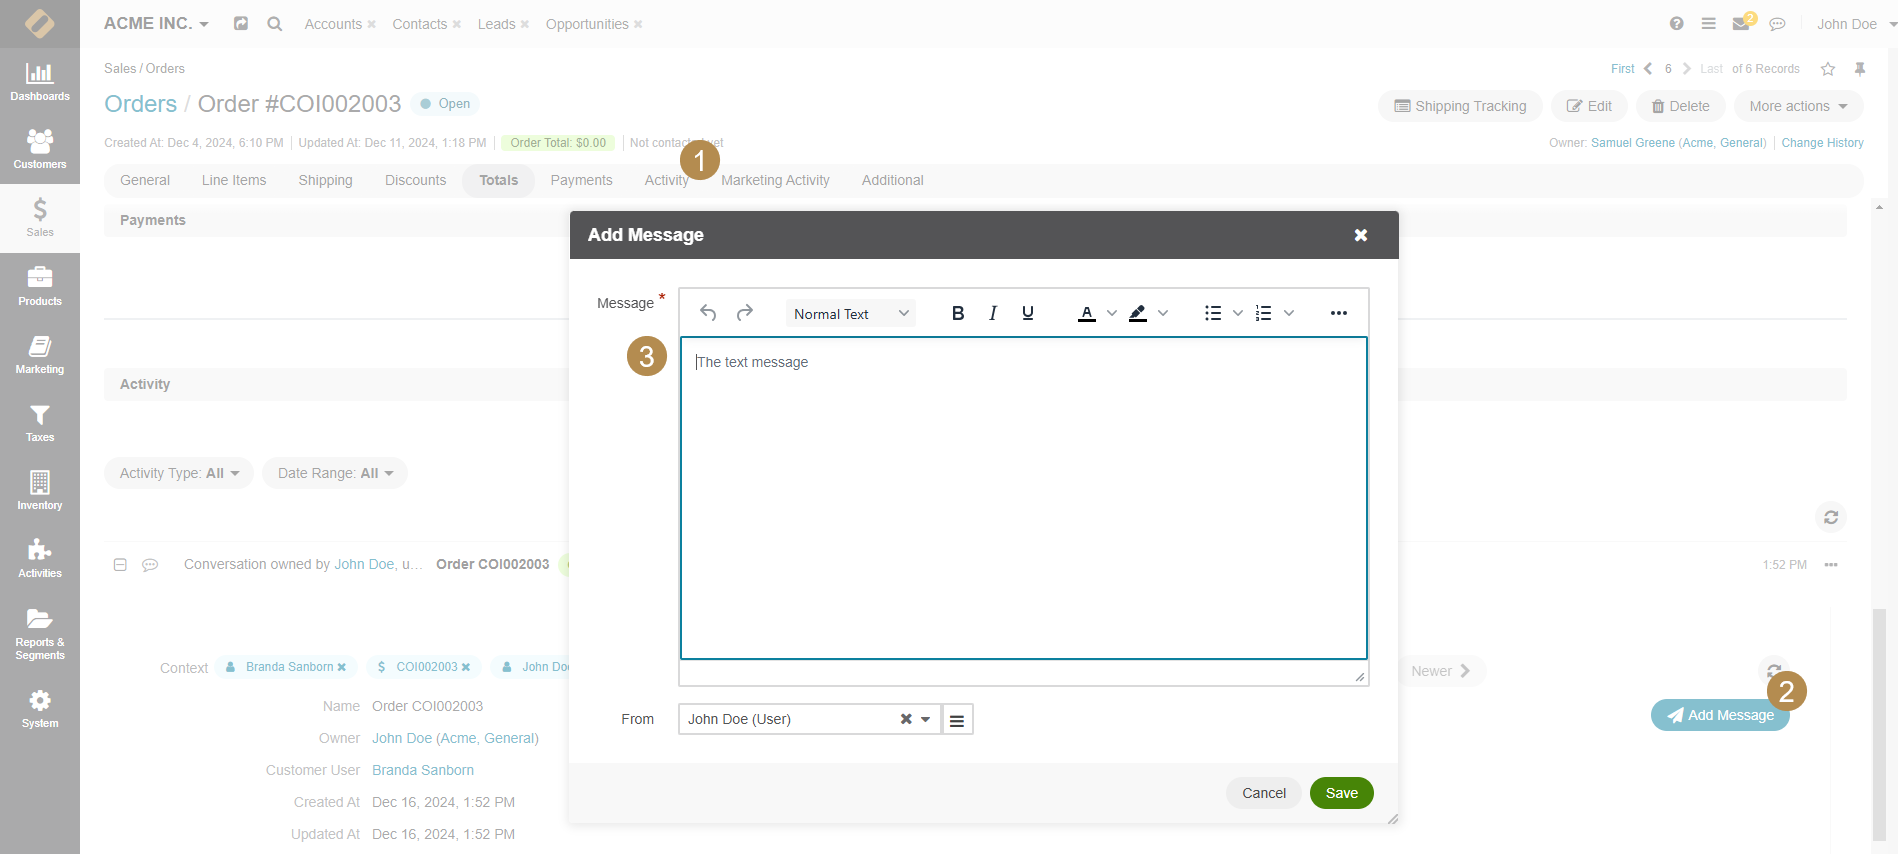
To create a message in a new or existing conversation:
Click on the Activity tab on the view page of a supported record.
Click Add Message on the top right of the conversation view page.
Provide your message in the text box and define who the message is from. You can choose other users other than yourself to be the sender of the message, if they have view user and customer user permissions.
Click Save.
You can interact with the conversation via any record added as context as long as the conversation status is not Closed. If a context is removed from the conversation, the conversation disappears from the Activity section of that record’s view page.
Manage Conversations and Messages
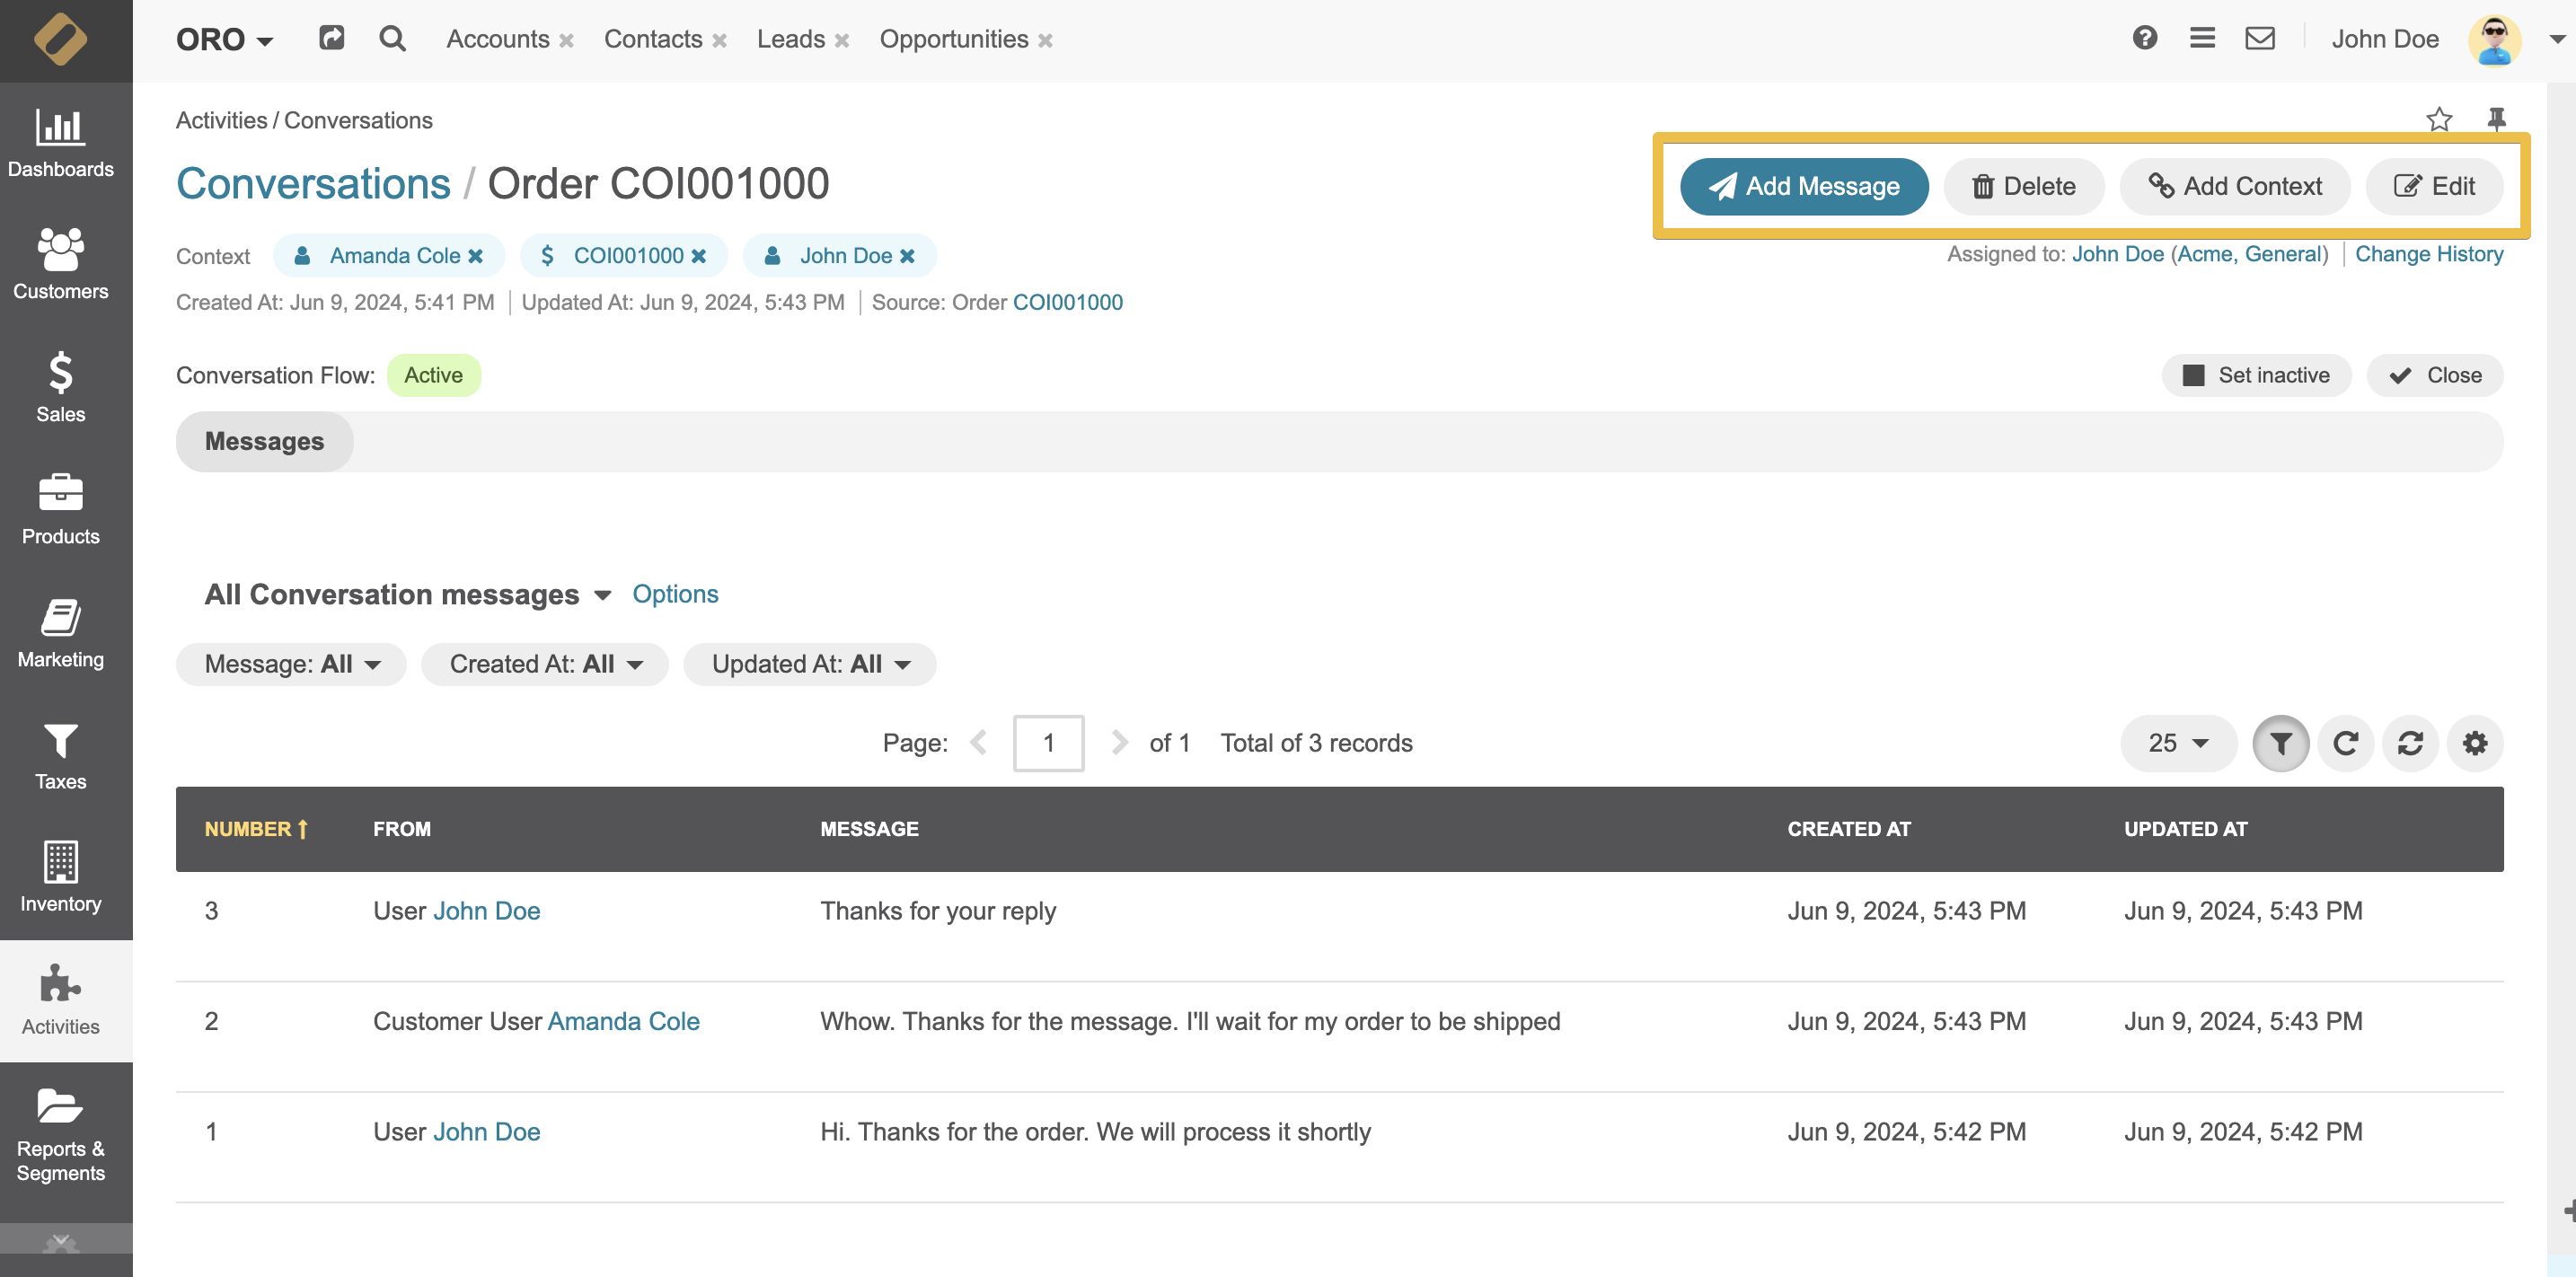
You can view, update, delete the existing conversations, and add context or a new message to them from the following pages in your Oro application:
From the page of a related record in the Activities section.
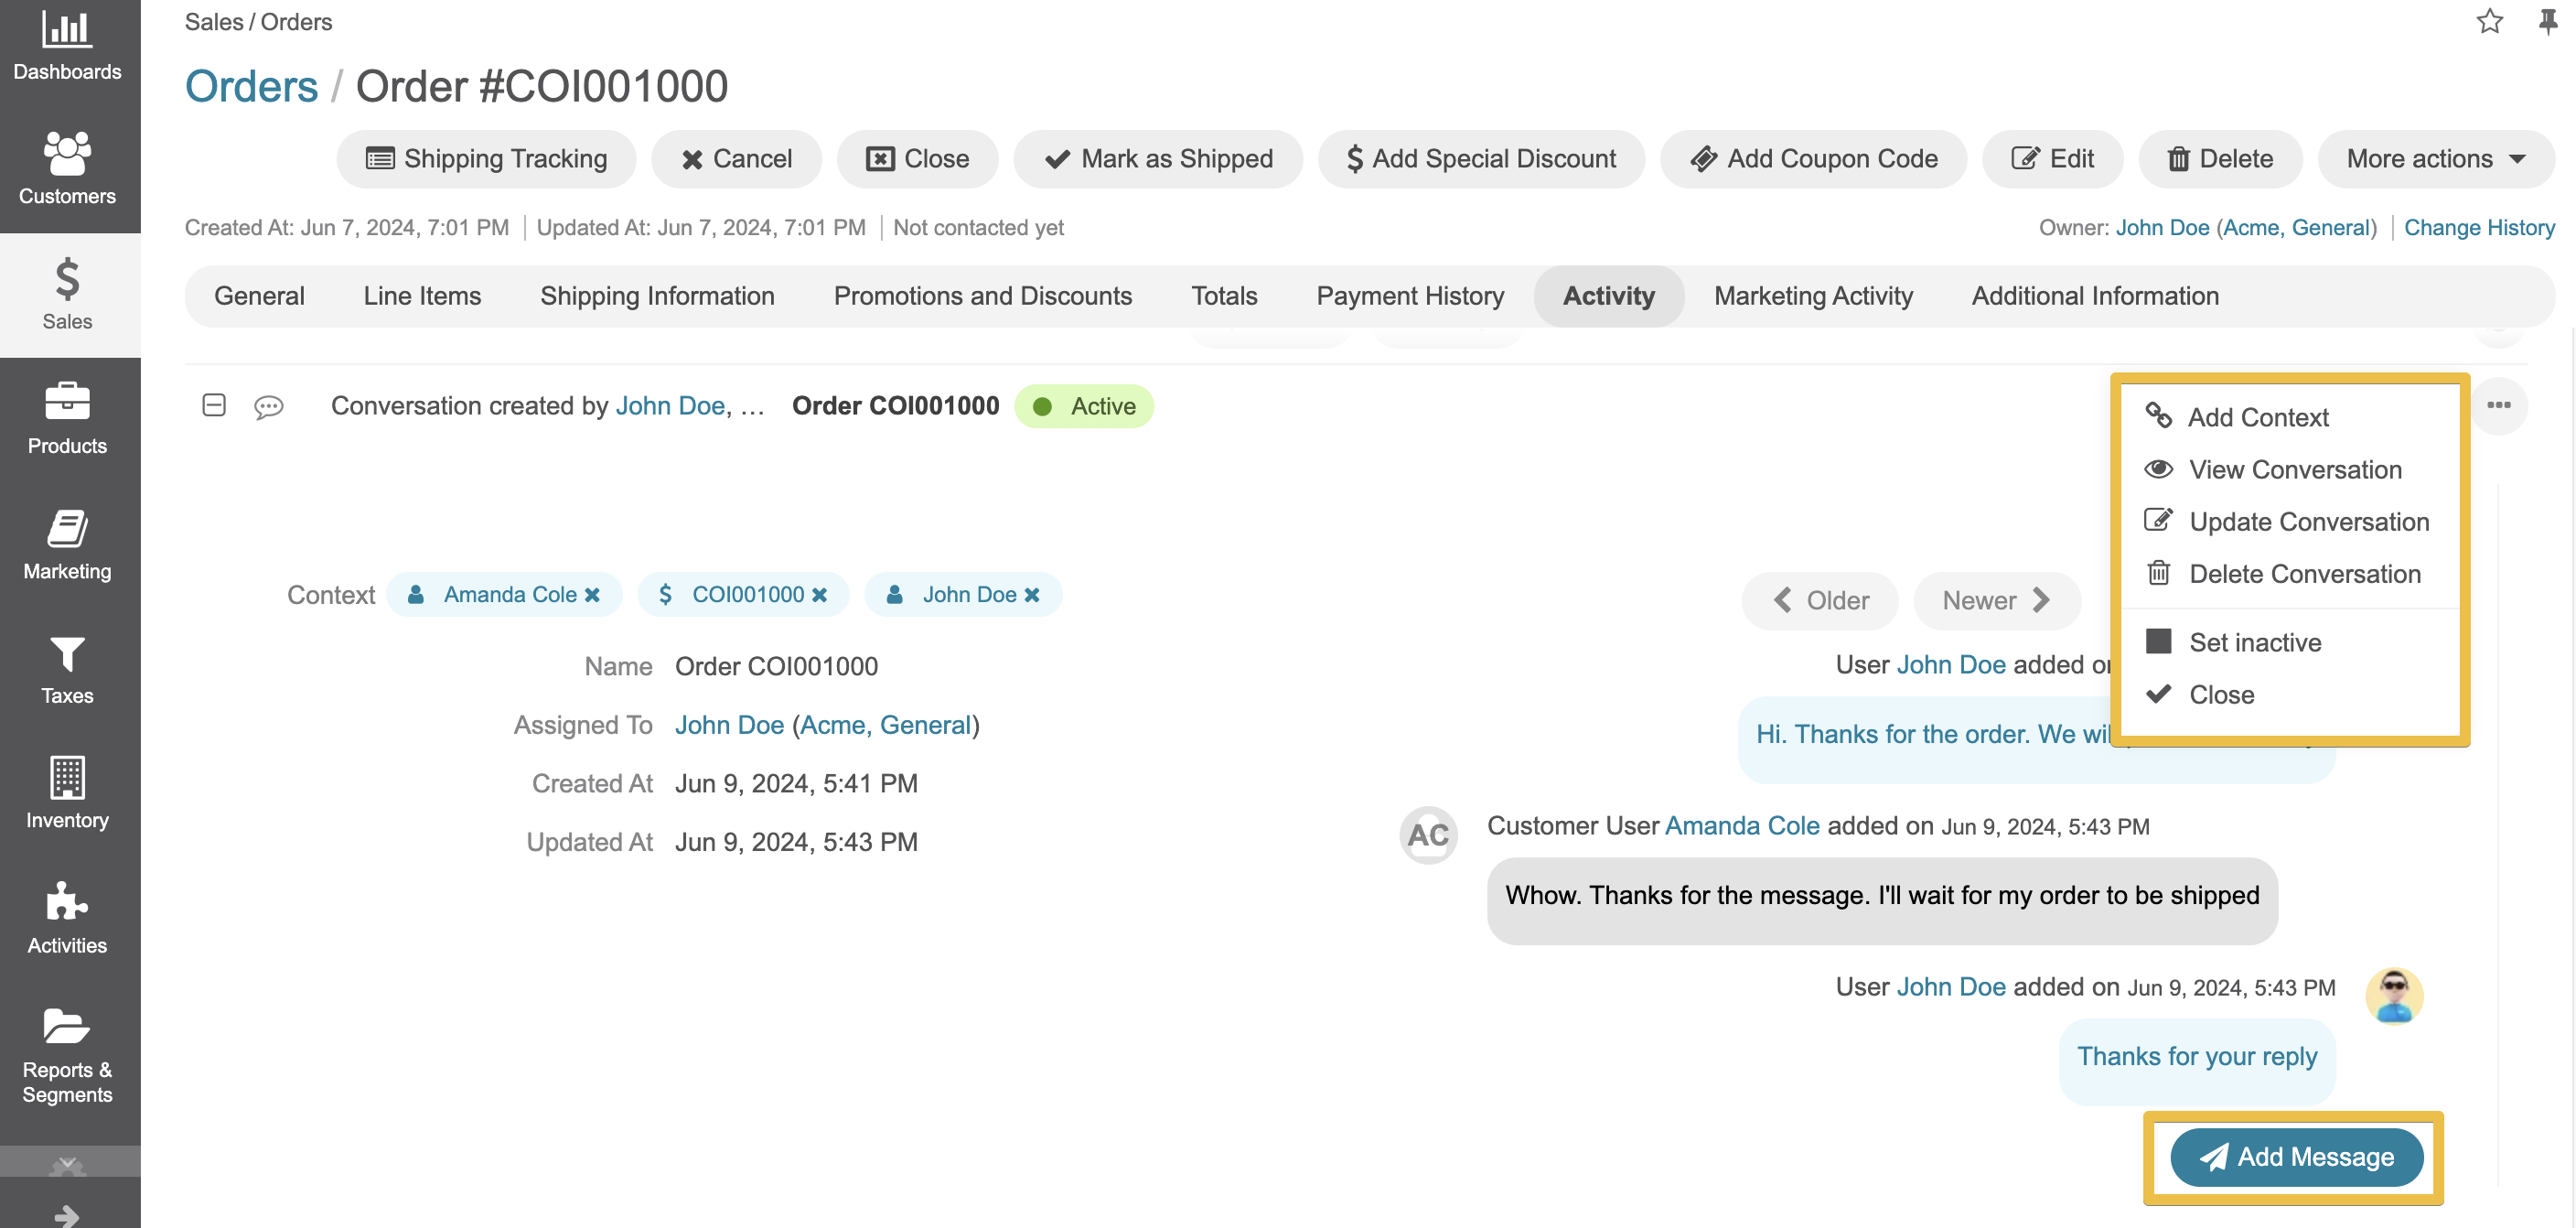
By default, the conversation displays the last 5 messages, but you can navigate through them by using the <Older or Newer> buttons. Use the Refresh button to synchronize it with the latest messages that may have been added.
From the page of all conversations under Activities > Conversations in the main menu, where you can perform the necessary actions for a conversation.
From the Conversations Indicator at the top of the page. The speech bubble icon will show the number of new conversations with new messages, if there are any. Clicking on the title will redirect you to the view page of a relevant conversation.
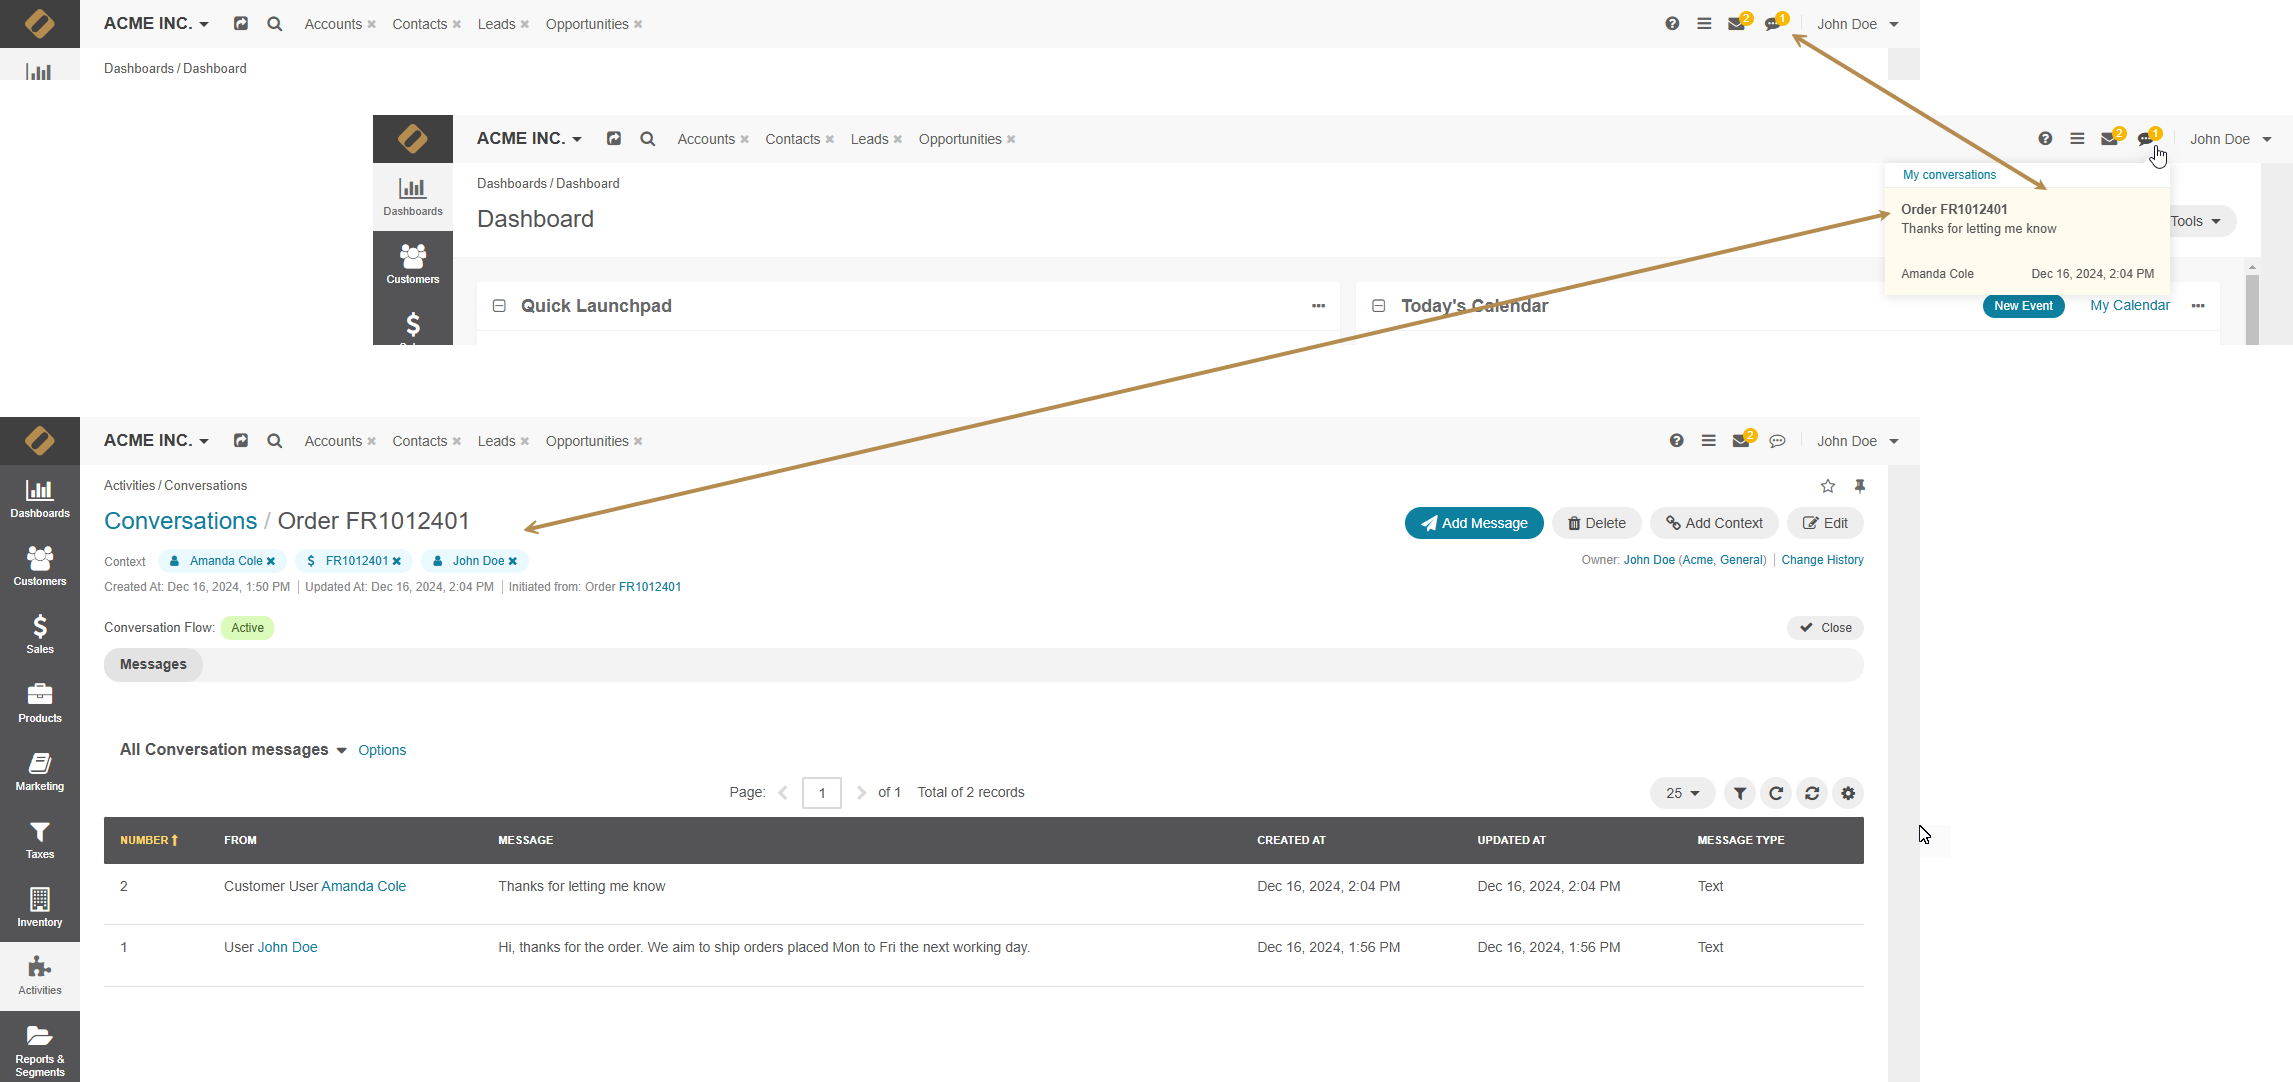
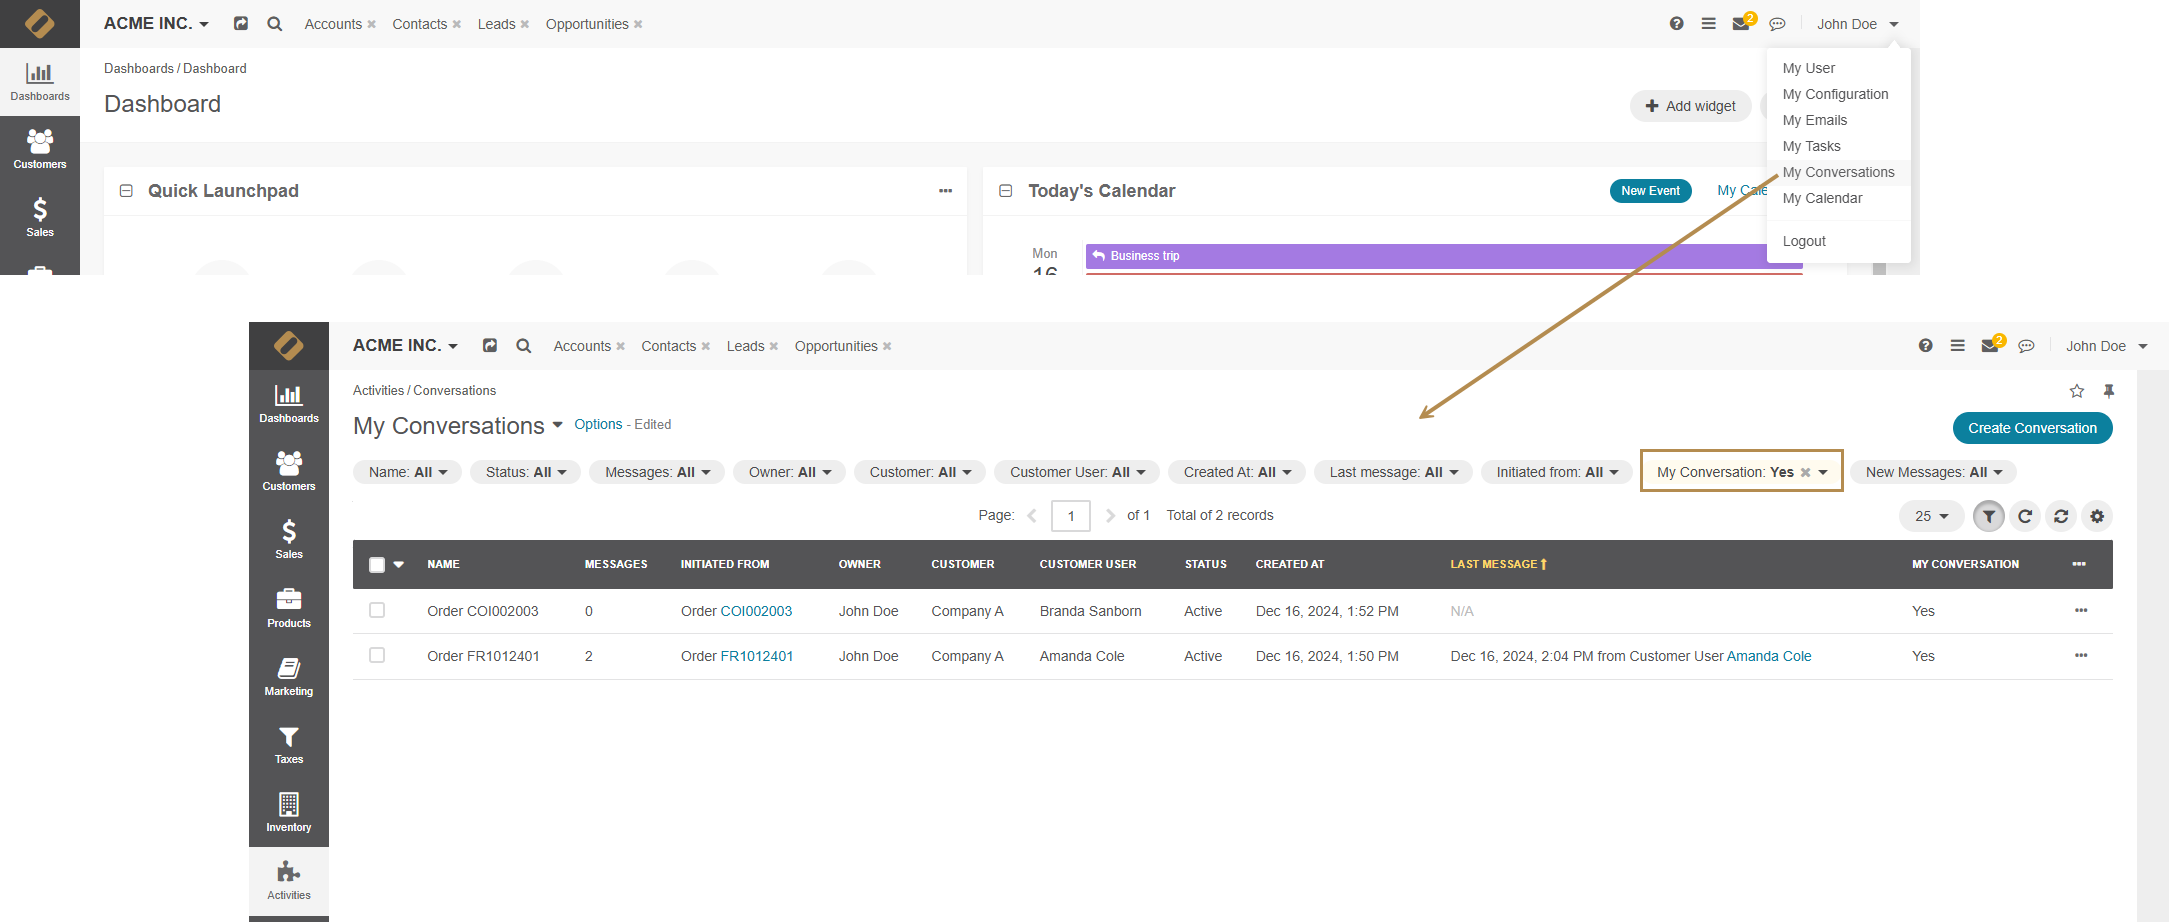
From My Conversations in the user menu. Clicking on this menu item will redirect you to the page of the conversations you initiated or are involved in. If you are an admin or a user with permission to view conversations of other users, clear the My Conversation filter.
Set Up Email Notifications for Conversations
In OroCommerce, you can configure email notifications to alert users about new conversations and new messages within existing conversations. To set up email notifications, you need to create an email template and notification rules to send the templates when conversation events occur.
Note
Email notifications are sent regardless of who starts the conversation or sends a message, a back-office or a storefront user.
To create new email templates:
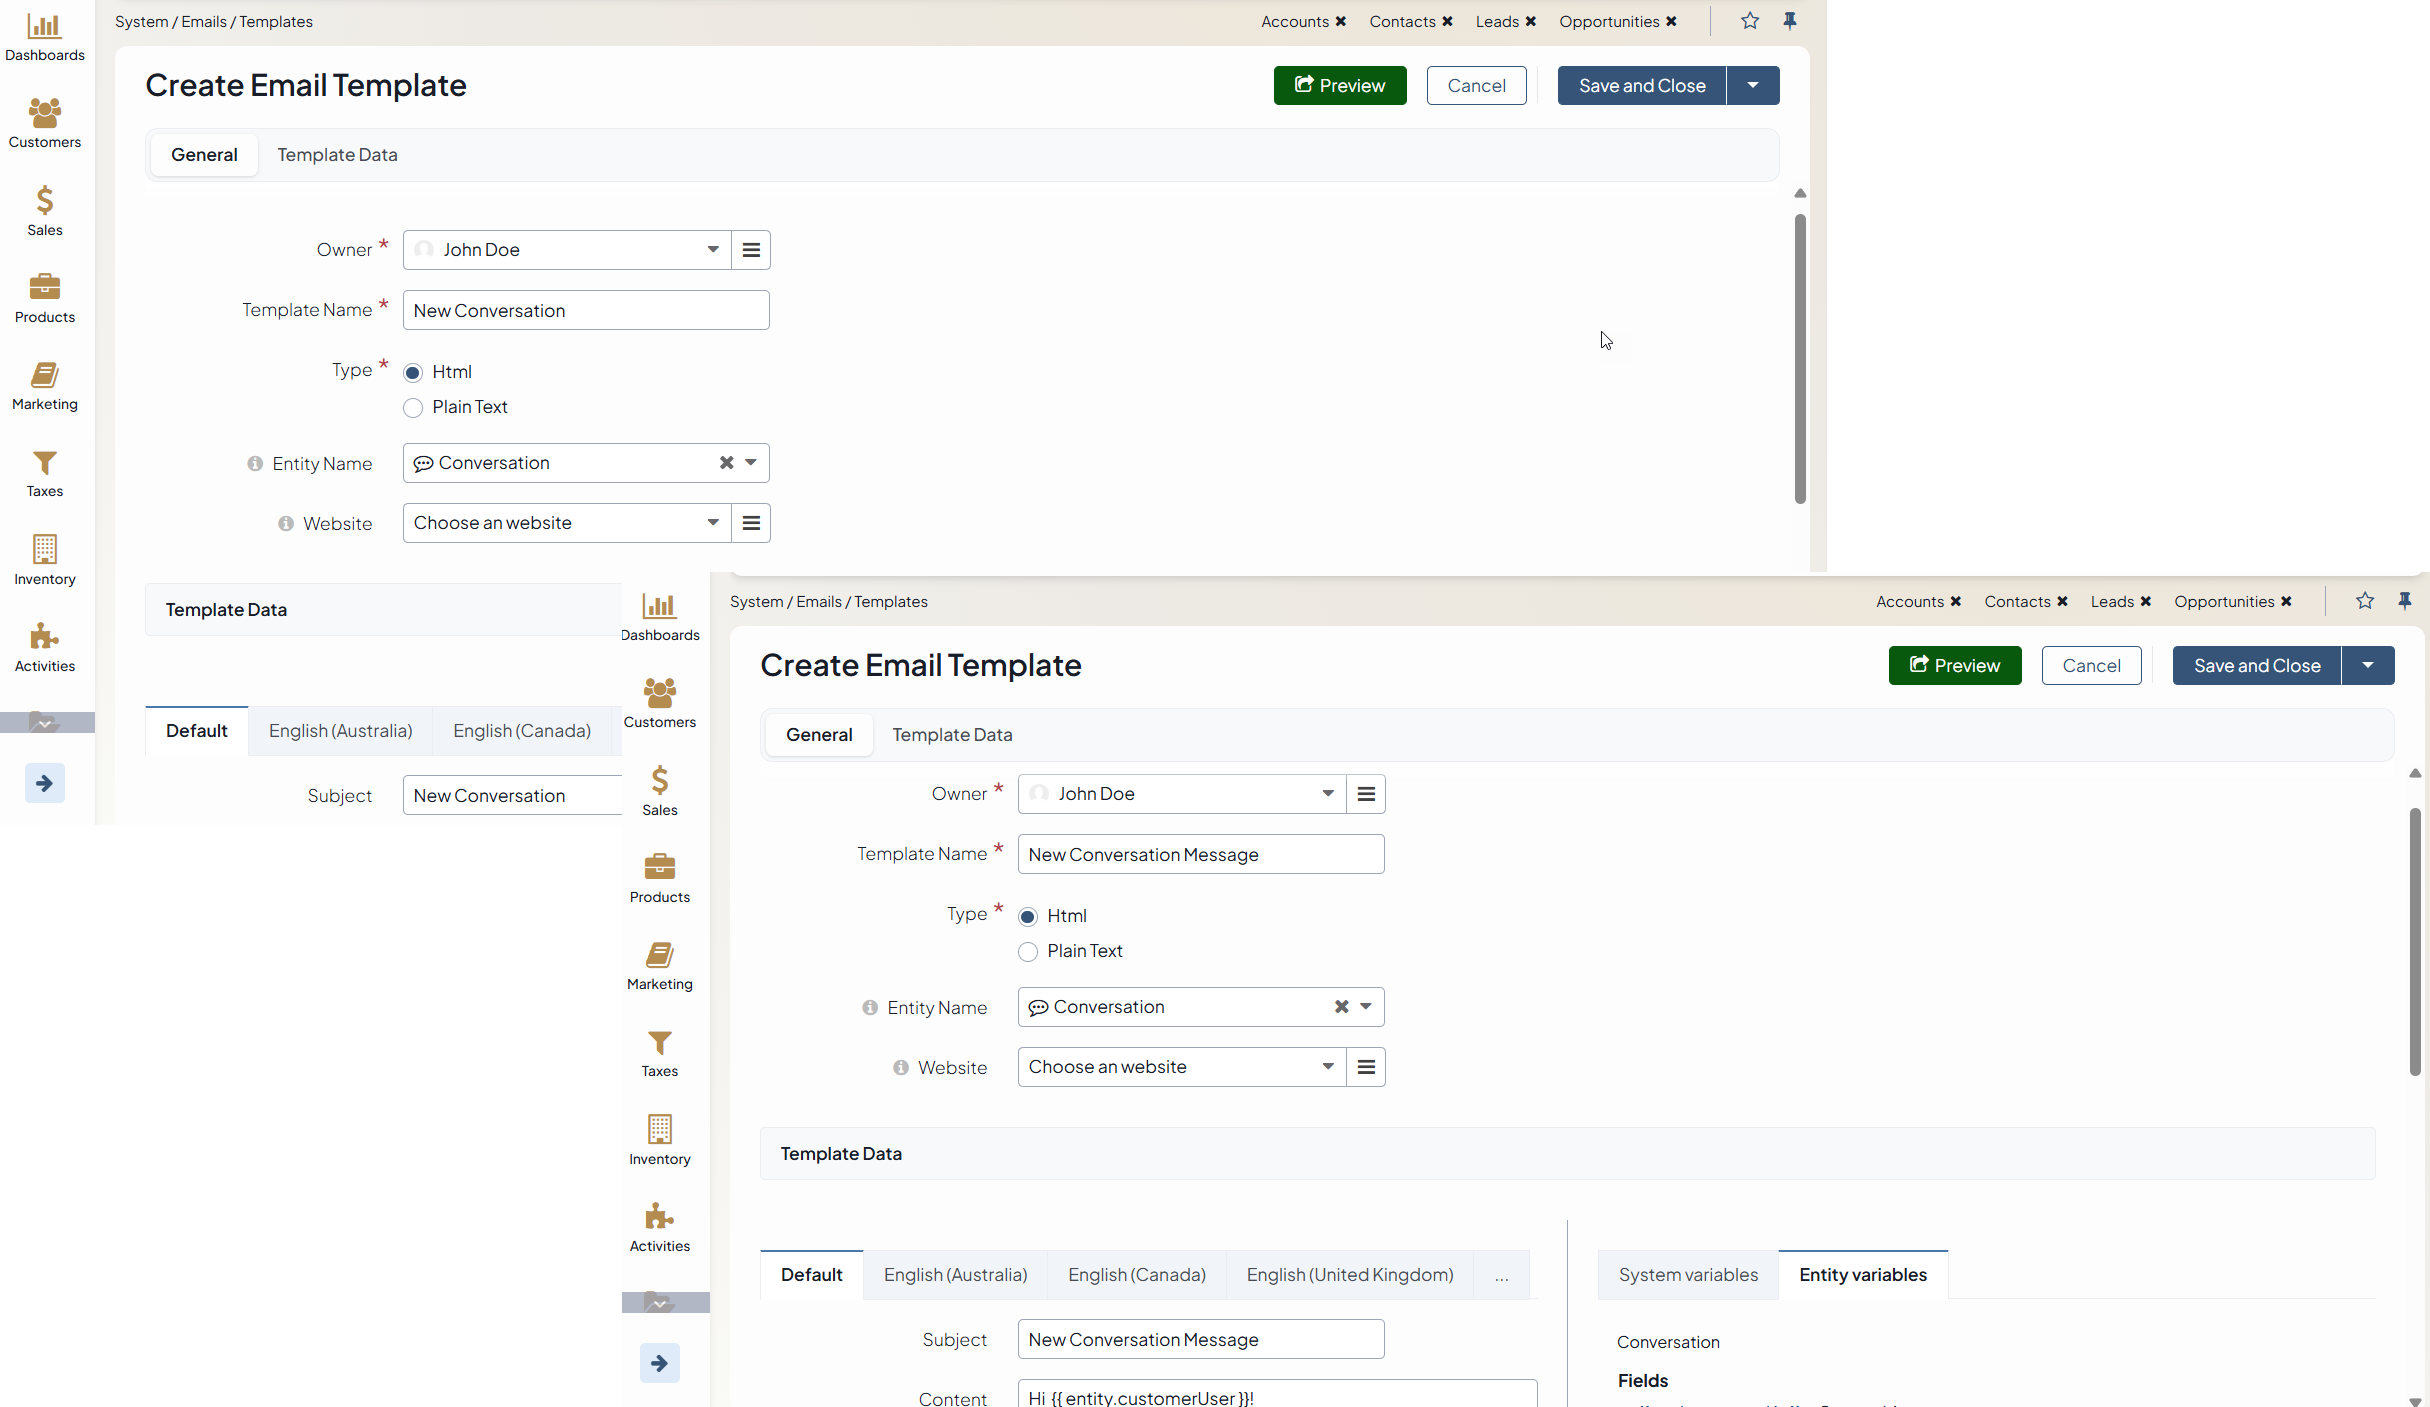
In the back-office, navigate to System > Emails > Templates.
Click Create Template.
Fill in the required fields.
From the Entity Name list, select Conversation.
Define the template details for each of the two templates you are creating (separately):
For a new conversation: Create a subject and body, using
entity variablesor free-form text as needed.For a new message in a conversation: Create a separate template for message events.
Save both templates for use in the next step.
To create two notification rules:
In the back-office, go to System > Emails > Notification Rules.
Click Create Notification Rule.
Define the rule details for each of the two rules you are creating (separately):
In the Entity Name field, select the Conversation entity.
For the Event Name field, select Entity Create for the new conversation and Entity Update for a new conversation message.
In the Template field, choose one of the previously created templates. Make sure you select the template you created for a new conversation if you selected Entity Create even name and a template for a new conversation message of you selected Entity Update.
Define the recipients. You can select specific users or email addresses depending on your business requirements.

Save the new notification rules.
Once templates and notification rules are configured, relevant users should automatically receive email alerts for new conversations and new messages within existing conversations.

Related Topics