Search Management in the Back-Office
OroCommerce offers a variety of search-related features essential for optimizing your website’s search functionality that you manage under Marketing > Search in the main menu, such as:
Search Terms
Search History
Search Synonyms
Hint
For more information on available configuration options for search, see our Search Functions Concept Guide.
Manage Search Terms
OroCommerce administrators can use the search terms functionality to dynamically respond to specific search phrases with tailored actions. When a designated search term is detected, the administrator can choose from the following responses:
Automatically direct users to a predetermined page that best matches their search intent, ensuring they find the most relevant information or product.
Add custom content blocks directly into the search results page. This can include promotional banners, important announcements, or additional information that enhances the user experience.
Replace the default search results with a curated collection of products. This allows for highlighting specific products, improving product discoverability, and potentially increasing sales for targeted items.
Create a Search Term
To create a new search term:
Navigate to Marketing > Search > Search Terms in the main menu and click Create Search Term on the top right.
Provide the following information in the General section:
Owner — The name of the business units whose users can manage the current search term.
Phrases — One or more search terms for which you want to trigger a specific action.
Partial Match — You can choose to trigger an action based on a fragment of the phrase(s) you specified in the field above (e.g., “tag” can trigger an action for “medical tag”). Please note that this is not a fuzzy search option, and deviation in spelling will prevent the action from being triggered.
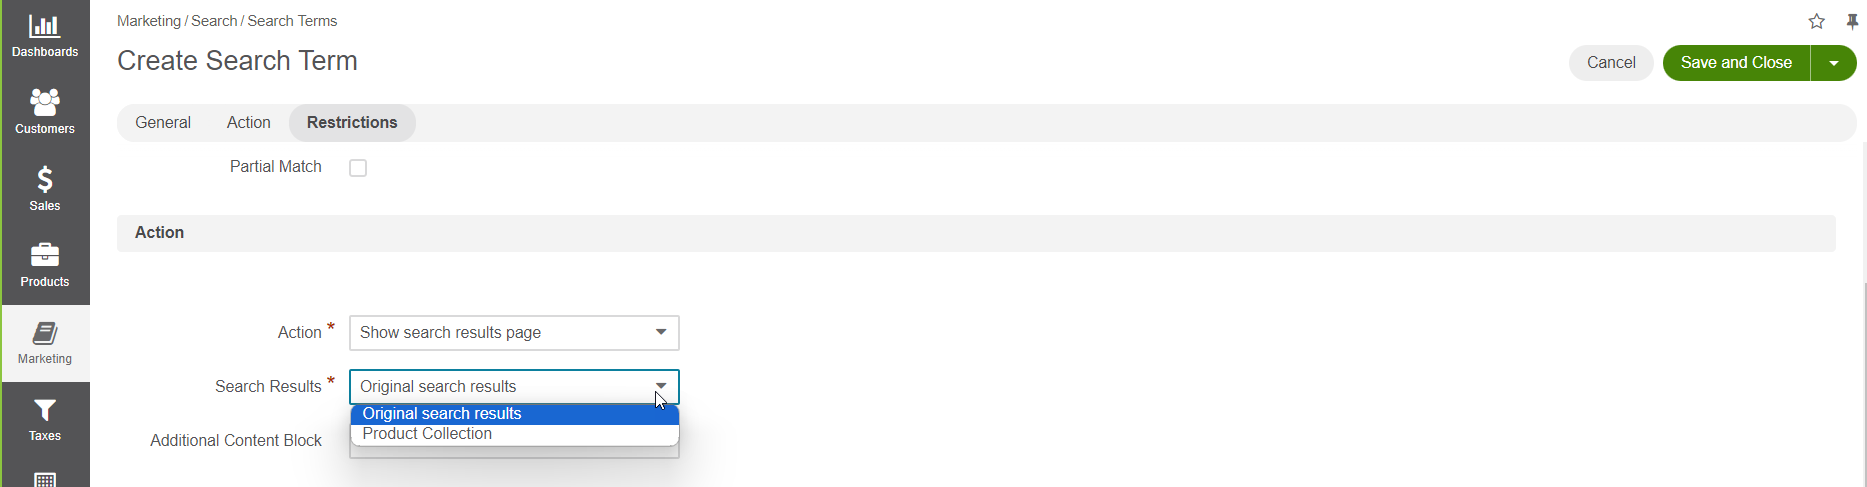
In the Action section, choose what action you want to trigger for a search term in the Action dropdown: Show search results page or Redirect to a different page. The information to provide next will depend on the selected action.
For the Show search results page action:
Search Results > Product Collection:
Product Collection – Choose a segment for the product collection.
Additional Content Block – Optionally, you can add a content block in addition to the product collection segment.
Search Results > Original Search Results:
Additional Content Block – Optionally, you can add a content block to the search results page.
For the Redirect to a different page action, select what to display to users instead of the specified search term(s) in the Target Type dropdown:
Content Node – specify the web catalog from which you want to choose the content node and the content node itself.
Product – select a specific product from the Product field dropdown
Category – select a master catalog category from the list in the Category field.
Landing Page – select a specific landing page from the Page field dropdown.
System Page – select a specific system page from the System Page field dropdown.
URI – specify a web address of the page or resource to which you want to redirect the user. This option supports URIs that include filters in the address (for example, when you use filters in the OroCommerce storefront to narrow down search results).
All target types, except URI, support the 301 Redirect option. When enabled, this means that instead of forwarding users internally to a different page retaining the original URL, users will be redirected to a page with a new URL.

Note
If the product search produces an empty result and there is no custom page configured for that specific combination of a search term and additional search criteria, you can configure an Empty Search Results Page in the system configuration on the global, organization and website levels.
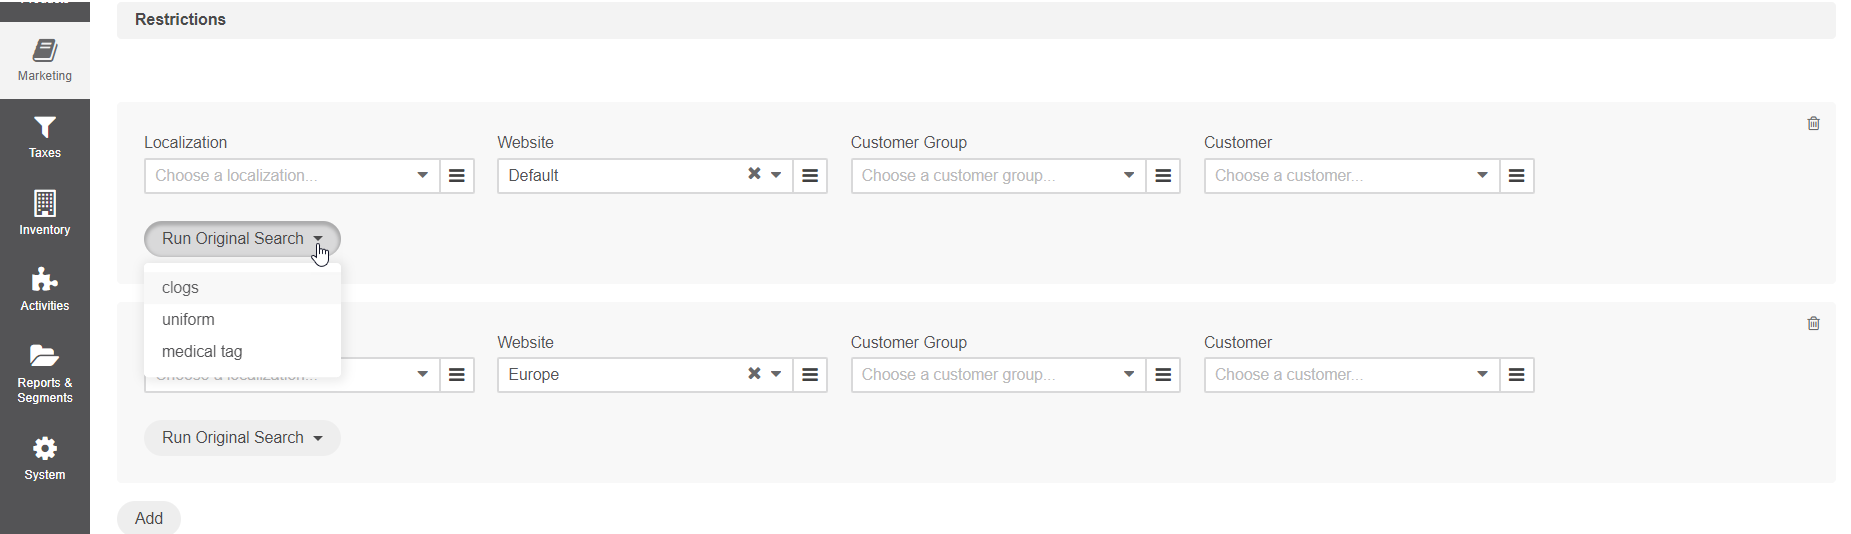
In the Restrictions section, specify the target localization, website, and customer or customer group to which the search term configuration should apply. Keep in mind that only one field must be chosen for customers at a time, either a customer group or a customer.
You also have the option to Run Original Search to check what a user sees without the search term configuration and what original search results you are substituting by adding the current search term configuration. You can view search results for each provided search term by clicking on the arrow next to the Run Original Search button.
To apply content to more than one localization, website, and customer group or customer, click Add and set up additional conditions.
Click Save on the top right.
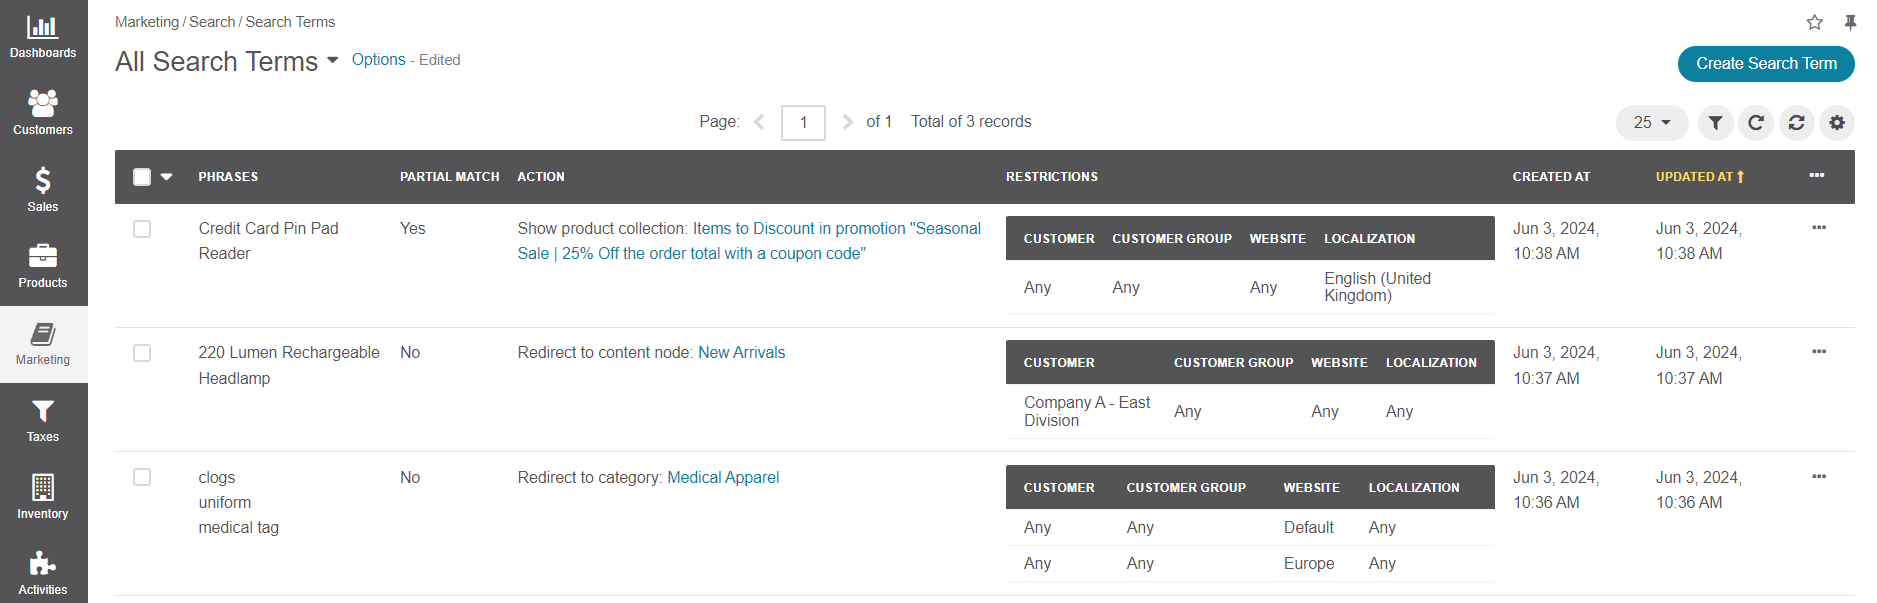
You can view the list of all created search terms in the Search Terms grid.
Manage Search History
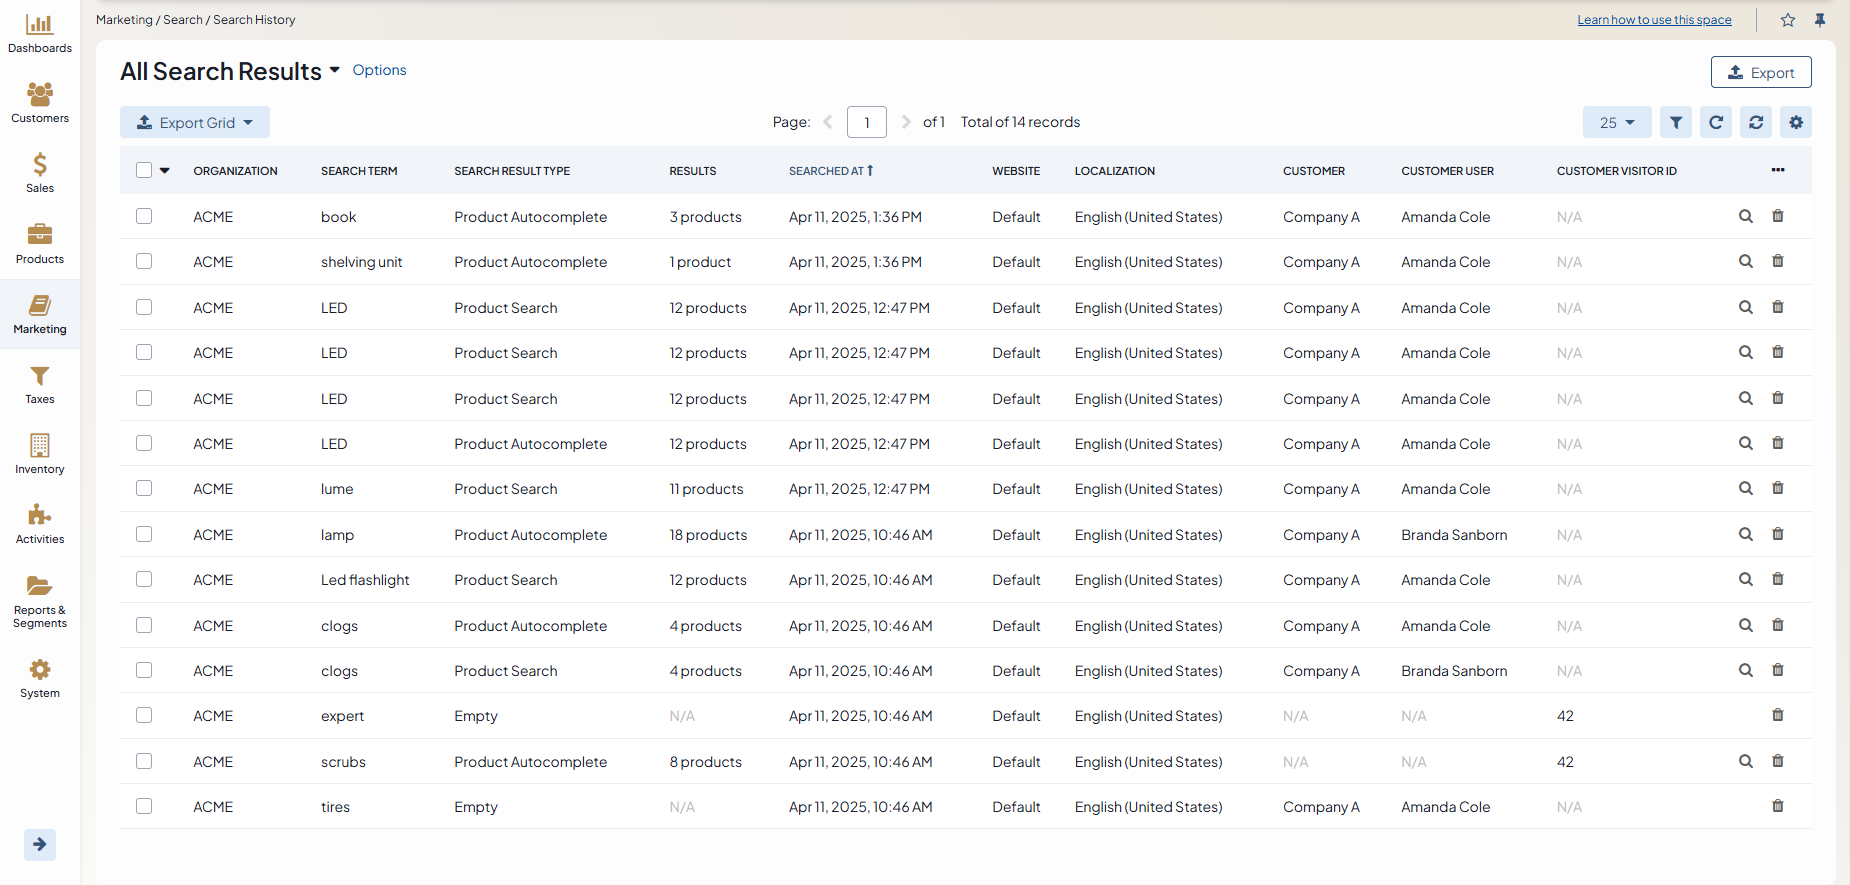
Search History enables users to view a history of all searches performed in the storefront if this option is enabled in the system configuration on the global, organization, or website level. In particular, you can view a grid of all search terms, including the search term entered by the user, the type of search result (product autocomplete, product search, or empty), the number of products found (if applicable), the date and time of the search, the website where the search was performed, the localization used when the search was performed, and the name of the customer and customer user who performed the search (if applicable).
You can also view a Search Terms report that displays the number of times a particular search term was used, the number of times that search term returned products, and the number of times it returned an empty result.
To view the search history, navigate to Marketing > Search > Search History in the main menu.
Here, you have the options to preview or delete search history items. Previewing items redirects you to a page in the storefront with a collection of products that match the search criteria.
Create Storefront Search Synonyms
Note
This feature is available in the OroCommerce Enterprise Edition.
You can create a synonym group where a search for one word from this group in the OroCommerce storefront would return results for all the synonyms in this group. Synonym management is enabled globally and per website in the system configuration, and subsequently managed through Marketing > Search > Search Synonyms in the main menu.
Create a Synonym Group
To create a new synonym group:
Navigate to Marketing > Search > Search Synonyms in the main menu.
Click Create Search Synonym.
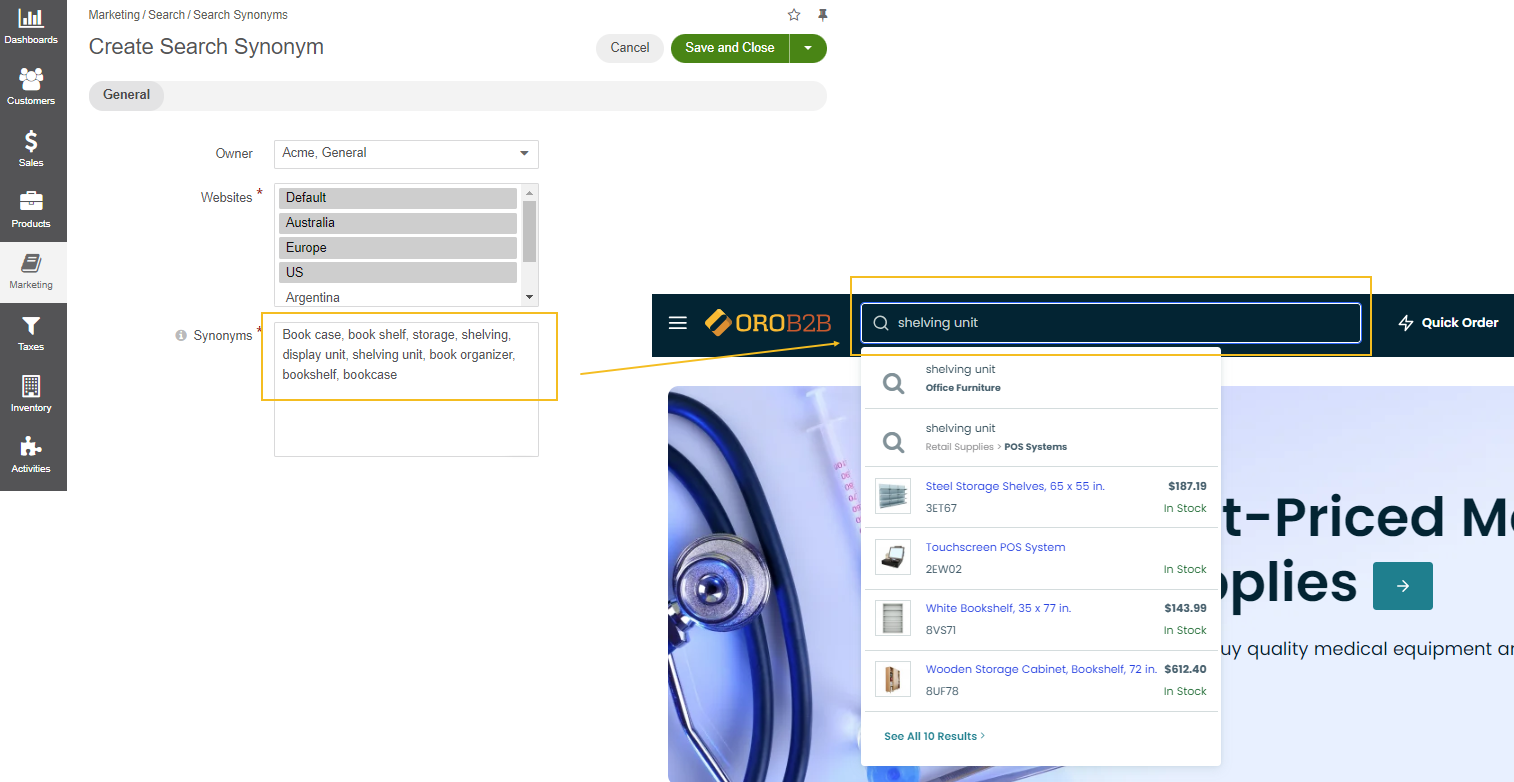
Fill in the following details:
Owner — the owner of the synonym being created. This field is only displayed in the global organization.
Websites — a list of websites where the synonym is to be used. Hold ctrl to select more than one website.
Synonyms — a list of comma-separated synonyms, for example, good, excellent. Arrow notation can be used to define unidirectional synonyms: excellent => good.
Click Save.
You can view the list of all created search synonyms in the Search Synonym grid.
Related Content: