Configure Global Shopping List Settings
In the Shopping List section of Commerce configuration settings, you to set various options for a shopping list, control whether to let unregistered customers purchase goods in the store, set the number of shopping lists allowed per customer, enable a shopping list section under the My Account menu, and more.
This can be configured on three levels – globally, per organization, and website.
Note
Please note that website settings override organization, organization settings override system settings.
To set the shopping list globally:
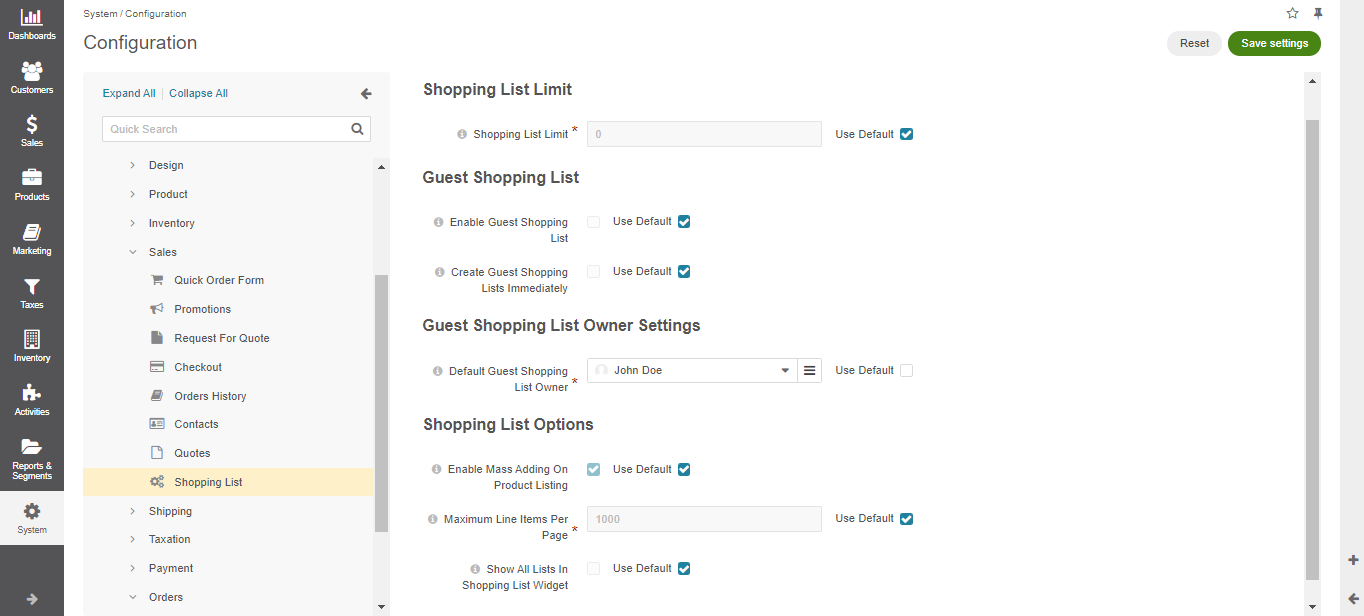
In the main menu, navigate to System > Configuration.
Select Commerce > Sales > Shopping List in the menu to the left.
Note
For faster navigation between the configuration menu sections, use Quick Search.
Note
To update any of the options, clear Use Default checkbox first.
In the Shopping List Limit section, set the number of shopping lists allowed per customer. The default value is zero. This means that no limit of shopping lists is applied.
In the Guest Shopping List section, set whether guests are allowed to create and manage shopping lists. By default, guest shopping lists are disabled. In addition, only 1 shopping list is available for guest customers.
In the Guest Shopping List Owner Settings section, select the user who will be the default owner of all guest shopping lists. Depending on the roles and permissions of the owner, guest shopping lists may or may not be viewed and managed by the users who are subordinated to the owner.
Note
To enable users from the same business unit or organization (that the owner belongs to) to view and manage guest shopping lists, adjust permissions for the shopping list entity in their roles accordingly.
In the Shopping List Options section, set the following options:
Enable Mass Adding On Product Listing — The options controls whether customer and guest users are allowed to mass select and add items to the shopping list in the storefront.
Maximum Line Items Per Page — The maximum shopping list line items that can be displayed per page. If the number of shopping list line items exceeds this value, then the “All” value, in the list of pagination dropdown values, is changed to the one specified in the option.
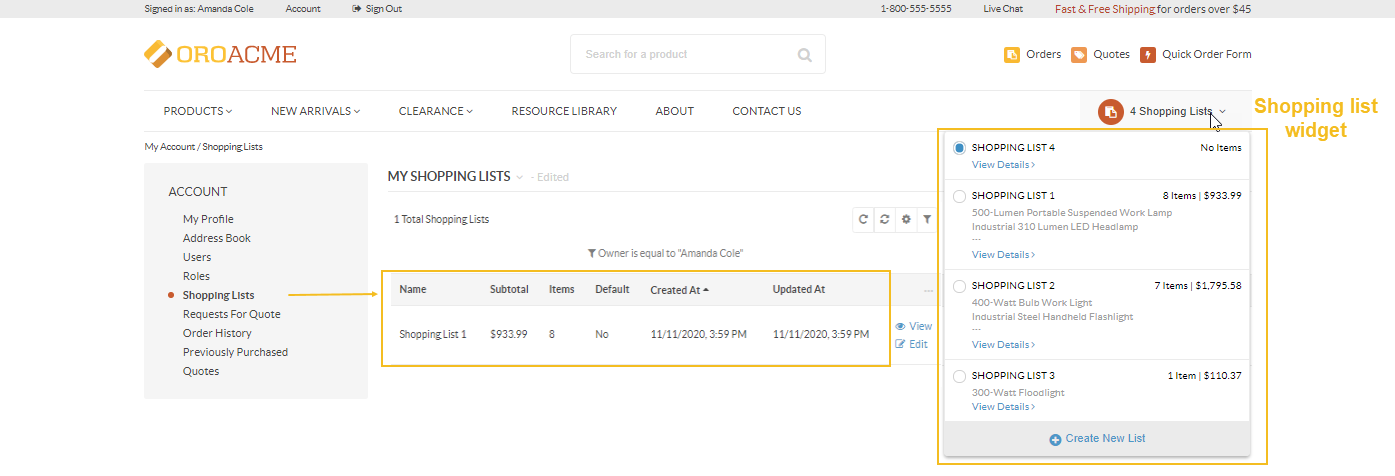
Show All Lists In Shopping List Widget — The option defines which shopping lists a customer user can view in the widget. If this option is enabled, the user can view all the shopping lists that they are allowed to access, besides their own. For instance, a user can own one shopping list, which is reflected in the Shopping List section under My Account, while the widget will display four shopping lists assigned to other users but available to view and edit by the selected user.
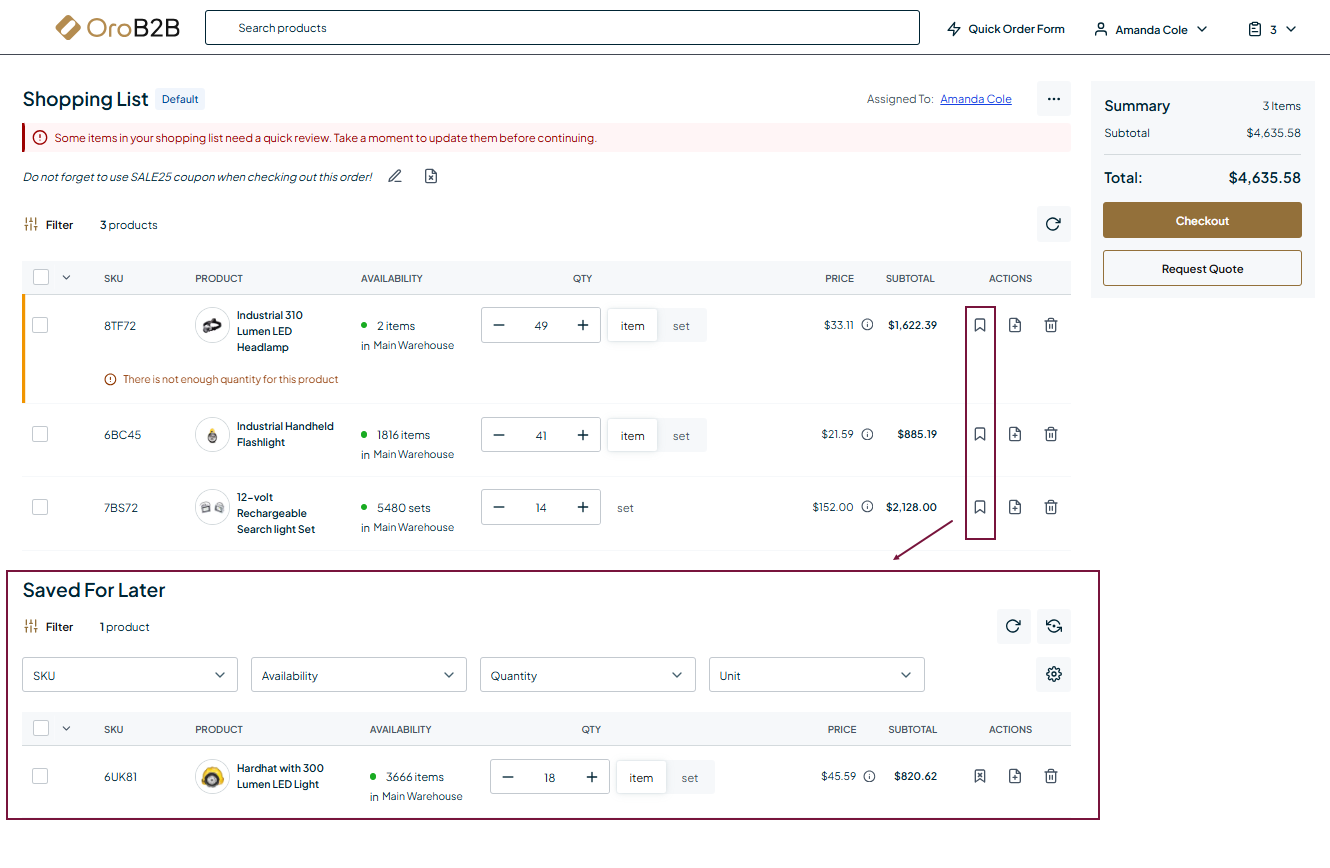
Enable Saved For Later — The option allows customers to temporarily set aside items on their shopping list without removing them. When enabled, users can mark any item as Saved for Later, which moves it to a dedicated section on the shopping list page. These items remain visible but are excluded from Checkout, Request for Quote (RFQ), total cost and quantity calculations. Customers can move items to and from the Saved for Later section at any time, provided they have the necessary Edit permission for the shopping list.
Click Save Settings.