Important
We are updating the images for OroCommerce version 6.1 to align with the latest changes in the back-office design. During this transition, some images may still show older versions. Thank you for your patience as we work to update all visuals to reflect these changes.
Configure Google Single Sign-On in the Back-Office
Oro application supports Google Single Sign-On. This means that for a user that has the same primary email in the Oro application and Google accounts, it is enough to log in only once during a session.
Google Side
Create Project
To configure single sign-on on the Google side:
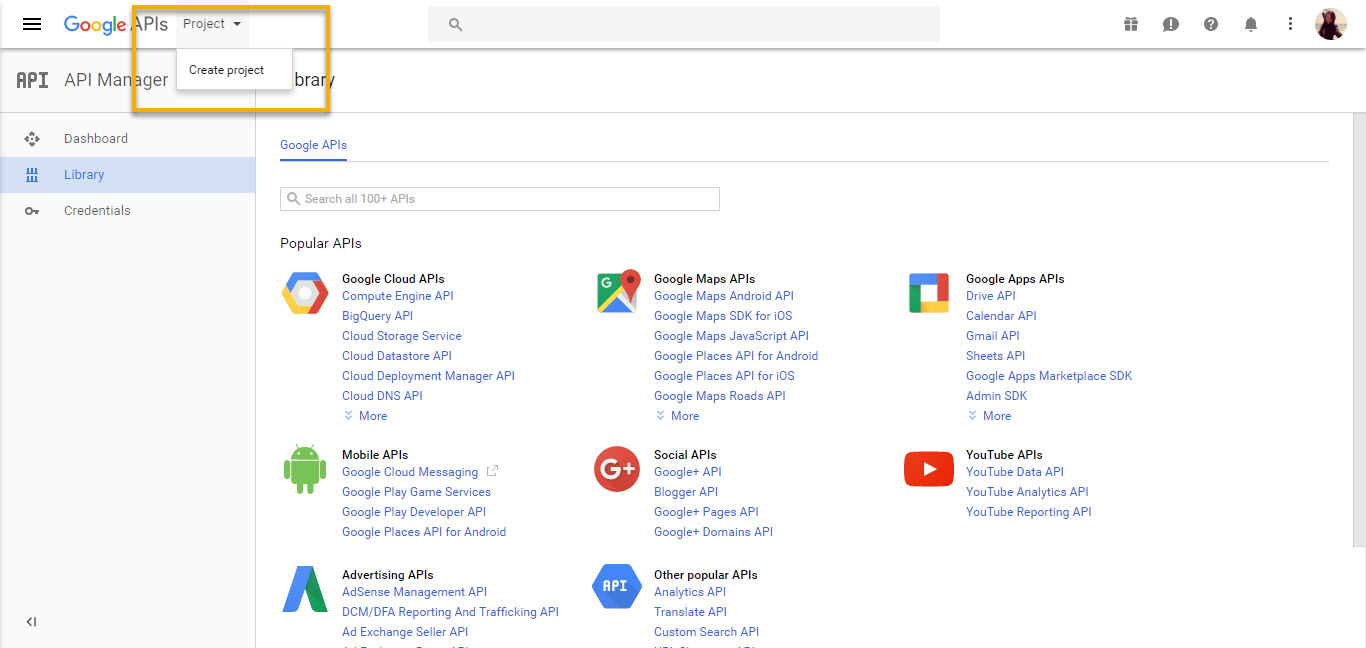
Open Google API Console.
Click My Project selector in the top left corner to open a popup form.
Click New Project at the top right.
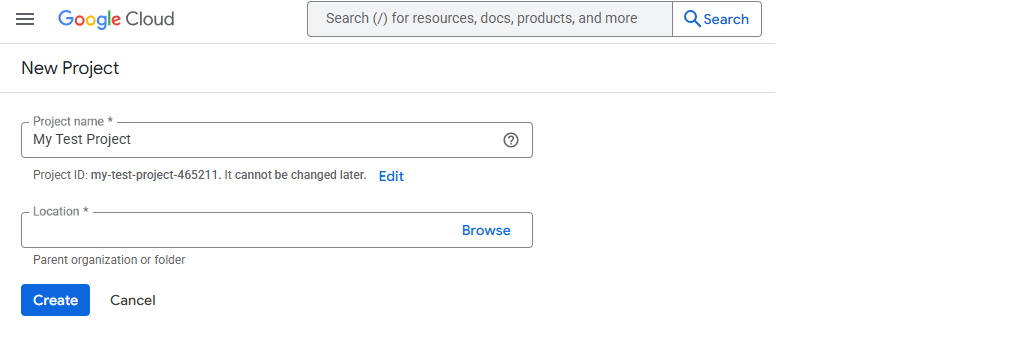
Define the Project Name and select the Location.
Click Create.
Create Credentials
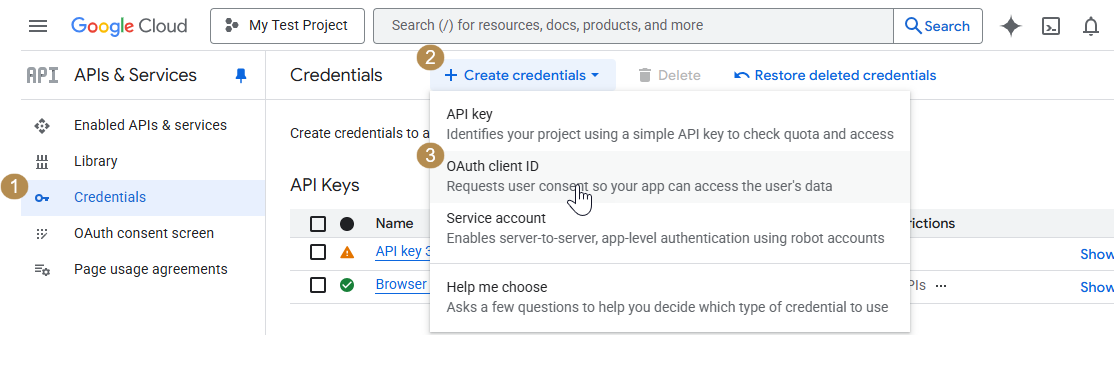
Navigate to API & Services > Credentials in the menu on the left.
Click + Create Credentials and then click 0Auth client ID.
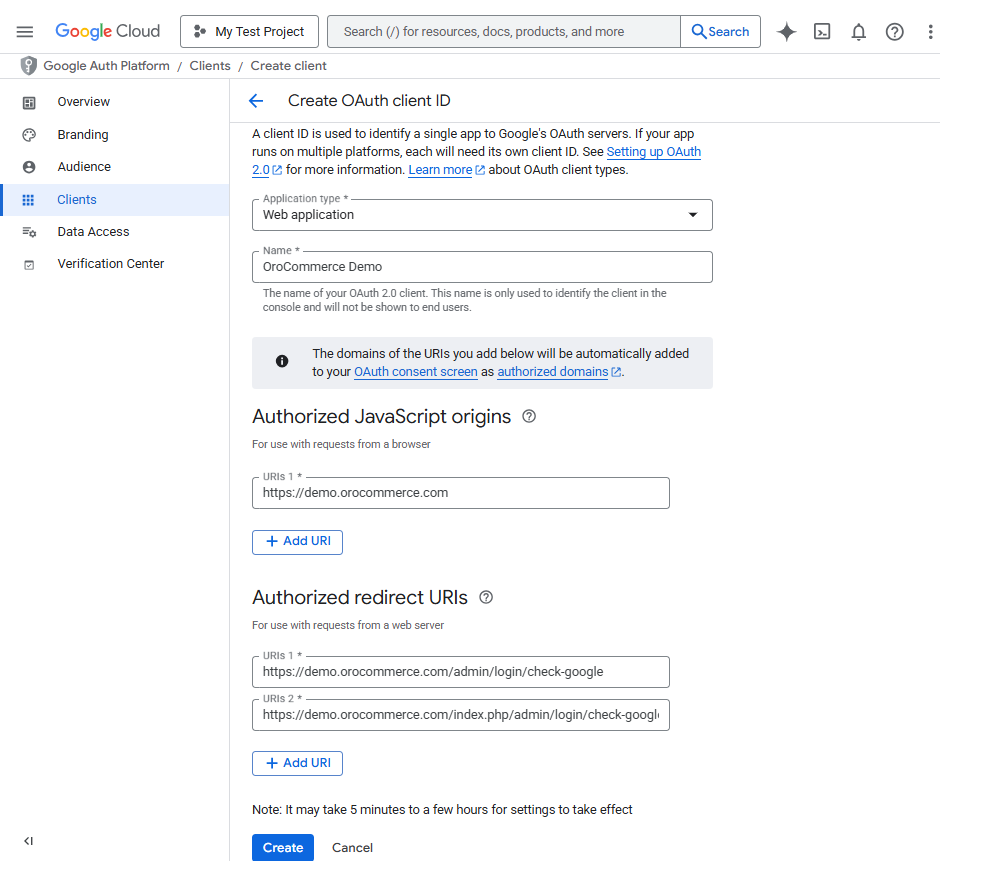
To create an OAuth client ID, set the Application Type to Web Application to load more settings depending on the selected type.
Enter the Name of your OAuth client. This name is only used to identify the client in the console and will not be shown to end users.
For Authorized JavaScript Origins, enter the URL of the Oro application instance for which single sign-on is being enabled.
Authorized Redirect URIs are unified resource names used for the interaction between Google and the Oro application instance. It is recommended to add the following two values:
[Oro application instance URL]/admin/login/check-google
[Oro application instance URL]/index.php/admin/login/check-google
Note
Please pay attention to the Authorized Redirect URIs, the value from the System > Configuration > Integrations > Google Settings > Google Integration Settings > Redirect URI must be added in Authorized Redirect URIs configuration.
Click Create.
Your Client ID and Client Secret are generated. For security reasons, the Client Secret is displayed only once – immediately after you have created a new OAuth client. You cannot view the Client Secret anywhere in the application once you close this dialog, so make sure you save it somewhere safe to access it later.
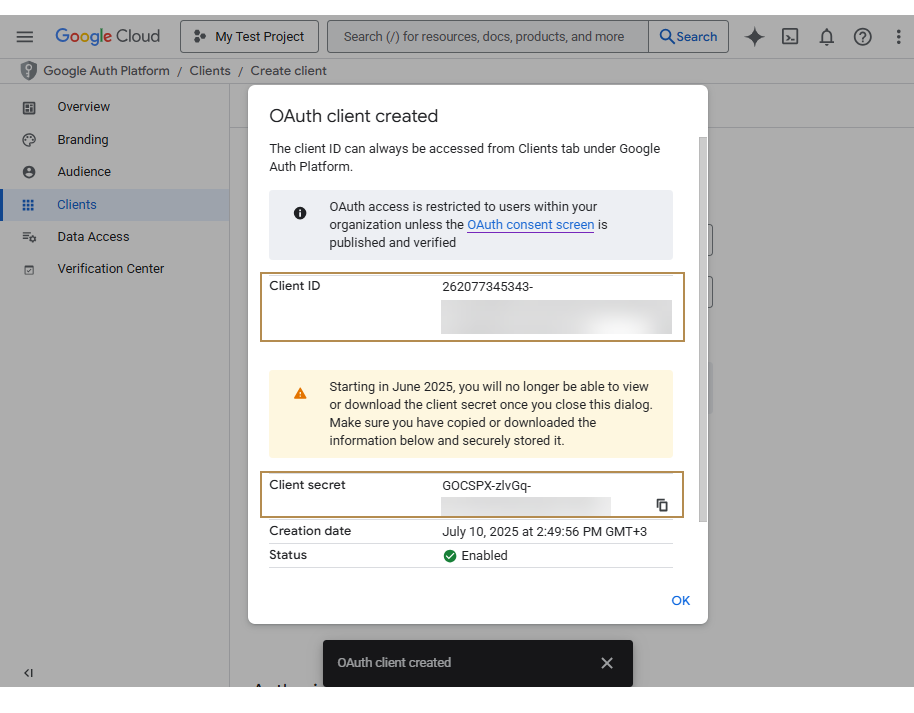
The client ID can always be accessed from the Google Auth Platform > Clients main menu.

Oro Application Side
Configure Google Single Sign-On
To configure the integration with Google Single Sign-On in your Oro application:
Navigate to System > Configuration > Integrations > Google Settings in the main menu.
Make sure that the information in the Google Integration Settings and OAuth 2.0 for Gmail emails sync is filled as described in the Configure Google Integration Settings topic.
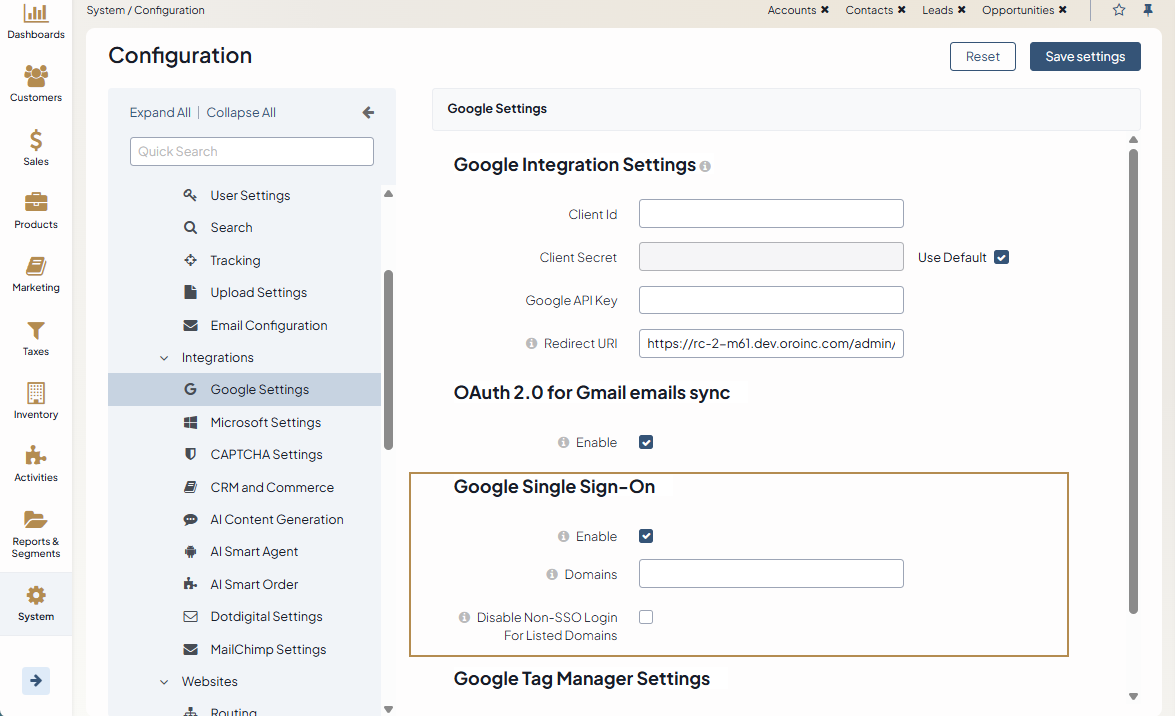
Define the following fields for Google Sign-On:
Enable — Check Enable to activate Google Single Sign-on.
Domains — Enter a comma-separated list of email domains allowed to use Google SSO (e.g., domains associated with your company). It limits Google SSO access to users with email addresses matching these domains. Leave the field empty to allow any domain.
Disable Non-SSO Login for Listed Domains (available as of OroCommerce version 6.1.2) — When enabled, users with email addresses matching the domains specified in the Domains field will be required to sign in using Google SSO only. Username and password login will be restricted for these users.
Log in with Google
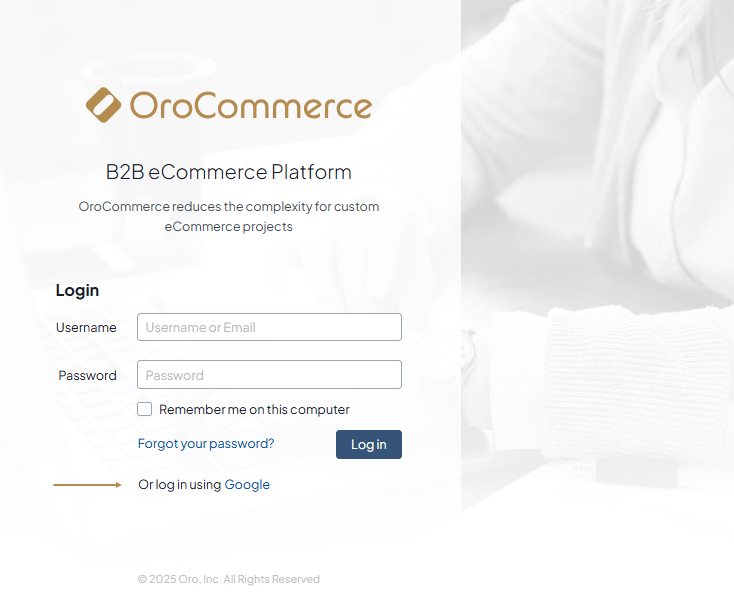
When a user opens the login page of the instance with the enabled single sign-on capability, the Login Using Google link is displayed.
If the user is not logged into their Google account, then clicking the button triggers opening a usual Google login page.
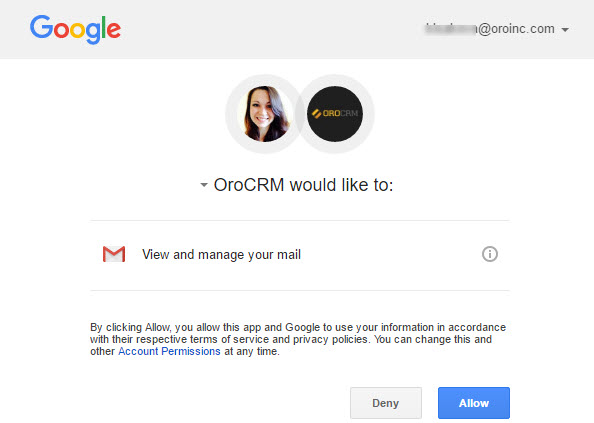
As soon as the user logs into their Google account, they need to accept the policy of using the application.
As soon as the user has logged into their Google account, a request to use the account in order to login to the Oro application is displayed (details defined for the consent screen is used).
Now, a Google-registered user can click the Login using Google button to enter the Oro application.
Note
Note that the email used for the Google account and the primary email of the user in the Oro application must be the same.
Related Topics