Configure Localization Settings per Website
Hint
This section is part of the Localization and Translation concept guide that provides a general understanding of the localization and translation processes in OroCommerce.
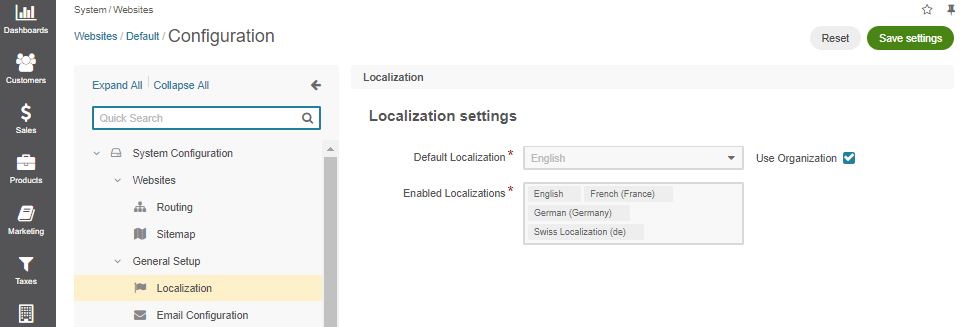
To define the custom localization options for the particular website:
Navigate to System > Websites in the main menu.
For the necessary website, hover over the More Options menu to the right and click to start editing the configuration.
Select System Configuration > General Setup > Localization in the menu to the left.
Note
For faster navigation between the configuration menu sections, use Quick Search.

Clear the Use Organization checkbox to change the default options, and provide new values.
Select one or multiple enabled localizations for the website from the list to support the translation of the storefront UI elements to the target language.
Select the default localization for the storefront of the website.
Click Save to the save the settings.