Configure Email Notification Rules in the Back-Office
To help you keep track of important changes or events, you can configure automatic email notifications.
Notification rules define when to send an email to a recipient. For example, you may want an administrator to receive notifications when a user sends them a request, notify users when a new activity is assigned to them, or inform each time customer details are edited.
Note
See a short demo on how to create notification rules or keep reading the step-by-step guidance below.
Create a Notification Rule
To create a notification rule:
Navigate to System > Emails > Notification Rules in the main menu.
Click Create Notification Rule.
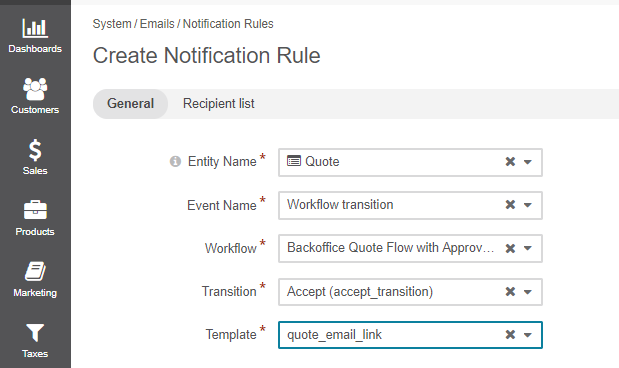
In the General section, define what triggers an email notification and the template used by providing the following details:
Entity Name — Select an entity related to the notification rule that you create.
Important
In the Oro applications, each automatic email notification is generated according to a certain notification template. Therefore, notification rules are bound to email templates, and you cannot create a notification rule for an entity that does not have related email templates. If you do not see the required entity on the list, please create a notification template for it first. For more information on templates, see Email Templates.
Event Name — Select the event that triggers sending of a notification email. You can select one of the following events:
Entity create — An entity record has been created.
Entity remove — An entity record has been removed.
Entity update — An entity record has been edited.
Workflow transition — Available only when the entity selected in Entity Name has related workflows. A workflow transition has been performed.
Template — Select the template for which the rule will be created.

Important
Keep in mind that the ability to view and add email templates from the dropdown list depends on specific roles and permissions defined in the system configuration. For example, with the User permissions, you can view and add the templates created by you exclusively. The Business Unit permissions give the access to the email templates created by any user who belongs to the same business unit as you. For more information about available access levels and permissions, see the Understand Roles and Permissions guide.
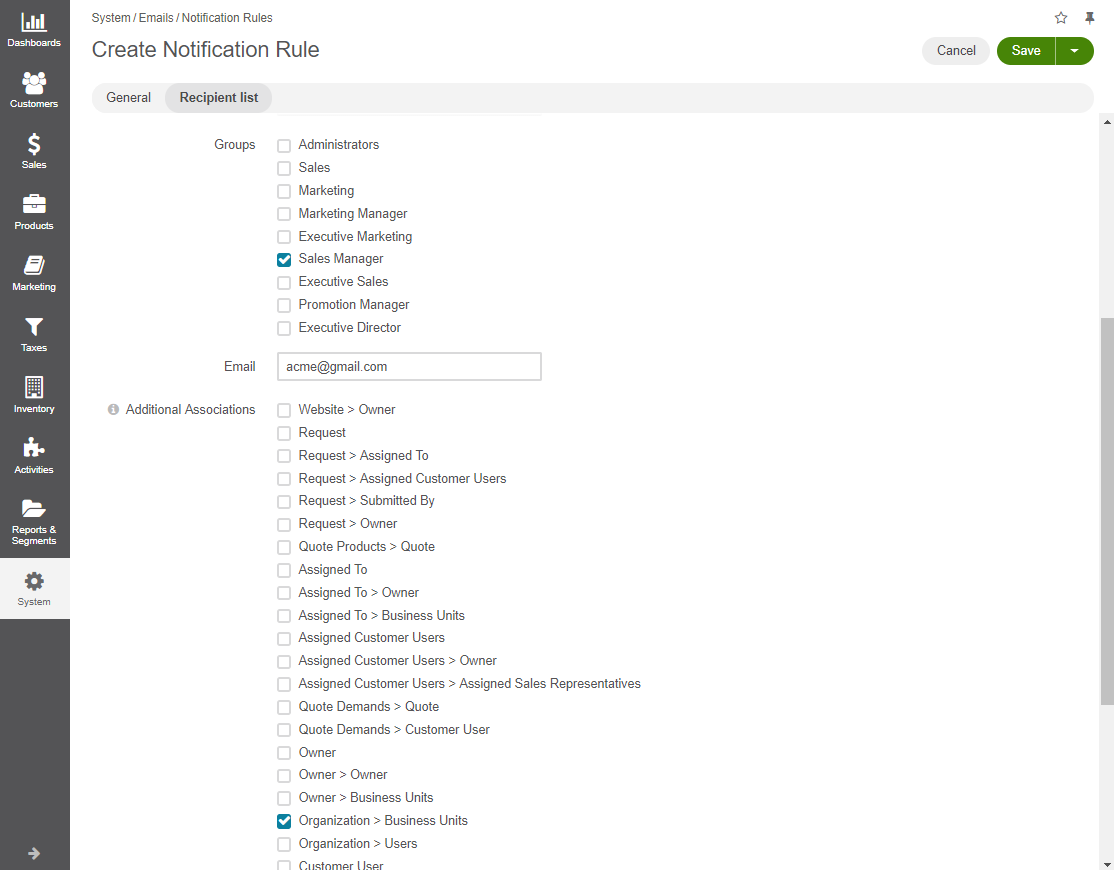
In the Recipient List section, define email notification recipients.
An email notification can be sent to specific users and/or user groups and/or external email address:
Users — Specify users to send notifications to. Start entering a name of the user, and when suggestions appear, click one to select it. Click the x icon to remove a user from recipients.
Groups — Select checkboxes in front of the user groups whose members are to receive the notifications.
Email — Enter the required email address.
Owner — Select this checkbox to send notifications to the owner of the record for which the event takes place.
Hint
The Owner checkbox is available only when the entity selected for Entity Name has the ownership type set to User.
Additional Associations — This is a list of entities with the email field whose records can be linked to records of the entity selected for the Event Name. Select checkboxes in front of the required associations to send notification emails to their addresses.
Example:
You have received a contact request.
Each contact request is associated with ‘Acme, Inc.’ organization and ‘Ltd. ABC’ lead.
The said organization has a business unit, ‘Acme, Inc., West’.
The lead record ‘Ltd. ABC’ can be associated with the contact ‘Elizabeth Hick’ .
In such case, if for Additional Associations you select Organization > Business Units and Lead > Contact, the notification emails will be sent to the ‘Acme, Inc., West’ email address and to the address of ‘Elizabeth Hick’.
Important
At least one recipient must be specified.

Contact Emails — A list of the selected entity fields marked as email contact information.
Click Save and Close.