Translate Product Attribute Options
Hint
This section is part of the Localization and Translation concept guide that provides a general understanding of the localization and translation processes in OroCommerce.
To translate a product attribute option from English into the required language, change the default language first:
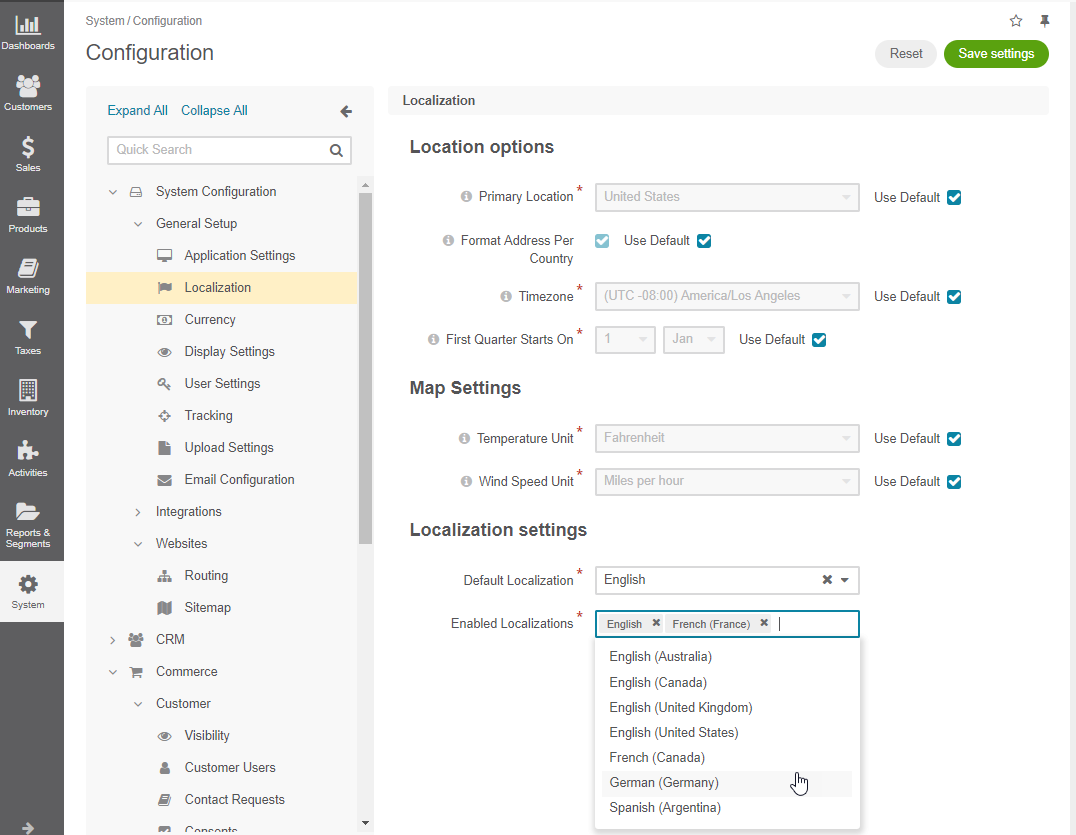
Navigate to System > Configuration > System Configuration > General Setup > Localization in the main menu.
In the Localization Settings, select the required localization from the list to add to Enabled Localizations.

Note
Make sure you have created the corresponding localization in the System > Localization > Localizations menu to make them available in the list.
Click Save Settings.
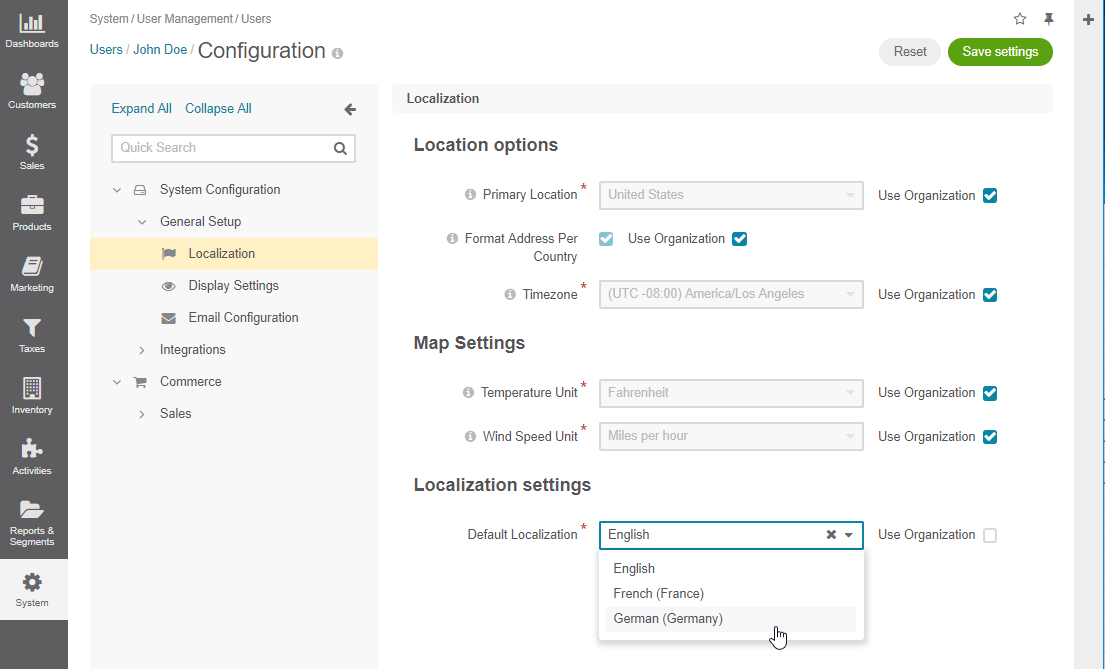
Navigate to your user configuration by clicking on your user name on the top right of the page and clicking My Configuration.

Clear the Use Organization checkbox and set the localization that you have just added (e.g., German) as the default language for your application and for the UI system elements and content displayed in the back-office and in the storefront.

Click Save Settings.
Once the default language is changed, update the label for the required product attributes:
Navigate to Products > Product Attributes in the main menu.

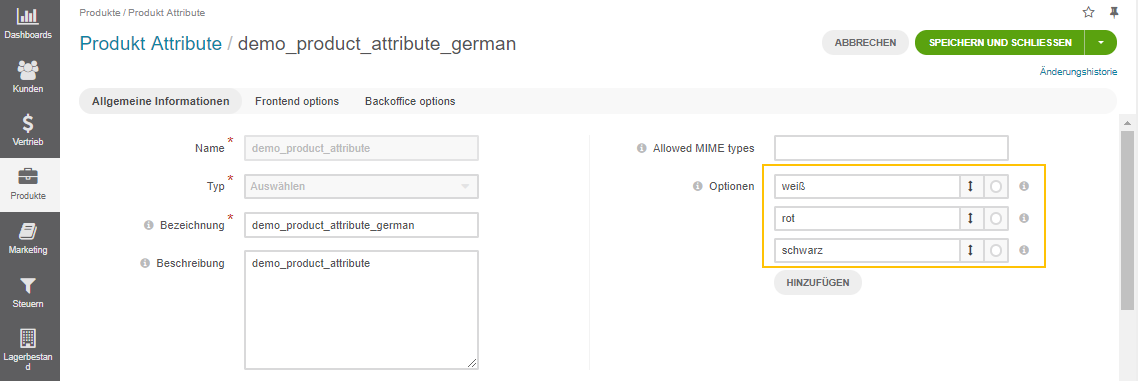
Open the edit page of the required product attribute.

Update the text for the label.

Note
Keep in mind that if an attribute is of a select or multi-select type, you can provide a proper translation to its options directly from the attribute edit page.

Click Save and Close (or its version in your default language).
The product attribute label and its options are updated in the storefront.
Note
To translate any UI system element, label, or a popup message, read the related documentation.