Configure Back-Office Menus
Hint
This section is part of the Storefront and Back-Office Menu Management Concept Guide topic that provides a general understanding of the available storefront and back-office menu types and their management in Oro applications.
In this section, you will learn how to edit and configure the menu for the Oro application back-office.
All the menus for the Oro back-office are located in the main menu under System > Menus.

Each menu type has a different purpose that is described in detail in the Storefront and Back-Office Menu Management Concept Guide.
Permissions Required to Customize Menus
The ability to configure menus globally, per organization, and for personal use is controlled by the two capabilities: Manage Menus and Access system configuration.
By default, only users with Admin role have these capabilities enabled and may customize menus on all configuration levels.
To enable a user to personalise menus for themselves and configure menus for each organization individually, include the Manage Menus capability into the user role.
To enable a user to configure menus globally, for all organizations, websites, and users whose configuration fall back to the global settings, both Manage Menus and Access system configuration capabilities should be enabled for the user role.

Back-Office Menus Configuration
In Oro applications, you can customize the back-office menus look, and the elements they contain globally, per organization, and for your own use.
Customize Back-Office Menus Globally
To customize one of the default back-office menus (e.g., application_menu or usermenu) globally:
Navigate to System > Menus in the main menu.
Click on the menu you would like to edit.
Update the menu contents following the guidelines provided in the Customize a Menu section. The changes apply automatically.
Customize Back-Office Menus for Your Own Use
To customize one of the back-office menus (e.g., application_menu or usermenu) for your own use:
Click on your name at the top right of the page and then click My User to open your profile.
Select Edit Menus from the More Actions list at the top right of the page.
Update the menu contents following the guidelines provided in the Customize a Menu section. The changes apply automatically.
Back-Office Menus Management
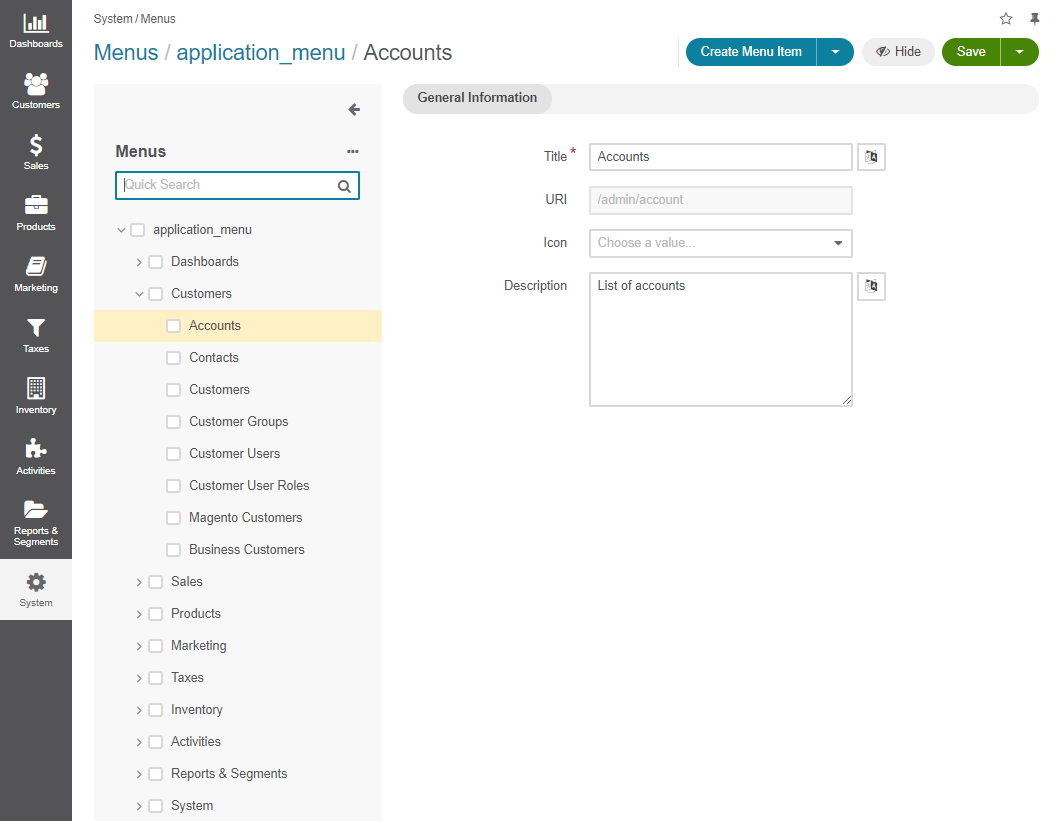
A back-office menu may be multi-level like, for example, a default Oro application back-office main menu. The child menu items are nested under parent menu items (e.g., Accounts, Contacts, Customers, and others are nested under Customers).
Menu items on the same level of hierarchy may be visually separated by a divider that looks like a horizontal line and helps you logically organize menu items.
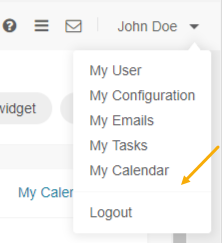
Note
Some menus do not support displaying dividers (on a particular level in the tree, or in general). For example, if you add a divider to the top level of Oro application back-office main menu (application_menu), the divider is not displayed.

Edit a Back-Office Menu
To view and edit menu contents, click on the menu name or on the View icon in the corresponding row of the menu list.

On the page that opens, the menu item tree is shown in the left panel. Center is reserved for the menu item configuration.

Toggle the Menu Tree View
To minimize or maximize the left menu panel, click a double arrow on the top right of the panel.
To expand / collapse all menu items, click the ellipses drop-down menu on the top right of the left panel and click Expand All or Collapse All.
To expand / collapse a parent menu item, click an arrow in front of it.

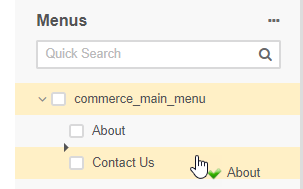
To change the position of an item / divider in a menu, drag and drop it in the left panel. You can change the order of menu items at the same level as well as move an item / divider to the higher or lower level. When you drag-and-drop items, pay attention to the arrow that shows where the item will be placed:
Add a Menu Item
In the left panel, click a menu item which will be parent for the menu item that you create.
Click Create Menu Item on the top right and then Create Menu Item from the dropdown list.
The created menu item will appear as the last one on the list of children of the same parent item. You can move it to the position that you need, as described in the Toggle the Menu Tree View action description.
In the right part of the page, specify the following information:
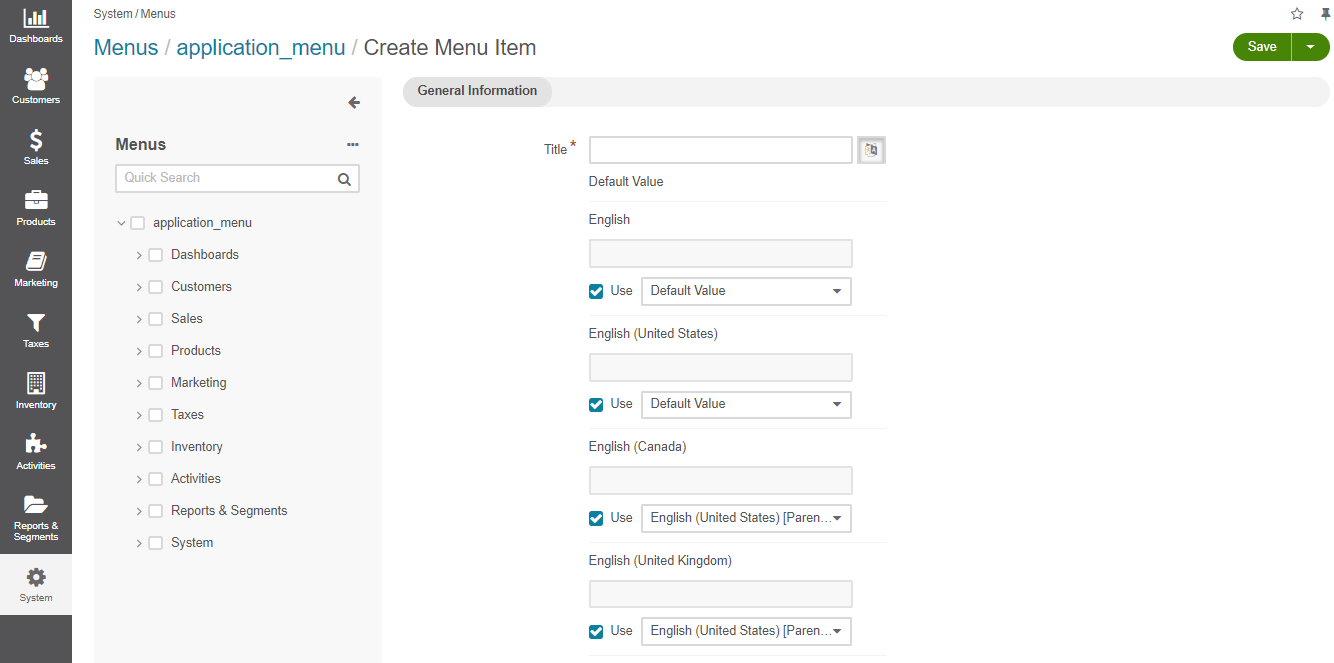
Title—A name for the menu item. This is how this menu item will be represented in the menu.
Click the Translations icon to provide spelling for different languages. Click the Default Language icon to return to the single-language view.
URI—A web address of the page or resource that this menu item opens.
You can specify an absolute URI or one relative to the application URI (as specified in Application Settings in System Configuration).
If this menu item serves as a non-clickable parent that does not link itself to any resource (like Customers in the default main menu), type #.
Icon—From the list, select the icon that will denote the menu item.
Sometimes menus (or menu levels) may not be supposed to display icons. For example, icons added to the first level of the main menu (application_menu) are displayed only when this menu is set to appear on the left.
Description—Type a short but meaningful description of the menu item.
Click the Translations icon to provide spelling for different languages. Click the Default Language icon to return to the single-language view.
Click Save to save your changes. If you wish to start creating another menu item right away, click Save and New on the top right.
Important
You need to reload the page to see the changes.
Add a Divider
In the left panel, click a menu item which will be parent for the menu divider that you create.
Click Create drop-down on the top right and select Create Divider.
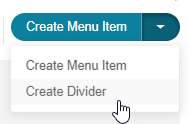
The created divider will appear as the last one on the list of children of the same parent item. You can move it to the position that you need, as described in the Toggle the Menu Tree View action description. Reload the page to see changes.
Note
Some menus (or some menu levels) cannot display dividers. For example, if you add a divider to the first level of the main menu (application_menu), this divider will not be displayed.
Toggle Item Visibility
Hide a Menu Item — To hide the default menu items from the interface, click the necessary menu item in the left panel. Click Hide on the top right. Reload the page to see changes.
Important
If a menu that you hide has child items, they will be hidden too.
You cannot hide non-default menu items.
Show a Menu Item — To show a previously hidden menu item, click the necessary menu item in the left panel. Click Show on the top right. Reload the page to see changes.
Note
If a menu item that you want to show has a parent, it will become visible too.
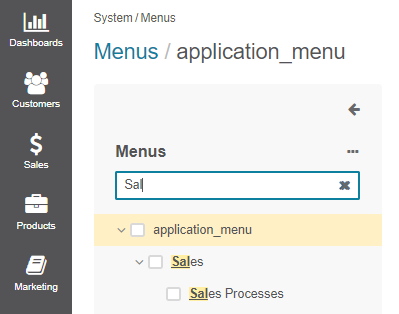
Find a Menu Item — To quickly find a menu item, enter its name into the search field and click the
Search icon, or press Enter.
Delete a Menu Item / Divider — To delete a menu item or a divider, click the necessary item in the left panel. Click Delete on the top right. In the Delete Confirmation dialog box, click Yes, Delete. Reload the page to see changes.
Important
You cannot delete default menu items.
When you delete a menu item that has child items, they will not be deleted but moved to the parent of the menu item that you delete.
Reset a Menu — To reset any customization changes and roll back to the menu that is provided out-of-the-box in the Oro application, click a menu name in the left panel. Click Reset on the top right. In the Reset Confirmation dialog box, click Yes, Reset. Reload the page to see changes.
