Important
You are browsing the documentation for version 4.2 of OroCommerce, OroCRM and OroPlatform, which is no longer maintained. Read the latest LTS version of the Oro documentation to get up-to-date information.
See our Release Process documentation for more information on the currently supported and upcoming releases.
Configure Integration with CyberSource Payment Service
Hint
This section is part of the Payment Configuration topic that provides the general understanding of the payment concept in OroCommerce.
Hint
The feature requires extension, so visit Oro Extensions Store to download the CyberSource extension and then use the composer to install the extension to your application.
CyberSource provides a secure online payment solution that enables global payment processing. The CyberSource gateway accepts all mainstream credit cards, debit cards, and other payment types.
Integration Prerequisites
To start using CyberSource with OroCommerce application, make sure you have:
Registered and created a merchant profile with CyberSource.
Enabled the card types that you want to use for payment transactions.
Configured each card type.
Enabled your profile.
Configure Integration Settings in the Back-Office
To configure the integration between CyberSource and OroCommerce, follow the steps outlined below:
Navigate to System > Integrations > Manage Integrations in the main menu of the OroCommerce back-office.
Click Create Integration on the top right.
Provide the following information in the form:
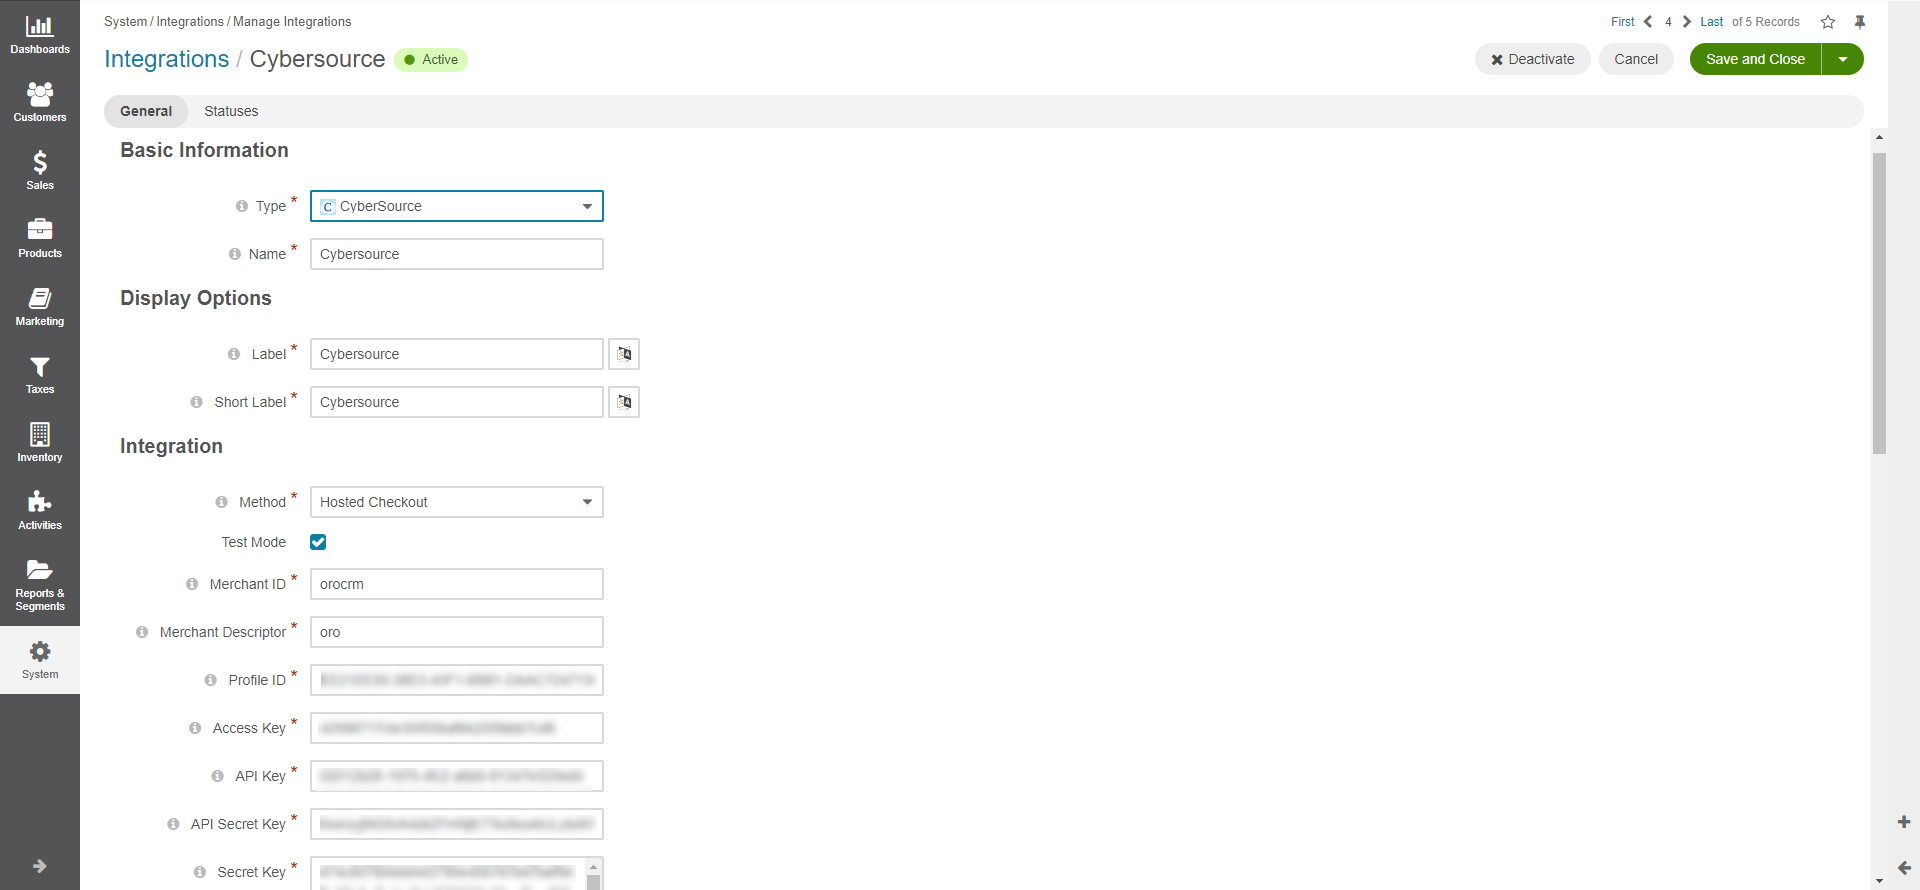
Type - Select CyberSource from the drop-down list.
Name - Provide the payment method name that is shown as an option for payment configuration in the OroCommerce back-office.
Label - The payment method name/label displayed as a payment option for the buyer in the OroCommerce storefront during the checkout. To translate the label into other languages, click on the icon next to the field.
Short label - The payment method name/label that is shown in the order details in the OroCommerce back-office and storefront after the order is submitted. To translate the label into other languages, click on the icon next to the field.
Method - Select integration method from the list:
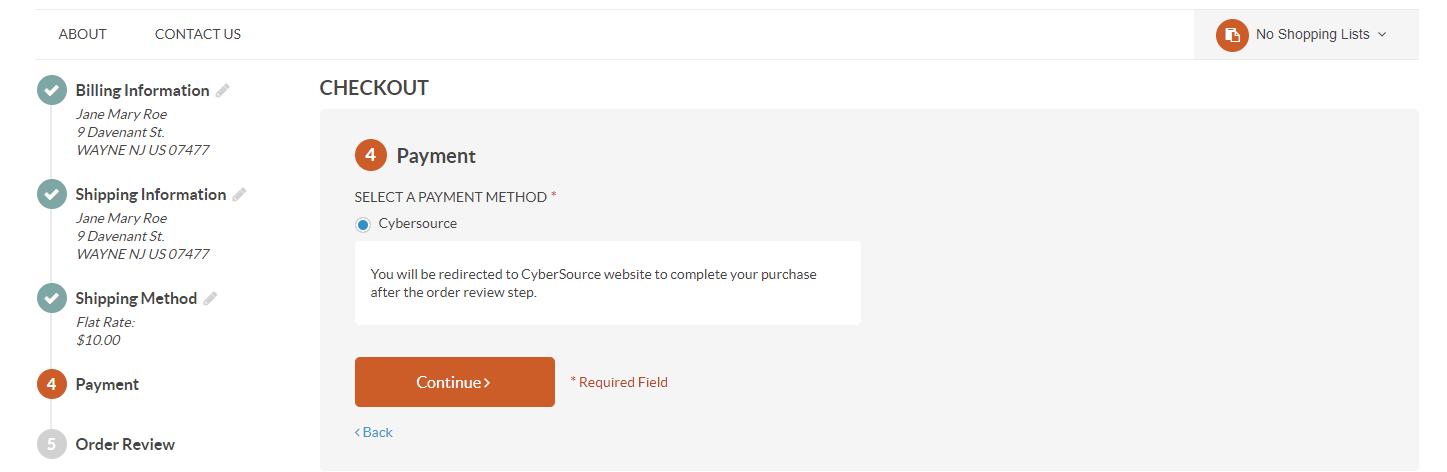
Hosted Checkout - When a customer in the storefront creates an order, they are redirected to a CyberSource payment form page to provide card authorization details. Any payment type supported by CyberSource is allowed.
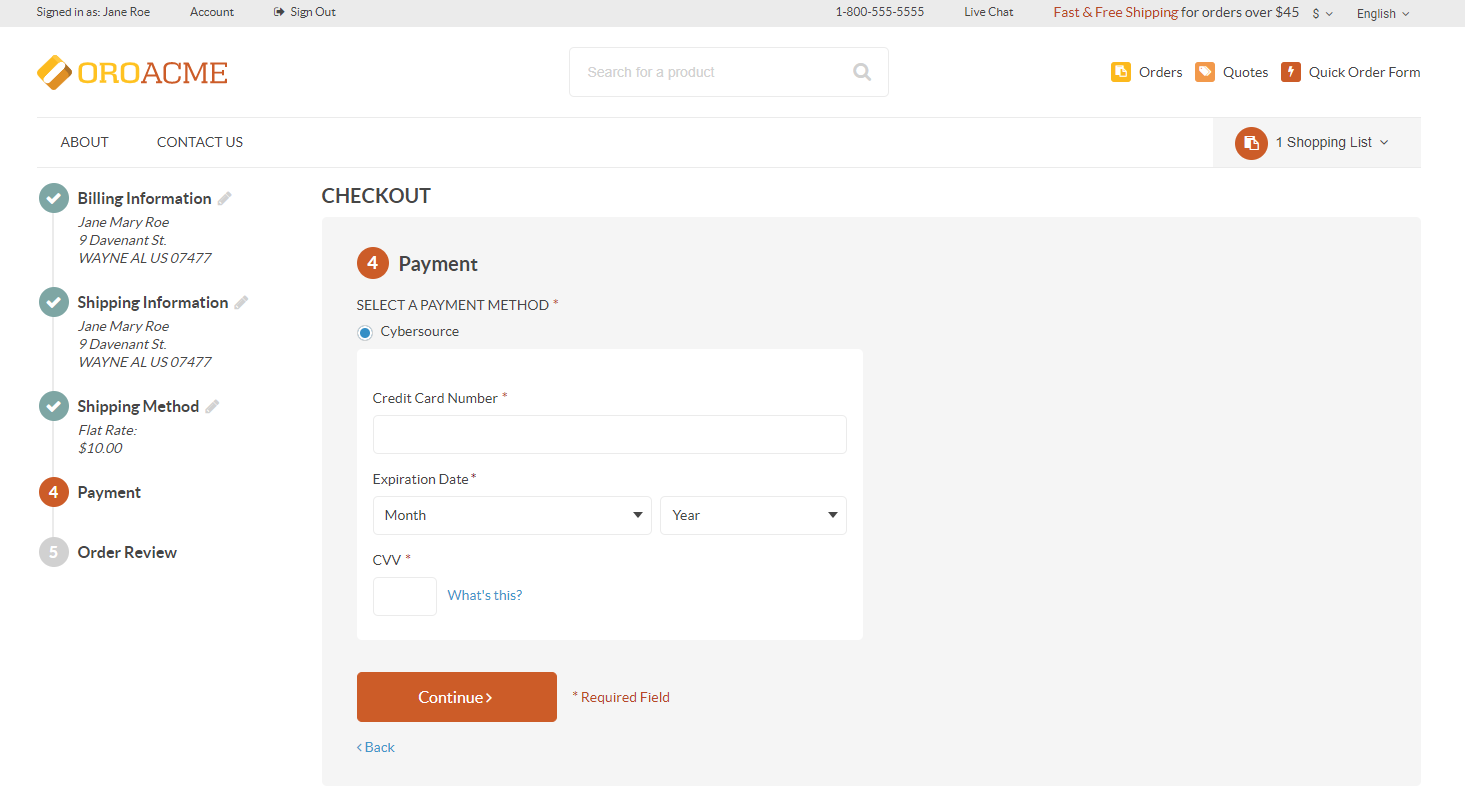
Checkout API - Payment is processed via an API call. Only debit and credit cards are allowed.
Test Mode — Select this check box to use CyberSource in the test mode that enables you to use the connection to the gateway without sending transaction information for processing.
Merchant ID - A CyberSource Merchant ID, also referred to as Organization ID, is a unique value within CyberSource that you define during account registration.
Merchant Descriptor - Enables you to submit merchant descriptor value displayed on a cardholder’s statement.
Profile ID - Identifies the profile to use with each transaction
Assess Key - Secure Sockets Layer (SSL) authentication with Secure Acceptance.
API Key - An identifier that helps authenticate your account. You must use separate keys for the test and production environments.
API Secret Key - A pre-shared key used to cipher payment information. You must use separate keys for the test and production environments.
Secret Key - Signs the transaction data and is required for each transaction.
Default Owner - A user who is responsible for this integration and manages it.
Click Save and Close.
Important
Once the integration with CyberSource is created, the next step is to set up a payment rule that enables CyberSource payment methods for all or some customer orders in the OroCommerce application.
Process Payments in OroCommerce Back-Office
To view orders and payment details for orders in the OroCommerce back-office, navigate to Sales > Orders in the main menu.
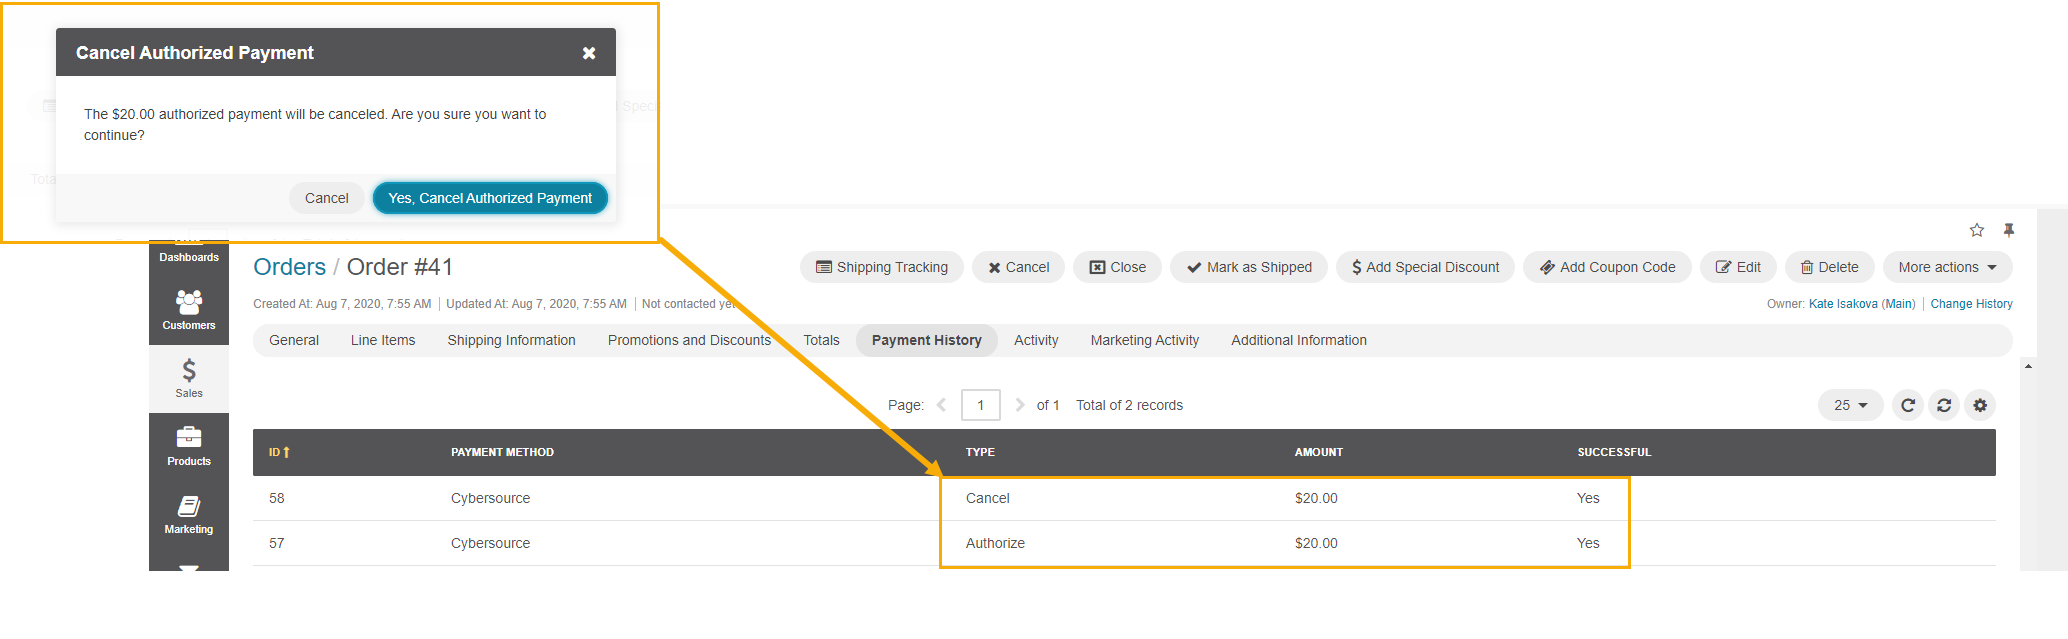
You can either Capture a payment, or Cancel it in Payment History of a particular order.
When you click Capture, the customer is charged the given amount. Payment status changes from Payment Authorized to Paid in Full. Payment history will show two transactions for this order, Authorize and Capture

When you click Cancel, the payment status changes to Payment Canceled. Payment history will show two transactions for this order, Authorize and Cancel