Important
You are browsing the documentation for version 4.2 of OroCommerce, OroCRM and OroPlatform, which is no longer maintained. Read version 5.1 (the latest LTS version) of the Oro documentation to get up-to-date information.
See our Release Process documentation for more information on the currently supported and upcoming releases.
Configure Global Routing Settings
Global routing configuration includes the following information:
Global website URL when reached using secure (https) and insecure (http) connection
Options that impact the way metadata for the search engine is generated
Meaningful URL support (e.g. /product/view/4 vs /500-watt-work-light)
Note
The website routing settings can be configured globally, per organization, and per website.
To change the default global routing settings:
Navigate to System > Configuration in the main menu.
Select System Configuration > Websites > Routing in the menu to the left.
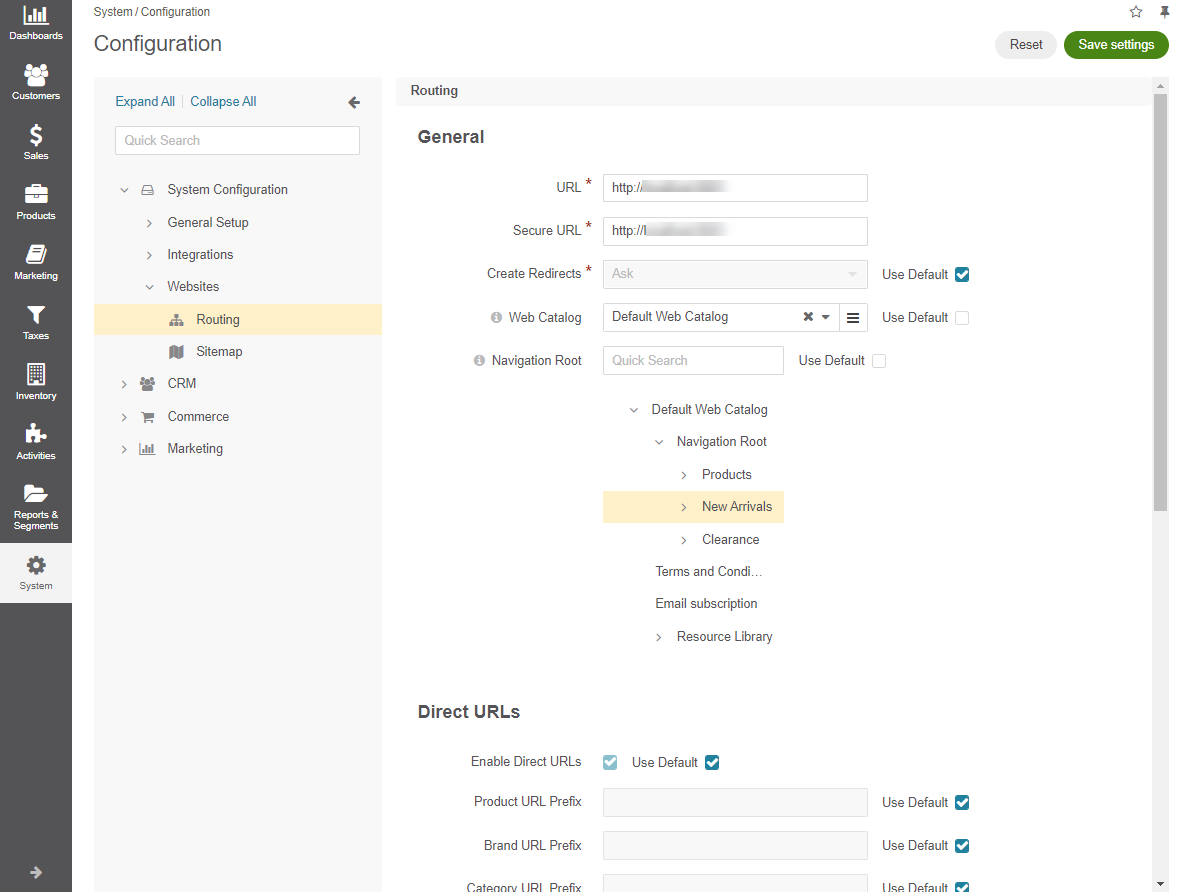
In the General section, define the following options:
URL - Internal links and canonical URLs (meta keywords) on the OroCommerce storefront pages may contain this value as the website base URL. This option value is used in internal links when a customer uses insecure (HTTP) connection. In the canonical links, it is used when the Canonical URL Security Type is set to Secure.
Secure URL - Internal links and canonical URLs (meta keywords) on the OroCommerce storefront pages may contain this value as the website base URL. This option value is used in internal links when a customer uses secure (HTTPS) connection. In the canonical links, it is used when the Canonical URL Security Type is set to Insecure.
Create Redirects - this option defines a strategy for creating redirects when the URL building rules change. Supported options: Ask, Never, Always.
When Ask is selected, OroCommerce prompts to confirm redirect creation on every change.
When Never is selected, OroCommerce does not create any redirects.
When Always is selected, the redirects are created by default.
Web Catalog - when a Web Catalog is selected, it populates the main menu and sub-menus on the OroCommerce Storefront. If there is no Web Catalog in OroCommerce, the Master Catalog structure is mimicked.
Once you decide on the Web Catalog, click Save Settings, and the detailed content tree of the selected web catalog appears under the Navigation Root field.
Navigation Root - select the root content node to be displayed in the OroCommerce storefront. Keep in mind that only the sub-menu nodes that belong to the selected parent node will be visible in the storefront.

In the Direct URLs section, configure the following settings:
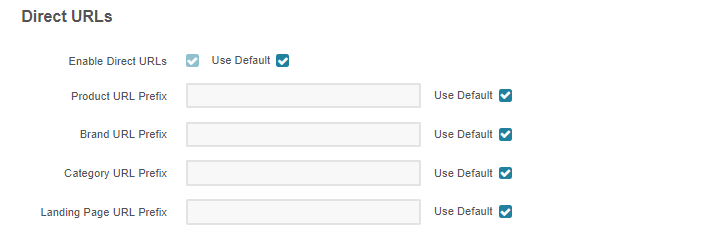
Enable Direct URLs - when enabled, the page URL is built using the page title (e.g., /500-watt-work-light). When disabled, the system path to the item and its ID is used (e.g., /product/view/4).
Product URL Prefix - the prefix that is appended to the product slug in the URL.
Brand URL Prefix - the prefix that is appended to the product brand slug in the URL.
Category URL Prefix - the prefix that is appended to the category slug in the URL.
Landing Page URL Prefix - The prefix that is appended to the landing page slug in the URL.
In the Canonical URLs section, define the following options:
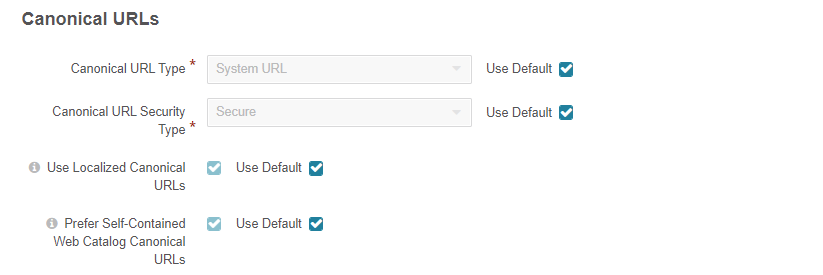
Canonical URL Type - this option defines whether the System URL or Direct URL should be used as a canonical link in the meta keywords in the page source code.
When System URL is selected, the page URL is built using the system path to the item and its ID (e.g. /product/view/4).
When Direct URL is selected, the page URL is built using the page title (e.g. /500-watt-work-light).
Note
Canonical link is used to help search engines identify the unique content that should be indexed.
Canonical URL Security Type - this option defines which value should be used as a website base URL in the canonical link in the page meta keywords. Supported options: Insecure and Secure.
When Insecure is selected, the website base URL in the canonical link matches the URL value.
When Secure is selected, the Secure URL value is used instead.
Use Localized Canonical URLs - When this option is enabled, the system generates canonical URLs using the localized version of URLs slugs (if available). Disabled by default. Keep in mind that the option is available starting from OroCommerce v4.2.4. To check which application version you are running, see the system information.
Prefer Self-Contained Web Catalog Canonical URLs - When this option is disabled, the canonical URLs point to the direct URLs of the underlying content types, if they are available. This option is enabled by default.
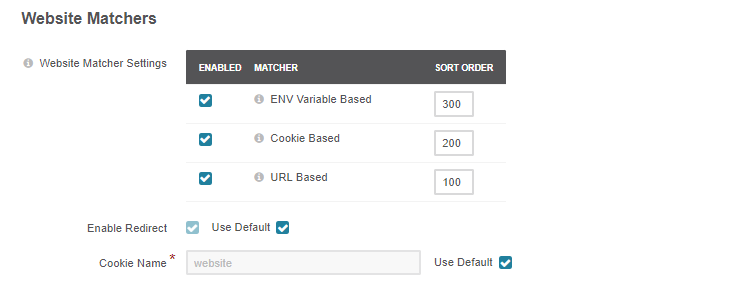
In Website Matchers, configure the following parameters to identify the visitors of your website through various tracking options:
Note
The Website Matchers feature is only available in the Enterprise edition.
Website Matchers - with this option, you can define the way OroCommerce will identify the website customer uses. It is recommended to select at least one option. Supported options: ENV Variable Based, Cookie Based, URL Based. When more than one option is selected, set the method priority in the sort order column to define the most reliable and trusted one.
Enable Redirect - indicates whether the customer should be automatically redirected to the website that was identified using one of the website matching methods (e.g., user navigated to the us-store.com but their cookies indicate that they are visiting the uk-store.com).
Cookie Name - the name of the cookie that stores information about the current website in the customer’s browser. To track the website, you need to set the related cookie value in the website’s configuration creating an individual parameter specific for the required website.
To customize any of these options:
Clear the Use Default box next to the option.
Select the new option.
Click Save.