Important
You are browsing upcoming documentation for version 7.1 of OroCommerce, scheduled for release in 2027. Read the documentation for the latest LTS version to get up-to-date information.
See our Release Process documentation for more information on the currently supported and upcoming releases.
AWS Cloud Platform
The Amazon Machine Image (AMI) with OroCommerce Community Edition is listed on the Amazon Web Services Marketplace. With its help, you can effortlessly and quickly set up an instance with a working OroCommerce Community Edition application on the Amazon EC2 platform, as described in detail further in this article.
Deploying a single EC2 instance is helpful when reviewing Oro application features or using the out-of-the-box uncustomized application version for low and medium-traffic websites.
Every AMI (Amazon Machine Image) contains an installed Oro Application along with the LEMP stack:
OS |
Oracle Linux 8 |
Web server |
Nginx v.1.23 |
Database |
PostgreSQL 15.1 |
PHP |
PHP-FPM and PHP CLI >=8.4 |
Other tools |
NodeJS v.22 or later, Git v.2.7, Composer v.2.14 |
Prerequisites
Before proceeding, ensure you have created an AWS user account.
Installation Steps
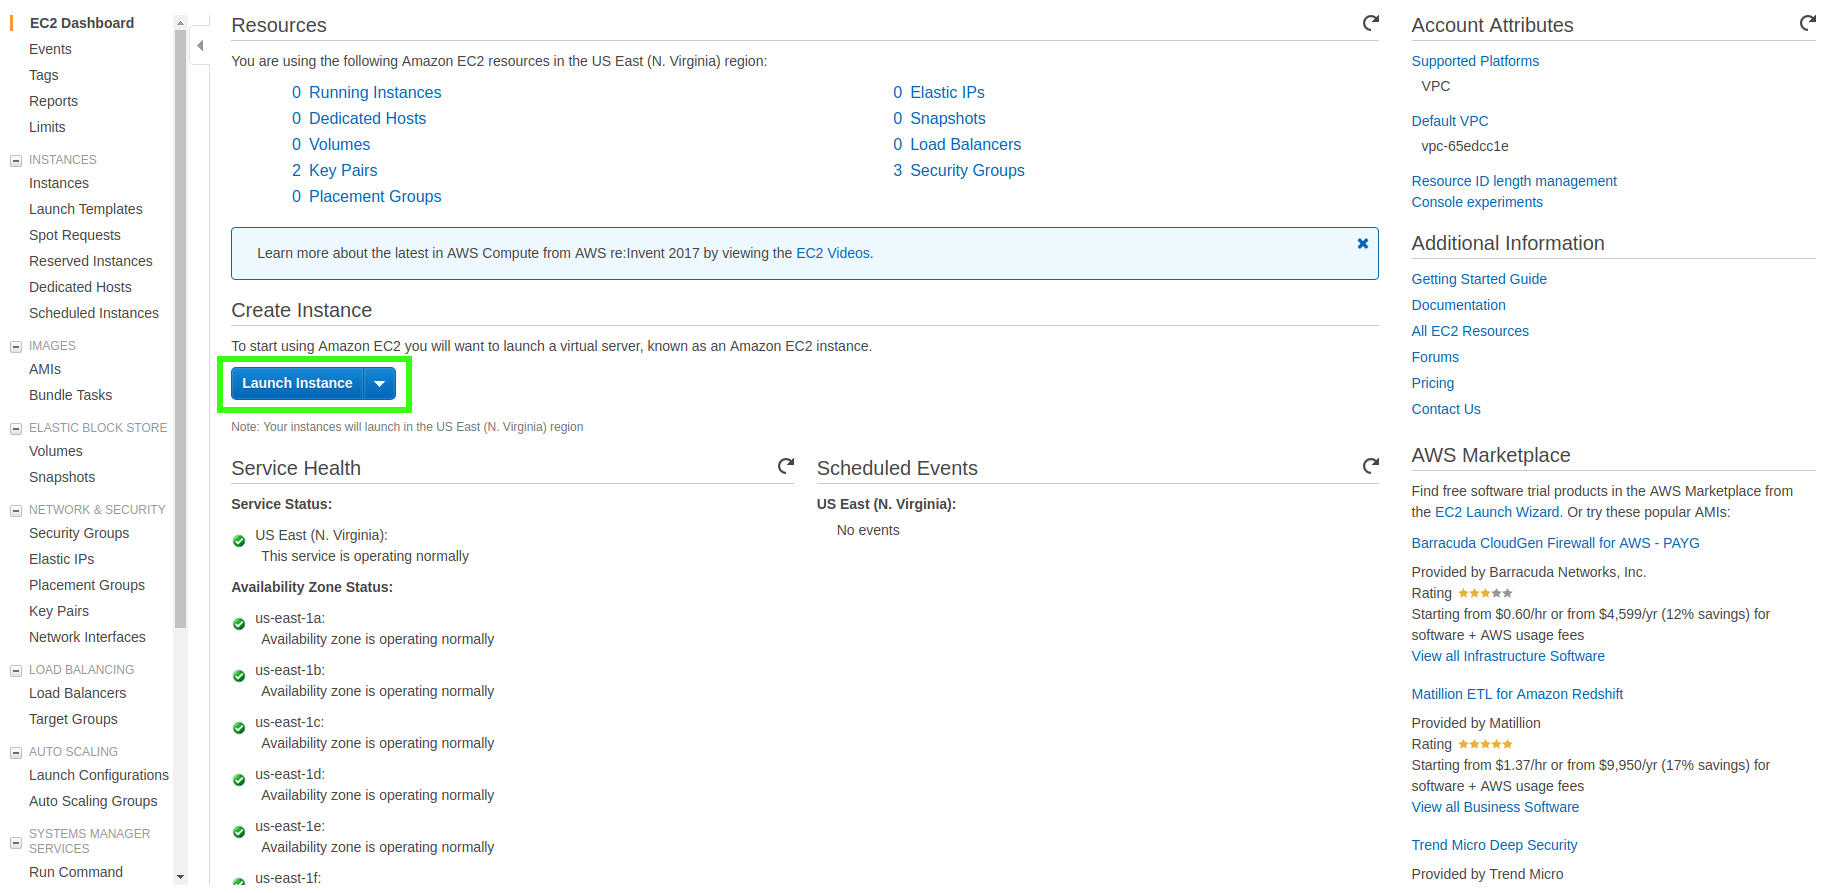
Sign in to the AWS Management Console.
Open the EC2 Dashboard page (the item Services -> EC2 in the top menu). The EC2 Dashboard enables you to observe and control all information related to your AWS EC2 instances.
Click Launch Instance to start the first step of the multi-step EC2 instance launching wizard.
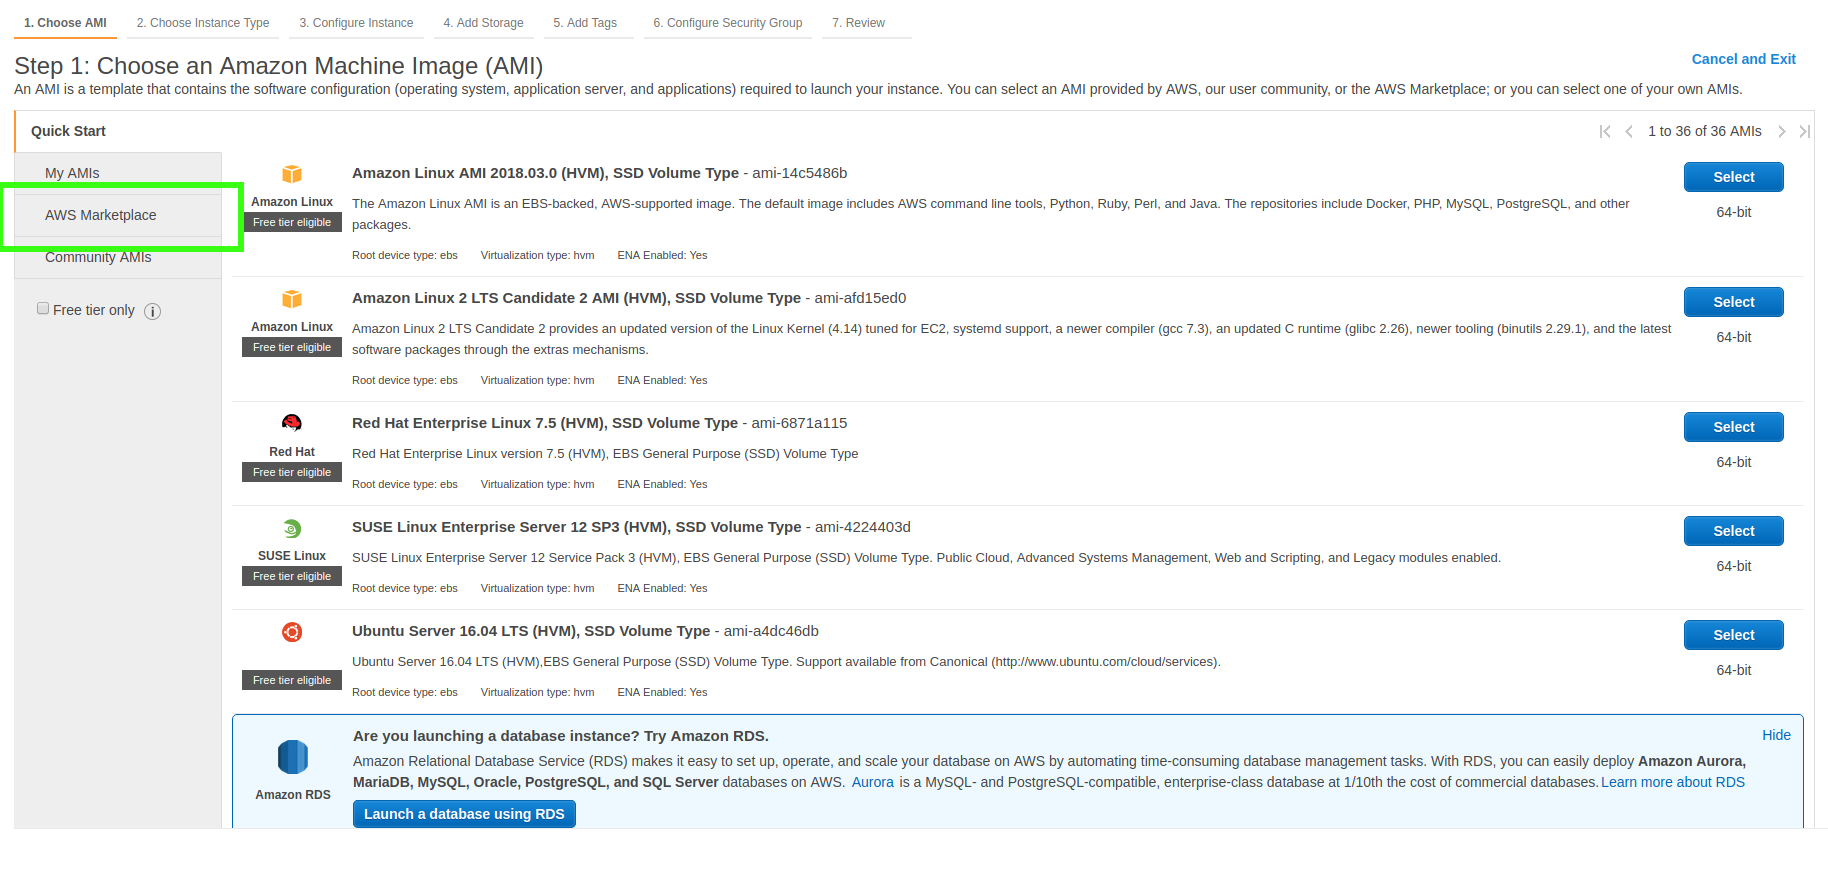
To select the source for the AMI to run on the EC2 instance, click AWS Marketplace in the panel to the left. Select the source for the Amazon Machine Image that will be run on the EC2 instance.
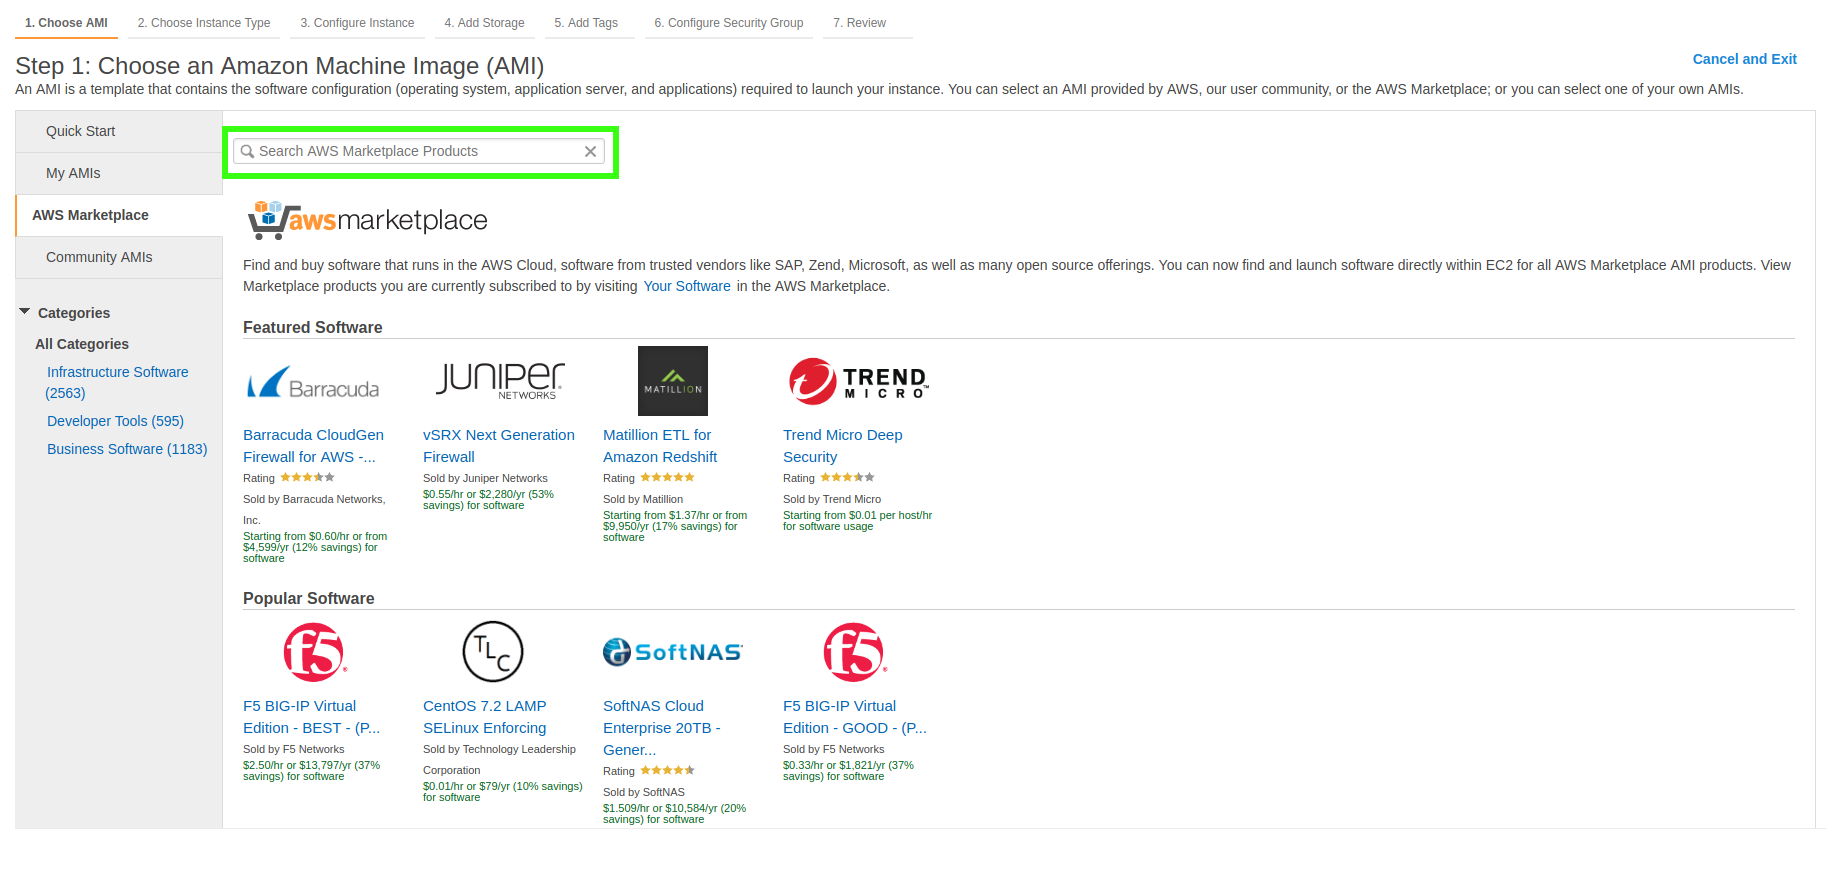
In the Search AWS Marketplace Products field, type in Oro and press Enter to see a list of AMIs with all Oro applications.
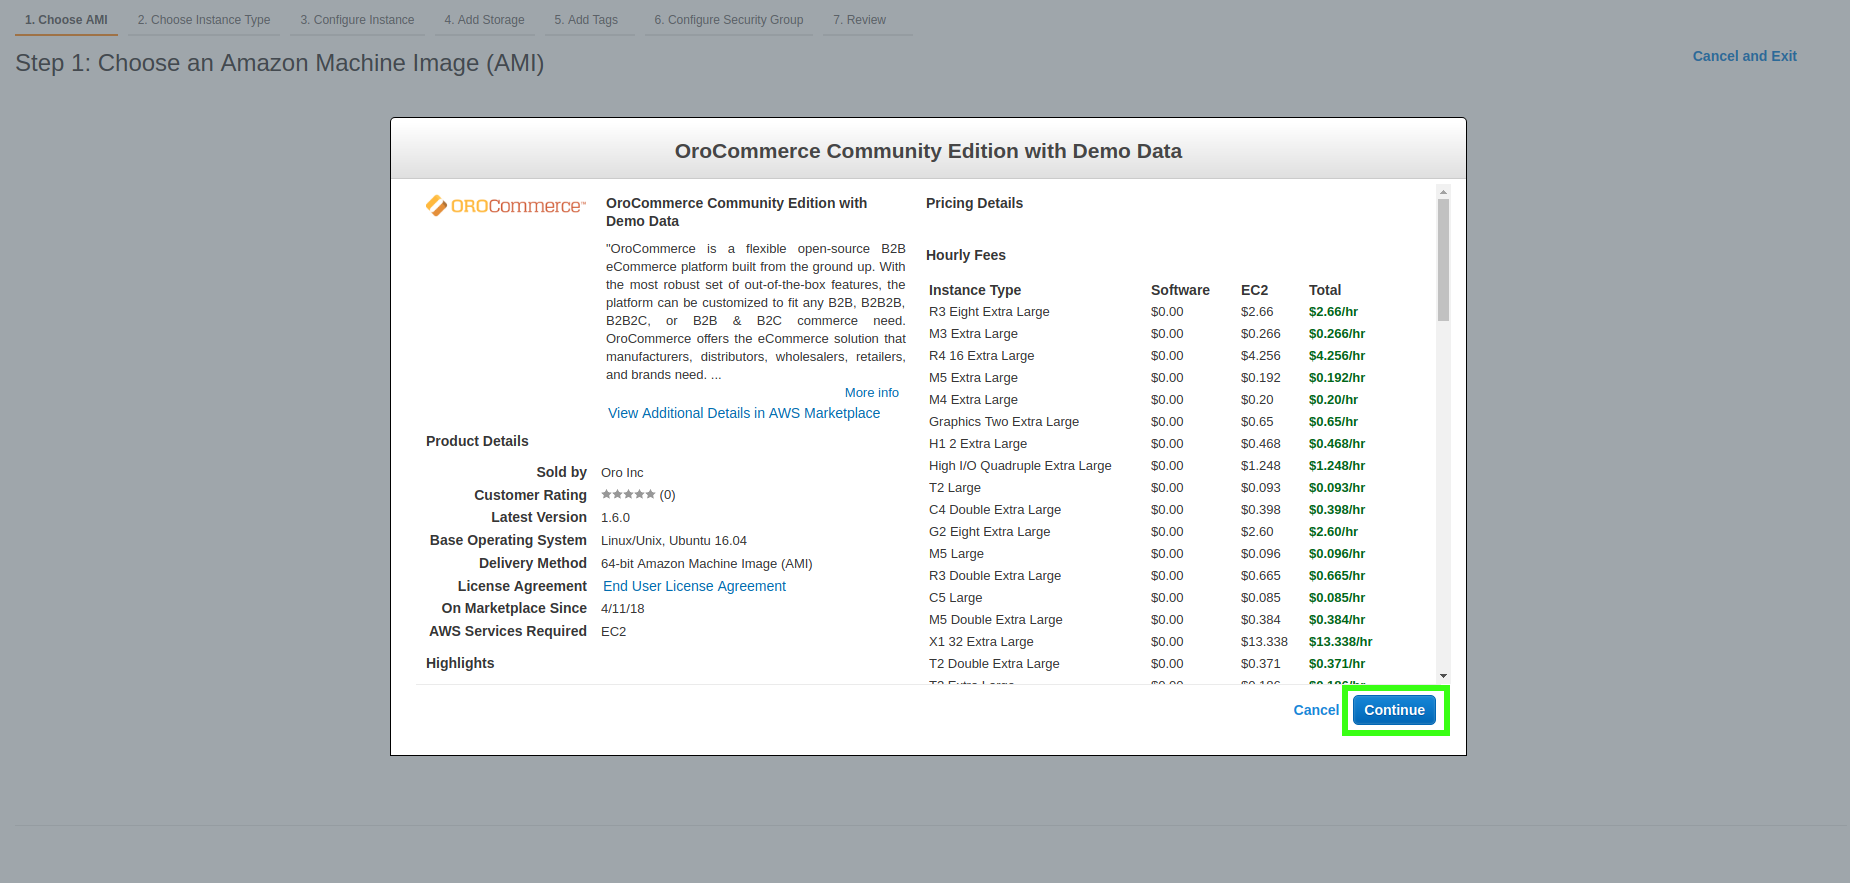
Select the required AMI from the list and click Select (e.g., OroCommerce Community Edition with Demo Data).
You are redirected to the selected AMI’s description page with the application’s information, a list of suitable EC2 instance types, and more.
Click Continue.
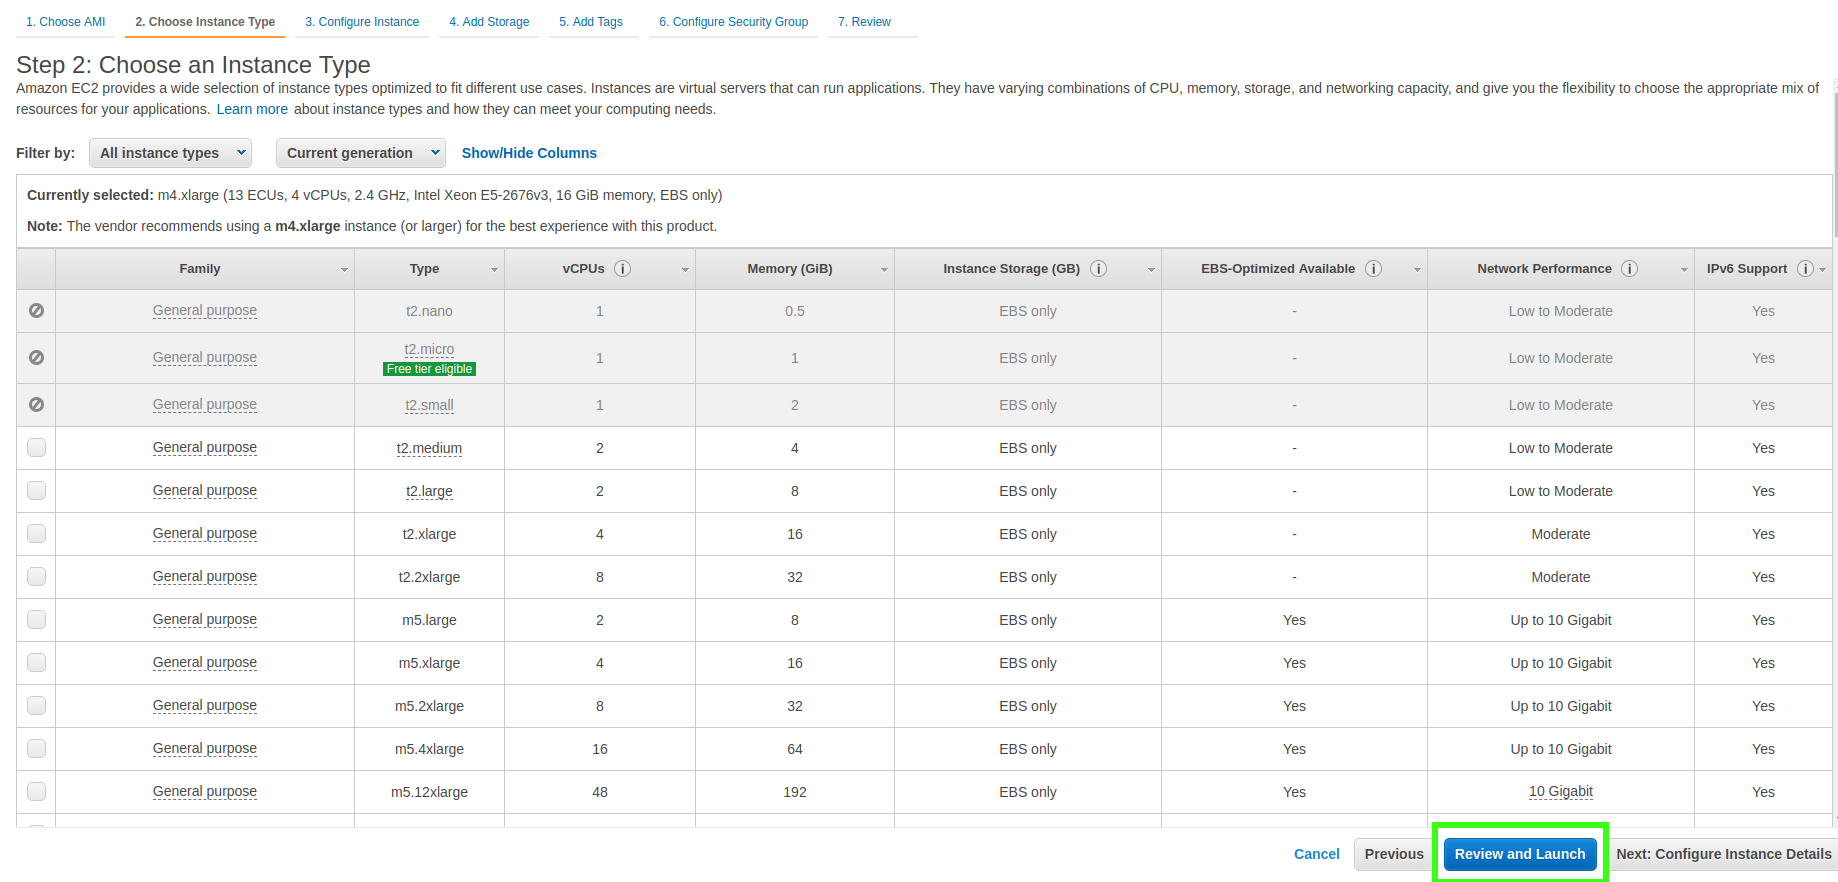
Select the checkbox next to the m4.large instance type and click Review and Launch.
Note
You can choose a different type of the EC2 cloud but make sure that it meets the Oro application System Requirements.
Clicking Review and Launch redirects you to the final installation step. Steps 3 to 6 are skipped as they contain preconfigured default values. Should you need to change the default values, return to Steps 3 to 6.
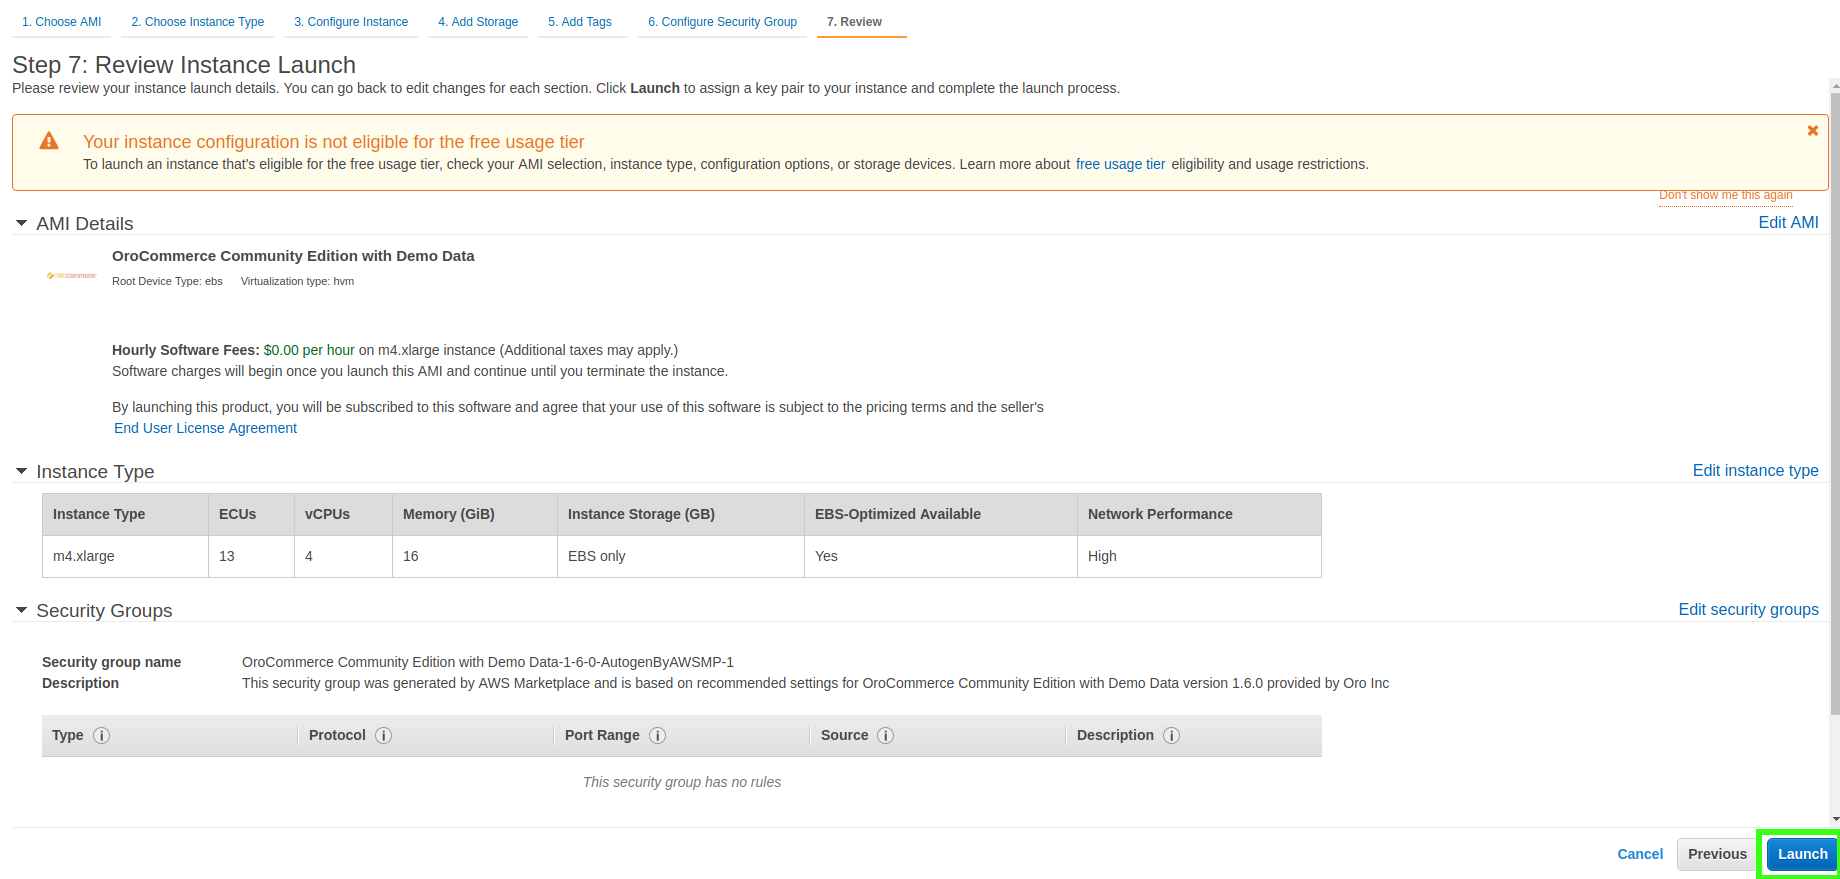
Click Launch on the bottom right. Select an existing public or private key pair for secure SSH access to your instance or create a new key pair.
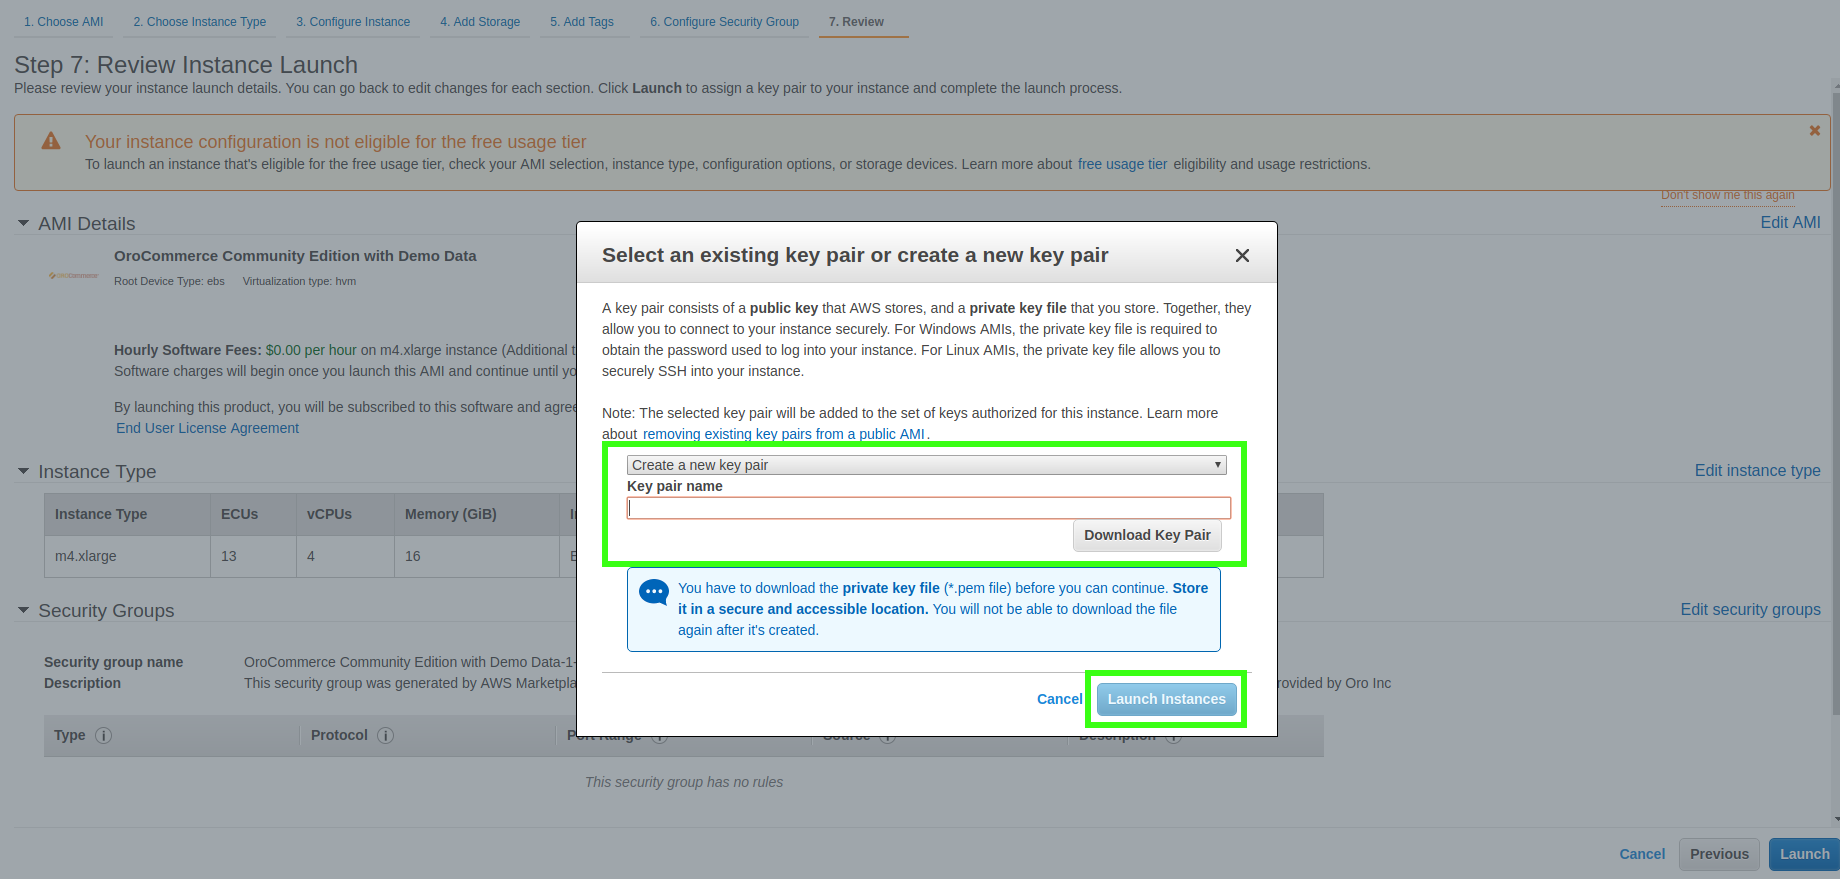
Click Create a new key pair, provide its name in the field, and click Download Key Pair.
Warning
Store the downloaded .pem private key file in a secure and accessible location. If you lose the file, you will not be able to log into your EC2 instance using SSH.
Click Launch Instances to open the Launch Status page where you can access the usage instructions, the software management page and other helpful resources.
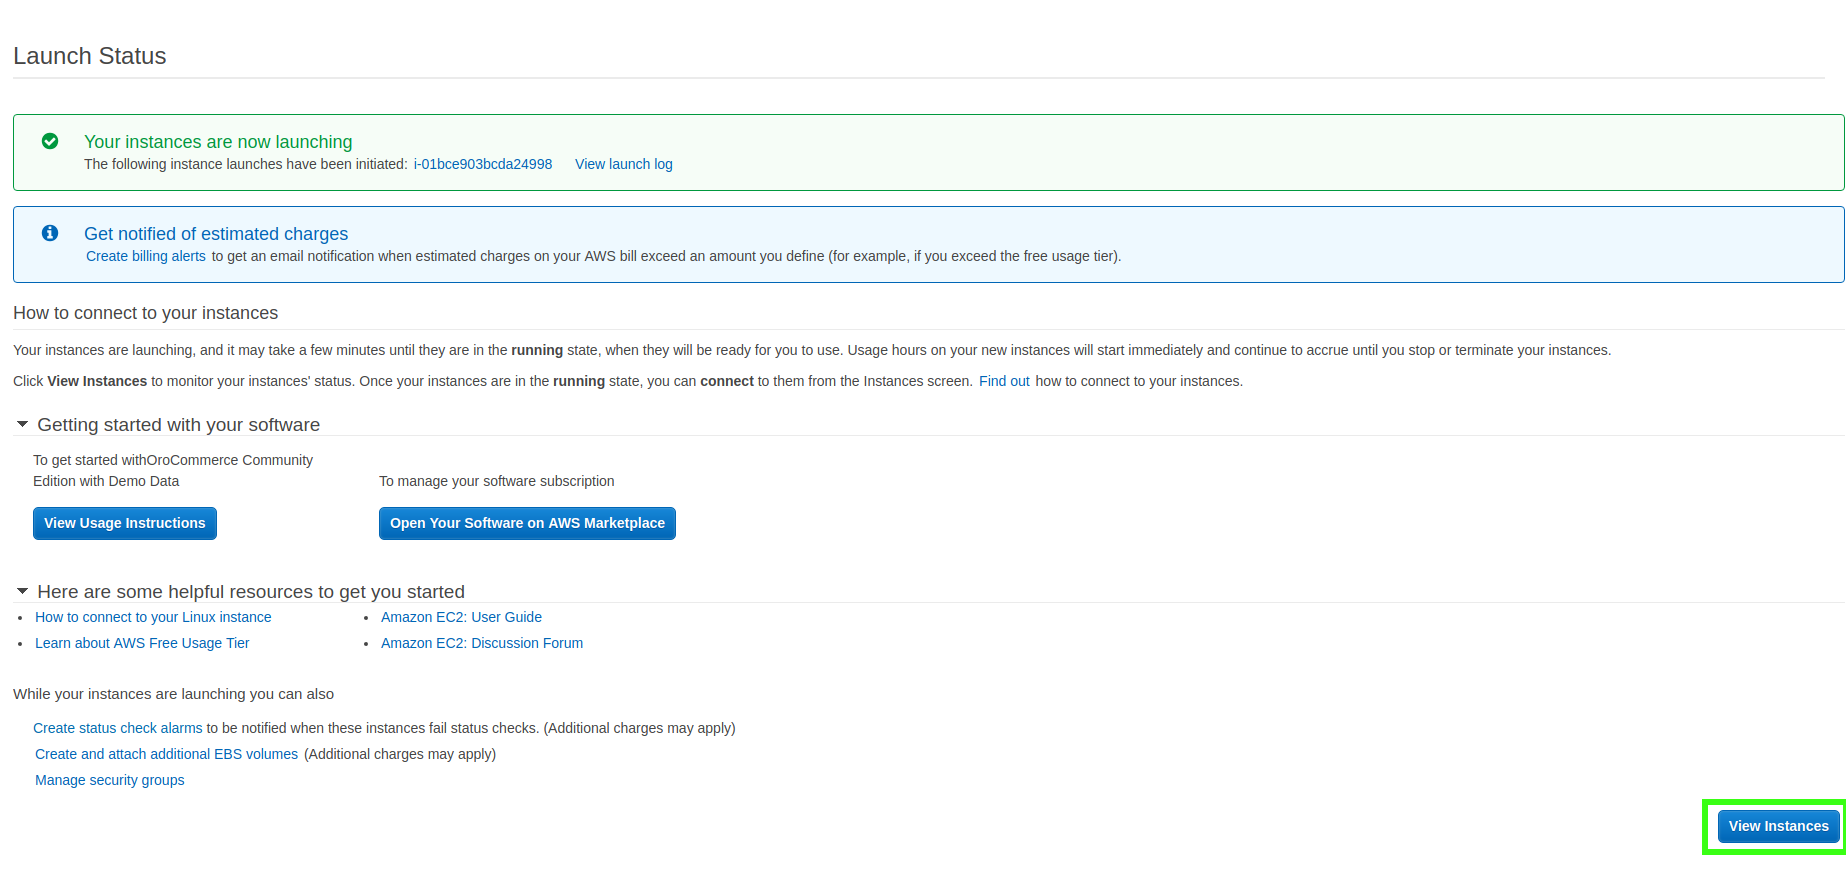
12. Click View Instances on the bottom right to access the Instances page with a list of your launched EC2 instances and the information on their state and status.
Click on the required instance from the list to view its description at the bottom. You can see detailed information about the selected instance below the launched instances list.
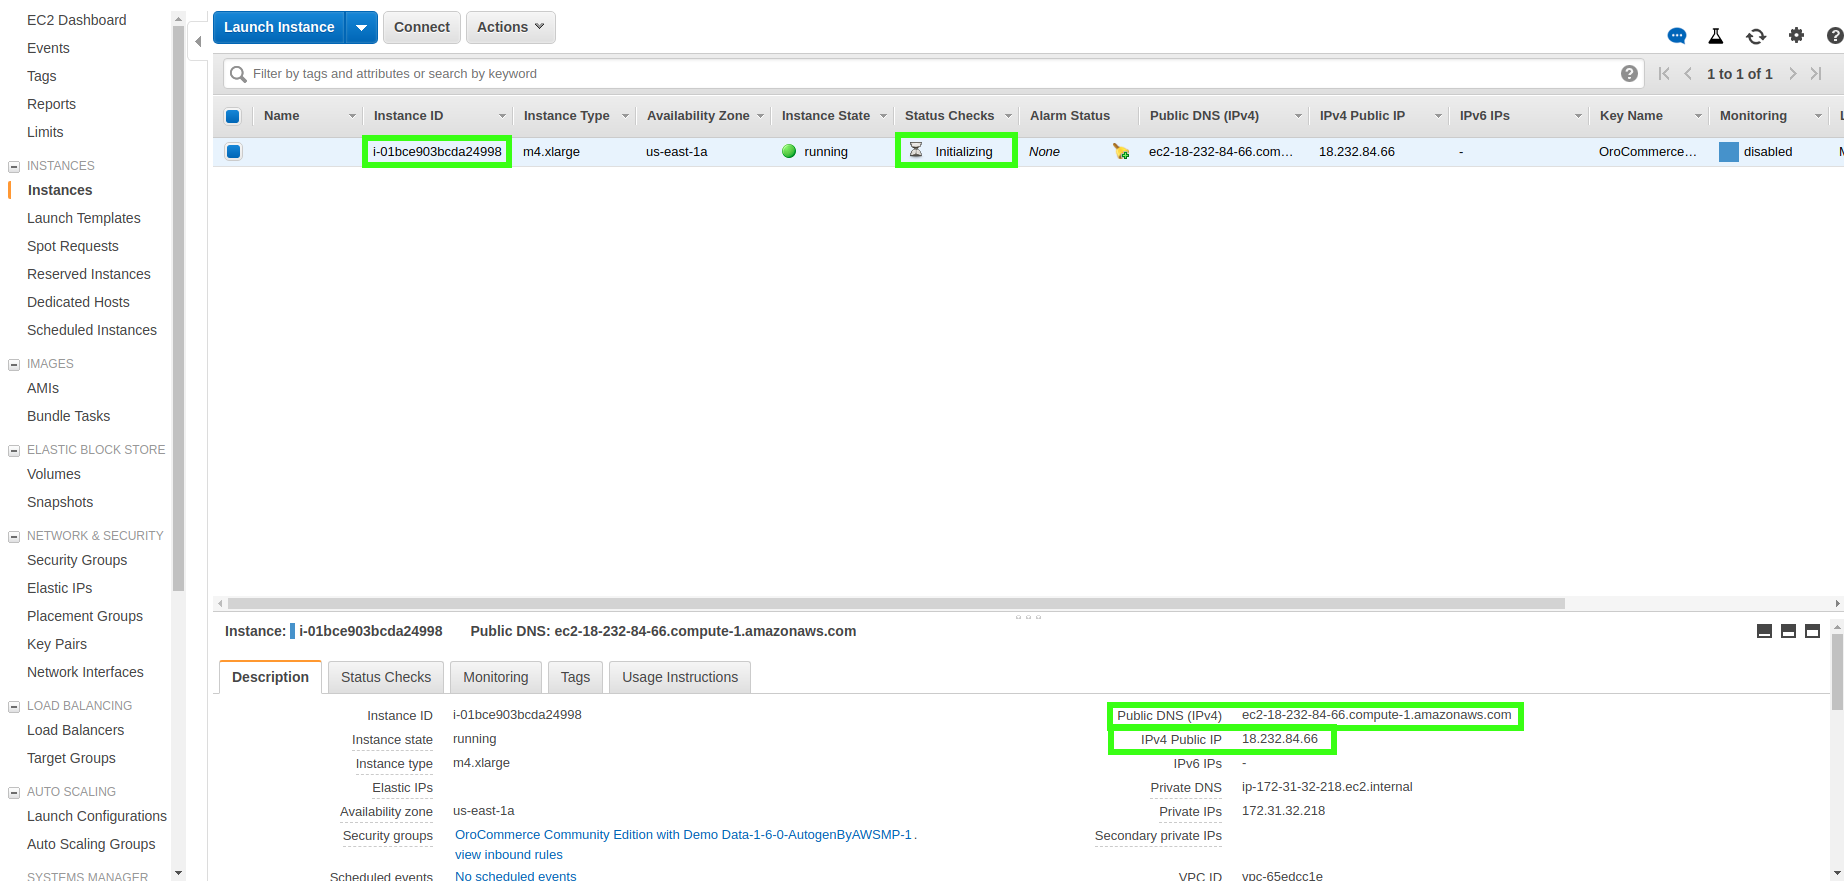
You will require the following information to access your instance:
Instance ID
(e.g., i-02197201a92cd0470)
Public DNS
(e.g., ec2-32-213-221-145.compute-1.amazonaws.com)
IPv4 Public IP
(e.g., 32.103.121.166)
14. The instance setup is finished. Once the 2/2 checks passed status is displayed, you can run the application. For more information, see the Usage section below.
Usage
Access the Oro Application
To access your Oro application storefront, use the http://<PublicDNS>/ or http://<PublicIP>/ URLs. If you have deployed Oro VM with demo data, use the following credentials both as your login and password to access the storefront:
AmandaRCole@example.org - a manager
BrandaJSanborn@example.org - a buyer
To access the back-office of the application, use the URLs http://<PublicDNS>/admin or http://<PublicIP>/admin. If you have deployed Oro VM with demo data, use admin as your login and password as Instance ID to access the back-office.
Note
Optionally, you can set up a DNS service to put your domain name to the IP address, so your OroCommerce site will be accessible on your domain name URL.
Access with SSH
To connect to the EC2 instance using SSH, use the key pair file that you have downloaded previously and the ec2-user username.
Change the directory to the one where the .pem key file is stored.
cd <.pem file storage directory>
Set permissions for the .pem file to 400.
chmod 400 <.pem file name>
Log into the EC2 instance with Oro Application.
ssh -i /path/to/file/filenamewithkeys.pem centos@<Public IP>
or
ssh -i /path/to/file/filenamewithkeys.pem centos@<Public DNS>
For additional information, please see the AWS guide Connecting to Your Linux Instance Using SSH.
Manage the EC2 Instance
With the help of the EC2 back-office, you can:
Create additional instances based on the Oro application AMIs
Connect to the running instances using a Java SSH client directly from your browser
Pause or terminate your EC2 instance
For detailed information about EC2 instances management features, please see the AWS guide Getting Started with Amazon EC2 .
Business Tip
Explore digital transformation examples in manufacturing to learn how digitization improves manufacturing processes, customer experiences, and sales.