Important
You are browsing documentation for version 5.0 of OroCommerce. Support of this version ended in January 2025. Read the documentation for the latest LTS version to get up-to-date information.
See our Release Process documentation for more information on the currently supported and upcoming releases.
Localization and Translation Concept Guide
Oro application supports localization process, enabling you to translate and adapt the content of your web application to a specific country or region. By default, it offers decent translation coverage for the most used languages and live access to all updates from the Oro team and community thanks to the CrowdIn service integration.
In the Oro application, you can provide the translation for all the content elements of your storefront (e.g., product names, descriptions, catalog titles, SEO attributes, and product attribute labels, etc.) and localize everything beyond the text, such as system elements, UI labels, monetary values, time and date layout, measurements, numbers, etc.
General Localization Process
To translate the Oro application’s storefront and back-office to a desired language, make sure to take the following steps in the localization process:
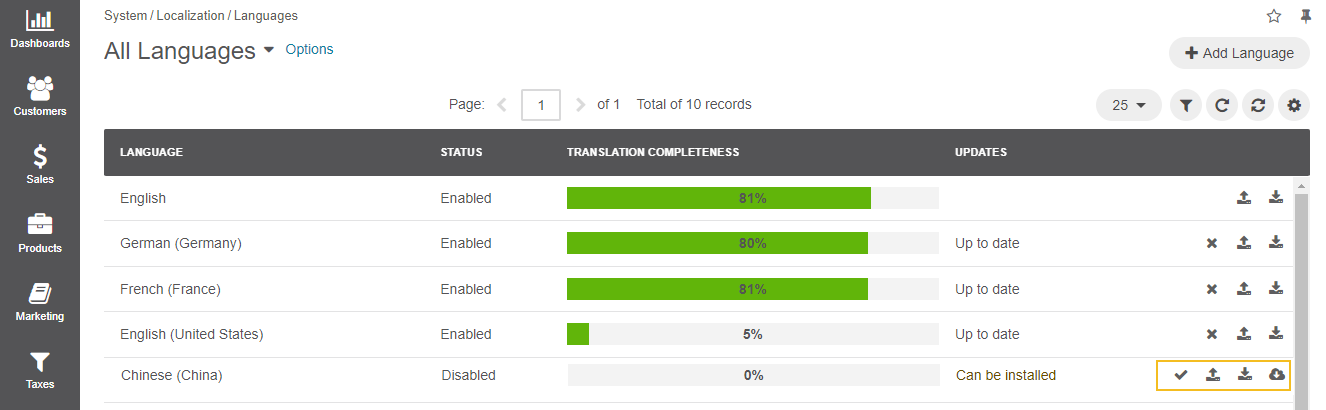
Step 1. In the Languages section, add desired languages to the system, enable them, import translation texts for the language or install translation updates from the CrowdIn project.
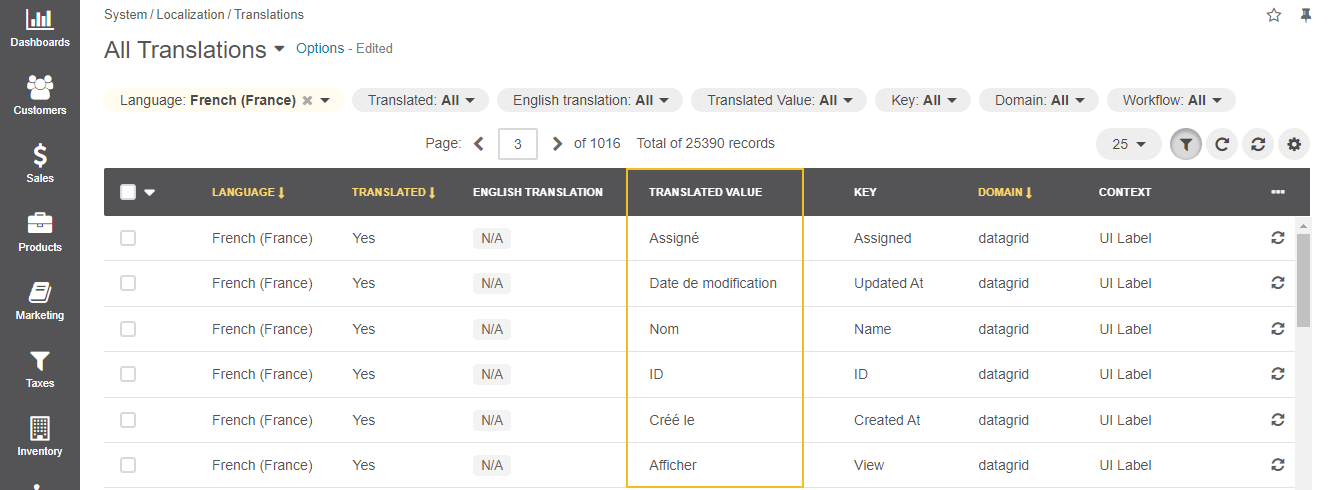
Step 2. In the Translations section, check the existing and imported translations for the UI system elements (e.g., labels, checkboxes, buttons, notifications, etc.). There, you can add, modify, or delete translation texts for these items if necessary.
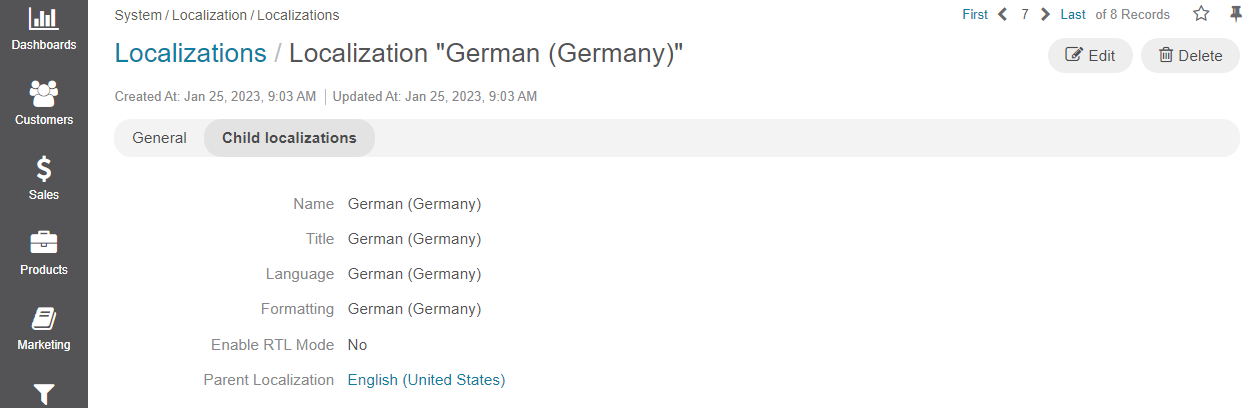
Step 3. In the Localizations section, create a localization that inherits a translation from another language when the translation to the main language of the localization is not available. This helps avoid double efforts when translating to similar and related languages and dialects of the same language.
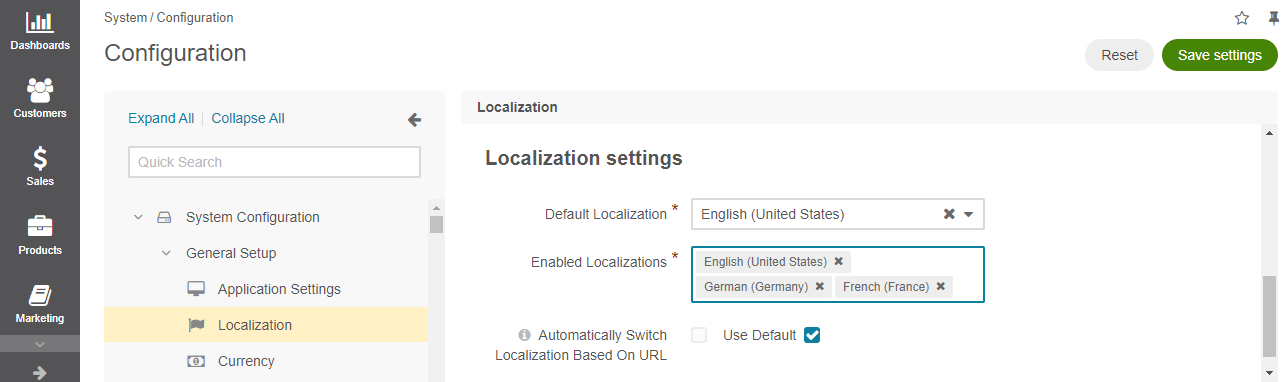
Step 4. Now, enable the necessary localizations to be displayed to the user both in the storefront and the back-office under the Localization Settings section (System Configuration > General Setup > Localization). Here, you can also set the default language of the UI system and content elements, and define the localization options, such as system locale, primary location, address formatting method, system timezone, calendar year settings, temperature and wind speed units on the map.
Step 5. Once the necessary localizations are created and enabled, you can now translate the required content / UI system element / UI messages / consents to the necessary language. For detailed information on each specific translation purpose, see the following sections: