Important
You are browsing documentation for version 5.0 of OroCommerce, supported until January 2025. Read the documentation for version 6.0 (the latest LTS version) to get up-to-date information.
See our Release Process documentation for more information on the currently supported and upcoming releases.
Configure Global Upload Settings
To define the size and formats of the files, reduce the size of images to be uploaded into the website back-office or the storefront, you need to configure the corresponding settings in the system configuration.
To configure the upload settings globally:
Navigate to System > Configuration in the main menu.
Go to System Configuration > General Setup > Upload Settings.
Note
For faster navigation between the configuration menu sections, use Quick Search.
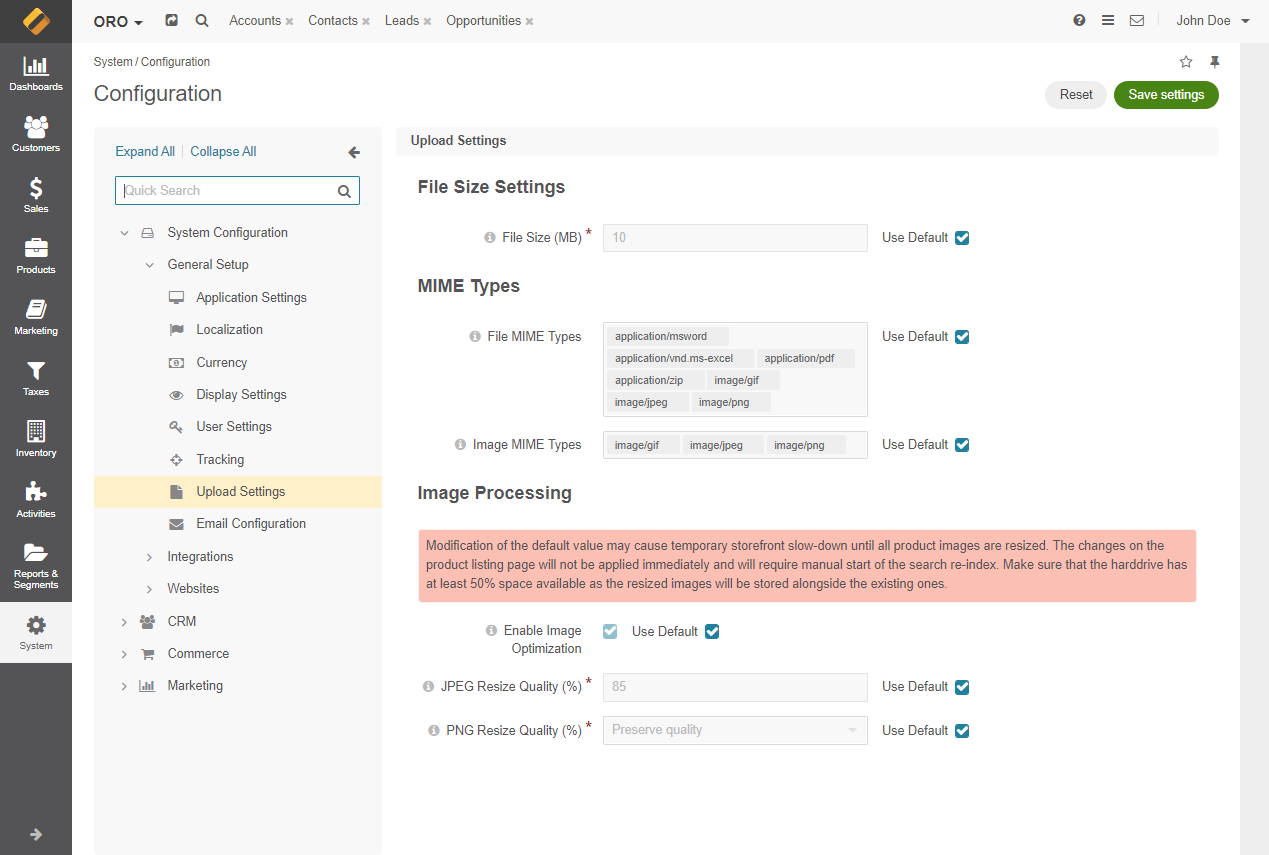
The following page opens:

Clear the Use Default checkbox next to the option.
In the File Size Settings section, provide the maximum file size (in MB) that is allowed to be uploaded to the application.
In the MIME types section, select a set of mime types that will be supported for the file and image attachments in the system. MIME types are Multipurpose Internet Mail Extension types which help identify the types of the attachments and, thus, limit the possibility of uploading the documents of inappropriate extensions.
Add any MIME type by writing the required file or image format in the text box.
Hint
The MIME types settings can be configured globally and per organization.
In the Externally Stored Files
Allowed URLs RegExp — The setting determines the regular expression that describes allowed URLs for externally stored files and images. If left empty, no external files and images will be allowed. The feature is available starting from v5.0.2. To check which application version you are running, see the system information.

In the Image Processing section, you can control whether to optimize or not the size of the uploading images in the storage. By default, the setting is enabled, which means that the size of all images that you upload to the system is compressed while preserving the quality.
Hint
Be aware that the Image Processing options are only available if libraries jpegoptim and pngquant are set up.

Enable Image Optimization — Select whether to enable the system to optimize the image, reducing the final image size. If disabled, all the images are uploaded without size modifications.
Keep in mind that all the images uploaded in earlier application versions, remain intact. They will not be deleted or replaced even after migration. If you want to resize them, then you should delete them manually and reupload.
JPEG Resize Quality (%) — The setting determines the percentage of the .jpg image resize quality. You can set the values from 30 to 100. The higher the value, the better the image quality.
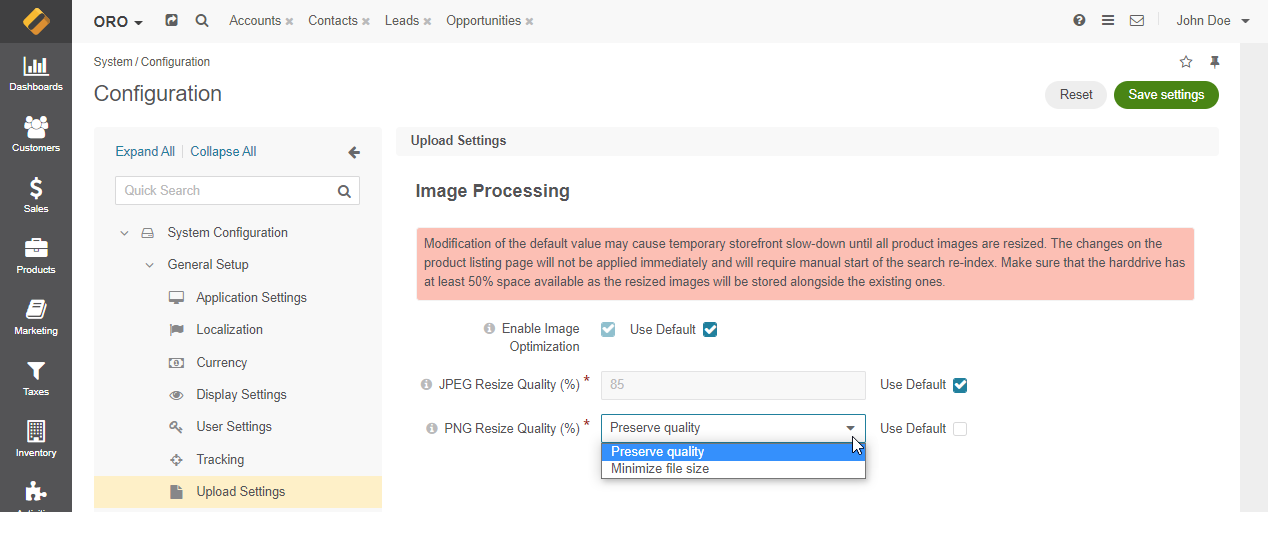
PNG Resize Quality (%) — The setting provides two options for controlling the quality of .png images. Preserve quality enables the system to slightly resize the image with the full preservation of the quality. Minimize file size enables the system to resize the image to its minimal possible size while still keeping the high quality.
In the WebP Settings section, you can control the quality of the resized images in the WebP format. By default, images are additionally converted to the WebP format, so each image is provided to browser in two variants: a resized image in the original format and a resized image in the WebP format.

WebP Resize Quality (%) — The setting determines the percentage of the .webp image resize quality. You can set the values from 30 to 100. The higher the value, the better the image quality.
Keep in mind that all the images uploaded in earlier application versions remain intact. They will not be deleted or replaced even after migration. If you want to resize them, then delete them manually and reupload.
In the File Names section, you can control whether to use original file names. By default, the setting is enabled.

Hint
The File Names setting is available starting from v5.0.2. and can be configured globally, per organization and per website.
Enable Original File Names — When enabled, the original file name is appended to the system-generated hash value. All non-alphanumeric characters (e.g., “:”, “)”, “,”, “~”) are replaced with “-” (dash).
For example, the name of the file is coffee_maker/bosch_#RND123.jpg, the system-generated hash value is
media/cache/attachment/filter/product_gallery_main/b6d3b12a2194f276376d682d2e7e6bd1/1/5bae287538.jpg. If the option is enabled, the file name is displayed in the storefront as followsmedia/cache/attachment/filter/product_gallery_main/623364376a0e8125036727/1/5bae287538-coffee-maker-bosch-RND123.jpgNote
When this option is enabled, the Enable Original File Names setting for Product Images is hidden from the system configuration page.
Click Save Settings.
If attachments are enabled for an entity, the configuration of the entity will prevail and override the corresponding global one.