Important
You are browsing documentation for version 5.0 of OroCommerce. Support of this version ended in January 2025. Read the documentation for the latest LTS version to get up-to-date information.
See our Release Process documentation for more information on the currently supported and upcoming releases.
Configure Microsoft Settings per User
To configure email, calendar events, and task synchronization with Microsoft 365 for a particular user, follow the steps outlined below.
Note
To use calendar events and tasks, add the Calendars.ReadWrite and Tasks.ReadWrite API permissions to the list of application permissions as well as the default list.
Note
These settings can be configured globally, per organization, and user.
Before configuring the Microsoft settings for a specific user, make sure that the Azure Active Directory Application Settings are filled in the system configuration (System > Configuration > Integrations > Microsoft Settings). Ask your administrator for help if you do not have the related permissions to check the system configuration.
Once filled, navigate to System > User Management > Users in the main menu.
For the necessary user, hover over the More Options menu to the right and click to start editing the configuration.
Select System Configuration > Integrations > Microsoft Settings in the menu to the left.
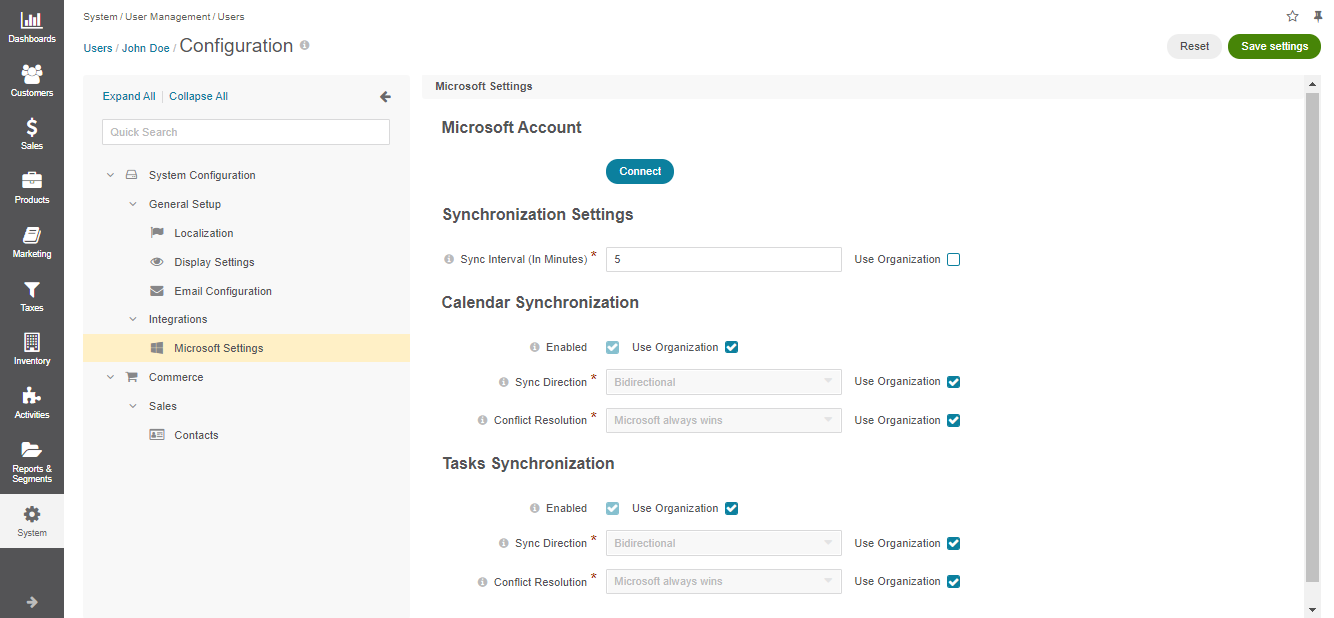
In the Microsoft Account section, click Connect to connect the user’s Microsoft 365 account and synchronize calendar events and tasks with it.
Once clicked, a popup dialog appears, prompting to sign in with the user’s Microsoft credentials. After successful login, the user’s Microsoft 365 account name is displayed, and you can check whether the Oro Microsoft connection works properly by clicking Check Connection.
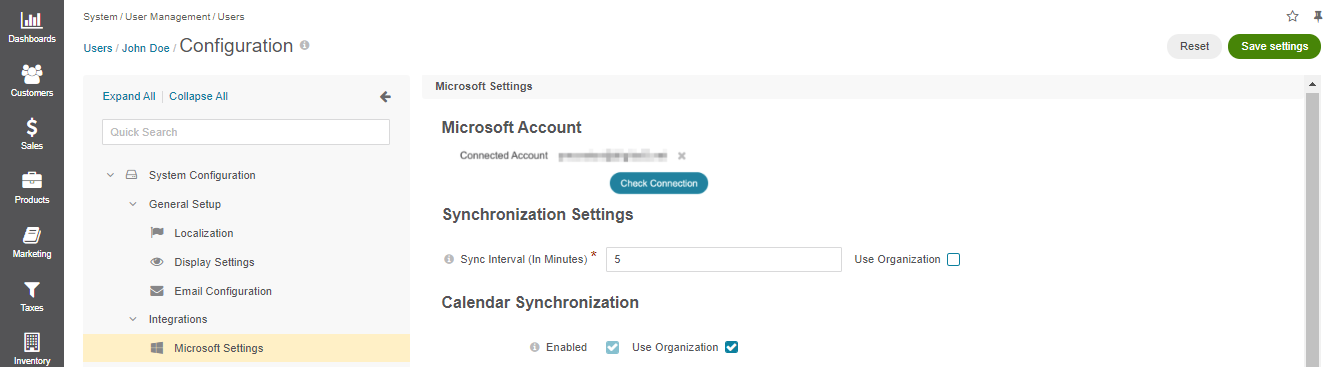
Clear the Use Organization checkbox to override the organization-wide setting for a selected user.
In the Synchronization Settings section, determine how often the data synchronization should be performed. The interval is set in minutes.
In the Calendar Synchronization and Tasks Synchronization sections, define the following:
Enabled - Indicates whether the synchronization of calendar events and tasks is enabled for the user.
Sync Direction - Data synchronization direction. It can be Oro to Microsoft, Microsoft to Oro, and Bidirectional.
Conflict Resolution - The conflict resolution strategy that should be used if the same calendar events and tasks are changed in both Microsoft and Oro. This option is applicable only when bidirectional data synchronization is configured.
Click Save Settings.
Note
To enable and configure the email synchronization for users, please see the User Email Synchronization Settings and System Mailbox Synchronization Settings documentation.