Important
You are browsing the documentation for version 4.1 of OroCommerce, OroCRM and OroPlatform, which is no longer maintained. Read the latest LTS version of the Oro documentation to get up-to-date information.
See our Release Process documentation for more information on the currently supported and upcoming releases.
Record Tables (Grids)
In Oro, the list of all available records of one type is aggregated on one page within a table (also called a grid). The data in the record tables can be filtered and saved as a new page, and the columns in the table can be customized to display only the required information. The page with all single-type records has a number of actions available as buttons on its top right. In addition, each item on the list has a number of actions available in the ellipsis (or the more options) menu at the end of its row. Actions at the top of the page and those within the ellipsis menu are all subject to the type of the records they are meant to apply to.
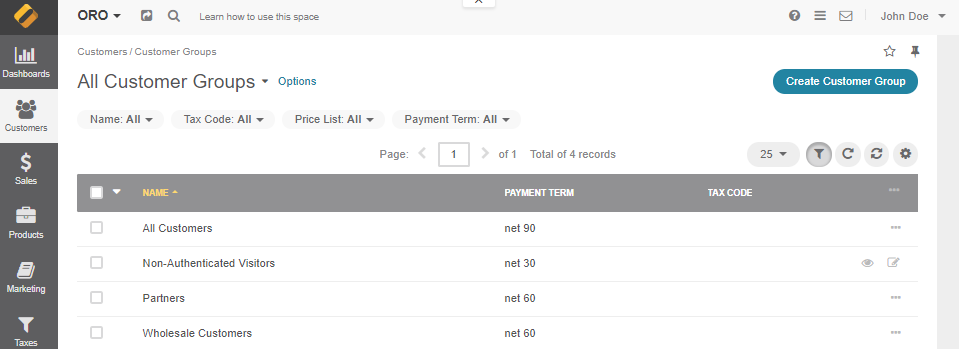
You can reach record tables in the following ways:
Via the main menu (e.g., Marketing > Marketing Lists).
Via the shortcuts menu.
By clicking the grid link on the page of a record (see the screenshot below).

Navigate Between Table Pages
If you have a lot of records, they may not all fit in one data page. In this case, use the pager block that you can see in the center above the table. In the pager block, you can see the page that you are currently on, the total number of pages, and the total number of records in the table.
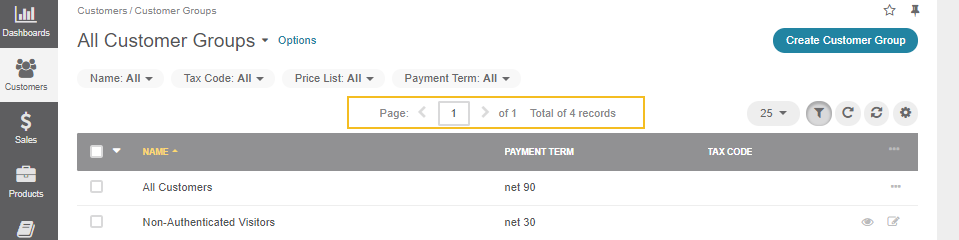
You can navigate between pages using the < (previous page) and > (next page) buttons. To open a particular page, type its number in the field that displays the current page, and press Enter.
To change the number of records displayed per page, click the View Per Page drop-down list on the top right of the table, and select the required number of items per page.
Manage Data in Tables
The tables not only display record data but also contain links to the pages of these records. In addition, the tables configurable, so you can adjust the appearance and contents of these tables to your taste and needs using the action buttons:
Export Data — Use to export the data in the table to a file either in .csv or .xlxs format (available formats may vary). Import results are sent to your email.
Sort Data — By default, data in tables is sorted in ascending order by the first column. To sort a field, click the column header. When sorting is ascending, an upward arrow appears next to the column name. When sorting is descending, a downward arrow appears.
Refresh — Use to refresh the data displayed in the table and retrieve the latest details
Reset — Use to clear the table customization and return to default settings. Reset applies to all filters, records per page and sorting changes you have made.
Grid Settings — Use to define which columns to show in the table.
You can manually select the columns by clicking on the check box next to the required field.
To show all columns in the table, click Select All.
To change the order of the columns, click on the arrow icon next to the name of the column you wish to move, hold the mouse button, and drag the column to the required position.
Use the quick search field to find the required item quickly.
Important
Some fields that an entity has may be unavailable as columns in the table. The list of available fields is defined by the system administrator. If you are the system administrator, see the description for the Show on Grid field in the Advanced Entity Field Properties topic.
Filters — Use to show/hide filters to select specific items to be displayed in the table. More information on filters is provided in the Filters section below.
Note
The default settings define whether to paginate data in tables, how many items to show per page, and what maximum number of pages can be shown. They also define whether to the top of the table is locked so you can see the page name, data headers, etc. when you scroll. Usually, these settings are defined by the system administrator for the whole OroCRM/OroCommerce application.
Filter Data in Tables
Filters are used when you need to quickly pick out the records you need from the entire data pool.
The following actions are available for filters:
To show/hide filters, click
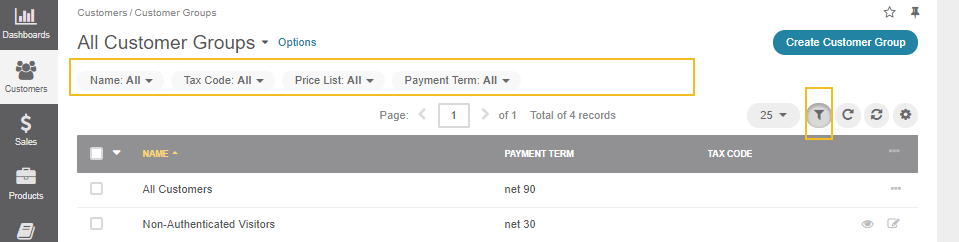
By default, filters are hidden. When filters are hidden, and some of them are currently applied to the data in the table, you will see the short summary of the applied filters on the top of the table. Click the summary to show filters.
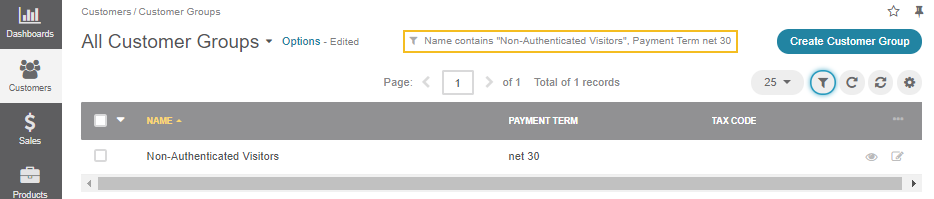
To apply a filter, click on its button in the bar, and specify your query in the control that appears. Note that filter controls might look different depending on the type of data you are going to filter — whether it is textual, numeric, date or option set. After the filter is applied, its query will appear in the control, so you can easily recall how you have filtered the data.
To remove a filter, click on a cross x after the query.
To select which filters from the available set to display, click Manage Filters. Select check boxes in front of the filters you want to display. You can use a search field at the top of the list to quickly find the required filter.
Types of Filters
The controls available for fields depend on the field type.
Text fields that can take any value
For text fields that can take any value, you can enter search words (or part of the word) and select from the list in front of it whether values that you select must contain these search phrase at any position or does not contain it at all, must start with it, end with it, etc.

For conditions like ‘Is Any Of’ and ‘Is Not Any Of,’ enter search words separated by the comma.
Fields that can take limited values
Start typing the required value into the text filed. When you this value appears in the drop-down list, click it to select. You can click the empty text field to see the list of all available values.
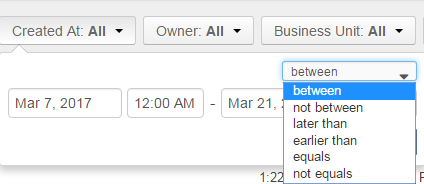
Dates and time
Click the date fields to select the date via the calendar menu. Click the time fields to select a time from the list.
In addition to selecting a strict calendar date, you can use variables that enable you to specify relative values, such as ‘today,’ ‘start of the month,’ etc.

Also specify the condition of how to form your desired time range, whether it starts from the day and time that you specified, lays between set dates, etc.
Important
If more than one filter is active, only the records that meet requirements of all selected filters are displayed.
Create Saved Table Views (Grid Views)
A saved view is a table with applied filters or custom orders. The default table view is what you see when you open a page with all single-type records. It shows unfiltered data.
Note
For some entities, additional default table views exist (e.g., Open Leads for leads, Duplicated Accounts for accounts).
If there is a frequent set of filters and/or ordering that you need to use, save them as a custom table view.
To save a table as a new one:
Click Options next to the table name.
Click Save as.
In the dialog, define a name of the new table view and set it as default if necessary.
Click Save.
To open a particular table view, click the arrow next to the current view name, and then click the name of the view you want to open.
To manage saved views, click Options next to the view name. The following is the list of options available:
Rename
Share with Others/Unshare (available for the Enterprise edition only)
Delete (custom views)
Set as Default
