Important
You are browsing the documentation for version 4.1 of OroCommerce, OroCRM and OroPlatform, which is no longer maintained. Read the latest LTS version of the Oro documentation to get up-to-date information.
See our Release Process documentation for more information on the currently supported and upcoming releases.
My Configuration
In this section, you can personalize the configuration of your Oro application. This configuration, if made through your profile menu, does not affect other users. To configure the settings for the whole system, please see the System Configuration guide.
To reach the My Configuration page:
Click on your user name on the top right of the application page.
Click My Configuration.
Important
User-level configuration settings can fall back to organization settings. For this, select the Use Organization check box next to the selected option. To go back to the default user-level settings, click Reset on the top right.
Two categories of settings are available for configuration at user level:
System Configuration (General Setup, Integrations)
Commerce (Sales)
More information about the options available for each of the two categories is available below.
Update Localization Options
In the Localization section, you can configure the following localization and map-related options:
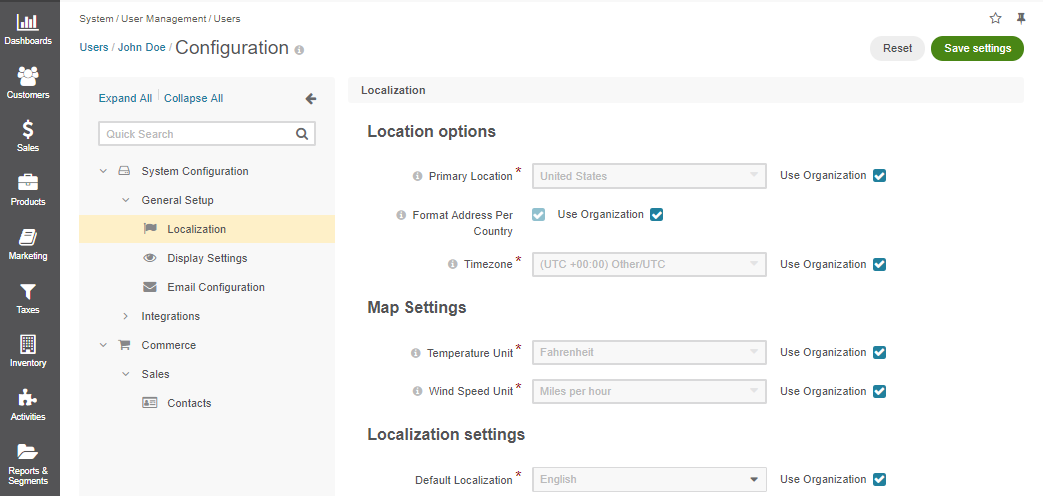
Location options
Field |
Description |
|---|---|
Primary Location |
Select the country which will be considered the user’s primary location. The addresses the user sees on the interface will be formatted according to the rules of this country. |
Format Address Per Country |
When this option is selected, addresses will be formatted according to the rules of their countries. Otherwise, the primary location formatting will be applied. |
Timezone |
Select the timezone for the user location. All dates and times will be displayed according to the specified timezone. |
Map options
Field |
Description |
|---|---|
Temperature Unit |
Select the temperature unit. This settings will be applied for weather on map. |
Wind Speed Unit |
Select the wind speed unit. |
Localization settings
Field |
Description |
|---|---|
Default Localization |
The default language of the back-office and storefront UI for the current website. |
Update Display Settings
In the Display section, you can configure the following display options:
User bar
Field |
Description |
|---|---|
Show Recent Emails |
Select this check box to display the recent emails on the user bar (they will appear next to the user name). 
|
Navigation bar
Field |
Description |
|---|---|
Position |
Select whether the application main menu will be positioned at the top of the page or on its left. |
Data Grid settings
Field |
Description |
|---|---|
Items Per Page By Default |
Select how many records will appear on one page of record grids. |
Lock Headers In Grids |
Select this check box to ensure that headers of a record grid will stay visible while you scroll. |
Record Pagination |
Select this check box to enable the user navigate to the previous or next grid record from a record view page. 
|
Record Pagination Limit |
Type the maximum number of records that the user can navigate from a record view page. |
Activity lists
Field |
Description |
|---|---|
Sort By Field |
Select whether to sort activity records by the date when they were created or by the date when they were updated for the last time. |
Sort Direction |
Select whether to sort records in the ascending or descending direction. |
Items Per Page By Default |
Select how many records will appear on one page of the activity grids. |
WYSIWYG settings
Field |
Description |
|---|---|
Enable WYSIWYG Editor |
Select this check box to enable text formatting tools for emails, notes and comments. 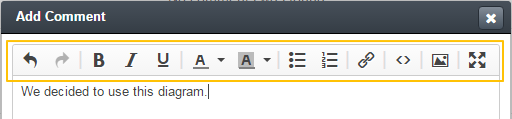
|
For more details on WYSIWYG management, see the WYSIWYG Editor topic.
Sidebar settings
Field |
Description |
|---|---|
Enable Left Sidebar |
Select Yes to enable the user to see and utilize the left sidebar. |
Enable Right Sidebar |
Select Yes to enable the user to see and utilize the right sidebar. |
Reports settings
Field |
Description |
|---|---|
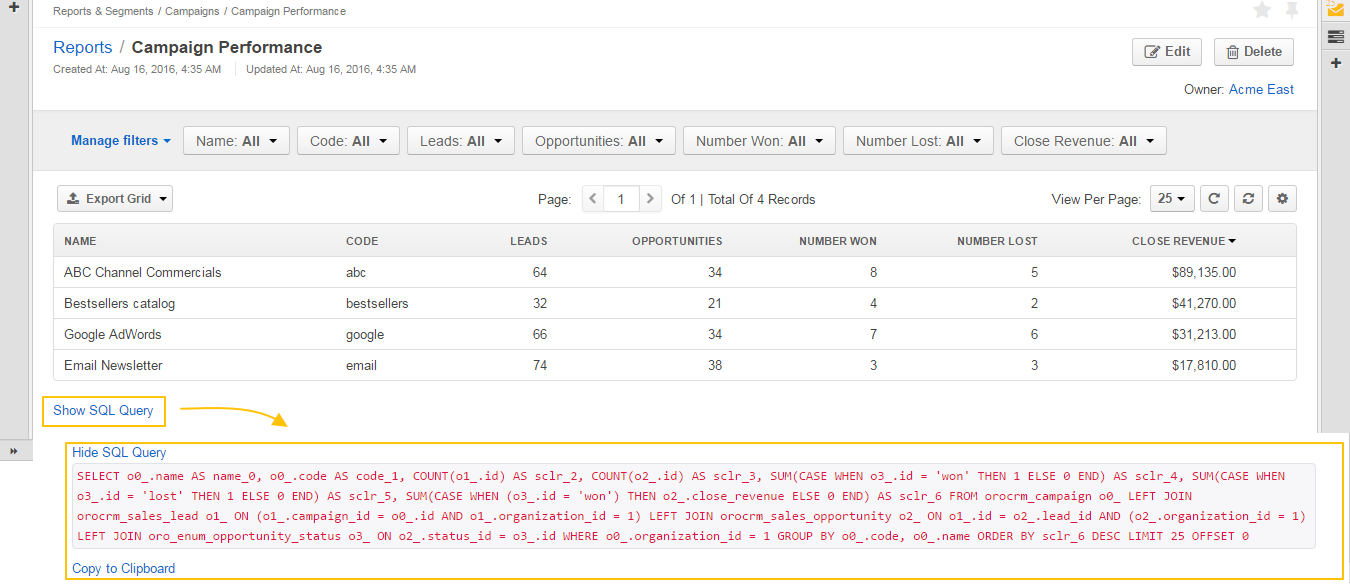
Display SQL In Reports And Segments |
Select this check box to enable the user to review the SQL request sent to the system for a report or a segment. |
Update Email Configuration Options
In the Email Configuration section, you can configure the following email related options:
Signature
Field |
Description |
|---|---|
Signature Content |
Type the signature to be appended to the user’s emails. |
Append Signature To Email Body |
Select whether the signature must be appended automatically or manually. |
Email synchronization settings
Field |
Description |
|---|---|
Enable IMAP |
Select this check box to enable the IMAP synchronization of the user’s remote mailbox with their Oro mailbox. Additional fields that alow you to configure IMAP settings will appear. |
IMAP Host |
Available only when Enable IMAP is selected. Enter a host name of your IMAP server, e.g. imap.gmail.com. |
IMAP Port |
Available only when Enable IMAP is selected. Enter a port that IMAP uses, e.g. 993. |
Encryption |
Available only when Enable IMAP is selected. Select the type of encryption: SSL or TLS. |
Enable SMTP |
Select this check box to enable the SMTP synchronization of the user’s remote mailbox with their Oro mailbox. Additional fields that alow you to configure SMTP settings will appear. |
SMTP Host |
Available only when Enable SMTP is selected. Enter a host name of your SMTP server, e.g. imap.gmail.com. |
SMTP Port |
Available only when Enable SMTP is selected. Enter a port that SMTP uses, e.g. 993. |
Encryption |
Available only when Enable SMTP is selected. Select the type of encryption: SSL or TLS. |
User |
Enter a username used to access mailbox on the configured server. For example, for Gmail, an email address server as a username: alanwise@gmail.com |
Password |
Enter the password to a user’s mailbox. |
Click Check Connection/Retrieve Folders to check whether the specified synchronization settings are correct, and to retrieve the current folder structure of the user’s remote mailbox.
Email Threads
Field |
Description |
|---|---|
Display Email Conversations As |
Select whether to visually group original emails with replies to them or show all emails separately. |
Display Email Conversations In Activity Lists As |
Select whether to visually group original emails with replies to them in the Activities sections of the record view pages or show all emails separately. |
Reply
Field |
Description |
|---|---|
Default Reply Button |
Select which button will be default for replying to emails: Reply or Reply All. Other button will continue be available in the Reply menu, it will just not be on the top of the list. 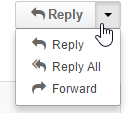
|
Update Contact Information
In the Customer Visible Contact Info list, the user will see the options that are enabled and selected in Available User Options on the system, website or organization levels.
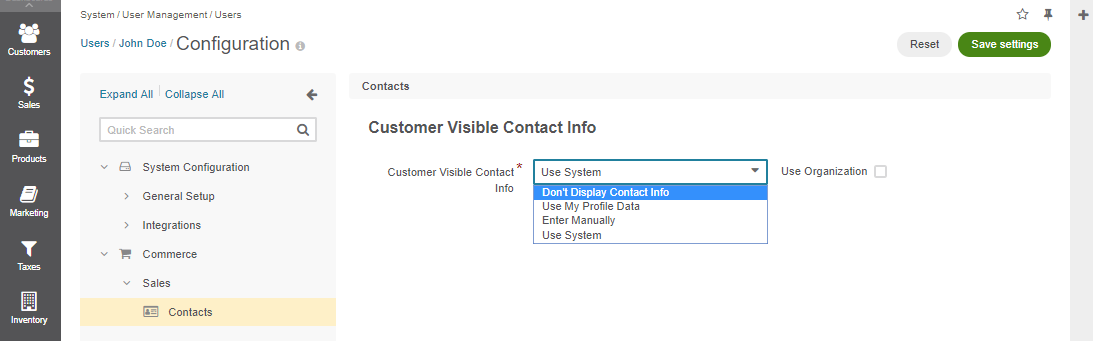
More information on how to configure the contact information visible to the customers of your store, please refer to the Configure Sales Representative Information topic of the Configuration guide and the contact information configuration sample.
Related Topics