Important
You are browsing the documentation for version 4.1 of OroCommerce, OroCRM and OroPlatform, which is no longer maintained. Read the latest LTS version of the Oro documentation to get up-to-date information.
See our Release Process documentation for more information on the currently supported and upcoming releases.
Checkout Configuration Concept Guide
After you have invested a lot of funds and time into designing a good-looking and intuitive website, developing product collections, and creating smart marketing strategies to attract visitors, the last thing you want to do is forget the cherry on top. And that is your checkout page - the grand finale for any e-commerce website launch. A checkout page is where customers conclude their purchase: they finalize their choice about the selected products or services, and provide payment and shipping details for delivery and invoicing.
At the end of the day, any e-commerce website’s success is measured by the number of completed sales, not the number of people visiting the website. This being the case, you want to provide your potential customer with a clear and straightforward path to purchase so they comfortably make it through the checkout process and place the order when they land on your website.
OroCommerce provides an advanced built-in checkout functionality that helps you configure your website’s checkout page customizing the default settings to suit your preferred checkout process. You can include or exclude the steps in the native checkout process chain and adapt the checkout content displayed in the storefront to your business requirements. You can also customize the checkout workflow to add new steps and transitions, such as requesting a senior manager’s approval before submitting the order.
Let’s get closer to the specifics of the checkout feature offered by Oro out-of-the-box.
Checkout Initiation
By default, the checkout can be initiated from three entities in the storefront:
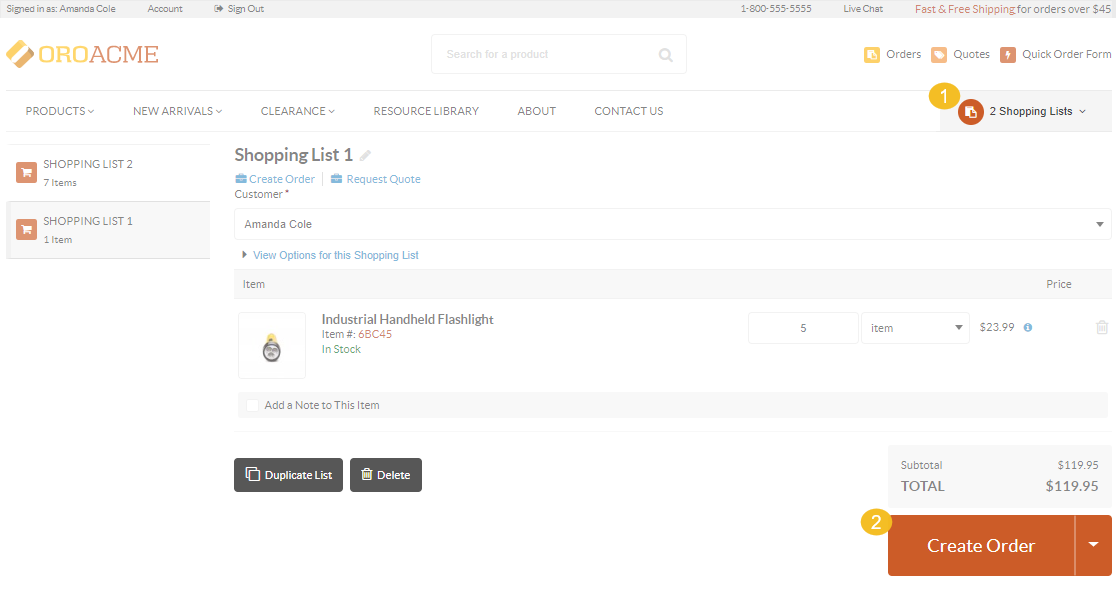
Shopping List — allows to create an order directly from the shopping list page.
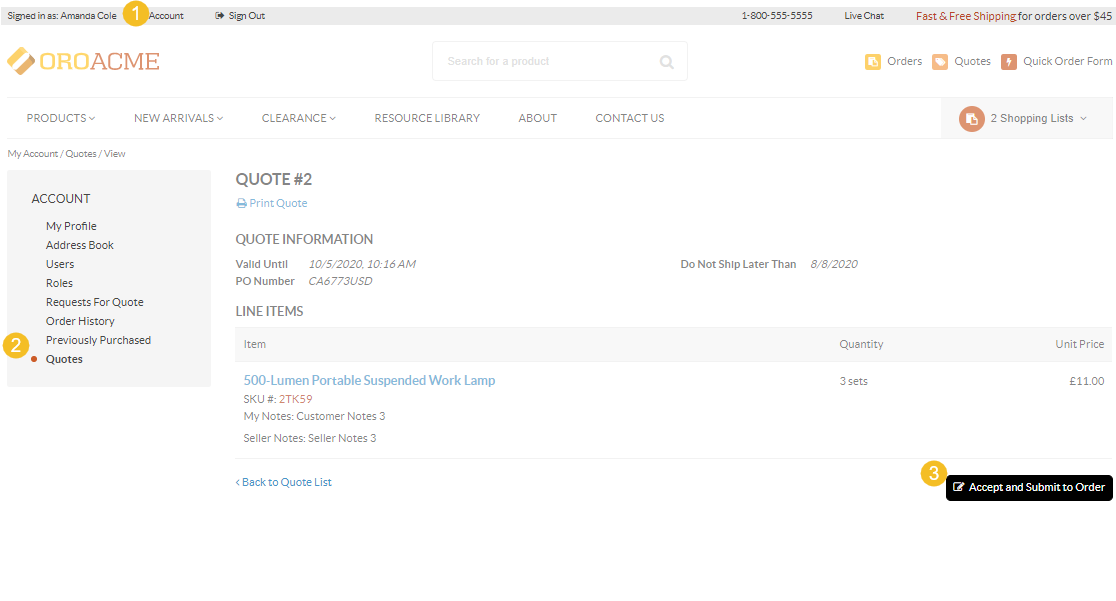
Quote — allows to start the checkout from the quote prepared by a sales manager.
All received quotes are stored under the Quotes section of the My Account menu. When you create an order from the quote, you accept the information provided by a sales rep. The information cannot be changed. So, if a sales rep inputs any data themselves (e.g., billing or shipping address, shipping or payment method, or any other extra costs), the preset values are applied at checkout automatically. You are only allowed to view and double-check the data.
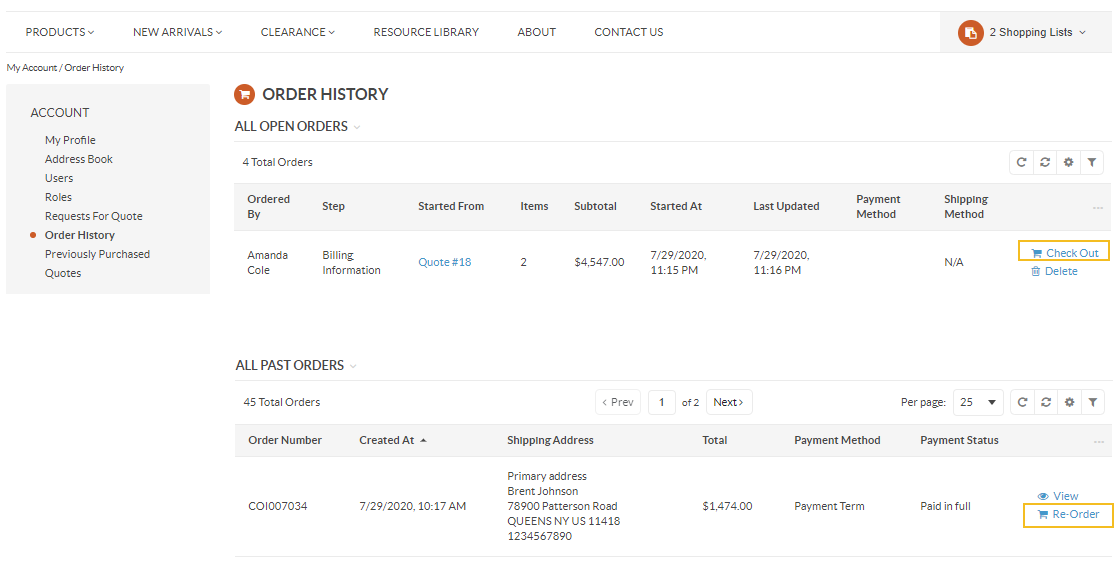
Order — allows to start the checkout from the currently open or already submitted orders.
The Check Out link directs you to the checkout page preserved in the same state you left it. All the information that had already been provided the moment you abandoned the form is automatically saved so you could return to the checkout later.
The Re-Order link displayed within the All Past Orders grid is the most straightforward way to place a similar or identical order to the one you have already submitted. By clicking Re-Order, you copy all products and checkout details from the original order and avoid a tedious product selection process.
All information about ongoing checkouts is compiled and stored under the Order History section of your Account menu. Keep in mind that only registered users have access to the menu and are able to trace the checkout progress of both their own checkouts and the checkouts initiated by other users from their organization (provided that the permission to do so is added to the customer user’s role).
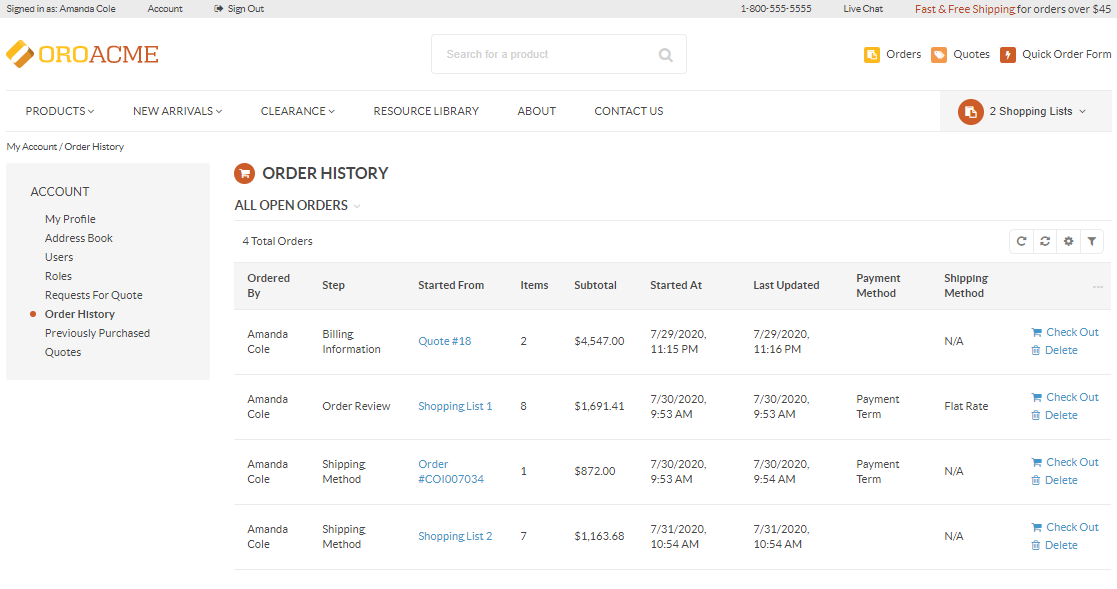
Here, you can check the following details:
who initiated the checkout
which entity the checkout was started from
which step the checkout was interrupted at
what info has been already provided and saved
It is convenient to have all the required information in one place, especially when it is shared within one organization. This way, a user with appropriate job responsibilities and role permissions can easily find the required checkout, analyze and approve it (if necessary), and continue the process to complete the checkout.
Single-Page, Multi-Page, and Guest Checkouts
Whether your customers are shopping from their desktop or phone, your checkout page should be fully adaptive and simple to use. That is why OroCommerce has designed an excellent checkout solution to let both registered and guest customers seamlessly proceed through all the steps of the checkout with no issues, resulting in the highly desired conversions.
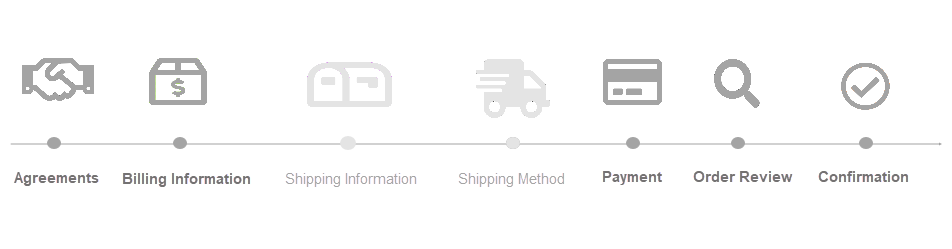
A typical checkout flow in OroCommerce looks as follows:
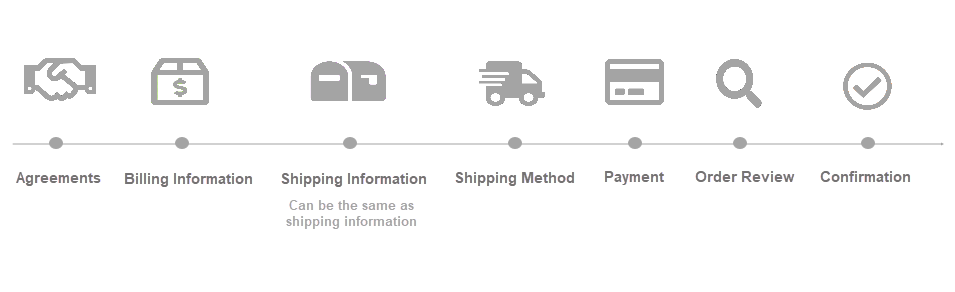
Agreements — The step requires a user to accept all consents to let the system process your personal data.
Billing Information — The step requires a user to enter a new billing address or select from the existing ones. The ability to create and manage your billing information depends on the configuration of the related capabilities for a particular user role.
Shipping Information — Can be the same as billing address if the Ship to this address option has been enabled in the previous step.
Shipping Method — If multiple methods are available to the customer, they must select the one that suits them best.
Payment — Similar to the shipping method step, a customer is required to select the most preferable way to pay for their order.
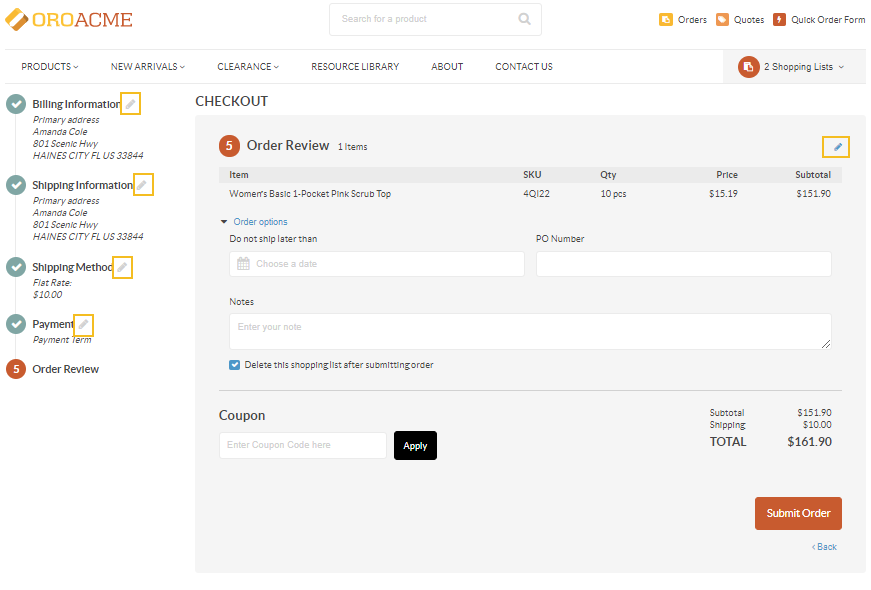
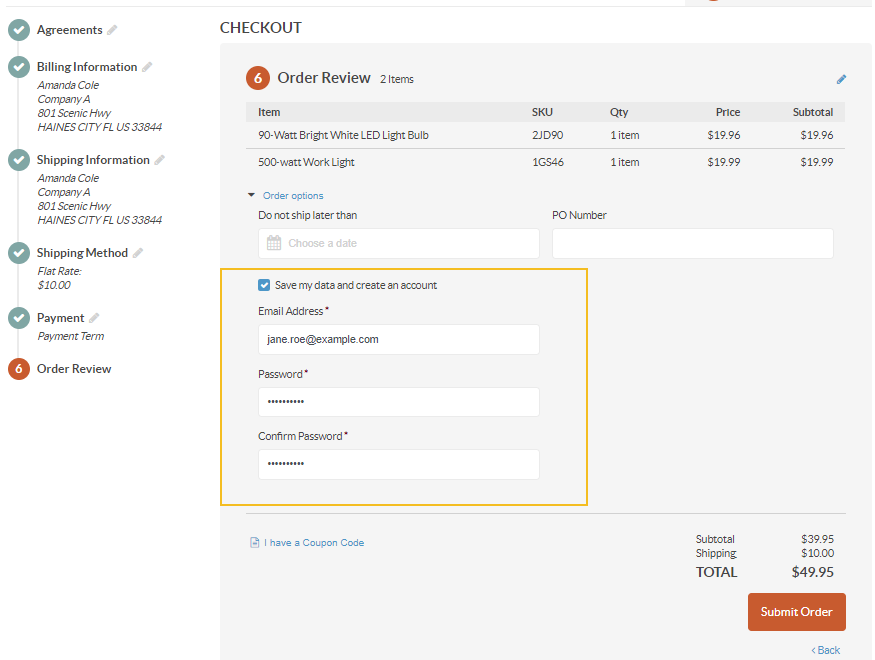
Order Review — The final step before submitting the order. At this step, a customer is supposed to check the order, review all the items and quantities, prices and subtotals, check the calculated taxes that are to be applied to the order, add a promotion coupon if any, or provide some comments to the sales manager. The customer can also modify the items by clicking on the right and returning to the checkout source page (a shopping list, quote, or an order), edit the required product information, and get back to the step they have left. However, if certain conditions are not satisfied due to new product adjustments (shipping or payment method is changed), the customer will be redirected to that specific step.
Confirmation
Keep in mind that the information you provide at checkout can be updated from any step and in any order.
The checkout pages in OroCommerce come in two types: single-page and multi-page checkout.
As the terms imply, your OroCommerce checkout pages can be configured either as a one-page solution or as a step-by-step process, whichever best suits your sales strategy.
To enable them for your application, you must activate one of the default checkout workflows in the back-office. As they are set to be mutually exclusive, only one can be activated per organization.
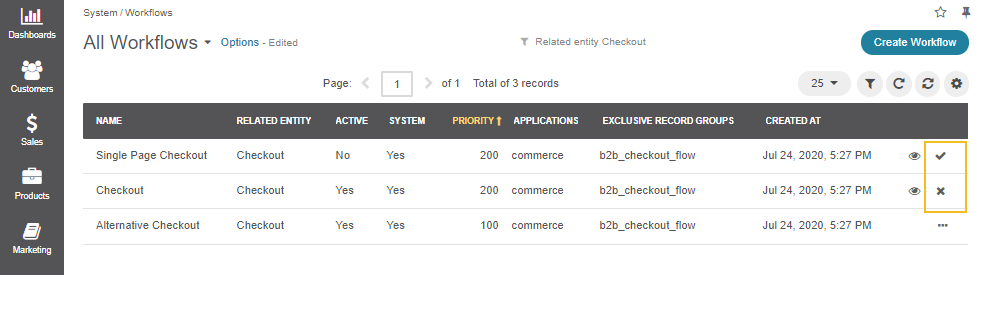
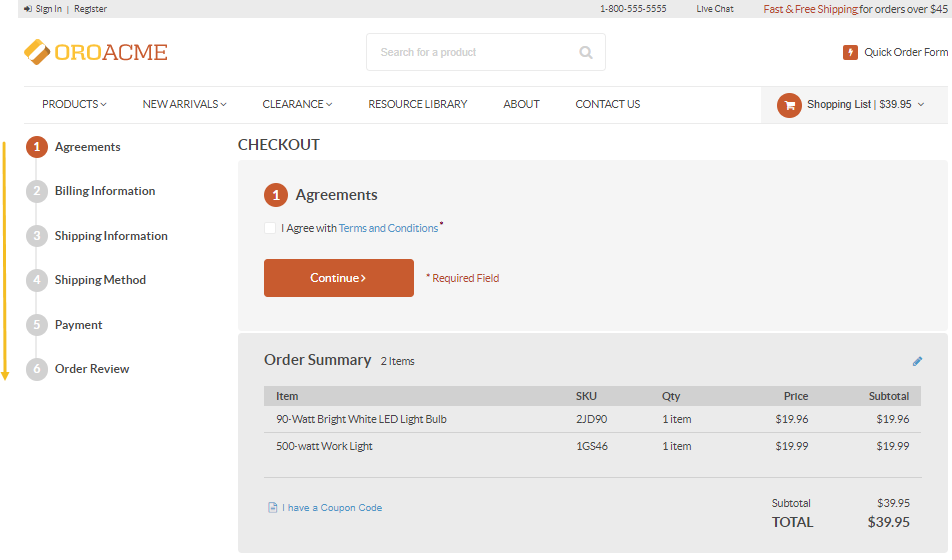
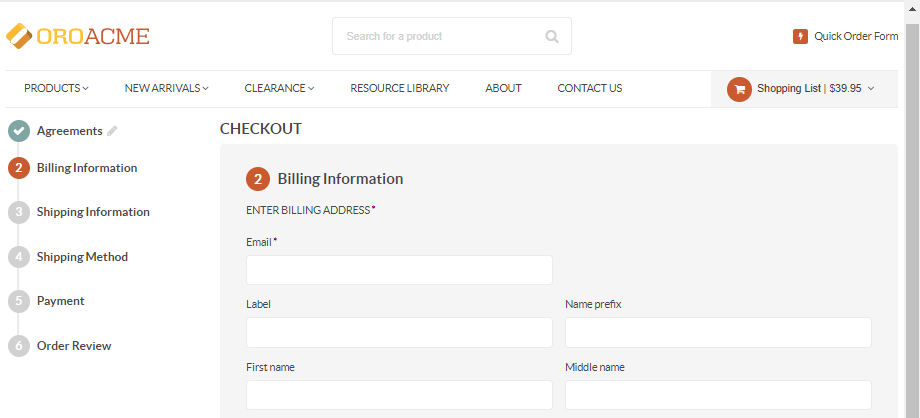
A multi-page checkout is a standard default checkout. The whole checkout process is split into multiple steps to provide a customer with a clean, minimalistic design that gives the impression of the checkout process to be simple and fast.
Hint
For more details on how to proceed through the multi-page checkout process, refer to the Multi-Page Checkout section.
A single-page checkout is another checkout workflow in the OroCommerce application. When you enable the checkout workflow, you make all steps fit one page, which allows customers to see how far along in the checkout process they are, and how many fields are left to complete. Although the number of fields in the form is the same as in the multi-page checkout, it can really take less time to finalize it as there is no need for the shoppers to wait for several pages to load. It also facilitates the editing process as customers do not need to navigate between multiple pages.
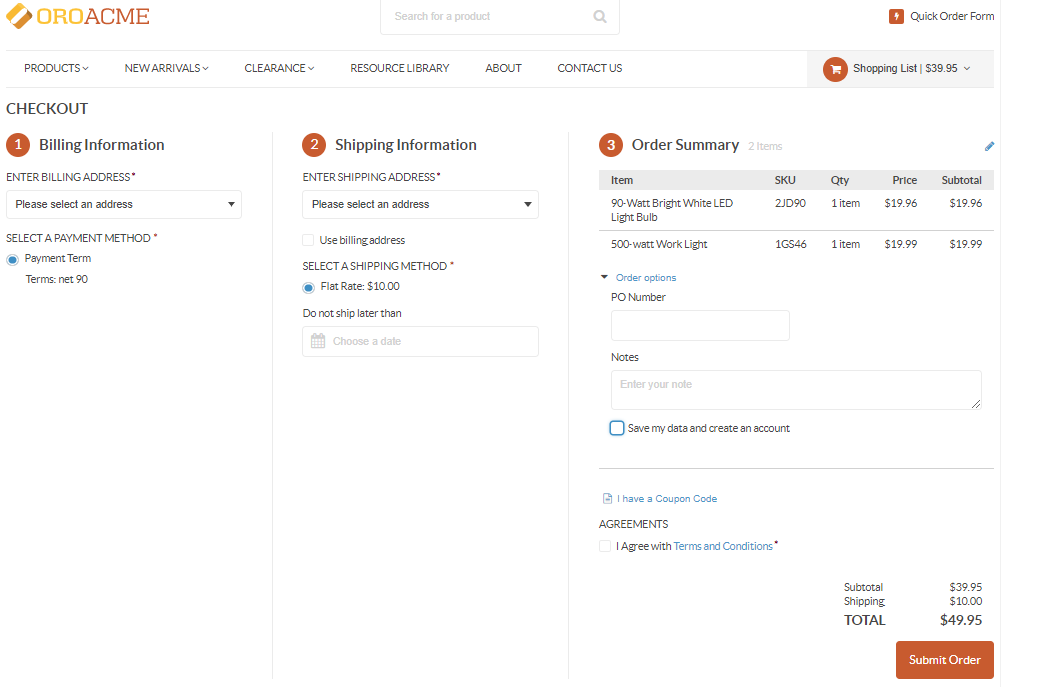
Hint
For more details on how to proceed through the single-page checkout process, refer to the Single-Page Checkout section.
A guest checkout is a checkout that allows unauthenticated users to submit the order.
Once you have decided on the checkout type, multi-page or single-page, you can then enable the guest checkout option in the system configuration on three levels (global, organization, and website) to allow guest visitors to proceed through the same checkout steps as the registered users do. The only exception is that guest users must input all their data manually as there is no pre-filled information in the form.
A guest checkout provides unregistered users with several options:
create an account before initiating the checkout
start the checkout as a guest and register afterward
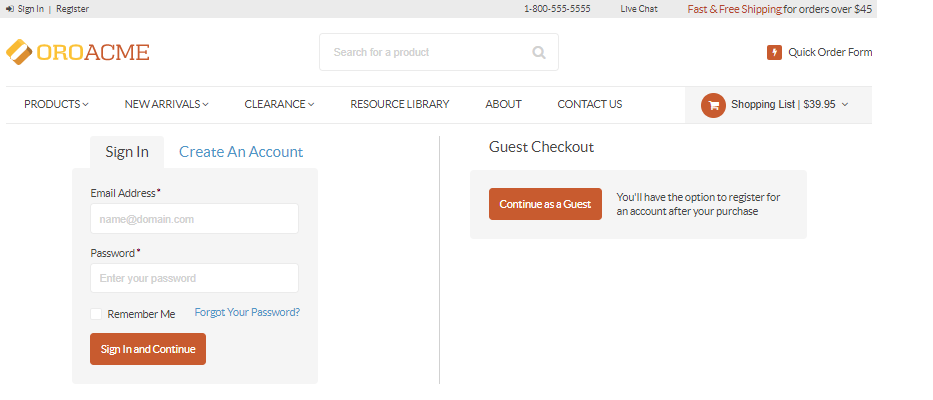
skip the account creation step at all and submit an order as a guest
Hint
For more details on how to proceed through the guest checkout process in the storefront, refer to the Guest Checkout section.
Checkout in Use
OroCommerce has designed a clear-cut and intuitive checkout functionality aimed to satisfy any business needs. However, you can always optimize and customize the out-of-the-box settings to fully cover the necessary marketing requirements.
On top of what is provided by default, you can also add your own code customization:
Cut the irrelevant checkout step out of your checkout flow. For instance, if you are selling digital goods, you do not need the section on shipping method and details, as nothing physical is going to be shipped.
Add the necessary steps and transitions to the checkout workflow. For this, you need to copy the workflow and then customize it the way you like. An example of such modernization can be an alternative checkout workflow that was customized to include the request and order approval steps before creating an order. For more details on how the alternative checkout workflow was configured, check the related documentation.
Add the required info fields to the Order Review step of the checkout form.
Add new entities from which a customer can initiate the checkout.
Assign a checkout workflow to a particular website so that different websites can use different checkout forms.
Related Topics