Important
You are browsing the documentation for version 4.1 of OroCommerce, OroCRM and OroPlatform, which is no longer maintained. Read the latest LTS version of the Oro documentation to get up-to-date information.
See our Release Process documentation for more information on the currently supported and upcoming releases.
WYSIWYG Editor
Hint
This feature is available since OroCommerce v4.1.1. To check which application version you are running, see the system information.
The WYSIWYG editor feature is implemented by Oro applications to help you control the content of your HTML-like web pages within your website. It is an HTML page builder that helps you create a complex and attractive content with cutting-edge default and third-party widgets, embedded videos and pictures without any coding knowledge. Preview functions enable you to optimize the page for mobile and desktop formats before you publish.
The WYSIWYG editor integrates the GrapesJS framework out-of-the-box. The framework provides multiple advanced capabilities for creating dynamic templates and HTML structures.
WYSIWYG Manager Blocks
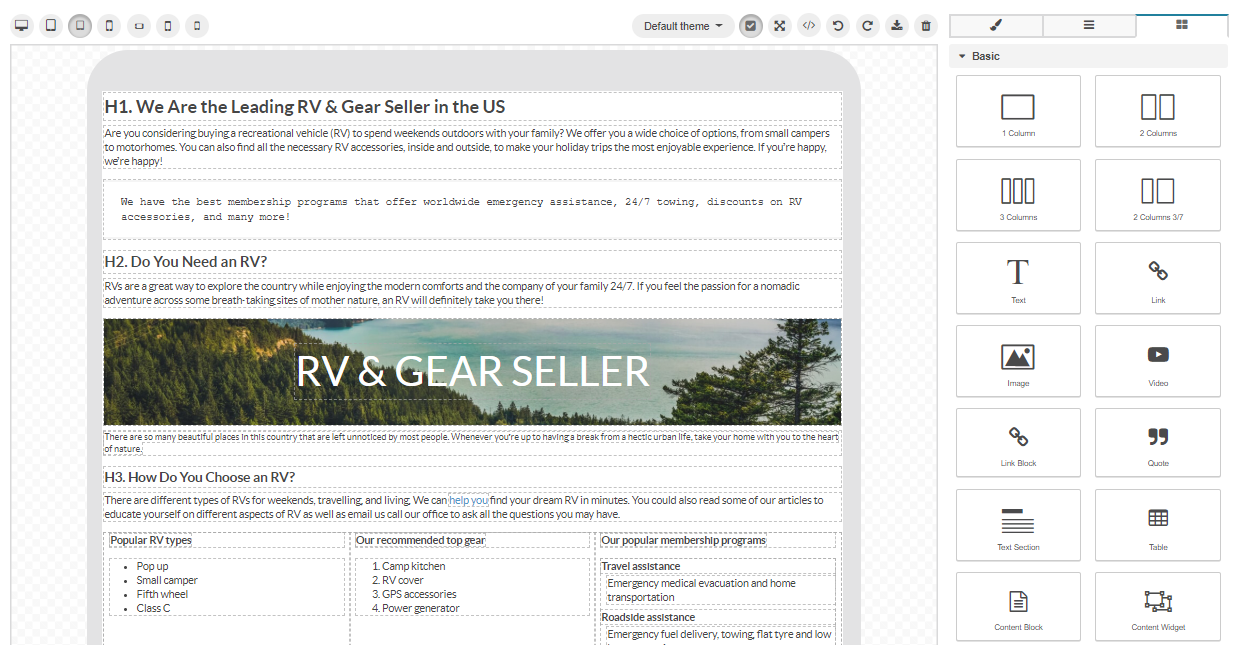
The power of WYSIWYG is in its functionality that provides you with diversified tools to manage the content of the web pages within your website.
The main parts of the editor help define the interface and the structure of your templates and are responsible for different aspects of your work with WYSIWYG:
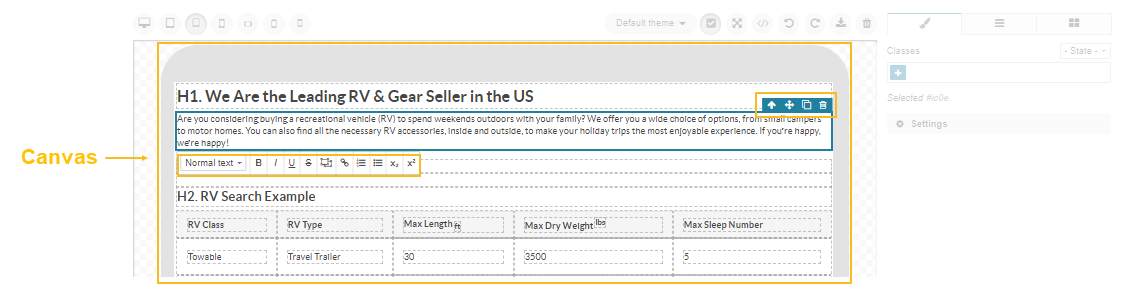
Canvas — A field with the appropriate HTML-like content to be displayed in the storefront. Within the canvas, you can move, copy, or delete the components, and format the text inside blocks.
Blocks — A group of various blocks that you can drag and drop to your canvas shaping the desired content. A block can be either a text, a multi media file, a table or a column. You can also embed a piece of code, any default or third-party widgets, insert a link, a quote, or add a button. The basic set of blocks can cover most of your needs.

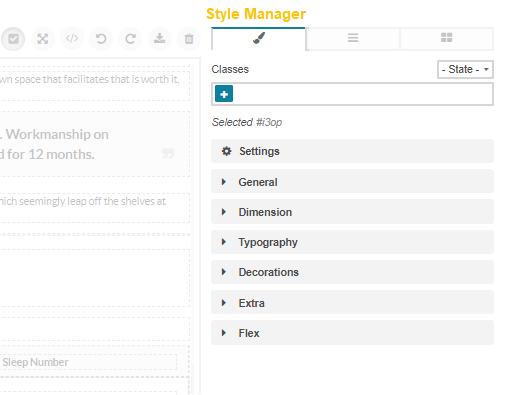
Style Manager — A group of settings that are used to customize the content blocks added to the canvas. Within the style manager, you can assign a selected CSS class to certain blocks, provided that the necessary class is specified in the file of css styles linked to the main website template. You can also set the alignment of the blocks against other content, set margins, paddings, fonts, and colors, scale and rotate the text, as well as apply other transformations to the selected content structure.
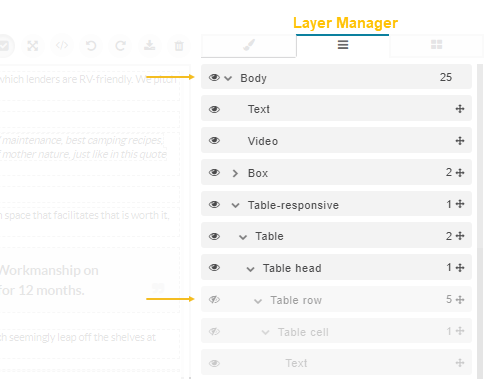
Layer Manager — A tree of used blocks structured in the order they are allocated on the canvas. To shift the order of certain blocks, click next to the selected block and drag it to the required place. You can also hide selected blocks, instead of deleting them, by clicking to the left of the block name.
WYSIWYG Functions
Hint
Keep in mind that, by default, the WYSIWYG editor enables users to insert only safe content. If a user cannot embed any content to the field, it may be because of content restrictions set in the configuration file. To change the restrictions, ask your developer’s assistance to follow the Post-Installation Configuration: Content Restrictions guide and override the default settings.
WYSIWYG enables you to do the following:
Add Formatting and Styles to Text
To add formatting such as bold, italic, and underlining to your text, you need to drag the text block, enter the required text, and left-click the block to display the menu with additional formatting options.
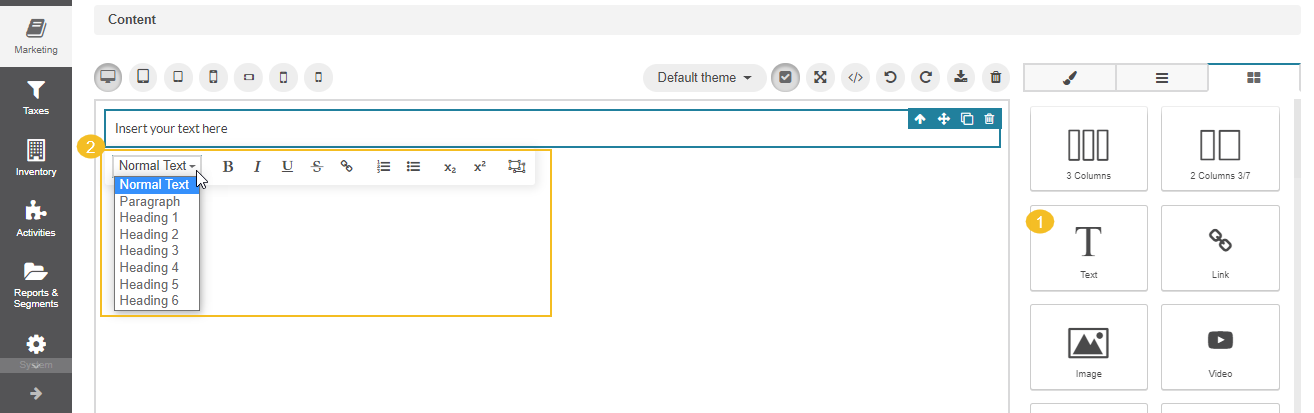
Click the necessary option to (from left to right):
Apply the heading (H1, H2, normal text, etc) by selecting the required one from the dropdown list
Add bold formatting to your text
Add italic formatting to your text
Underline the text
Add a strikethrough effect on your text ()
Insert links to the text
Create a numbered list
Create a bulleted list
Set your text below the standard line of type with the subscript icon
Set your text above the standard line of type with the superscript icon
Insert inline widgets
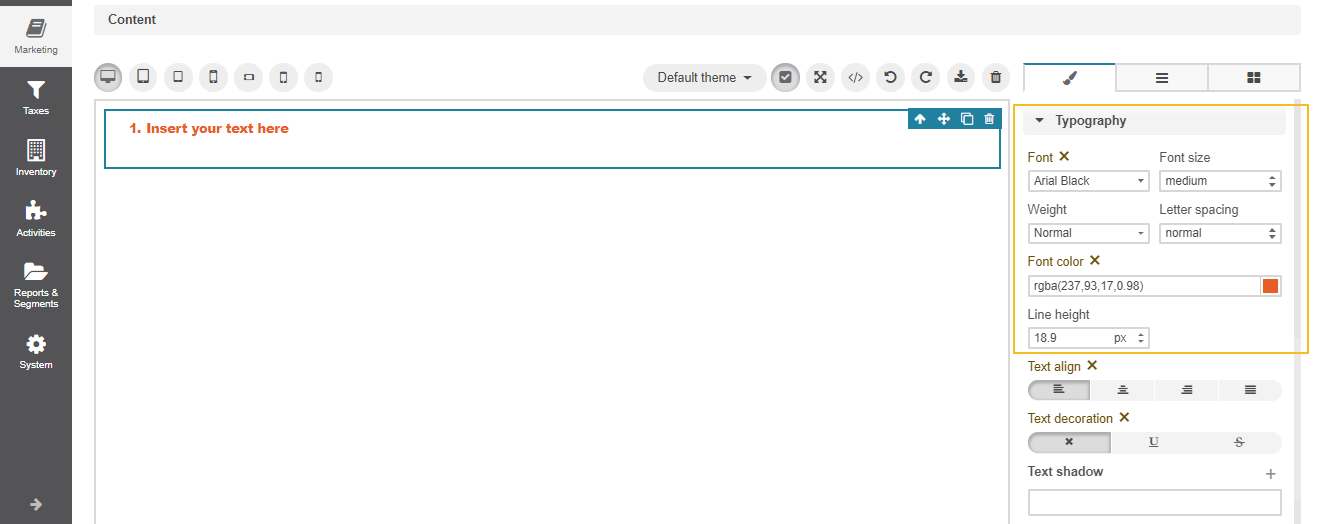
To apply different font faces, sizes, and colours to the whole text block, use the settings in the Typography section of the Style Manager Block.
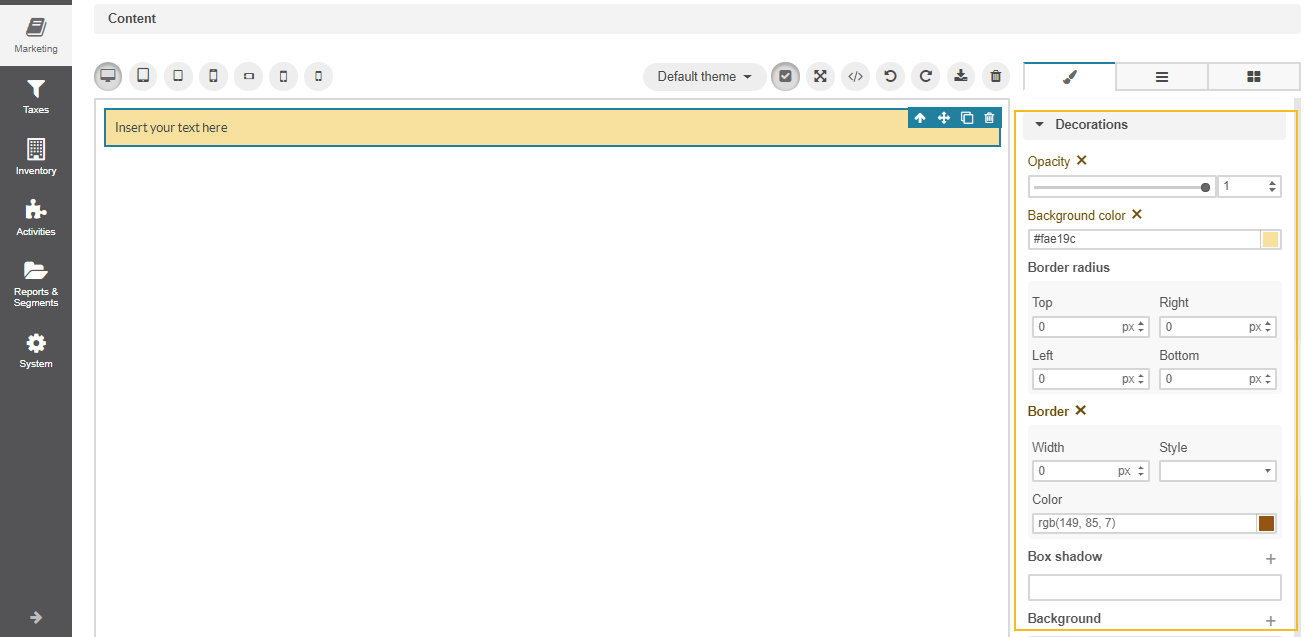
To set the opacity of the text block and add its background color, use the Decorations section of the Style Manager Block.
Shift the Text to a New Line
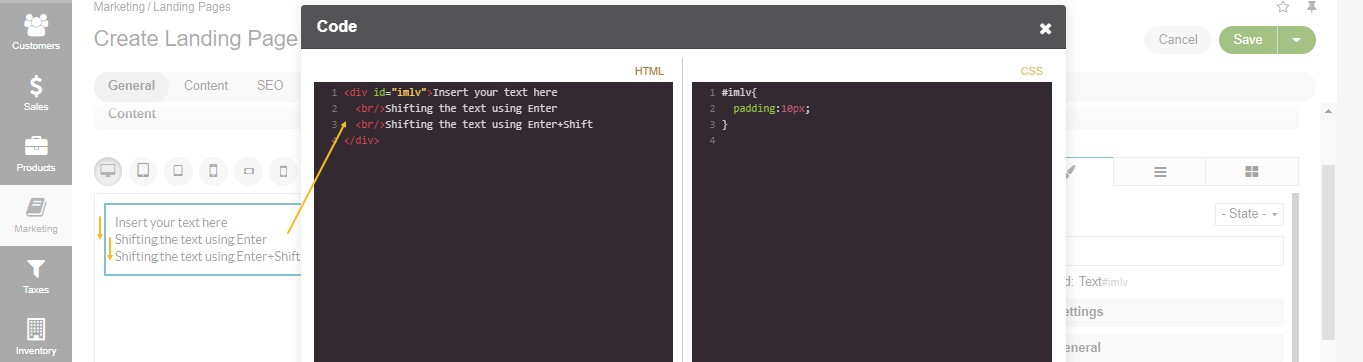
To move the text to a new line down, you can either press the Enter key or a combination of Shift+Enter. Both options shift the text to a new line without creating any gaps, paragraphs, or <div> between lines.
If you create a bulleted or numbered list, then press Enter to continue the flow or Shift+Enter to move a new line down without creating a new bullet or number.
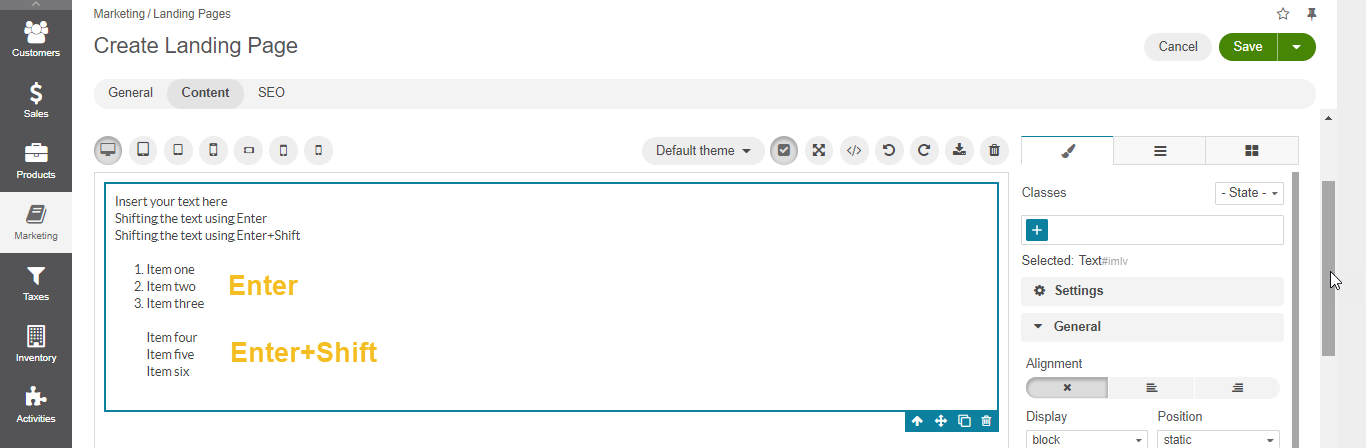
If H2, H3, or any other formatting is applied to the text, then you have several options to choose from:
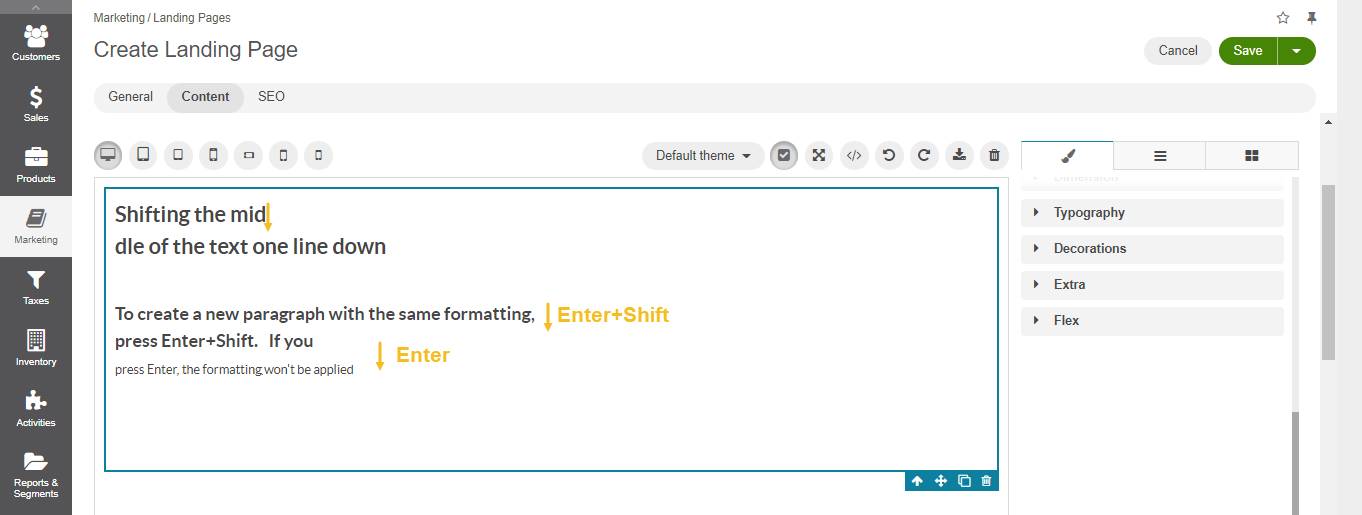
If the cursor is in the middle of the text, then regardless of what you press, be it Enter or Shift+Enter, the remaining part after the cursor will be moved to a new line with the same formatting.
If the cursor is in the end of text, then pressing Shift+Enter, you move the text to a new line with the same formatting.
If the cursor is in the end of text, then pressing Enter, you create a new paragraph without any formatting applied to it.
Insert Multimedia
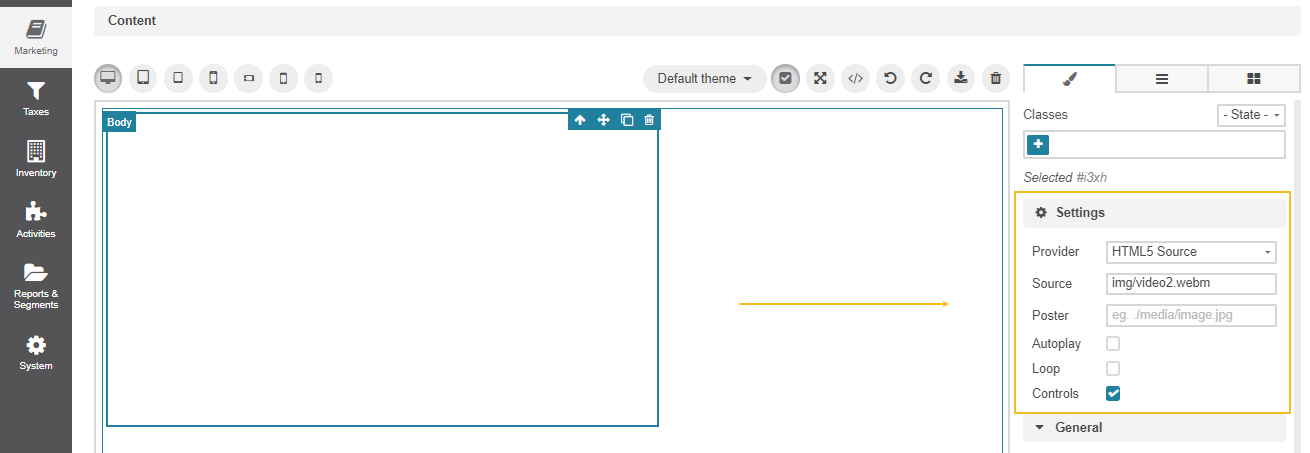
To embed YouTube or Vimeo URLs to your content, you need to drag the video block to the canvas. Set the video provider (HTML5 Source, vimeo) in the Settings section under Style Manager and add the direct link to the Source field. The permissions to add videos depend on the restrictions set in the configuration file.
Insert Multimedia Preserving the Required Aspect Ratio
There are some cases when a video on a mobile device or a responsive page doesn’t fit the layout or appears with unrelated bars. To fix it, you need to configure the settings of such multimedia, image, or map, maintaining their correct scale and size.
There are several options to embed some multimedia into the WYSIWYG editor, preserving the required proportions (aspect ratios).
Option 1
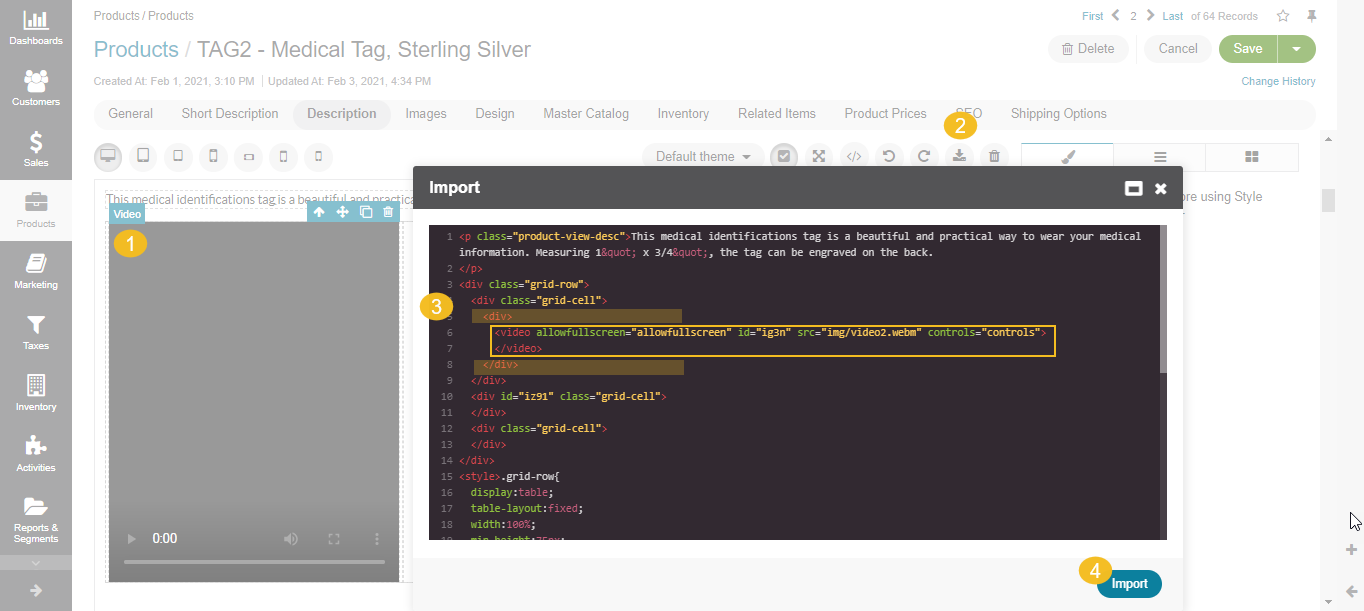
Drag the video, image, or map block to the canvas.
Click Import on the top menu above the canvas to open the HTML editor.
Find the video block and wrap it in a <div> container.
Save it by clicking Import in the popup bottom corner.
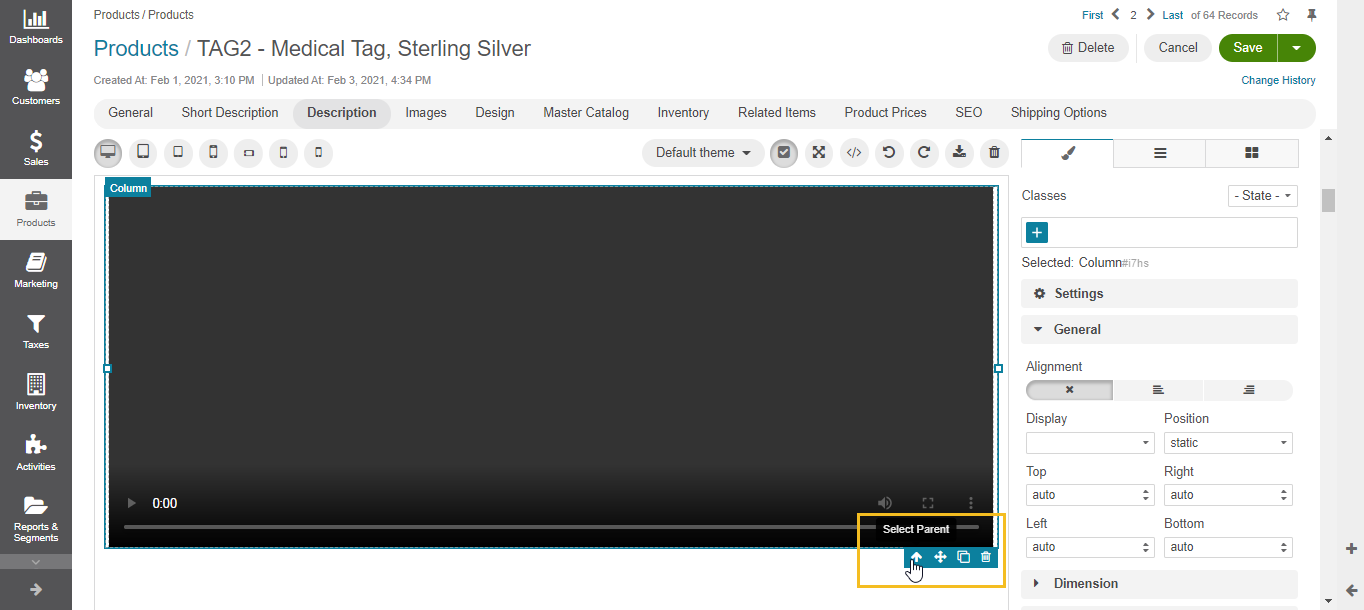
Click the wrapped file to open its settings and configure the following:
position: absolute;
top: 0;
left: 0;
width: 100%;
height: 100%
Click the file again and then click Select Parent to open the settings of its parent file.
Configure the settings of the parent file as follows:
position: relative
padding-bottom: 56.52% (depending on the required scale)
Click Save.
Option 2
Drag the video, image, or map block to the canvas.
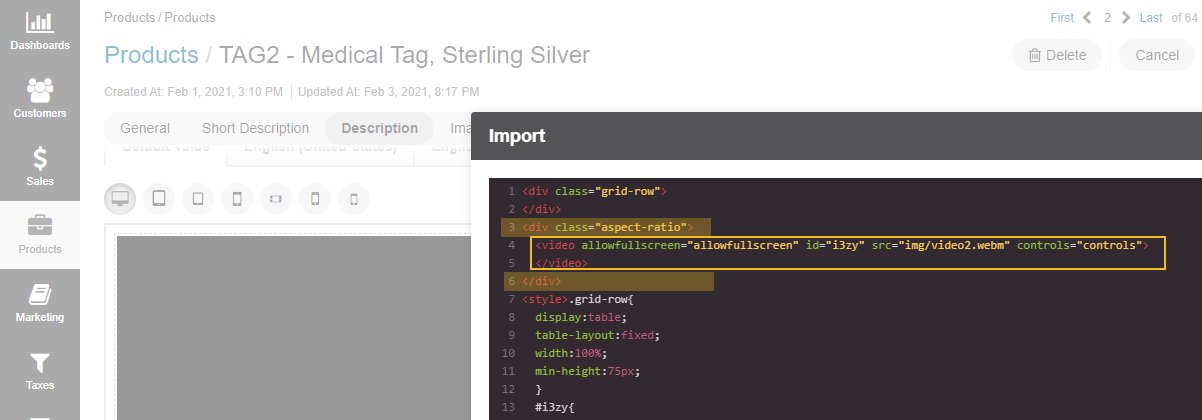
Click Import on the top menu above the canvas to open the HTML editor.
Find the video block and wrap it in a <div> container with the aspect-ratio class, as follows:
<div class="aspect-ratio"></div>
Add the following code to the <style> tag:
.aspect-ratio{
    overflow: hidden;
}
.aspect-ratio:before{
    content: '';
    width: 1px;
    height: 0;
    margin-left: -1px;
    padding-bottom: calc(9 / 16 * 100%);
    float: left;
}
Set the height and width parameters to your wrapped file:
width: 100%;
height: 100%;
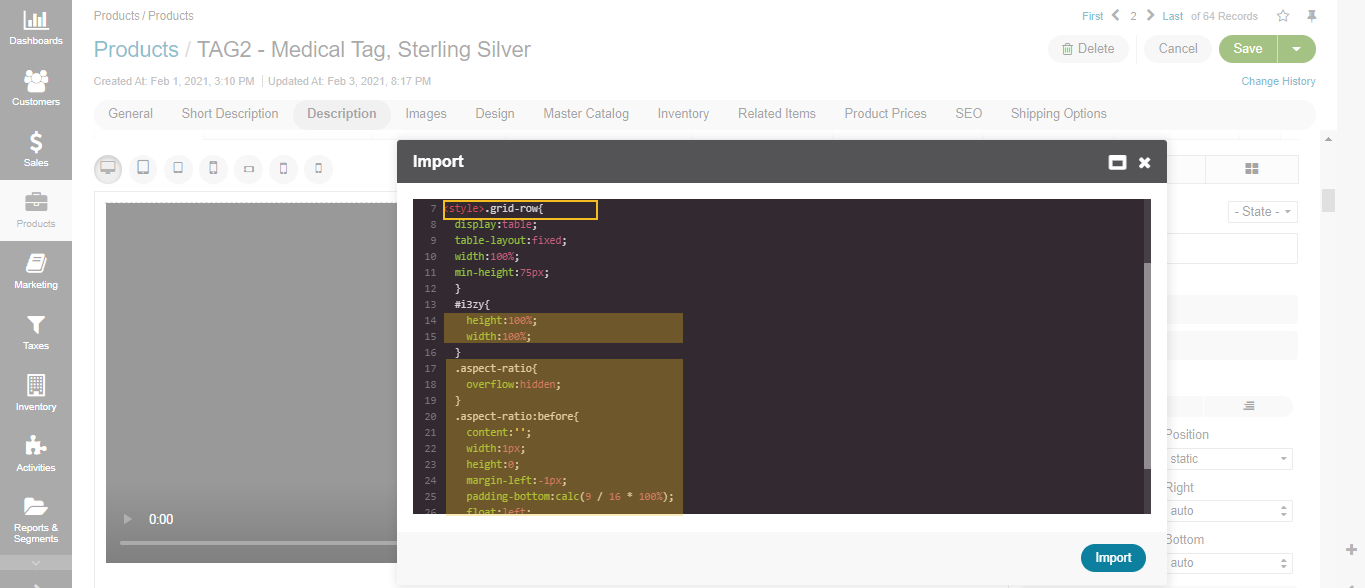
Click Import.
Click Save.
Insert Images
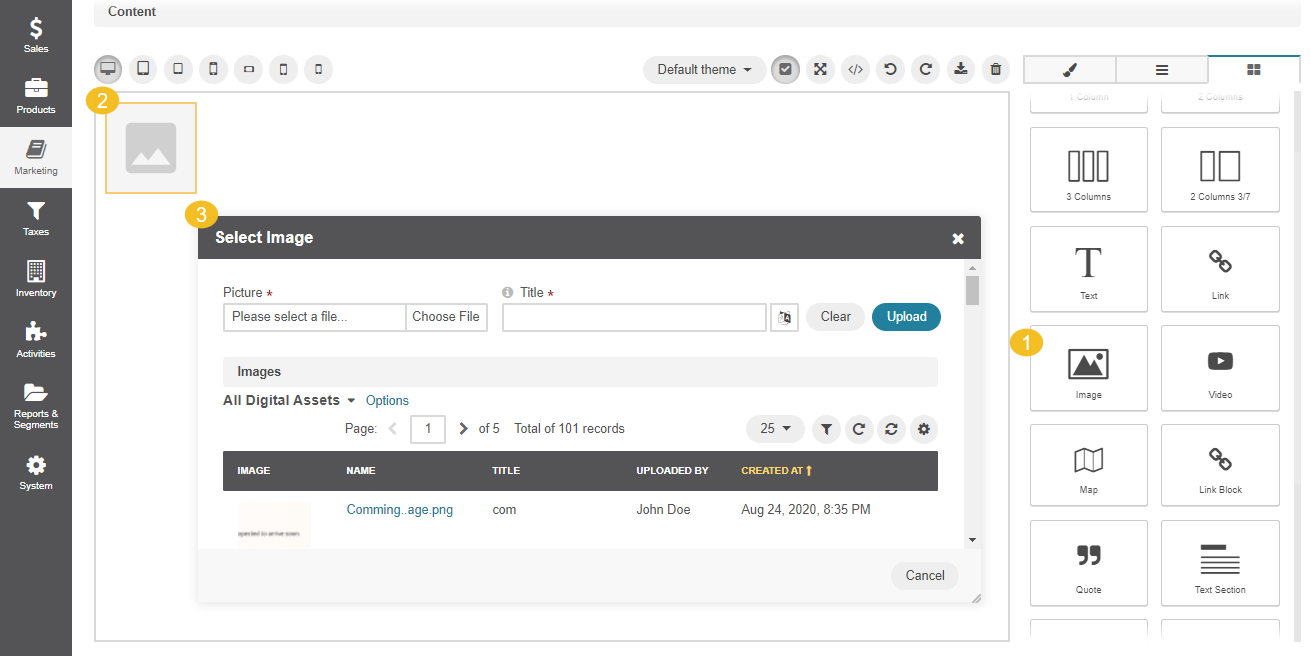
To insert an image to your content, you need to drag the image block to the canvas. Once you click the icon, it will navigate you to the file manager for you to select and add the required image from your local directory or from the list of available DA records.
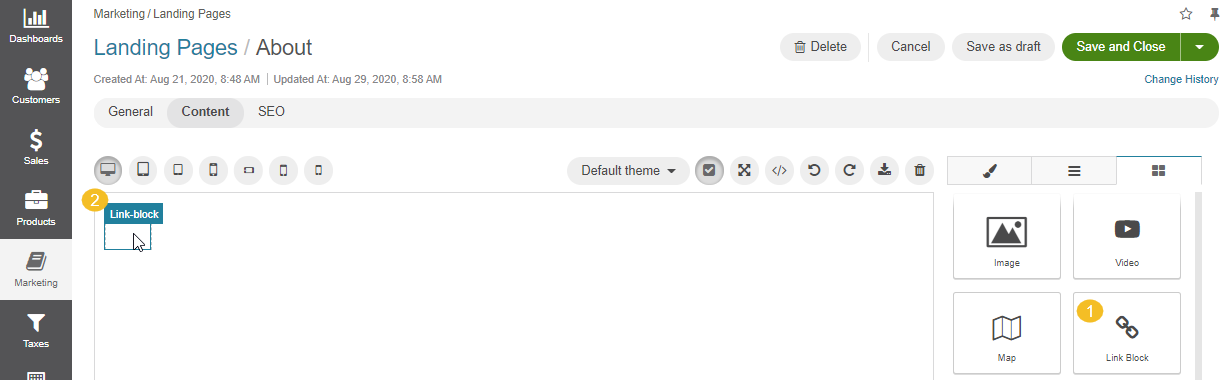
Insert Clickable Images
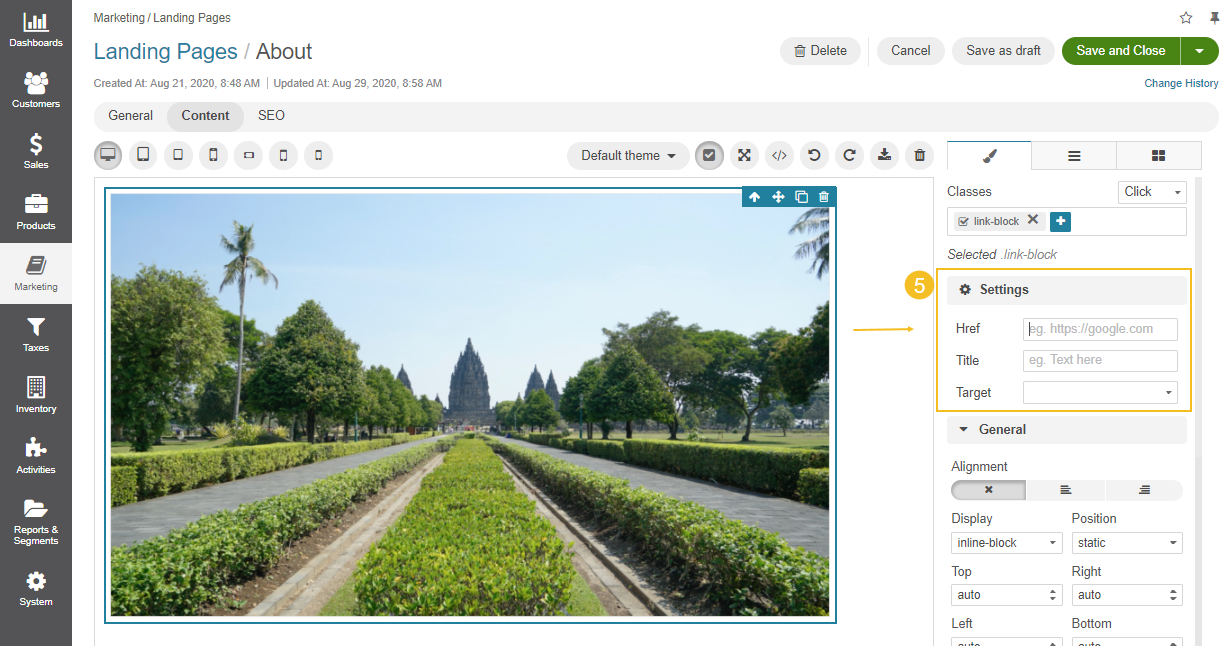
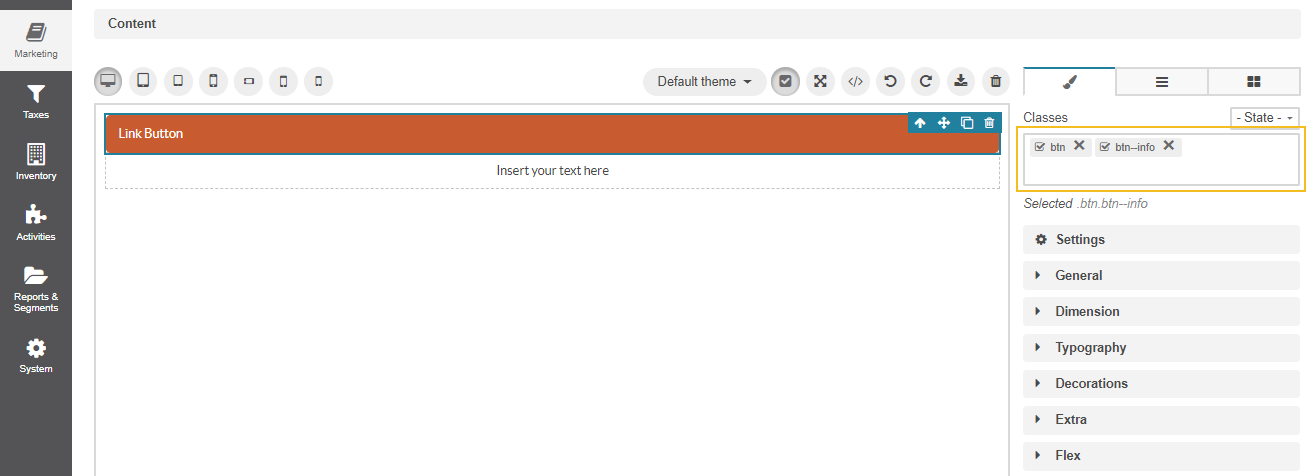
To add a clickable image to your content, you must first insert the link block (1,2). Then, place the image block inside the link block (3,4).
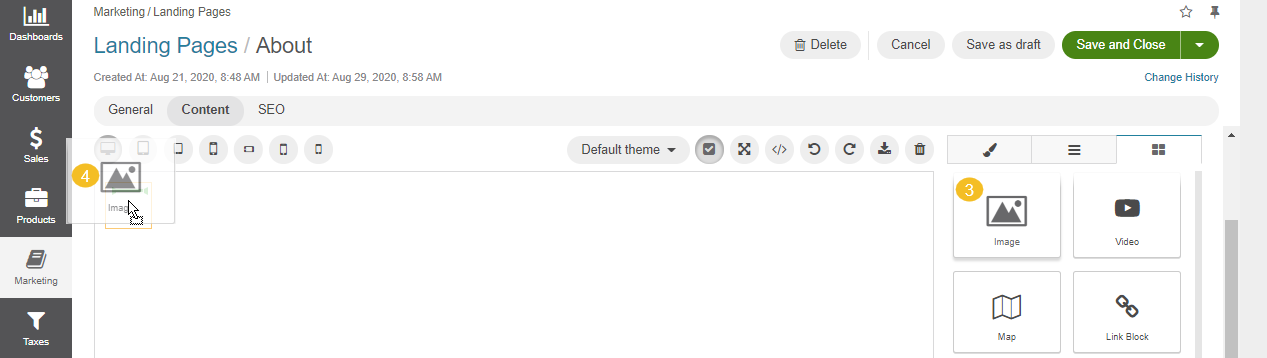
Click the link block again to display the Style Manager menu settings. In the Settings section, input the link for the image to direct people to the necessary website, once they click the image in the storefront.
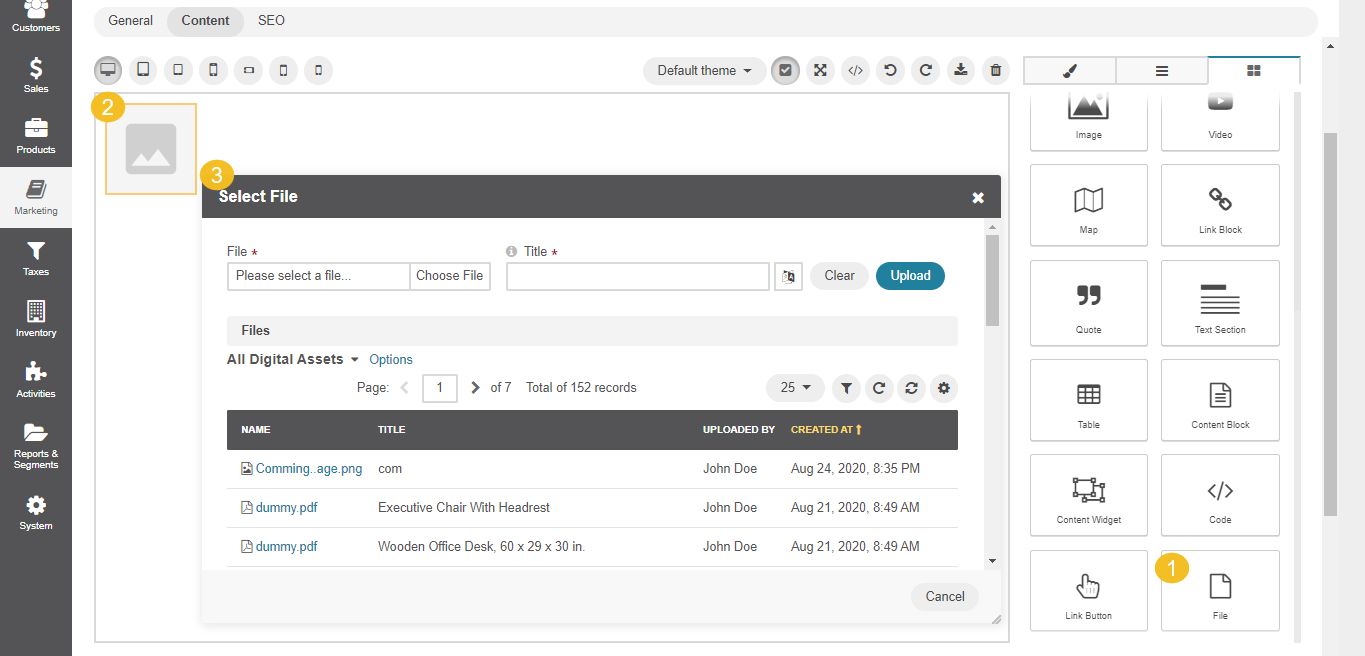
Insert Files
To insert a file to your content, you need to drag the file block to the canvas. Once you click the icon, it will navigate you to the file manager for you to select and add the required file from your local directory or from the list of available DA records.
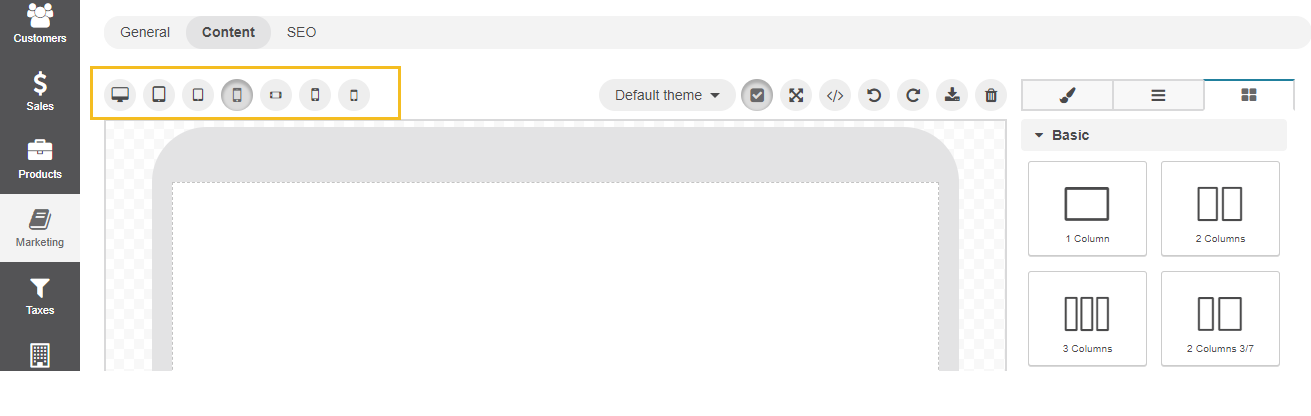
Add Columns
To add multiple columns to your content, you need to drag the block with the required column number (1,2,3) to the canvas. You can place a column inside another column to extend the quantity of columns, like in the example below:
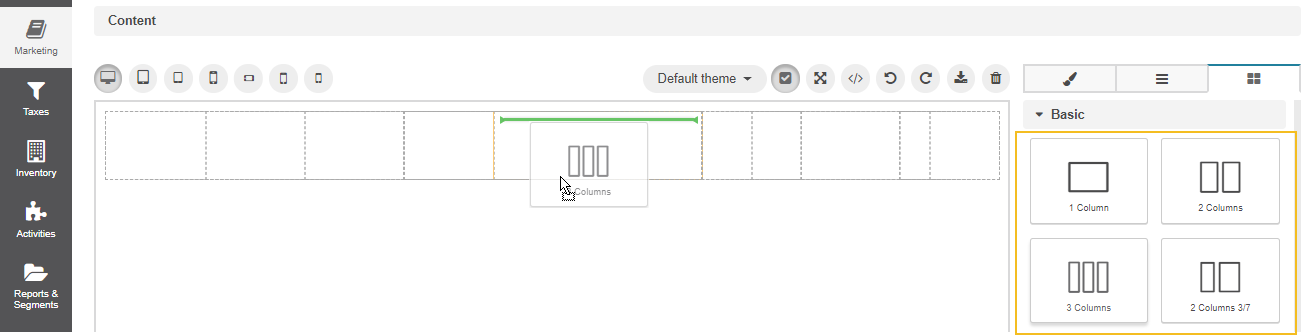
Columns are fully responsive and adapted to content, formatting, and styles that you apply afterwards.
Add Tables
To add a table to your web page, you need to drag the table block to the canvas and place it to the required location. By default, the block inserts a 3x3 table. You can either delete the unnecessary column or add another column by cloning the required one.

Insert Content Blocks
To add a content block to your web page, you need to drag the content block to your canvas and select the required one from the list of available content block that you have previously created and saved.
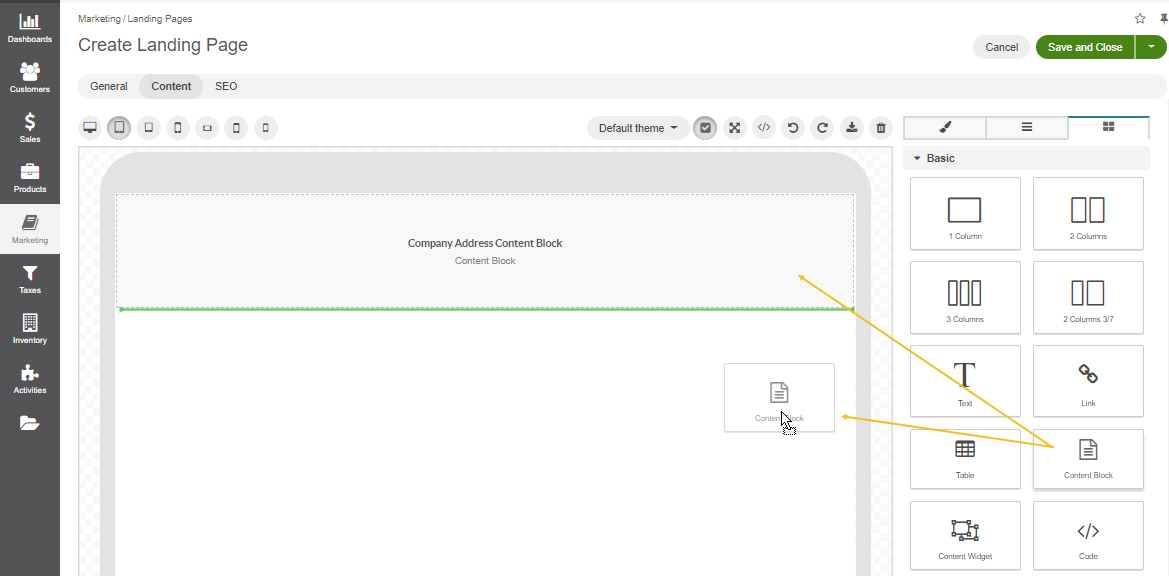
Once the landing page is added as a content variant to the content node of a web catalog, the content block should then become visible in the storefront.
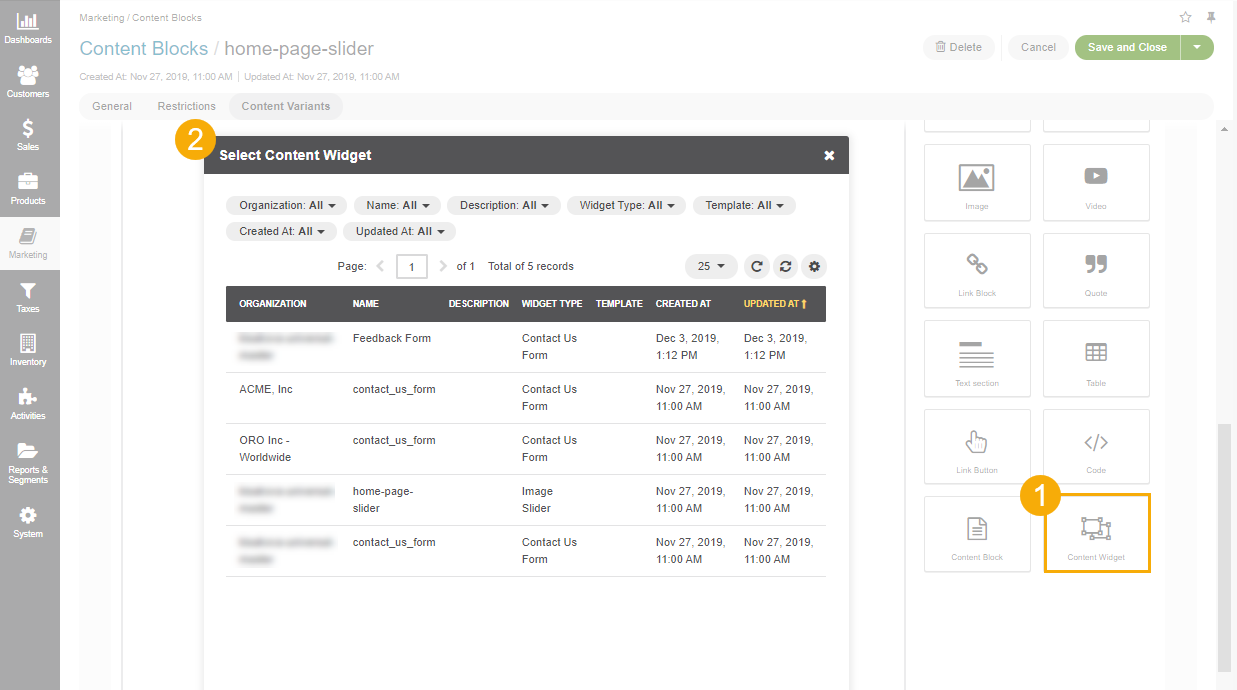
Insert Content Widgets
The widgets in OroCommerce come in two types, block widgets and inline widgets.
To add a block widget, you need to drag the content widget block to your canvas and select the required widget from the list of available widgets that you have previously created and saved.
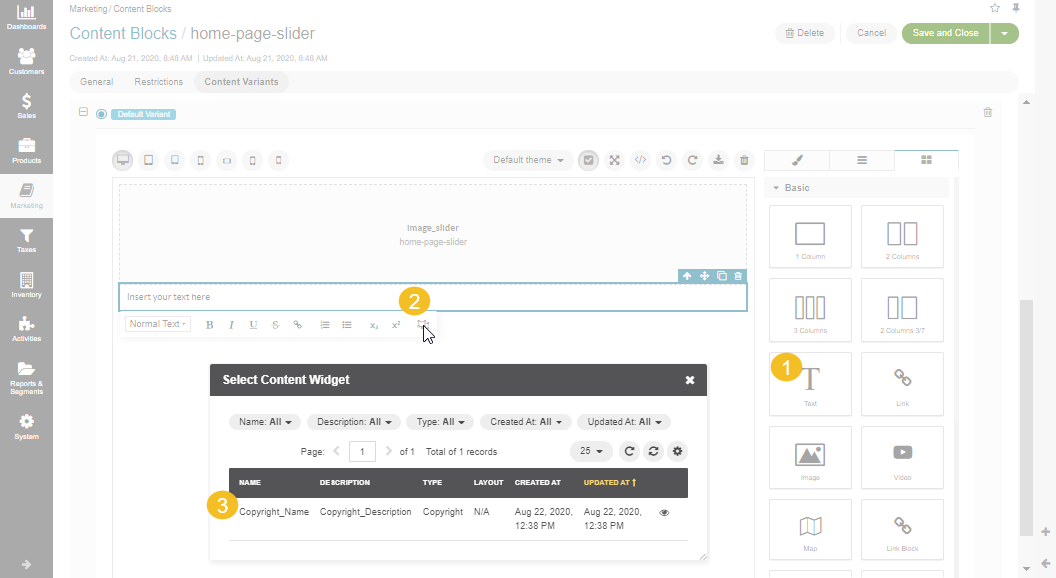
To add an inline widget, you need to add the text block, left-click it, and select the inline widget from the menu.
Apply Advanced Styling
To apply the existing CSS styles to an HTML element, you need to select the required block and enter the CSS style name in the Classes field under Style Manager. The style attribute with its defined properties and values is immediately assigned to the selected block. You can preview the changes directly in the WYSIWYG editor.
Align Blocks
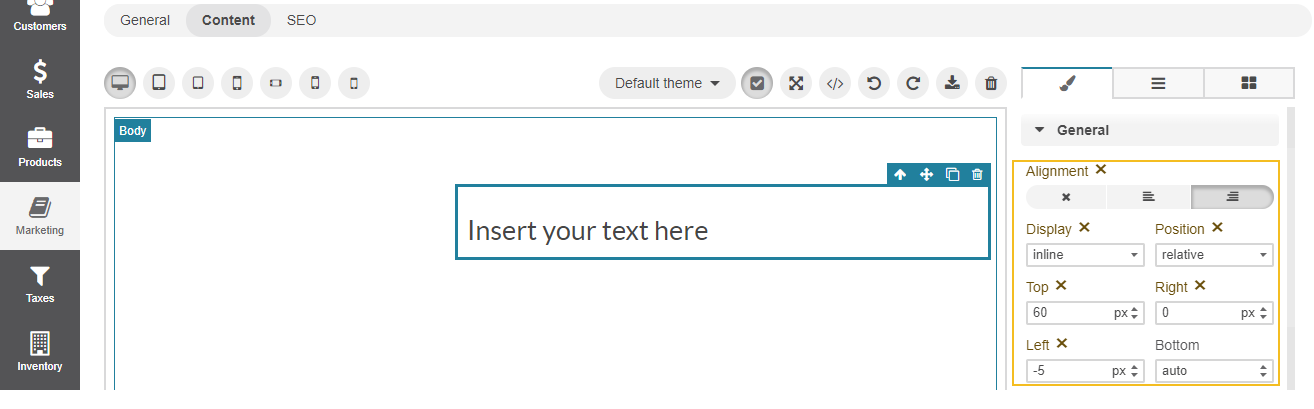
There are several ways to align the block to center, left, or right. For this, you need to click the block element to display the Style Manager menu settings and configure its options.
In the General section, select the required value in the Display and Position options. This allows you to relocate the block on the web page by changing the top, right, left, and bottom values.
In the Dimension section, set the following parameters:
width and height of the selected block
block margins — the space outside the content block, i.e., the area between the content block and the page edges
paddings — the space inside the content block, i.e, the area between the content block edges and the text inside

Align Content Inside Blocks
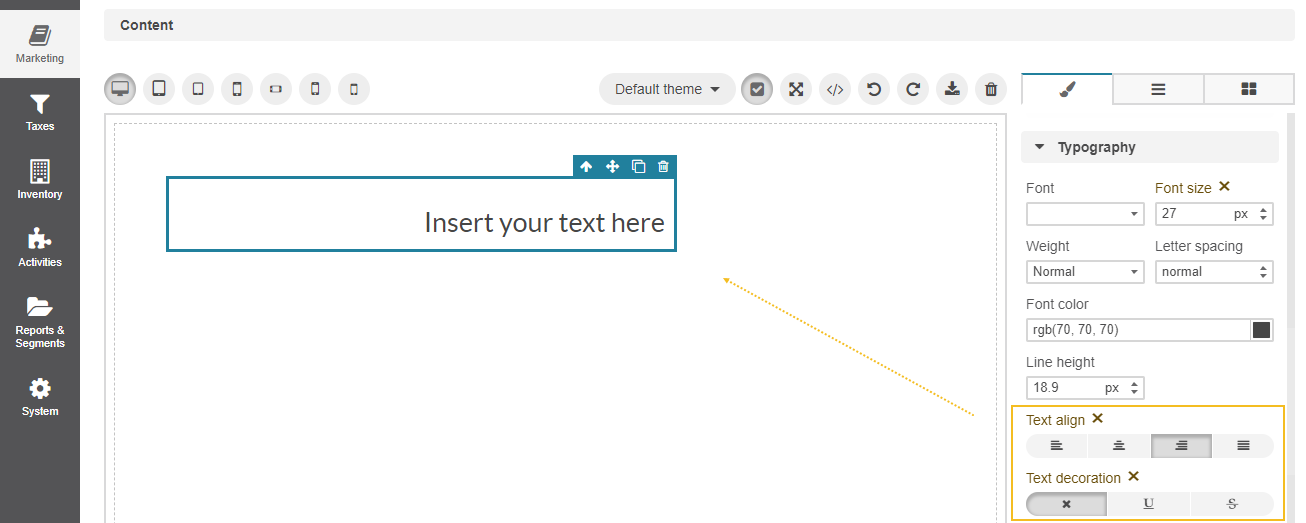
There are several ways to left-align, right-align, centre, or justify text, links, buttons, or any other content inside the block or column. For this, you need to click the block element to display the Style Manager menu settings and use one of the following options:
In the Typography section, select the required position for the text.
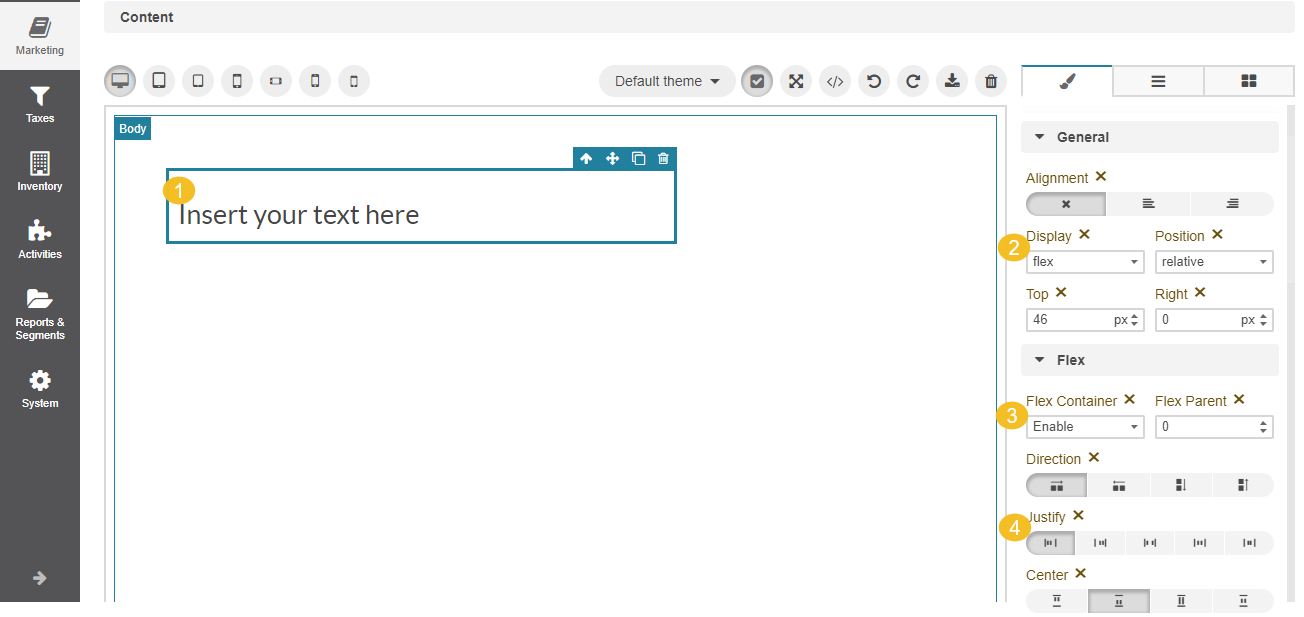
In the General section, select the Flex value for the Display option. Then, enable the flex container under the Flex section and align the text to the required position.
Adapt Content to Different Displays
You can set the individual formatting of your content for each display type (desktop, tablet, and mobile), including different background colors, blocks dimension, text alignment, and other. For this, select the display type and customize the settings appropriately. View the results dynamically by switching from one display to another.
Input or Edit HTML Code
If you are experienced at HTML coding, you can enter your own HTML code into the WYSIWYG editor via the import popup dialog.
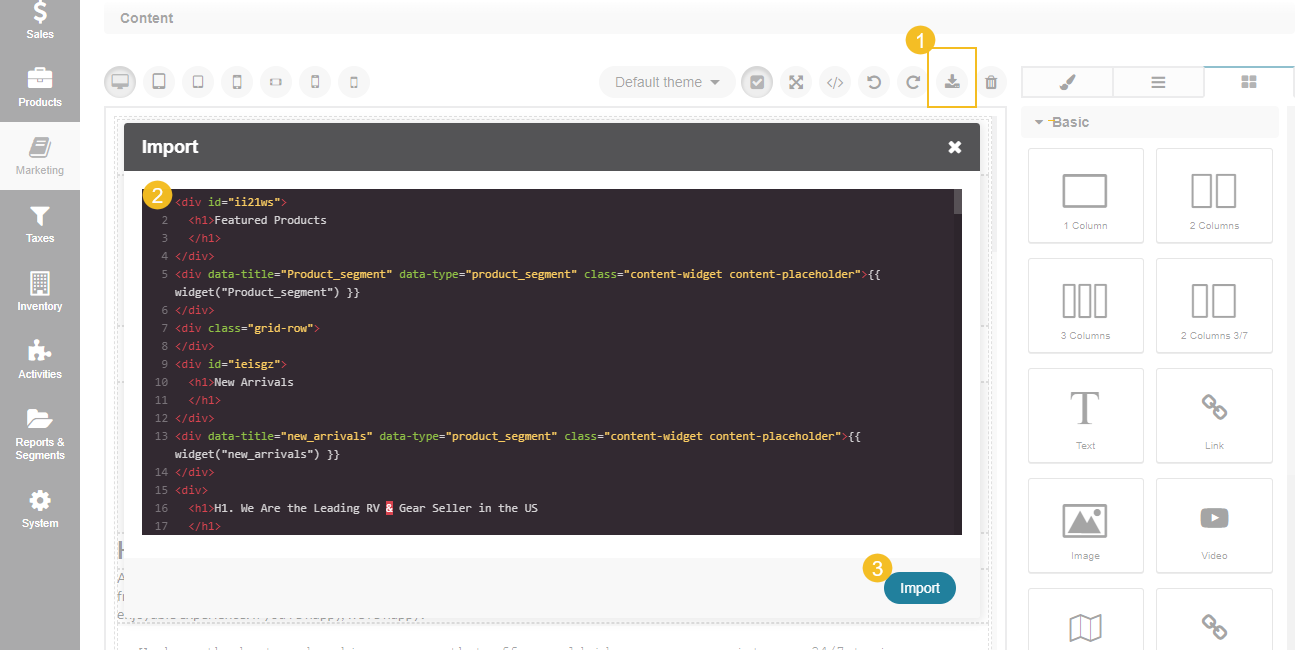
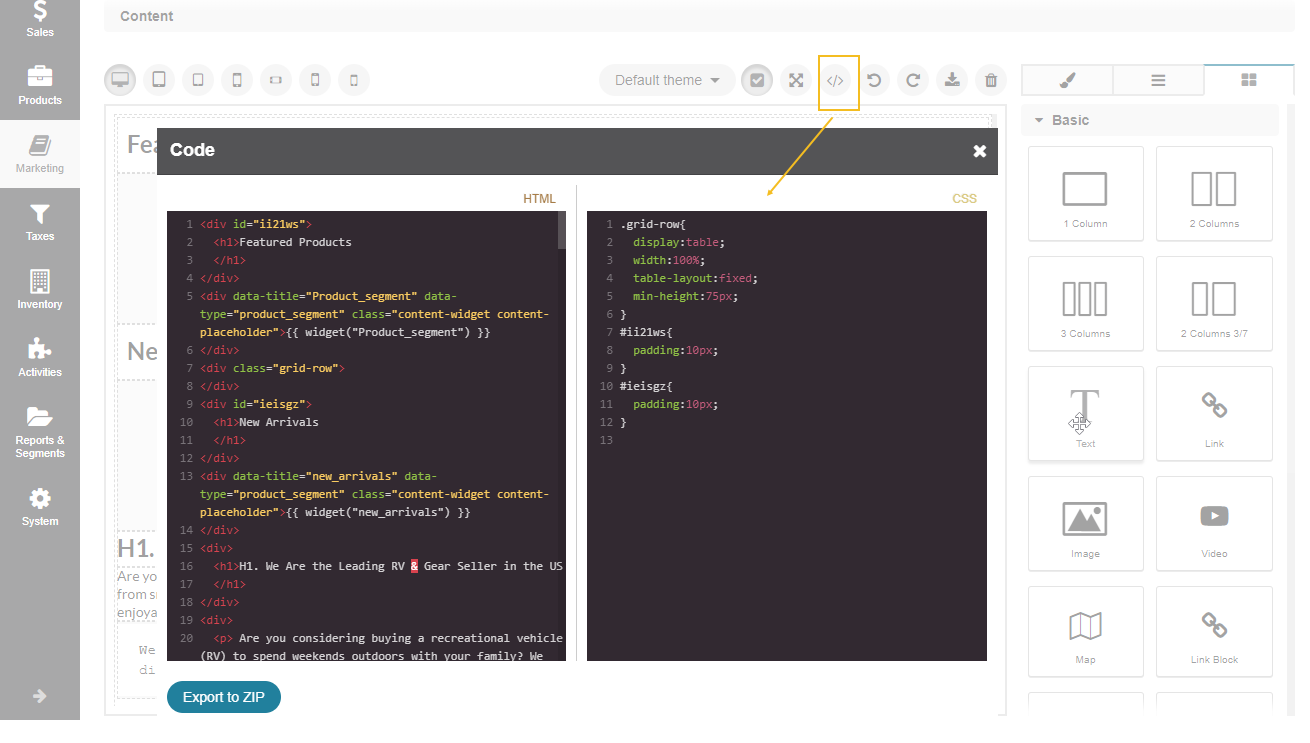
You can also edit the existing HTML code that was already applied to the canvas based on the created content. For this, click the </> icon on the toolbar from the right.
Related Topics