Important
You are browsing the documentation for version 4.1 of OroCommerce, OroCRM and OroPlatform, which is no longer maintained. Read the latest LTS version of the Oro documentation to get up-to-date information.
See our Release Process documentation for more information on the currently supported and upcoming releases.
Configure MailChimp Integration in the Back-Office
Install Extension
To configure MailChimp integration, ensure that you have MailChimp extension installed in your Oro instance. For installation instructions, click here.
Configure Integration on the MailChimp Side
To configure the integration with Oro application on the MailChimp side, you need to create an API key. To do that:
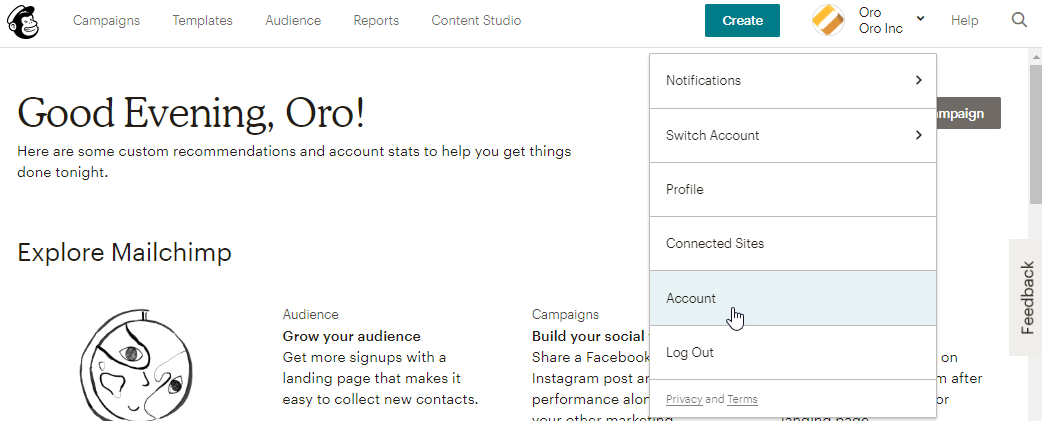
Login to MailChimp.
Navigate to your name in the upper right corner.
Select Account.
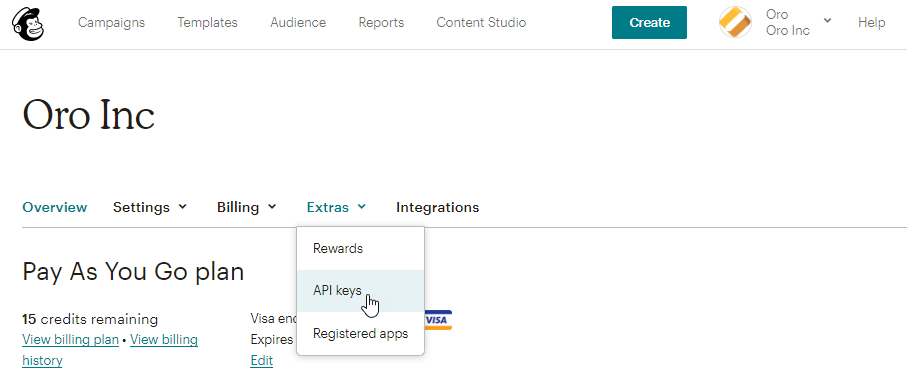
Go to Extras > API keys.
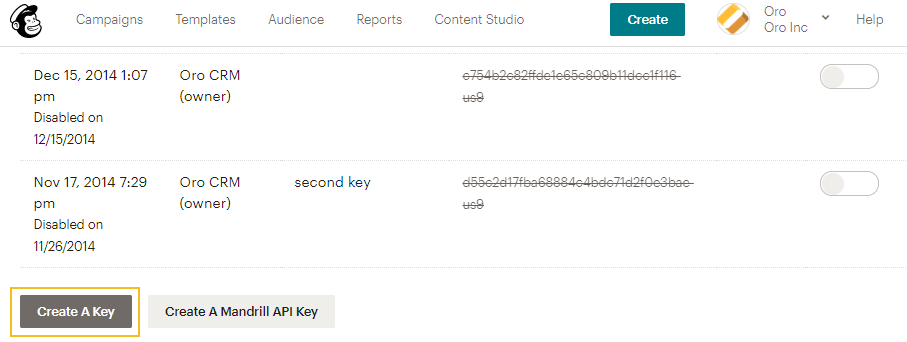
Scroll down to the bottom of the page and press Create a Key.
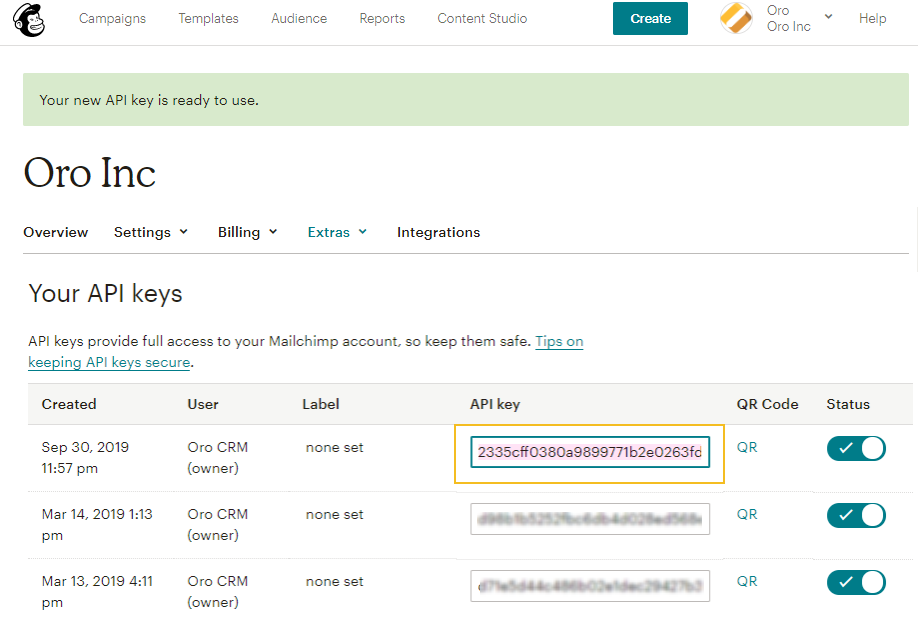
A newly created key will appear at the top of the list. Copy the key.
Configure Integration on the Oro Side
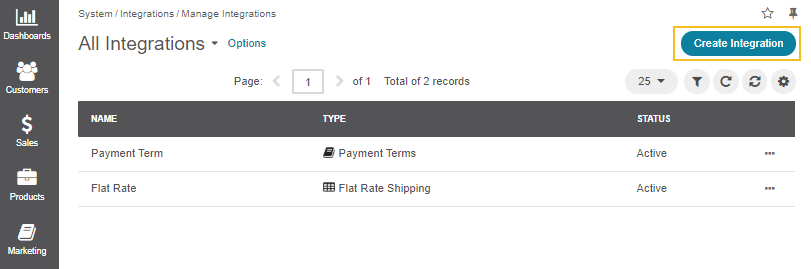
Log into your Oro application and navigate to System > Integrations > Manage Integrations.
Click Create Integration in the top right corner.
Next, complete the following fields:
Field
Description
Type
Among other third-party services, choose MailChimp as this is the integration we are configuring. A form specific to MailChimp will be displayed.
Name
Specify the integration Name as it will be referred to within Oro application.
API Key
Paste the API key you copied in your MailChimp account. Click Check Connection. Everything’s Chimpy means that the connection was successful and you are now authorized.
Activity Update Interval
Now set the Activity Update Interval to a period you plan to run your campaign for. This should be set based on the length of your campaign and data storage requirements specific to your Oro instance.
Status
Active or Inactive. By default, Status is set to Active.
Owner
The Owner determines the list of users who can manage the integration and the data synchronized with it. This means that the owner receives the data produced by the email campaign. All Entities imported within the integration will be assigned to the selected user. It is suggested to select a marketing rep as the owner.
Enable Two Way Sync
Use this section to enable or disable two-way synchronization. By default, Enable Two Way Sync is unchecked. If it remains unchecked, unsubscribes will pass from MailChimp to Oro application. If enabled, subscription status can be passed from Oro application to MailCHimp and the other way around.
Sync Priority:
Remote Wins means that the MailChimp will be considered the master and override conflicts with the Oro application. Local Wins means that local data will be the master and override any conflicts with MailChimp.

Click Save and Close.
The integration has been successfully configured and will now appear in the integration grid.
Sync Integration
In order to sync your integration:
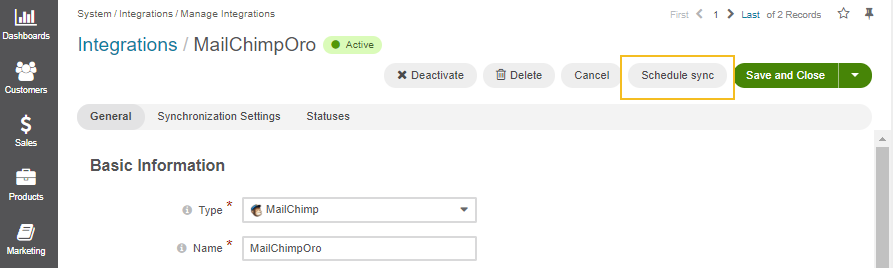
Navigate to System > Integrations > Manage Integrations.
Select your newly created integration.
Click Schedule Sync in the top right corner.
Business Tip
Technologies drive digital transformation in critical industries such as manufacturing. Learn how eCommerce can accelerate digital transformation in manufacturing.
Related Topic