Important
You are browsing the documentation for version 4.1 of OroCommerce, OroCRM and OroPlatform, which is no longer maintained. Read the latest LTS version of the Oro documentation to get up-to-date information.
See our Release Process documentation for more information on the currently supported and upcoming releases.
Configure Google Tag Manager Integration in the Back-Office
Integration between your Oro application and Google Tag Manager enables you to add tracking tags to your OroCommerce web store pages with the help of Enhanced E-commerce and collect information on customer behavior, purchases, product clicks, page views, etc. All this information can subsequently be shared with Google Analytics to measure various user interactions with products on your website through E-Commerce reports. This can help you get a full picture of on-page visitor behavior, how well your marketing strategies work, and how to target your audience better.
Hint
The feature requires extension, so visit Oro Marketplace to download the Google Tag Manager extension and then use the composer to install the extension to your application.
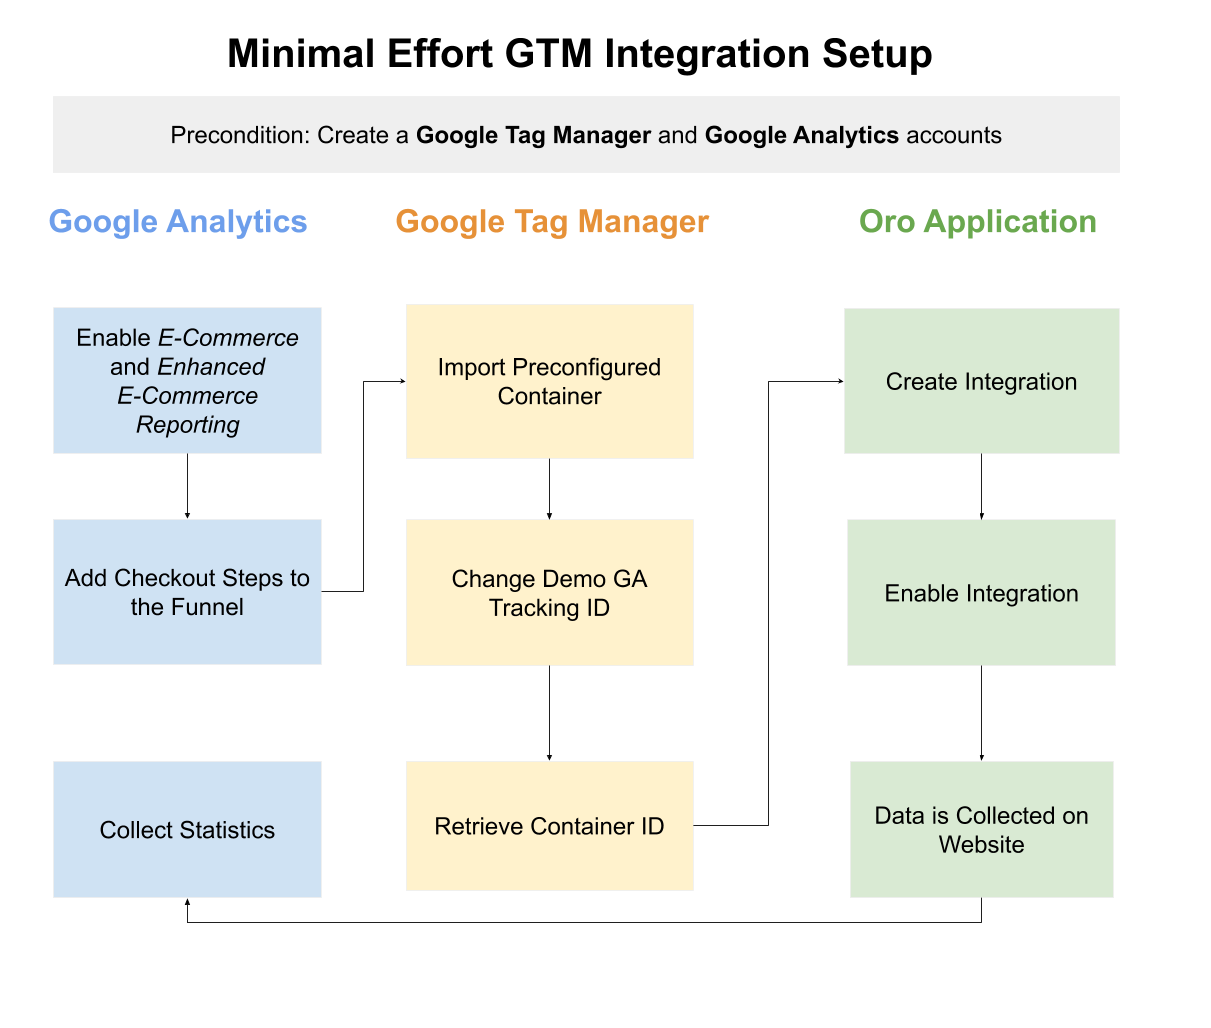
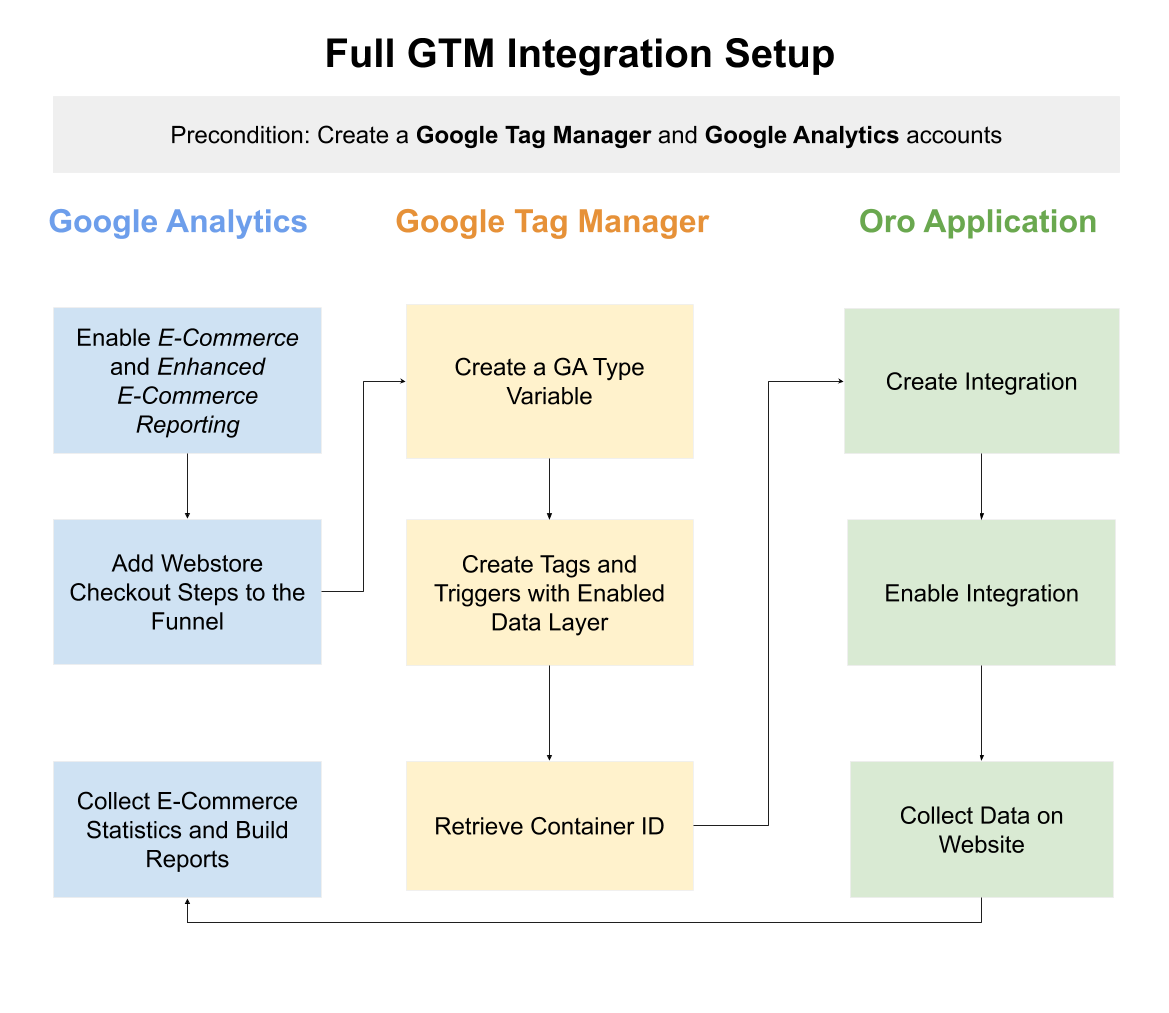
In this topic, we are going to illustrate how to integrate your Oro application with Google Tag Manager and pass data to Google Analytics using two methods:
By importing a pre-configured container with pre-defined tags and triggers for all collected events, or
By configuring tags for all required events manually
Hint
Please, be aware that you must have Google Tag Manager and Google Analytics accounts already created to proceed with the integration between your Oro application and Google Tag Manager, and pass data to Google Analytics.
Configure Google Analytics Settings
Retrieve Tracking ID
You require Google Analytics Tracking ID to configure your Google Tag Manager variable for the tag that tracks events on your OroCommerce website.
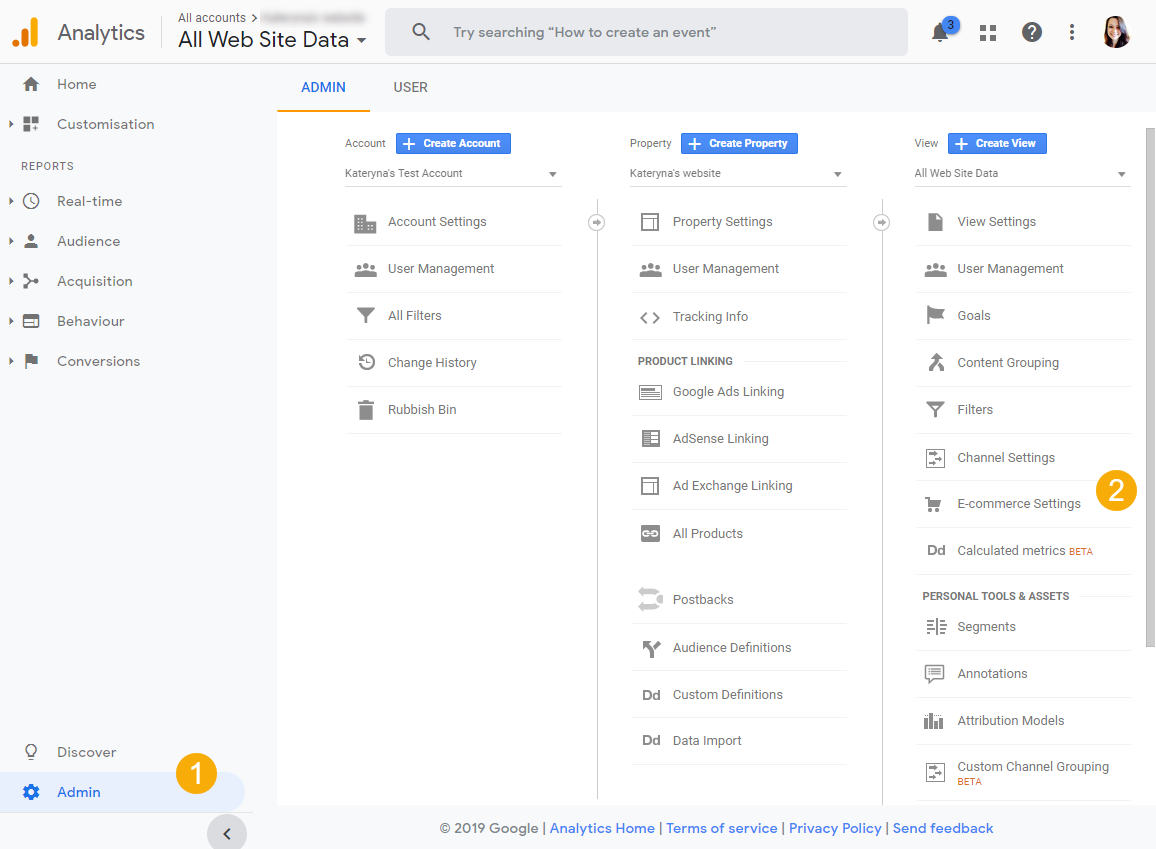
The Tracking ID is located in your Google Analytics account under Admin > Tracking Info > Tracking Code.
Keep the ID at hand when you start configuring tags in Google Tag Manager.
Enable Google Analytics Enhanced E-Commerce
Google Analytics Enhanced E-commerce enables you to get better insights into the shopping behavior of your web store users (e.g., by offering you out-of-the-box reports on products, brands, orders). It sends valuable data, such as product impressions, promotions, and sales data with any of your Google Analytics page views and events. You can use page views to track product impressions and product purchases, and use events to track checkout steps and product clicks.
You need to enable Enhanced E-commerce in your Google Analytics account and map your checkout steps to retrieve the data collected by Google Tag Manager on your OroCommerce website. Please keep in mind that in order for Enhanced E-commerce to retrieve and process information, you need to select Data Layer as a source of E-commerce data when configuring tags in Google Tag Manager.
To enable Enhanced E-commerce:
Navigate to your Google Analytics account, and click Admin > All Web Site Data > E-commerce Settings.
Toggle the switches to set Enable E-commerce and Enable Enhanced E-commerce Reporting to ON.
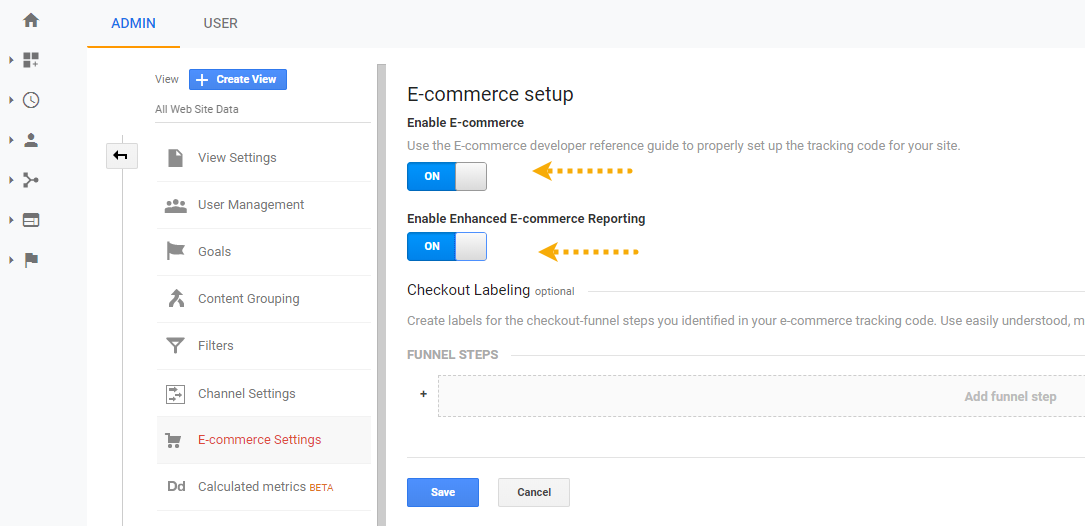
In the Checkout Labeling section, add your checkout steps to the funnel.
The following screenshot illustrates mapping of the checkout steps of the default OroCommerce web store.
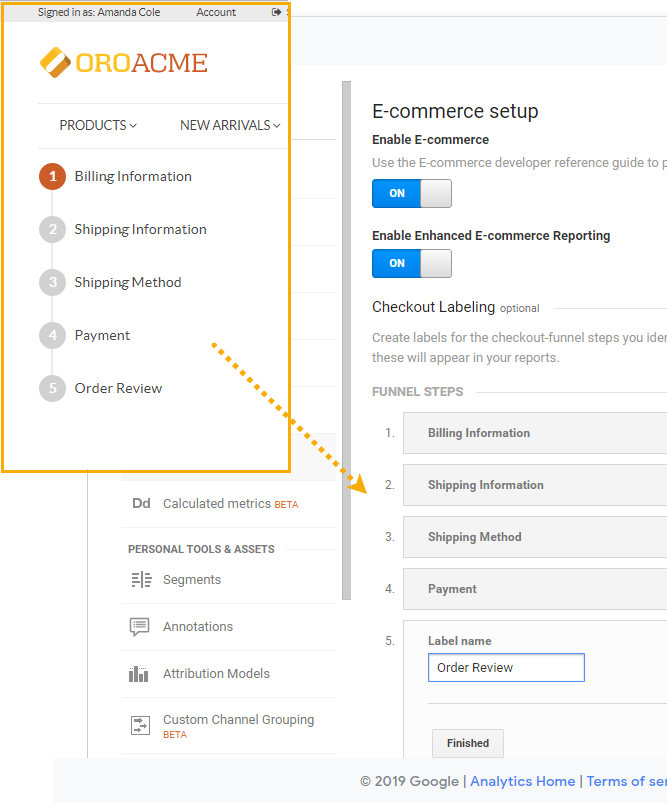
Adding checkout steps of your web store enables you to track checkout behavior.
Click Save
Important
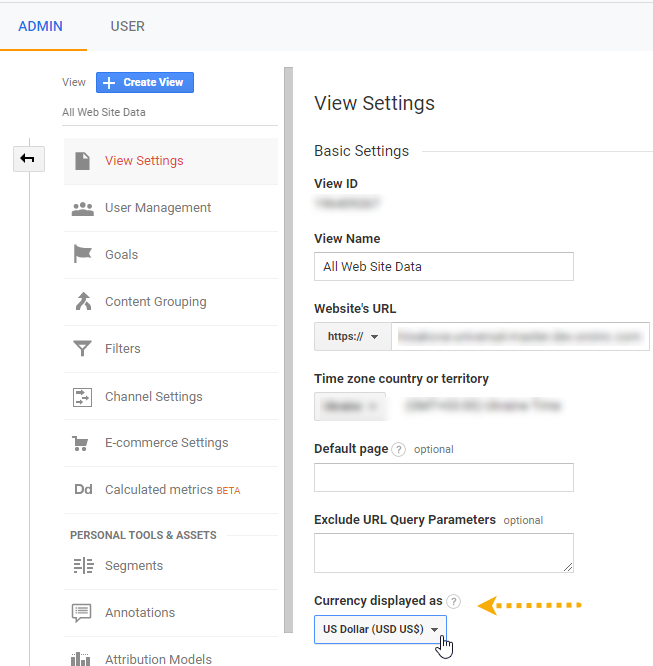
Google Analytics tracks only one currency at a time. This means that if, for example, your default currency is set to US dollars, but you have a multi-currency web store (available for the Enterprise edition only), a purchase of 100EUR will be tracked in the converted dollar amount of 113USD (depending on the currency rate that day). To set the default currency in your Google Analytics account, navigate to Admin > View Settings > Basic Settings > Currency displayed as.
Configure Google Tag Manager Settings
To collect information (events) from your web store, you need to create tags in your Google Tag Manager account for each event that you want to track. Enhanced E-commerce enables you to track and collect information about the following events:
You can either import pre-defined tags that we have configured for all types of events that can be collected for Enhanced E-commerce, or create tags manually for those events that you would like to track. Importing pre-defined tags requires minimal efforts, as each tag has already been pre-configured with triggers and variables that will enable you to connect to your OroCommerce website. Creating tags from scratch requires more time but allows you to provide custom data during configuration, or create tags only for specific events.
Retrieve Container ID
You require Google Tag Manager Container ID to integrate with your Oro application.
The Container ID is located in your Google Tag Manager account on the top right of the workspace page. It is formatted as GTM-XXXXXX.
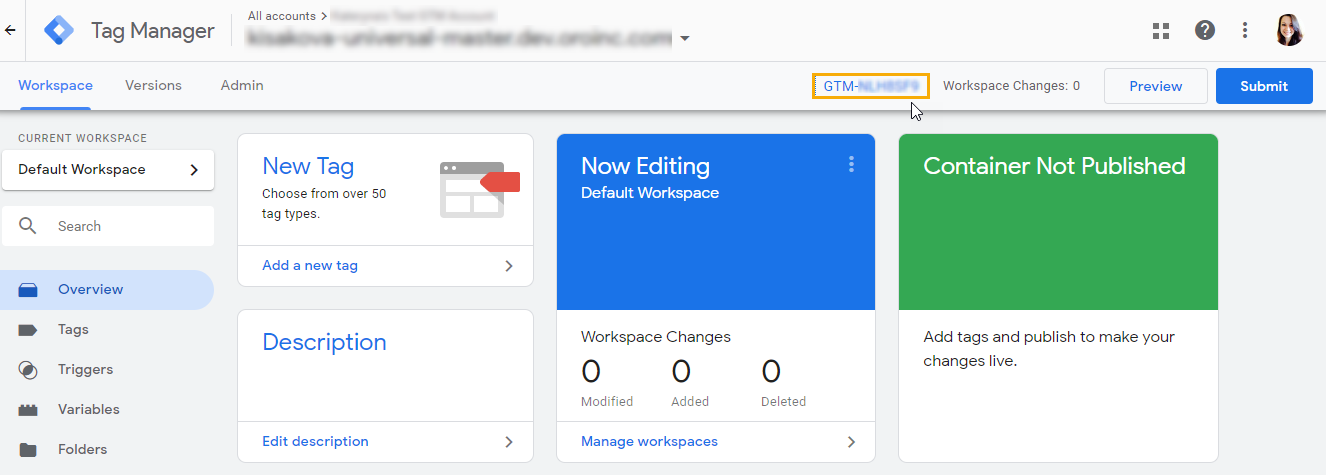
Keep the container ID at hand when you start creating an integration between Google Tag Manager and OroCommerce.
Option 1: Import Container
To simplify tag configuration, download a .json file with a container that includes tags that have already been pre-defined for your convenience. All you need to do is import this file into your Google Tag Manager account, and substitute the dummy Tracking ID in the variable to the Tracking ID of your Google Analytics account.
Follow the steps below to complete import:
Download the .json file with a pre-configured container.
Save and extract the archive on your computer.
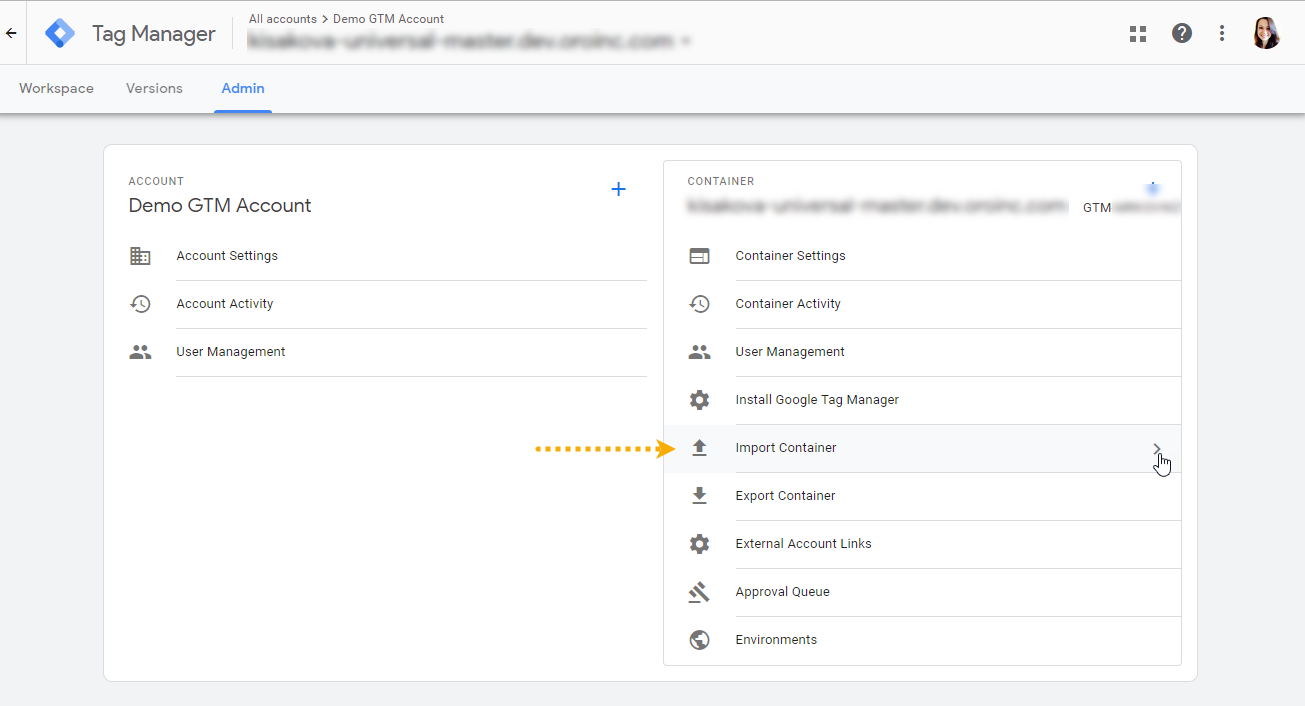
In your Google Tag Manager account, navigate to Admin > Import Container.
Click Choose container file to import the extracted .json file. The file contains 10 tags, 9 triggers, and 6 variables.
Choose the workspace and import option.
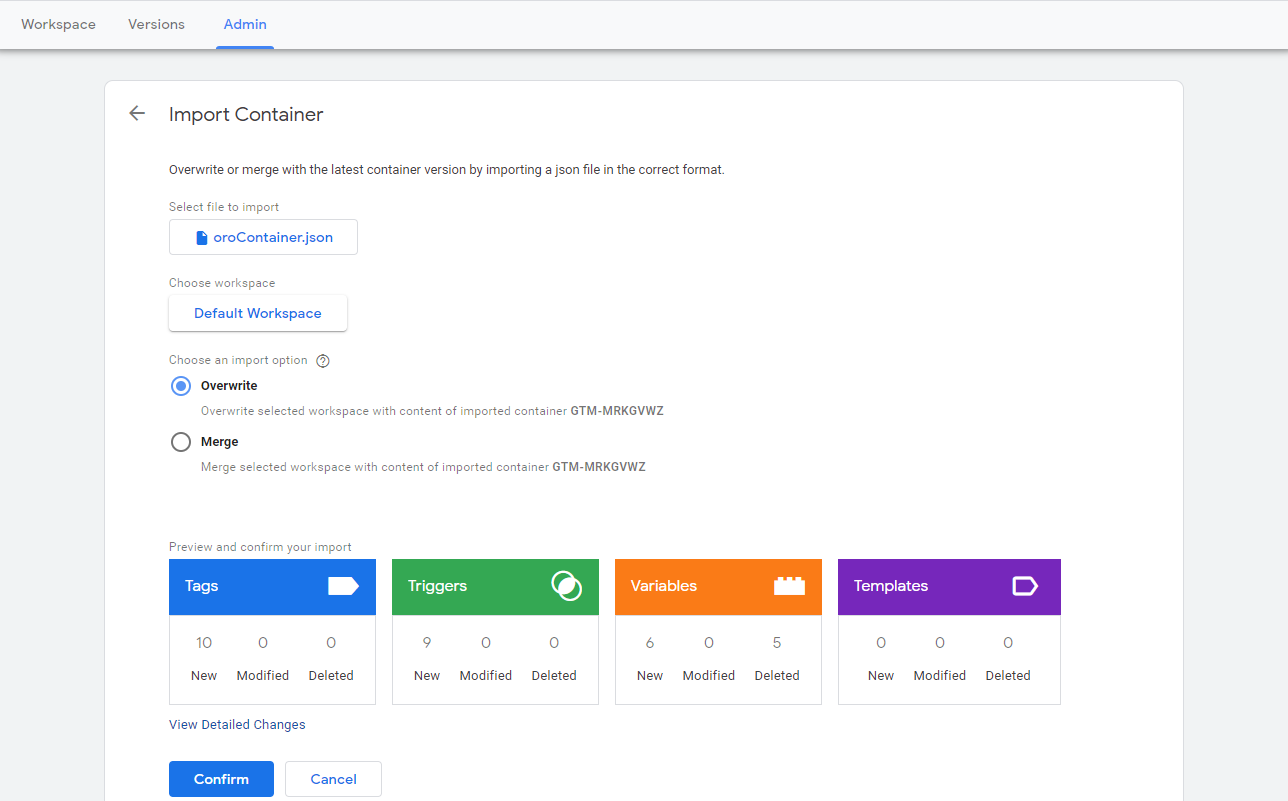
Click Confirm to start file import.
The container that you have imported contains a dummy Tracking ID number. You need to change the ID to be able to transfer correct data to Google Analytics.
To change the tracking ID for the imported variable:
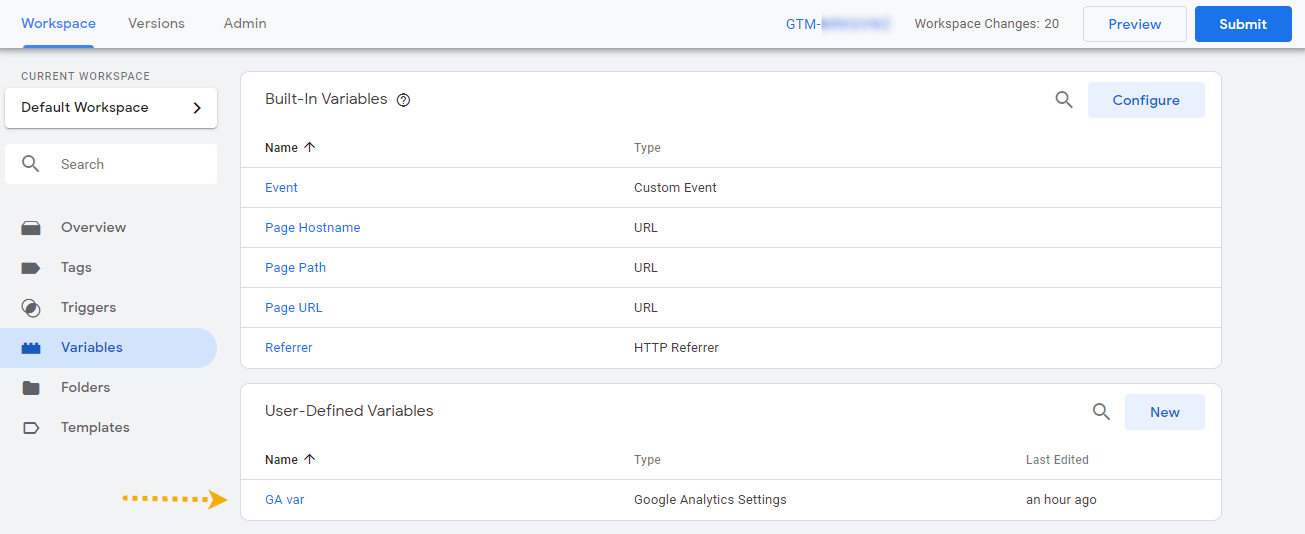
In your Google Tag Manager Account, click Variables in the left menu pane.
In the User-defined Variables section, click GA var to open its configuration page.
Click the Edit icon
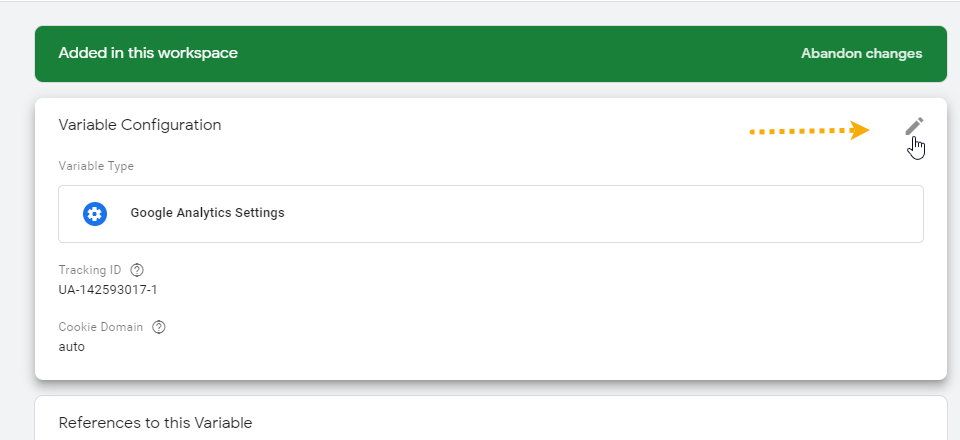
Provide your Google Analytics Tracking ID number that follows the UA-XXXXXXXXX-1 instead of the dummy number.
Click Save to save variable settings.
Option 2: Configure Tags Manually
To start collecting information from your web store, you need to create a variable and triggers to populate tags for all or selected events that you want to track on your website. When configuring tags manually, make sure that:
The variable is of Google Analytics Type
Tags have Enable Enhanced Ecommerce Features enabled
Tags use Data Layer to store information and pass it to Google Analytics
Create a Variable
To create a variable that enables you to configure Google Analytics settings for the tags:
In the left pane menu of your workspace, click Variables and then New.
Provide variable name, e.g., {{GA var}}.
Click Variable Configuration.
For Variable Type, select Google Analytics Settings. This setting ensures that tracking data is sent to Google Analytics.
Provide the Tracking ID from your Google Analytics account.
Hint
The Tracking ID is located in your Google Analytics account under Admin > Tracking Info > Tracking Code.
Click Save.
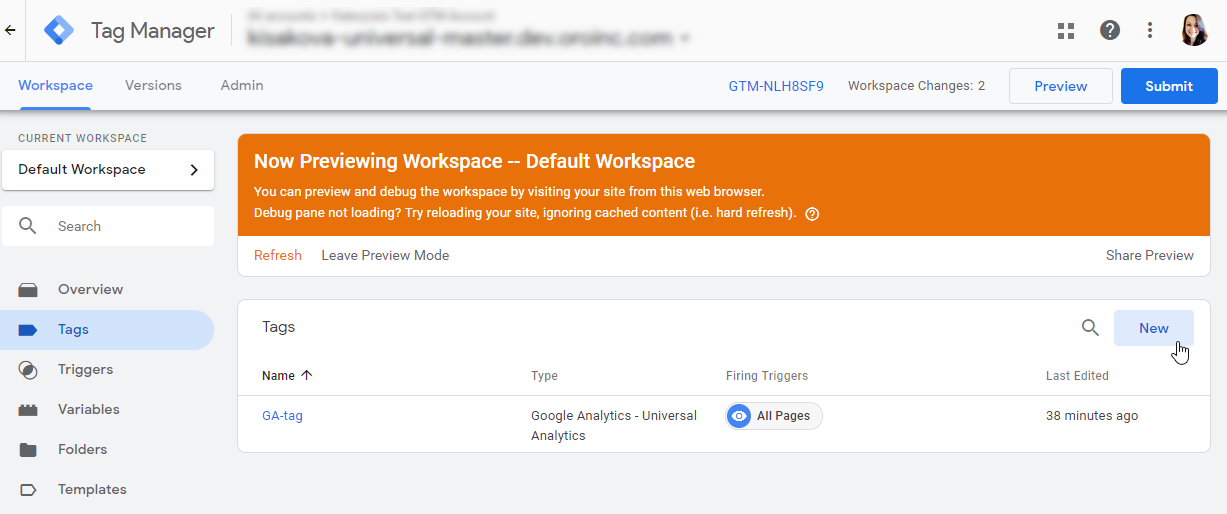
Create Tags
To create a new tag, navigate to the left side of the main interface, click Tags and then New.
Further configuration options depend on the event type that you want to track.
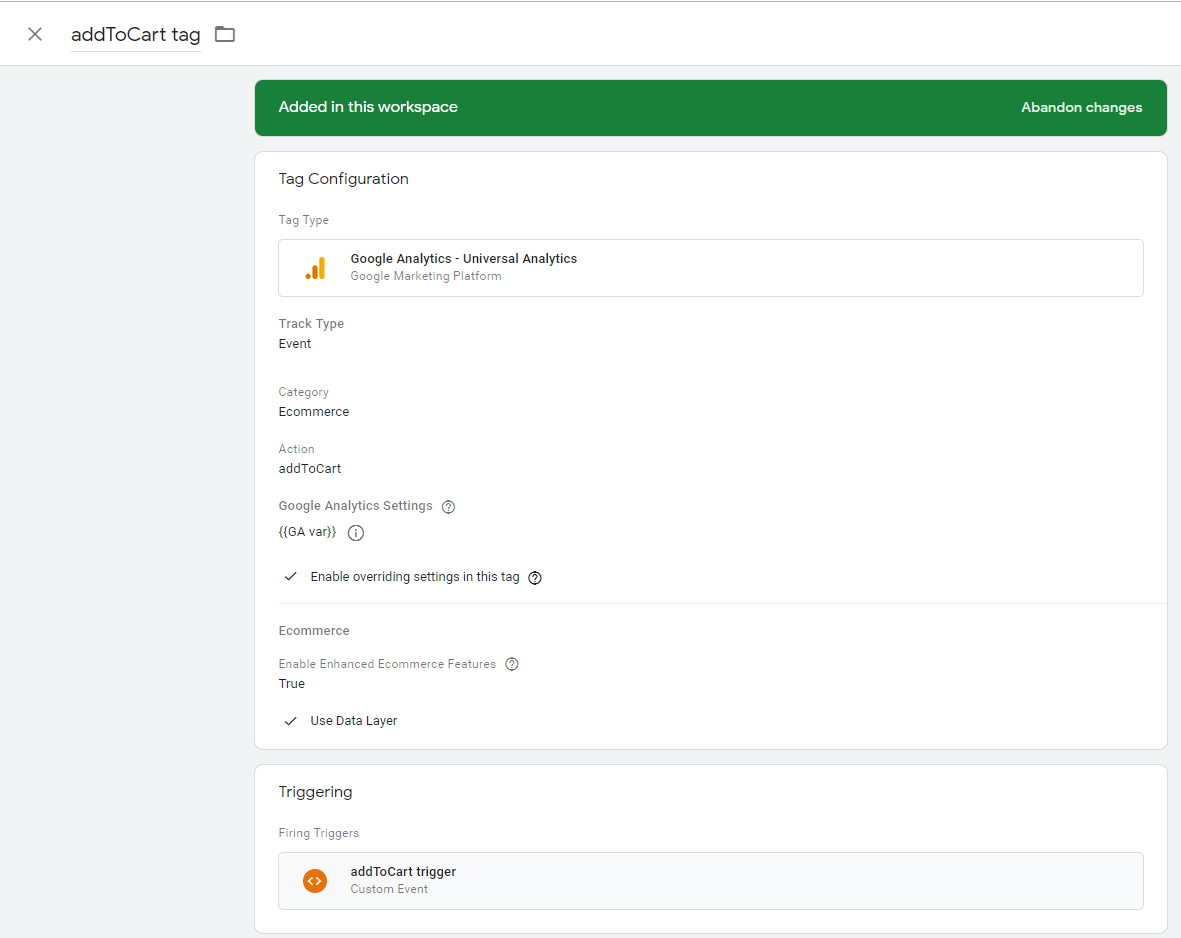
addToCart
To track when items are added to customer user shopping lists in your web store, create an addToCart tag.
To configure it correctly, provide the following tag, trigger, and variable configuration options:
Tag Configuration
Name — addToCart tag
Track Type — Event
Category — Ecommerce
Action — addToCart
Google Analytics Settings — {{GA var}}
Enable overriding settings in this tag — Yes
Tracking ID — Inherited from Settings variable
More Settings > Ecommerce > Enable Enhanced Ecommerce Features — True
Use Data Layer — Yes
Triggering
Name — addToCart
Trigger Type — Custom Event
The trigger fires on — All Custom Events
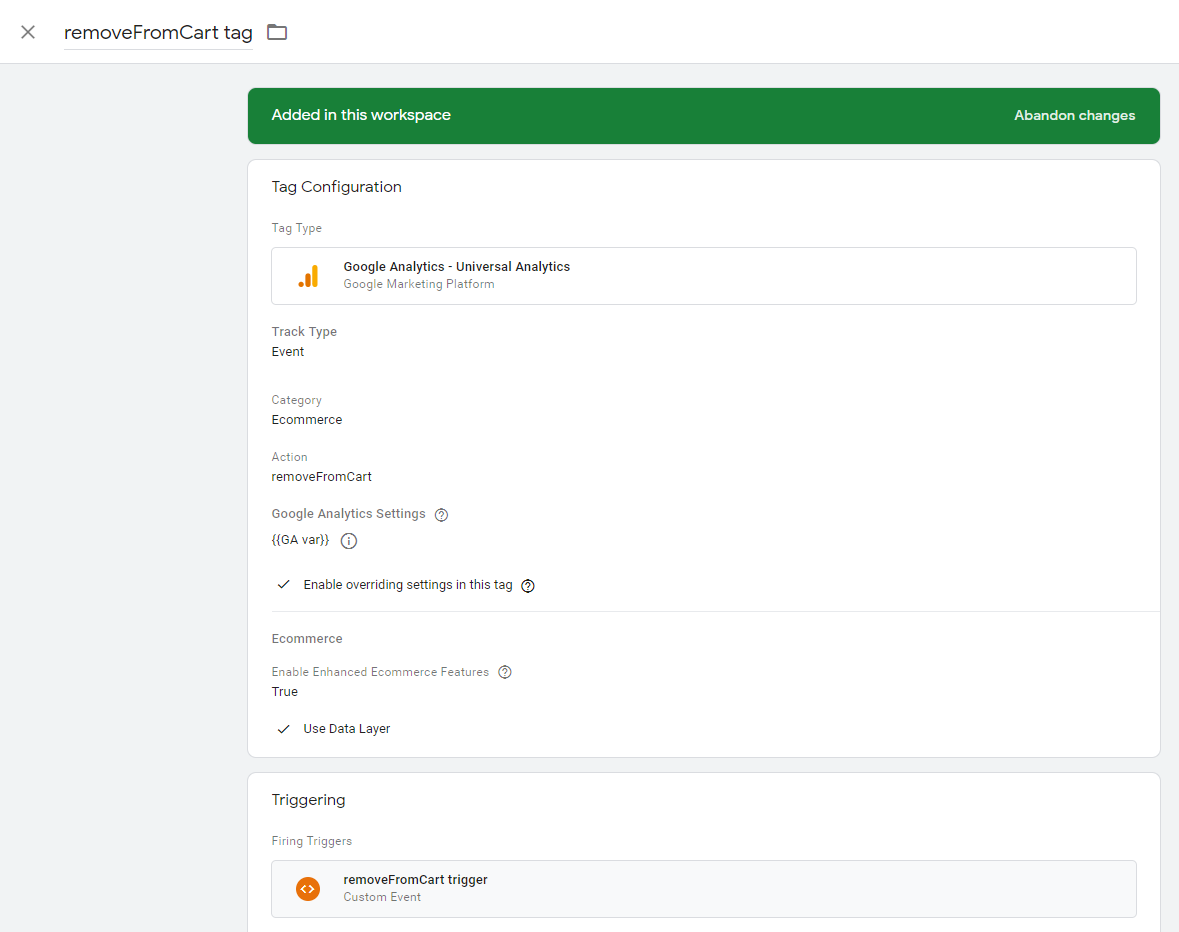
removeFromCart
To track when items are removed from customer user shopping lists in your web store, create a removeFromCart tag.
To configure it correctly, provide the following tag, trigger, and variable configuration options:
Tag Configuration
Name — removeFromCart tag
Track Type — Event
Category — Ecommerce
Action — removeFromCart
Google Analytics Settings — {{GA var}}
Enable overriding settings in this tag — Yes
Tracking ID — Inherited from Settings variable
More Settings > Ecommerce > Enable Enhanced Ecommerce Features — True
Use Data Layer — Yes
Triggering
Name — removeFromCart
Trigger Type — Custom Event
The trigger fires on — All Custom Events
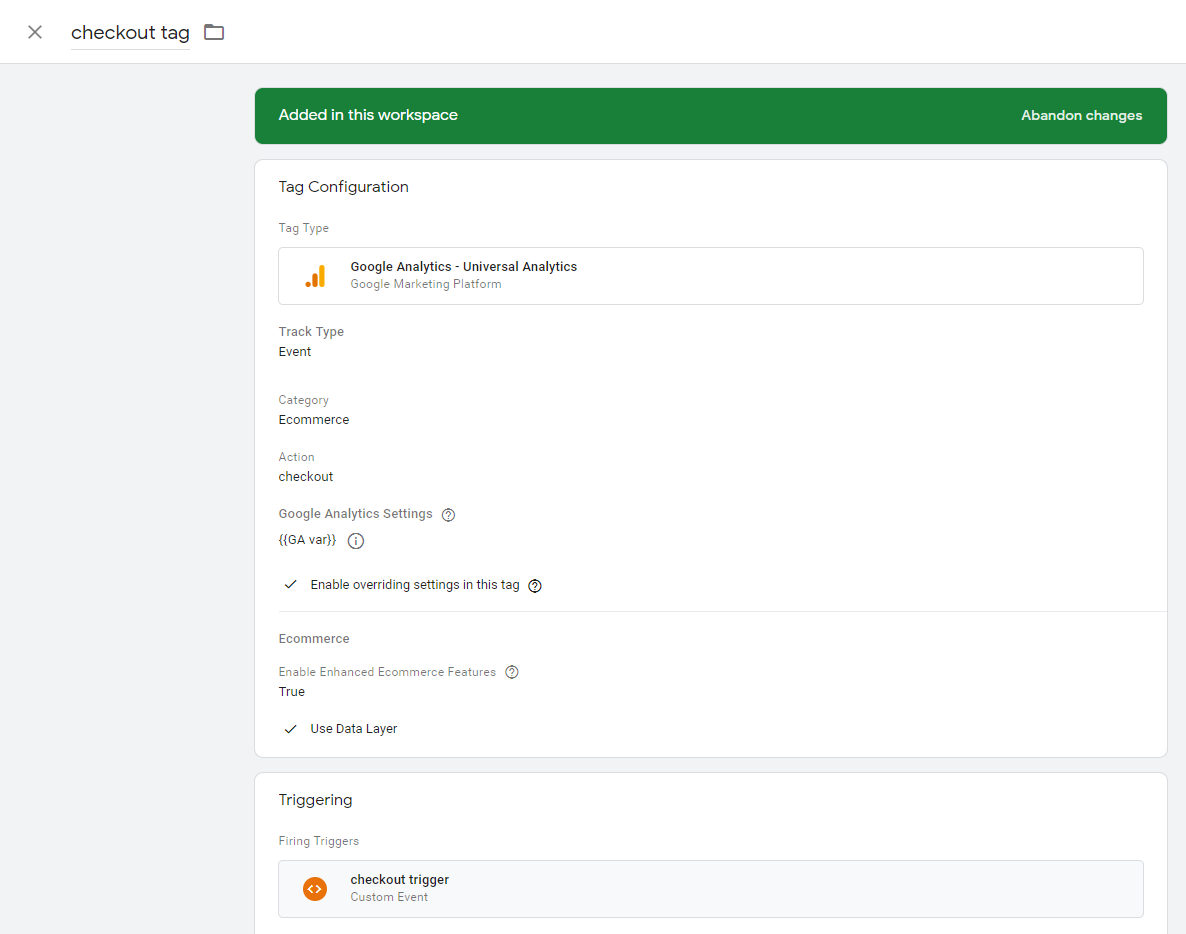
checkout
To measure each step in a checkout process, create a checkout tag.
To configure it correctly, provide the following tag, trigger, and variable configuration options:
Tag Configuration
Name — checkout tag
Track Type — Event
Category — Ecommerce
Action — checkout
Google Analytics Settings — {{GA var}}
Enable overriding settings in this tag — Yes
Tracking ID — Inherited from Settings variable
More Settings > Ecommerce > Enable Enhanced Ecommerce Features — True
Use Data Layer — Yes
Triggering
Name — checkout
Trigger Type — Custom Event
The trigger fires on — All Custom Events
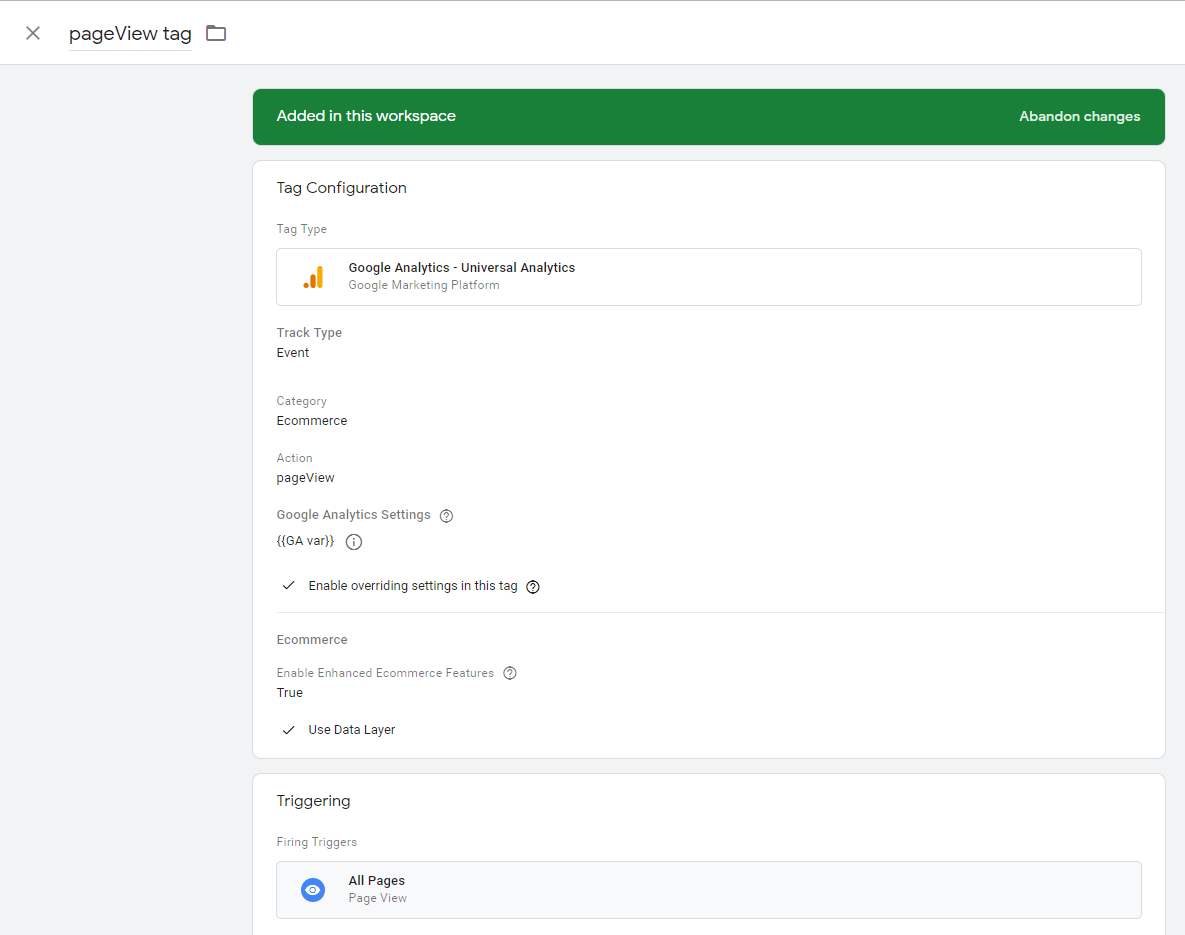
pageView
To track each time a page loads in a web browser, create a pageView tag.
To configure it correctly, provide the following tag, trigger, and variable configuration options:
Name — pageView tag
Track Type — Event
Category — Ecommerce
Action — pageView
Google Analytics Settings — {{GA var}}
Enable overriding settings in this tag — Yes
Tracking ID — Inherited from Settings variable
More Settings > Ecommerce > Enable Enhanced Ecommerce Features — True
Use Data Layer — Yes
Triggering
Name — All Pages
Trigger Type — Page View
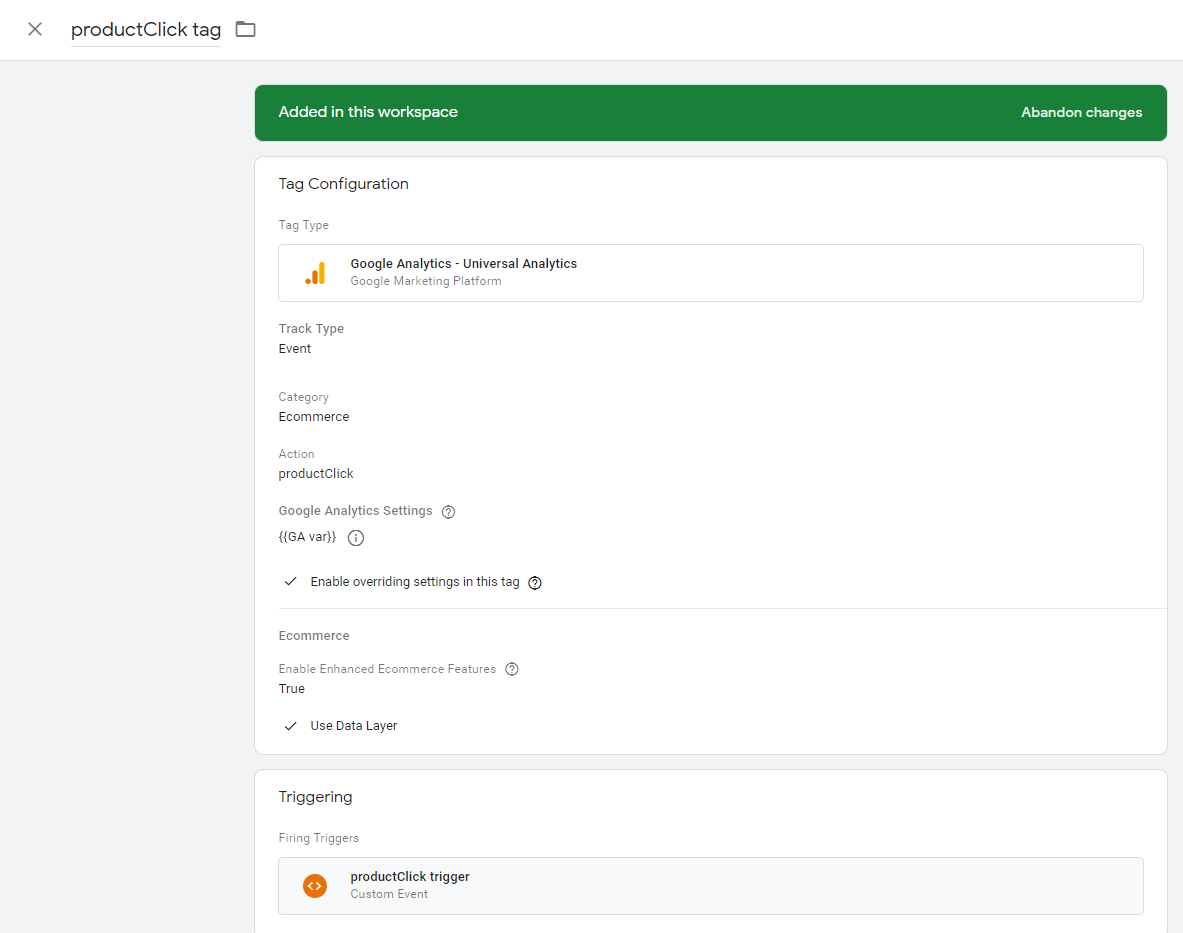
productClick
To measure product clicks, create a productClick tag.
To configure it correctly, provide the following tag, trigger, and variable configuration options:
Tag Configuration
Name — productClick tag
Track Type — Event
Category — Ecommerce
Action — productClick
Google Analytics Settings — {{GA var}}
Enable overriding settings in this tag — Yes
Tracking ID — Inherited from Settings variable
More Settings > Ecommerce > Enable Enhanced Ecommerce Features — True
Use Data Layer — Yes
Triggering
Name — productClick
Trigger Type — Custom Event
The trigger fires on — All Custom Events
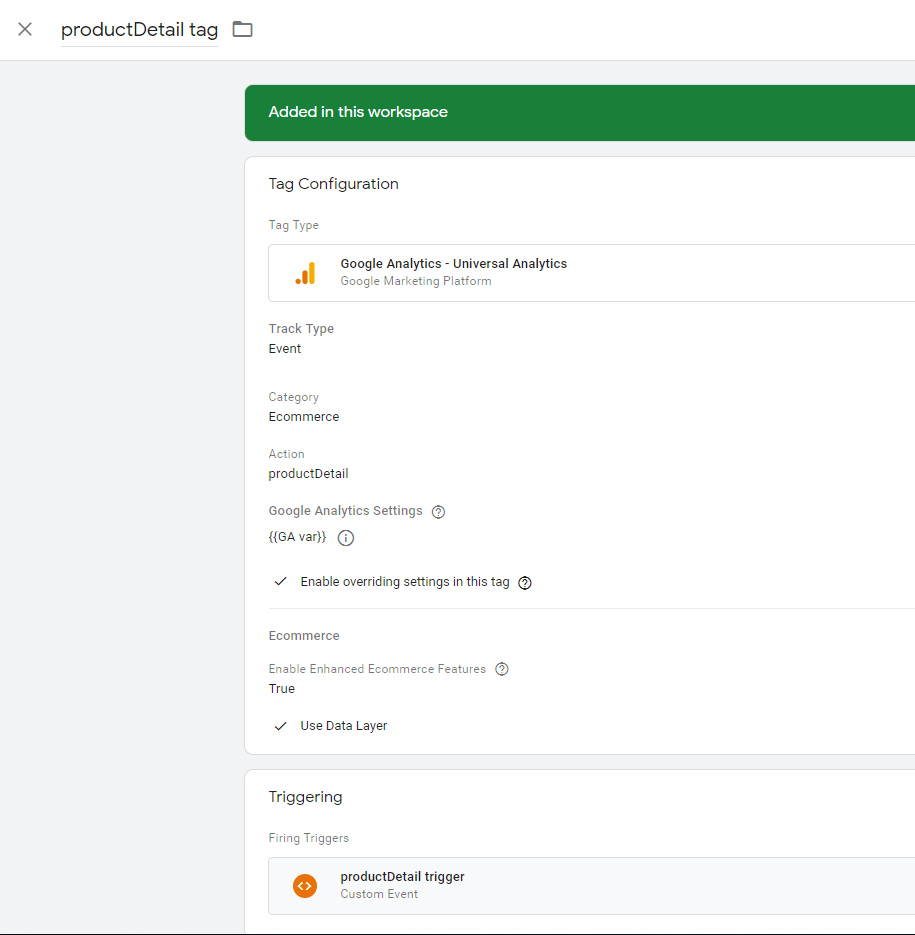
productDetail
To track product detail views, create a productDetail tag.
To configure it correctly, provide the following tag, trigger, and variable configuration options:
Tag Configuration
Name — productDetail tag
Track Type — Event
Category — Ecommerce
Action — productDetail
Google Analytics Settings — {{GA var}}
Enable overriding settings in this tag — Yes
Tracking ID — Inherited from Settings variable
More Settings > Ecommerce > Enable Enhanced Ecommerce Features — True
Use Data Layer — Yes
Triggering
Name — productDetail tag
Trigger Type — Custom Event
The trigger fires on — All Custom Events
productImpression
To track how many times a product was seen on the web page, create a productImpression tag.
To configure it correctly, provide the following tag, trigger, and variable configuration options:
Tag Configuration
Name — productImpression tag
Track Type — Event
Category — Ecommerce
Action — productImpression
Google Analytics Settings — {{GA var}}
Enable overriding settings in this tag — Yes
Tracking ID — Inherited from Settings variable
More Settings > Ecommerce > Enable Enhanced Ecommerce Features — True
Use Data Layer — Yes
Triggering
Name — productImpression
Trigger Type — Custom Event
The trigger fires on — All Custom Events

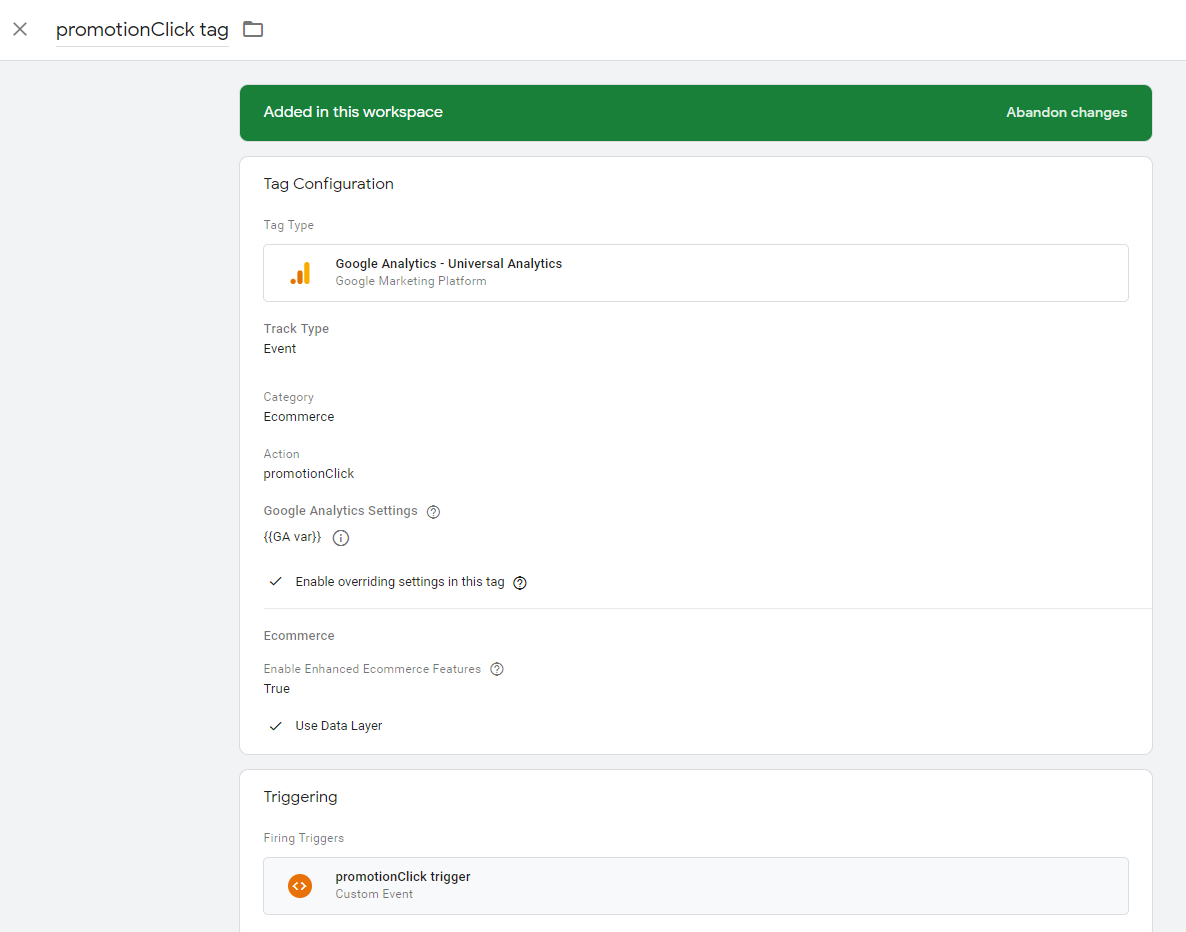
promotionClick
To measure clicks on promotions on your website, create a promotionClick tag.
To configure it correctly, provide the following tag, trigger, and variable configuration options:
Tag Configuration
Name — promotionClick tag
Track Type — Event
Category — Ecommerce
Action — promotionClick
Google Analytics Settings — {{GA var}}
Enable overriding settings in this tag — Yes
Tracking ID — Inherited from Settings variable
More Settings > Ecommerce > Enable Enhanced Ecommerce Features — True
Use Data Layer — Yes
Triggering
Name — promotionClick
Trigger Type — Custom Event
The trigger fires on — All Custom Events
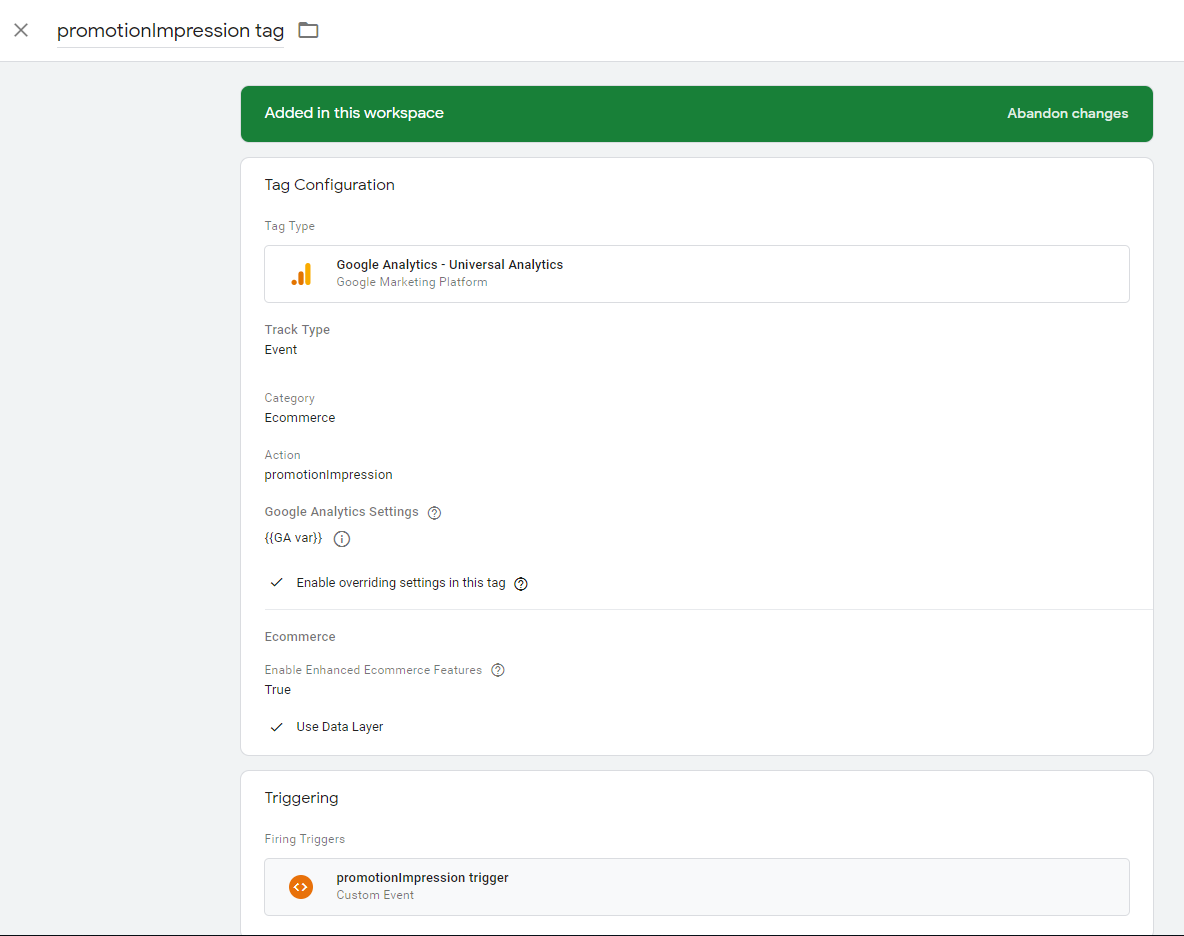
promotionImpression
To track how many times a promotion was seen on the web page, create a promotionImpression tag.
To configure it correctly, provide the following tag, trigger, and variable configuration options:
Tag Configuration
Name — promotionImpression tag
Track Type — Event
Category — Ecommerce
Action — promotionImpression
Google Analytics Settings — {{GA var}}
Enable overriding settings in this tag — Yes
Tracking ID — Inherited from Settings variable
More Settings > Ecommerce > Enable Enhanced Ecommerce Features — True
Use Data Layer — Yes
Triggering
Name — promotionImpression
Trigger Type — Custom Event
The trigger fires on — All Custom Events
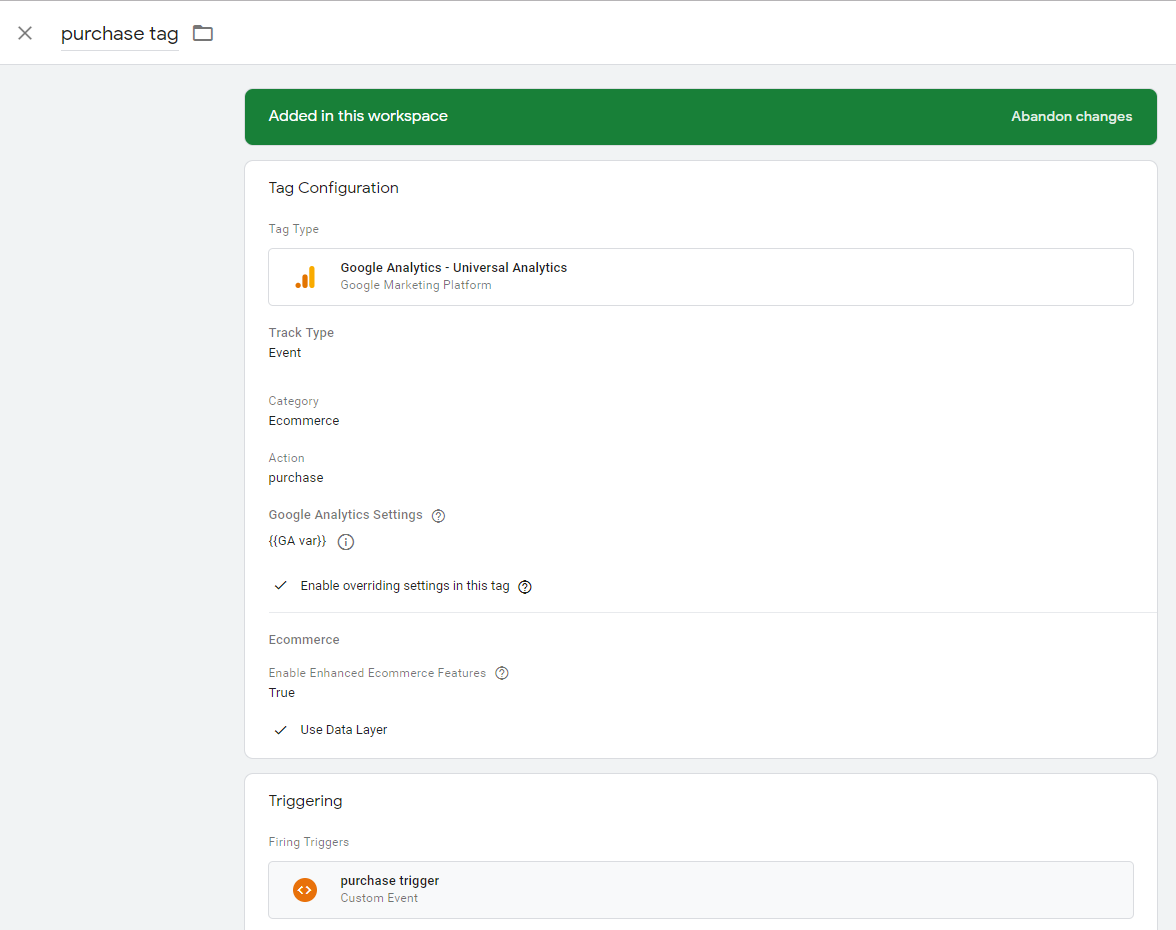
purchase
To collect transaction details once the order was placed, create a purchase tag:
To configure it correctly, provide the following tag, trigger, and variable configuration options:
Tag Configuration
Name — purchase tag
Track Type — Event
Category — Ecommerce
Action — purchase
Google Analytics Settings — {{GA var}}
Enable overriding settings in this tag — Yes
Tracking ID — Inherited from Settings variable
More Settings > Ecommerce > Enable Enhanced Ecommerce Features — True
Use Data Layer — Yes
Triggering
Name — purchase
Trigger Type — Custom Event
The trigger fires on — All Custom Events
Create and Enable Google Tag Manager Integration
To create a new integration with Google Tag Manager in your Oro application:
Navigate to System > Integrations > Manage Integrations in the main menu.
Click Create Integration on the top right.
In the Type fields, select Google Tag Manager.
In the Name field, provide the name for the integration you are creating to refer to it in the Oro application. Since you can create many Google Tag Manager integrations, make sure the name is meaningful.
In the Container ID field, provide the container ID that follows the GTM-XXXXXXX pattern. You can find container ID in your Google Tag Manager Account.
In the Status field, set the integration to Active to enable it. Should you need to disable it, select Inactive from the list.
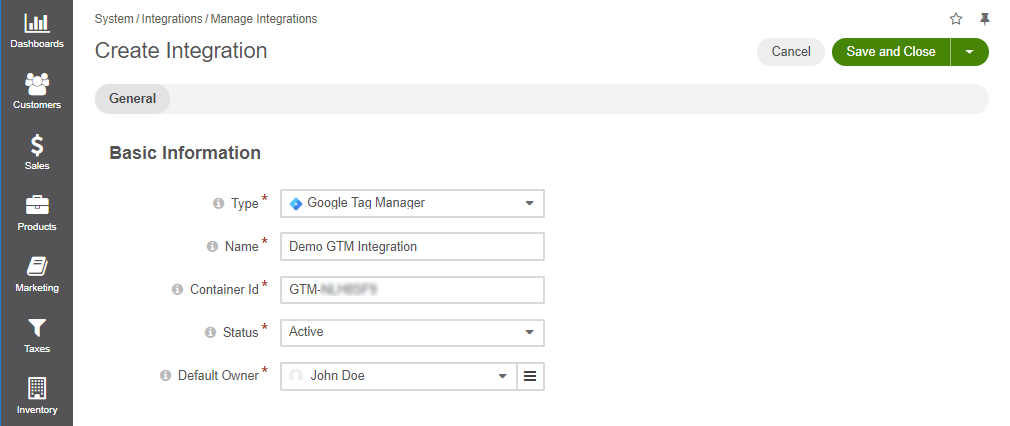
In the Default Owner, select the owner of the integration.
Click Save and Close.
Once the integration is saved, it becomes available in the Integrations grid under System > Integrations > Manage Integrations.
Important
To enable a Google Tag Manager integration for data mapping, connect it to the application in the system settings globally, per organization or website.
Business Tip
Do you want to reap the benefits of the new digital commerce trend? Learn more about the B2B online marketplace and how it can help you expand into a new market.