Important
You are browsing the documentation for version 4.1 of OroCommerce, OroCRM and OroPlatform, which is no longer maintained. Read the latest LTS version of the Oro documentation to get up-to-date information.
See our Release Process documentation for more information on the currently supported and upcoming releases.
View Order Details
To view details of an order:
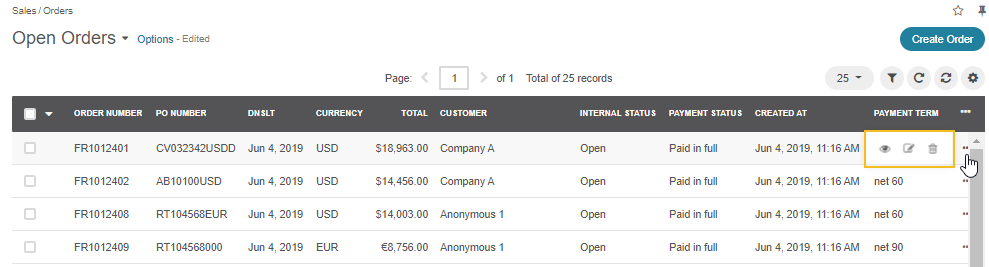
Navigate to Sales > Orders in the main menu.
Find the line with the necessary order and click it.
Alternatively, click the More Options menu at the end of the row, and then click View.
On the top left of the page, you can see the order name.
In the next row, you can find when the order has been created and last updated, as well as whether the customer user who created an order has been already contacted.
To manage an order, use actions buttons on the top right of the page. The following buttons are available by default but depend on the order status:
Shipping Tracking — Click to add shipping tracking.
Cancel — Click to cancel an order. Available only for open orders.
Close — Click to close an order. Available only for open, canceled, and shipped orders.
Mark as Shipped — Click to mark an order as shipped. Available only for open orders.
Archive — Click to archive an old order. Available only for closed orders.
Add Special Discount — Click to add special discounts.
Add Coupon Code — Click to provide a coupon code.
Edit — Click to edit an order.
Delete — Click to delete an order.
More Actions drop-down:
Add Attachment — Click to attach a file to the order.
Add Note — Click to make a note regarding this order.
Add Event — Click to add an event.
Send Email — Click to send an email related to the order.
In the next row, you can check which user is responsible for the order (owns it). Click the owner name to open the profile of the corresponding user. Enclosed in parentheses, there is the name of the organization that the owner belongs to.
Click the Change History link to see who, how, and when modified the product.
General
This section is for order details, such as who created the order, who the customer and customer user are, and which website this order applies to.

Field |
Description |
|---|---|
Order Number |
The unique order reference number. It is generated automatically for new orders. |
PO Number |
Another order reference number. It is usually defined by the buyer and used by the buyer’s side to match invoice and received goods with purchase. |
Currency |
The currency in which the order is made. |
Subtotal |
The amount due for items in the order. Does not include additional costs, taxes, discounts. |
Customer |
The customer that made the order. |
Customer User |
The customer user that made an order on behalf of the customer. |
Internal Status |
The order status visible only in the back-office. See the description of internal statuses. |
Do Not Ship Later Than |
The date on which the order expires. |
Source Document |
If the order has been created from an RFQ, quote, or another order, this field contains a link to the corresponding record. If the order has been created from scratch (in the back-office) or the quick order form (in the storefront), the field shows ‘N/A’. |
Payment Method |
The payment method selected to pay for the order. |
Payment Status |
Whether the order is already paid in full, the payment for the order is authorized, etc. |
Website |
The storefront website that the order was made from. |
Billing Address |
The address where the buyer receives the payment statements. Some payment providers use a billing address to authorize payments and demand it to match the payment account holder’s current address. |
Shipping Address |
The address to deliver the ordered goods to. |
Customer Notes |
Any additional information or wishes provided by the buyer regarding the order. |
Payment Term |
The terms and conditions for order payment. For more information, see Payment Terms Integration. |
Warehouse |
The warehouse that the goods are shipped from. |
Line Items
This section has the list of products added to the order, and their details.
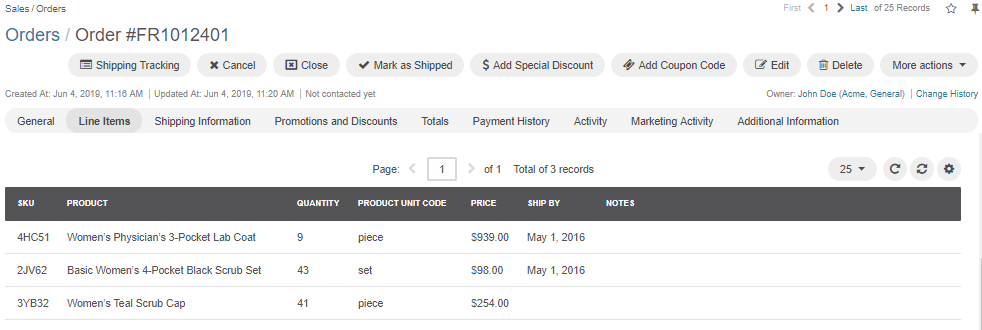
The product information visible by default is the following:
Field |
Description |
|---|---|
SKU |
The stock keeping unit that helps identify the product and track it in inventory. |
PRODUCT |
The name of the product how it appears on the user interface. |
QUANTITY |
The ordered quantity of product units. |
PRODUCT UNIT CODE |
Whether the product variant is enabled and can be used. |
PRICE |
Agreed price for the individual product unit. |
SHIP BY |
The date before which this product must be shipped. |
Shipping Information
This section displays details of shipping tracking and cost.
Promotions and Discounts
This section provides the information about promotions and discounts applied to the order. The section is divided into All Promotions and All Special Discounts.
Within All Promotions, you can view:
Promotions added automatically if the order qualifies
Coupon codes added manually
Note
Promotions can be disabled for an order via REST API, in which case the following message is displayed:
Promotions are disabled for the order.
Within All Special Discounts, you can view:
Special discounts added manually
For more information, see Promotions and Discounts.
Totals
This section shows order cost including any discounts (in all currencies, configured for the purpose).

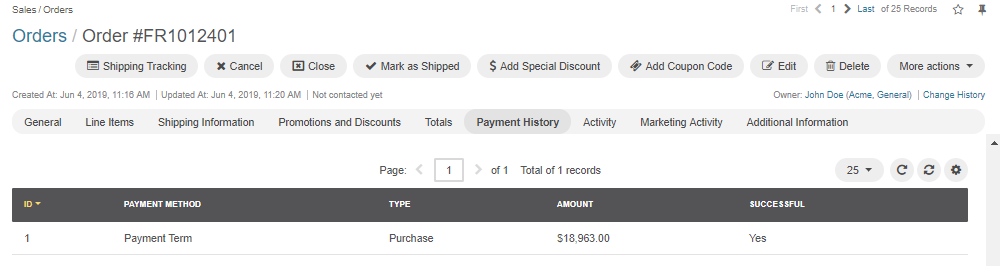
Payment History
This section provides the information about payment transactions concerning the order.
Field |
Description |
|---|---|
ID |
The unique identifier of the payment transaction. |
PAYMENT METHOD |
The payment method that has been used to pay for the order. |
TYPE |
The type of the transaction. For example:
|
AMOUNT |
The transaction amount and currency. |
ACTIVE |
Whether the transaction is being processed. |
SUCCESSFUL |
Whether the transaction has been successfully processed. |
Created At |
The date and time when the transaction has been started. |
Updated At |
The date and time when the transaction information was last updated. |
Hint
This section is visible only to the users with the corresponding permission.
If you do not see this section, contact your administrator.
If you are an administrator, in the user role, find the Order entity and check the access level configured for the View Payment action.
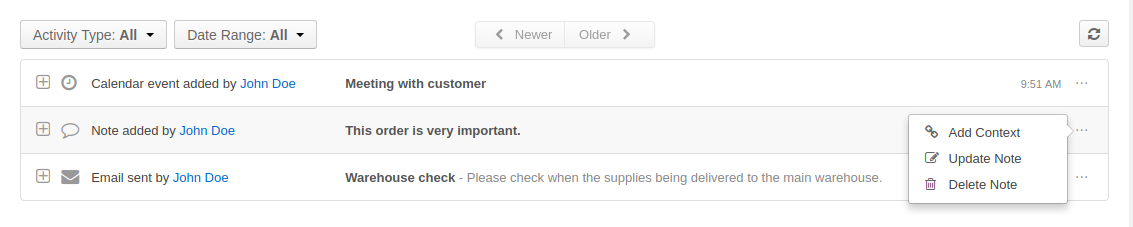
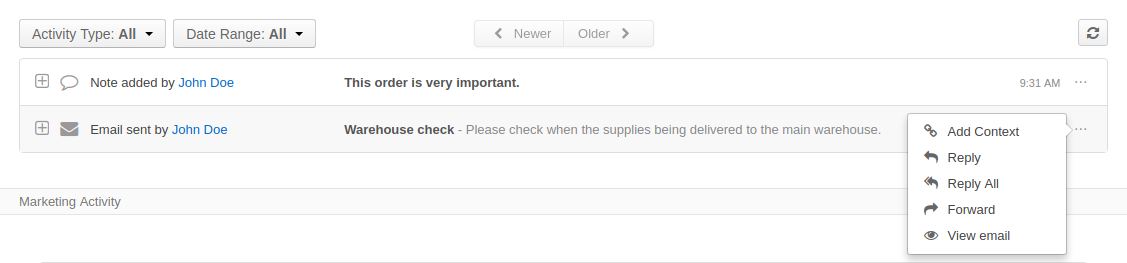
Activity
This section displays any notes, calendar events, or emails related to the order.
You can filter activities by type and by date (e.g. an exact date, or a date range that covers the activity date) and browse them from the newest to the oldest and vice verse.
You can see who started the activity, its type, name and description, when it was created, and a number of comments made on it.
Click the activity to see detailed information about it.

To edit the activity, click the More Options menu at the end of the row and click Update. In the dialog that appears, make required changed and then click Save.
To delete the activity, click the More Options menu at the end of the row and click Delete. In the confirmation dialog, click Yes, Delete.
You can add and delete an activity context.
To add a context to the activity, click the More Options menu at the end of the row, and the click Add Context. In the Add Context Entity dialog, choose the desired context and click it to select.
For an email activity, you can reply/reply all/forward the corresponding email. To do this, click the corresponding icon in the More Options menu at the end of the activity row. Alternatively, click activity to expand it, and select the required action from the list on the right.
To delete a context from the activity, click the activity to expand it, and under the activity name, click the x icon next to the context that you want to remove.
You can add a comment under a particular activity. To do this, click the activity to expand it, and click Add Comment. In the Add Comment dialog, type your message. Use the built-in text editor to format your comment. You can also attach a file to your comment. For this, click the Upload link in the dialog and locate the required file. When the comment is ready, click Add.
To edit or delete a comment, click the More Options menu next to it and click the Edit or Delete icon correspondingly.
For more information about activities, see the Activities guide.
Marketing Activity
This section shows any activity of this kind associated with the order.
Additional Information
This section includes any attachments, if available.
For information on attachments and how to manage them, see the Attachments guide.