
Important
You are browsing the documentation for version 1.6 of OroCommerce, OroCRM and OroPlatform, which is no longer maintained. Read the latest LTS version of the Oro documentation to get up-to-date information.
See our Release Process documentation for more information on the currently supported and upcoming releases.
Advanced Entity Field Properties
Note
This topic is part of the section on Creating Entity Fields, and describes the second stage of creating a new entity field.
Once the basic properties (field name, storage type and type) have been specified, proceed to create the custom entity field as described below.
In the General Information section, provide:
- Label — Type a label that will be used for referring to the field on the interface. By default, the label is the same as Name.
- Description — Type a short but meaningful description that will appear as a field tooltip on the interface.
- Field Type-related Properties — Depending on the entity type selected when defining the basic properties for the entity field you are creating, additional type-related options appear in the General Information section once you click Continue.
In the Import and Export section, specify the following information:
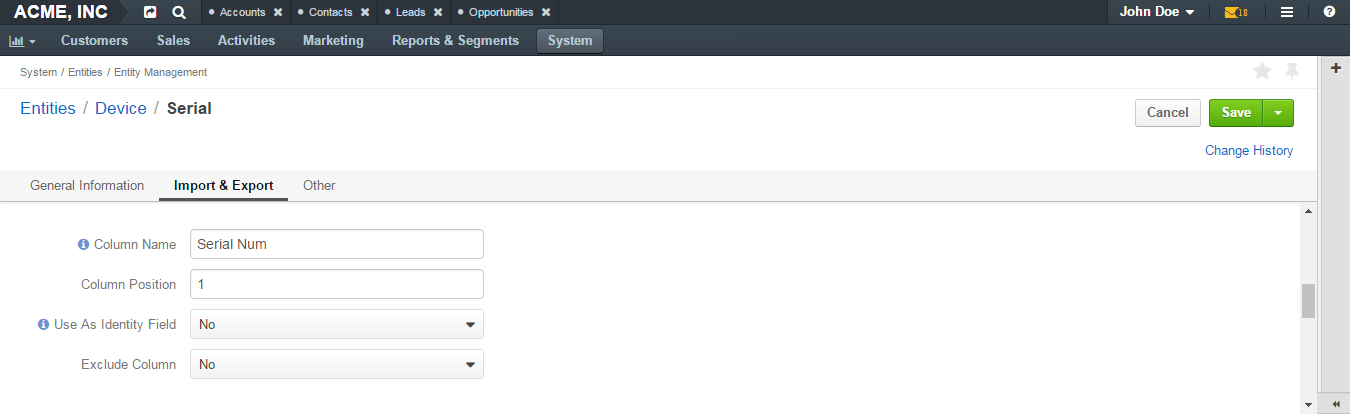
Column Name — Type a name that will be used for identifying the field in the .csv file with entity records. If left empty, the Label value will be used for identifying the field when you export entity records.
Column Position — Type a number that corresponds to the position of this field in the .csv file that contains entity records.
Exclude Column — Select No if you want this field to be available for export. Select Yes if you do not want this field to be available for export (this field will not be present in the .csv file obtained as a result of the export operation).
Note
Import and export of non-default fields may not be supported until the dedicated customization is developed.
Export Fields — When a field is a relation (many to many, many to one, one to many), in the Export Fields you can select whether all the fields of the related entity are exported, or the identity fields only.
In the Other section, provide the following information:
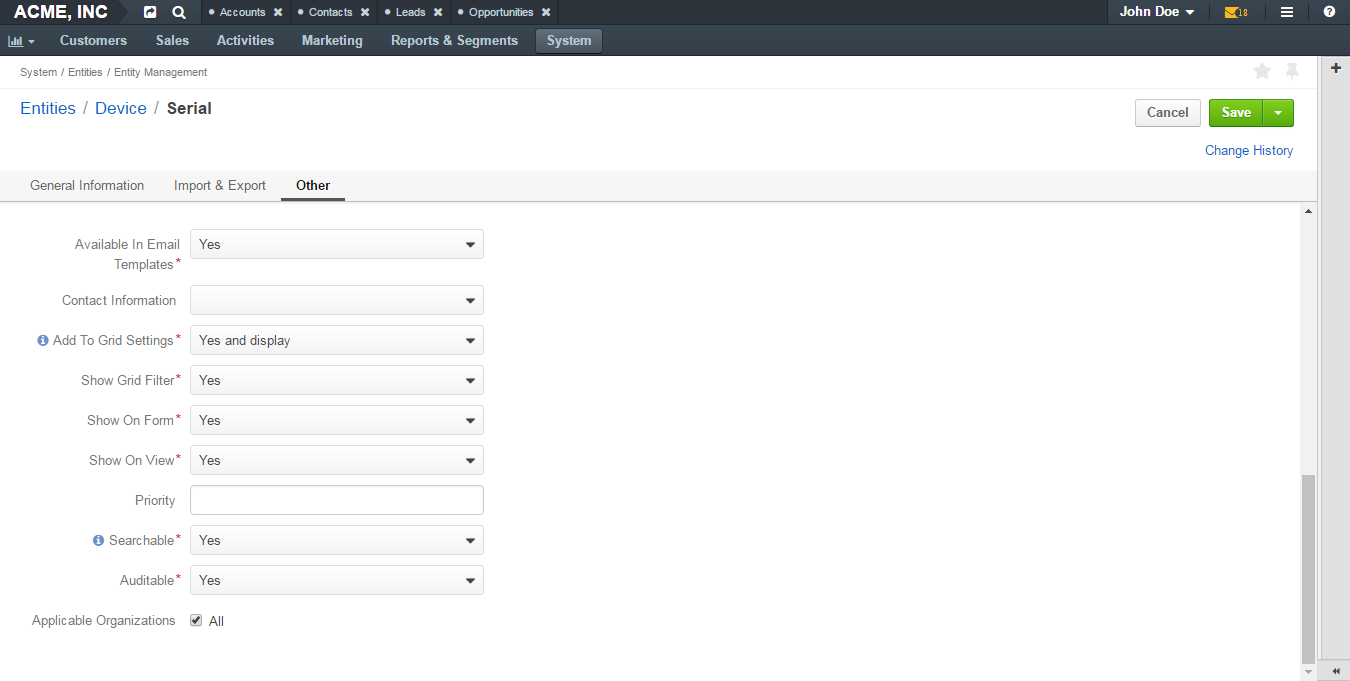
Available in Email Templates — If this option is set to Yes, values of the field can be used for creating email patterns.
Contact Information — Possible values are:
- Empty — The field will not be treated as contact information.
- Email — Values of the field will be treated by marketing lists as email addresses.
- Phone — Values of the field will be treated by marketing lists as phone numbers.
Show on Grid — If set to Yes, the field will be displayed in a separate column of the respective grid.
Show Grid Filter — Not available for serialized fields. If set to Yes, a corresponding filter will be added to grid filters by default.
Show on Form — If set to Yes, the field value appears as editable on record edit pages.
Warning
If the Show on Form value has been set to No when creating the field, you cannot create or update its values from your Oro application. This is only reasonable for the field values uploaded to the system during synchronization.
Show on View — If set to Yes, the field is displayed on record view pages.
Priority — Defines an order of custom fields on entity record view, edit, and create pages, and on the respective grid.
Custom fields are always displayed one after another, usually below the system fields. If no priority is defined or the defined priority is 0, the fields will be displayed in the order in which they have been added to the system. The fields with a higher priority (a bigger value) will be displayed before the fields with a lower priority.
Searchable — If set to Yes, the entities can be found using the search by values of this field.
The Search Result Title — If set to Yes, the field value will be included into the search result title.
Auditable — Not available for serialized fields. If set to Yes, the system will log changes made to this field values when users edit entity records.
Applicable Organizations — Defines for what organizations the custom field will be added to the entity. All is selected by default. Clear the All check box to choose specific organizations from the list.
Caution
If the Show on Form value has been set to No, there will be no way to create/update the field values from your Oro application. Thus, such configuration is reasonable only for data which is uploaded to the system during a synchronization.
- Allowed MIME types — Limits the types of files you can attach to an entity. This applies to file attributes only. For instance, using this option, you can enable application users to upload files only in .pdf format. For this, add the File field to the opportunity entity, and enter application/pdf into the Allowed Mime types field. If this field is left empty, the list of MIME types defined in the system configuration is applied.
Once all the information has been provided, click Save and Close on the top right.
On the entity page, click Update Schema on the top right, if the storage type for the entity field has been set to Table Column.