Important
You are browsing the documentation for version 1.6 of OroCommerce, OroCRM and OroPlatform, which is no longer maintained. Read the latest LTS version of the Oro documentation to get up-to-date information.
See our Release Process documentation for more information on the currently supported and upcoming releases.
Connect MS Outlook Add-in
During add-in installation you are required to provide integration settings to ensure correct work between applications:
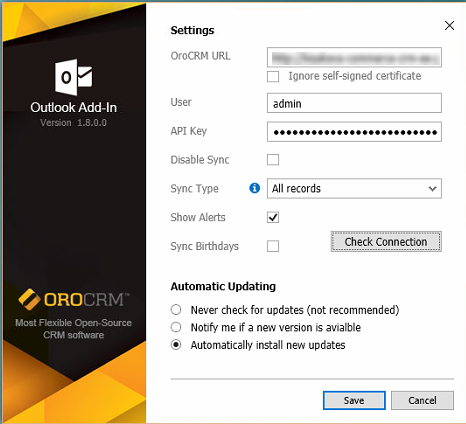
OroCRM URL — Provide the URL of your instance:
- If you are running a CRM application, copy the URL from the address bar. Alternatively, copy it from the Application URL field by navigating to System > Configuration > System Configuration > General Setup > Application Settings (e.g. demo.orocrm.com).
- If you are running an OroCommerce application, add /admin at the end of the URL. Otherwise, connection between the add-in and your Oro instance may fail (e.g. demo.orocommerce.com/admin).
Ignore self-signed certificate — Check this box to allow connection to secure servers that use self-signed certificates. We recommend to keep this box checked at all times.
User — Provide the username defined on the My User page of your Oro instance.
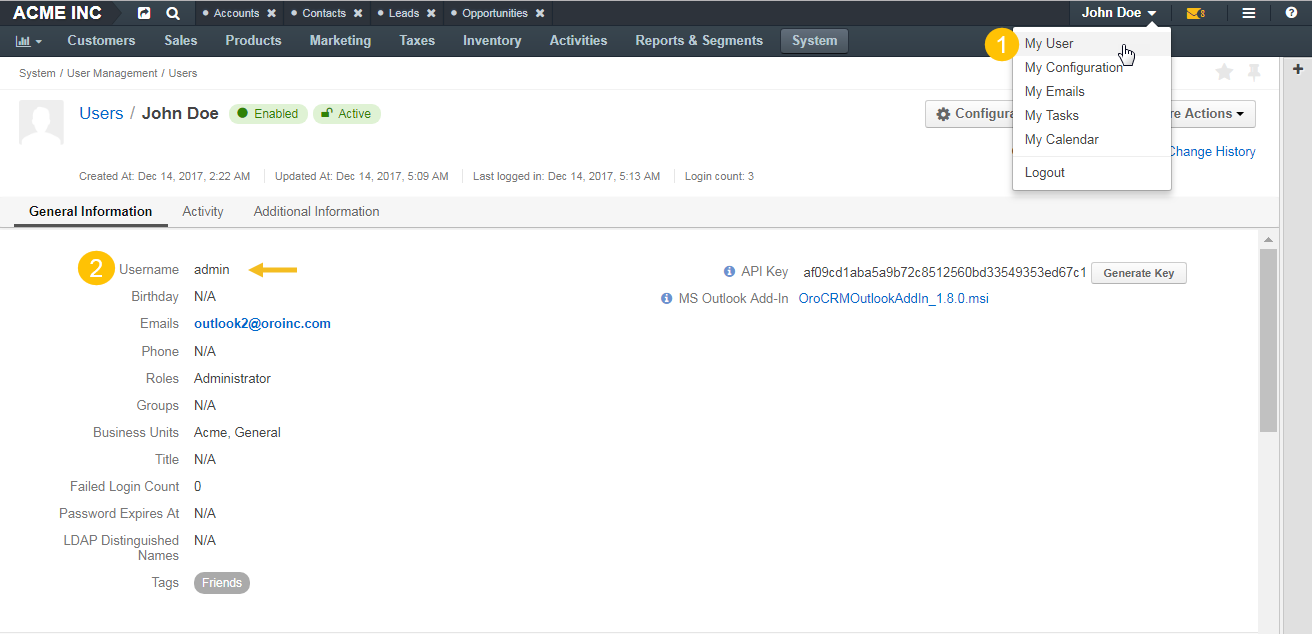
API Key — Paste the API key generated in your Oro instance.
Note
You can generate the key by opening My User page and clicking Generate Key next to the API Key option. Copy the key once generated.
Disable Sync — this check box defines synchronization conditions.
When Disable Sync is not selected, synchronization runs automatically within the intervals defined in your Oro instance.
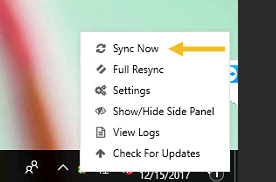
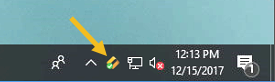
When Disable Sync is selected, synchronization has to be triggered manually. One way of doing this is by right-clicking on the Outlook add-in icon on the bottom right of your screen and clicking Sync Now.
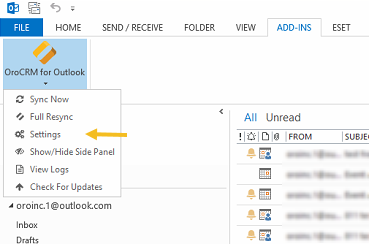
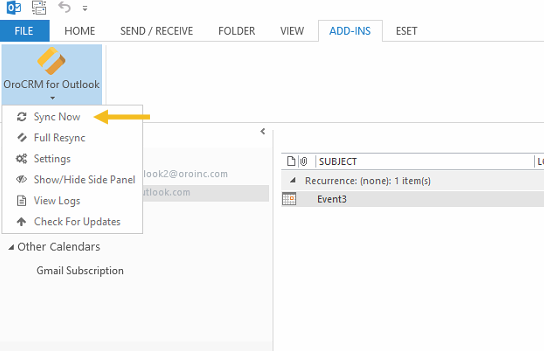
Alternatively, start sync within your Outlook application by clicking the ADD-INS tab, and clicking Sync Now in the OroCRM for Outlook settings menu.
Sync Type — Select whether you wish to sync all or selected records.
Show Alerts — This check box controls whether alerts are displayed in the bottom panel next to the add-in icon:
- If the Show Alerts check box is checked, sync-related alerts pop up in the bottom panel.
- If the Show Alerts check box is not checked, alerts are not displayed.
Sync Birthdays — Select the check box if you wish to sync contacts’ birthdays.
Check Connection — Click Check Connection once you filled in all the settings fields. A corresponding message pops up when the connection fails/is successful.
Automatic Updating — Define the schedule and conditions for updates.
Click Save to save these settings.
When the add-in is installed, you see its icon displayed on the bottom right corner of your computer screen.
Note
You can access the same settings after installation by clicking Settings in the OroCRM for Outlook menu under the ADD-INS tab in your Outlook application.