
Important
You are browsing the documentation for version 1.6 of OroCommerce, OroCRM and OroPlatform, which is no longer maintained. Read the latest LTS version of the Oro documentation to get up-to-date information.
See our Release Process documentation for more information on the currently supported and upcoming releases.
Manage Entities
In your Oro application, you can update existing entities, delete custom entities with no records, and manage unique keys to avoid duplication of existing information.
Edit an Entity
Important
The configuration of each specific entity defines which of its properties are available for editing.
To edit an entity:
Navigate to System > Entities > Entity Management in the main menu.
On the All Entities page, choose the entity you want to edit, click the ellipsis menu at the right end of the corresponding row and then click the Edit icon.
Make the required changes following steps 3 to 6 of the Create an Entity section.
Important
You cannot change the name and the ownership type of the entity.
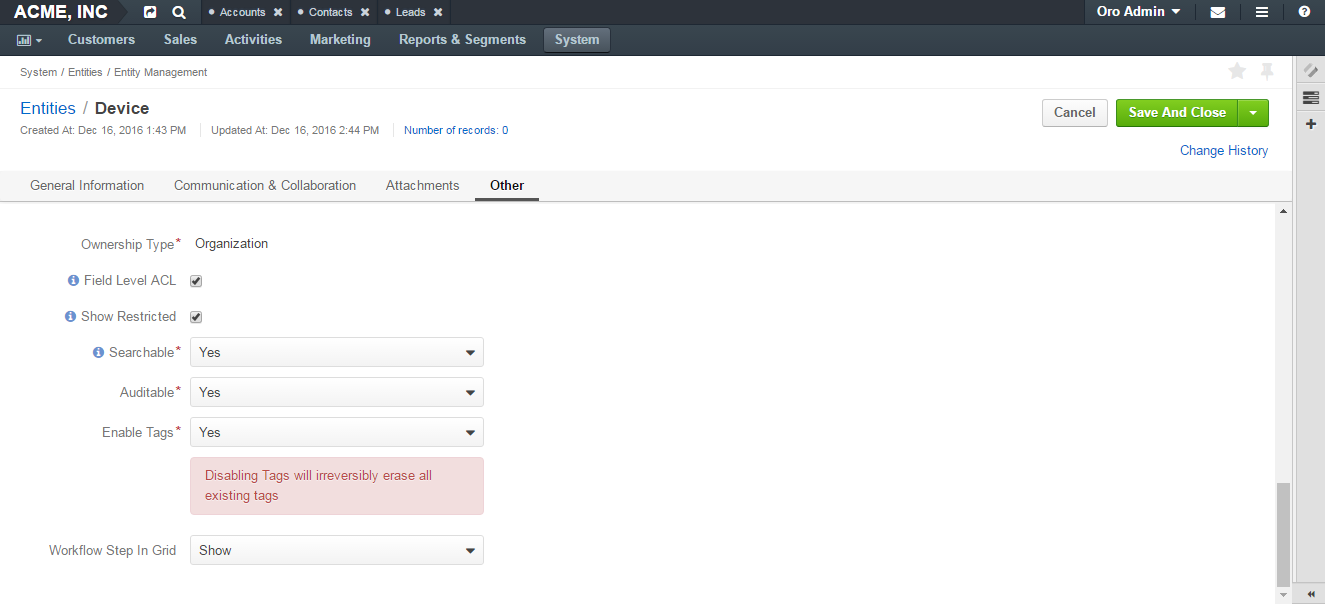
There are also several additional fields in the Other section that are available only when you edit an entity:
- Field Level ACL — Select this check box to define that permissions can be set on individual fields of this entity. For more information about field level ACLs.
- Show Restricted — Select this check box if you enabled Field Level ACL and are going to disable editing of some fields of the entity records but still want users to review the disabled fields on the interface. Fields disabled for modifying will appear dimmed on the interface. For more information about field level ACLs.
- Searchable — Defines whether record users can search for and find records of this entity via your Oro application’s search functionality.
- Yes — Select this value from the list if users can search for and find records of this entity.
- No— Select this value from the list if records of this entity are invisible for search.
- Applicable Organizations — Select in which organizations this entity will be available. The default value is All. To specify a particular organization, clear the All check box and click the field that appears to choose the organization from the list.
Click Save And Close.
Delete an Entity
You can delete only custom entities that have no records. To delete such entities:
Navigate to System > Entities > Entity Management.
In the grid on the All Entities page, choose the entity you want to delete, click the ellipsis menu at the right end of the corresponding role and then click the Delete icon.
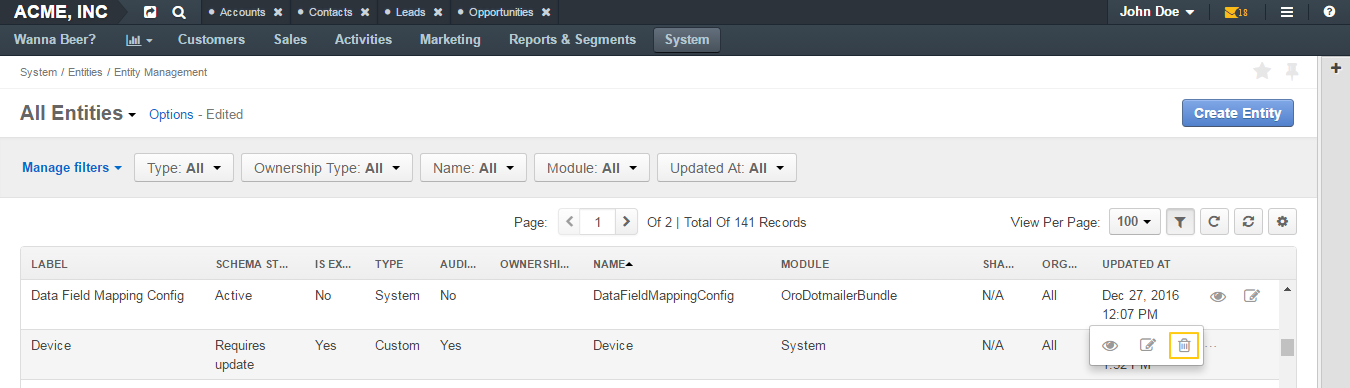
In the Deletion Confirmation dialog box, click Yes.
Reload the page when you see the notification about item deletion.
Note
If you can still see the entity in the grid on the All Entities page, update the schema.
Manage Unique Keys
Unique keys are a set of fields by which the system matches new information with an existing entity record to determine whether this record is distinct or not. Use unique keys to avoid duplication of existing information.
For example, by default you can create two contacts with the same information:
Jane Roe, born 1985-01-15, sales@example.com
The system assigns them different IDs and treats them as different records, but they look the same on the interface and actually represent the same person.
Now imagine that before adding contacts you have defined two sets of unique keys:
- First Name+Last Name+Birthday
- First Name+Last Name+Email
You create a contact:
Jane Roe, born 1985-01-15, sales@example.com
And your colleague Roger tries to add Jane as a contact too:
Jane Roe, sales@example.com
The system checks:
- The first names and the last names are the same, but the birthday is different (not specified in the second case), maybe these are different contacts.
- The first names and the last names are the same, but the email is the same too, so it must be the same contact.
As a result, the system informs Roger that this contact already exists in the system.
To manage unique keys:
Navigate to System > Entities > Entity Management in the main menu.
In the grid on the All Entities page, click the required entity.
Click Manage Unique Keys in the upper-right corner of the page.
On the Unique Keys page, click +Add.
Specify the required information:
- Name — The set name on the interface. It is used just for reference.
- Key — The fields that will be included in this set. Hold the CTRL key to select several fields.
If you need to add another set, repeat steps 4–5.
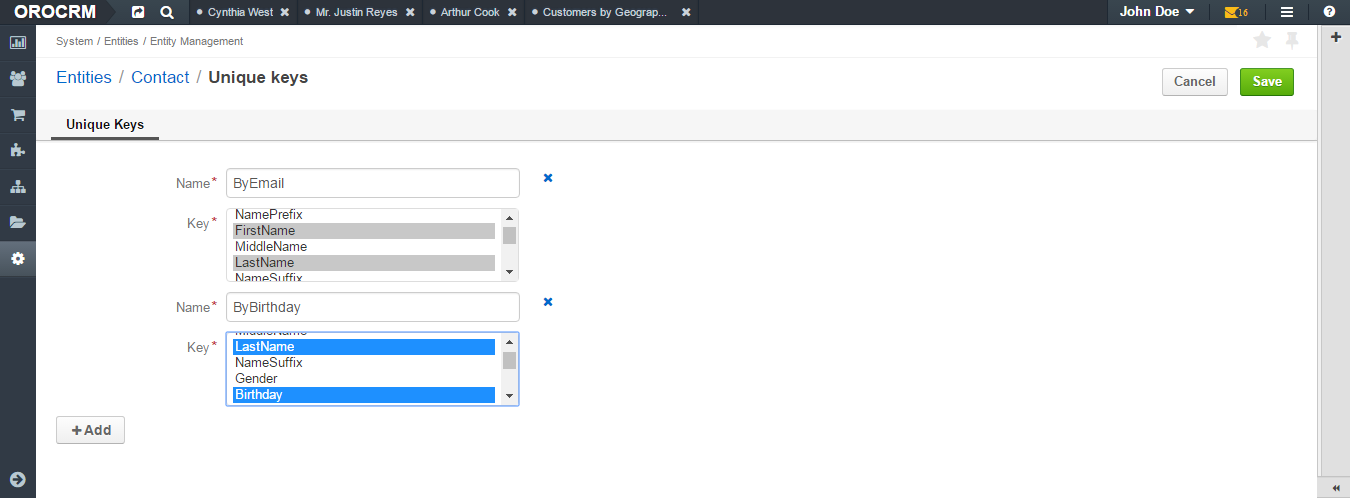
If you need to delete a set, click the x icon next to the set name.
Click Save.