Important
You are browsing the documentation for version 1.6 of OroCommerce, OroCRM and OroPlatform, which is no longer maintained. Read the latest LTS version of the Oro documentation to get up-to-date information.
See our Release Process documentation for more information on the currently supported and upcoming releases.
Checkout with Consents Workflow
Overview
The Checkout with Consents workflow restricts customer users from proceeding through the checkout if mandatory consents to process personal data have not been accepted. It is a system workflow that defines the sequence of steps and transitions that a customer user goes through when creating an order in the storefront. When Checkout with Consents is activated, the default checkout workflow is disabled.
As opposed to the standard checkout workflow, the checkout with consents adds Agreements as the first step of the checkout in the OroCommerce storefront. As it is impossible to process orders without collecting personal data, such as shipping or billing details, accepting mandatory consents is required to complete checkout and ultimately place the order. When mandatory consents have already been accepted previously (e.g. in the buyer’s account, for example), you are not asked to accept such agreements for the second time.
Note
Keep in mind that if you accept a mandatory consent at the Agreements step and then abandon the checkout, the mandatory consents are considered accepted and can only be declined through the buyer’s profile account.
Activate Checkout with Consents
By default, the Checkout with Consents workflow is disabled in the OroCommerce application, and can be activated for the storefront through the back-office.
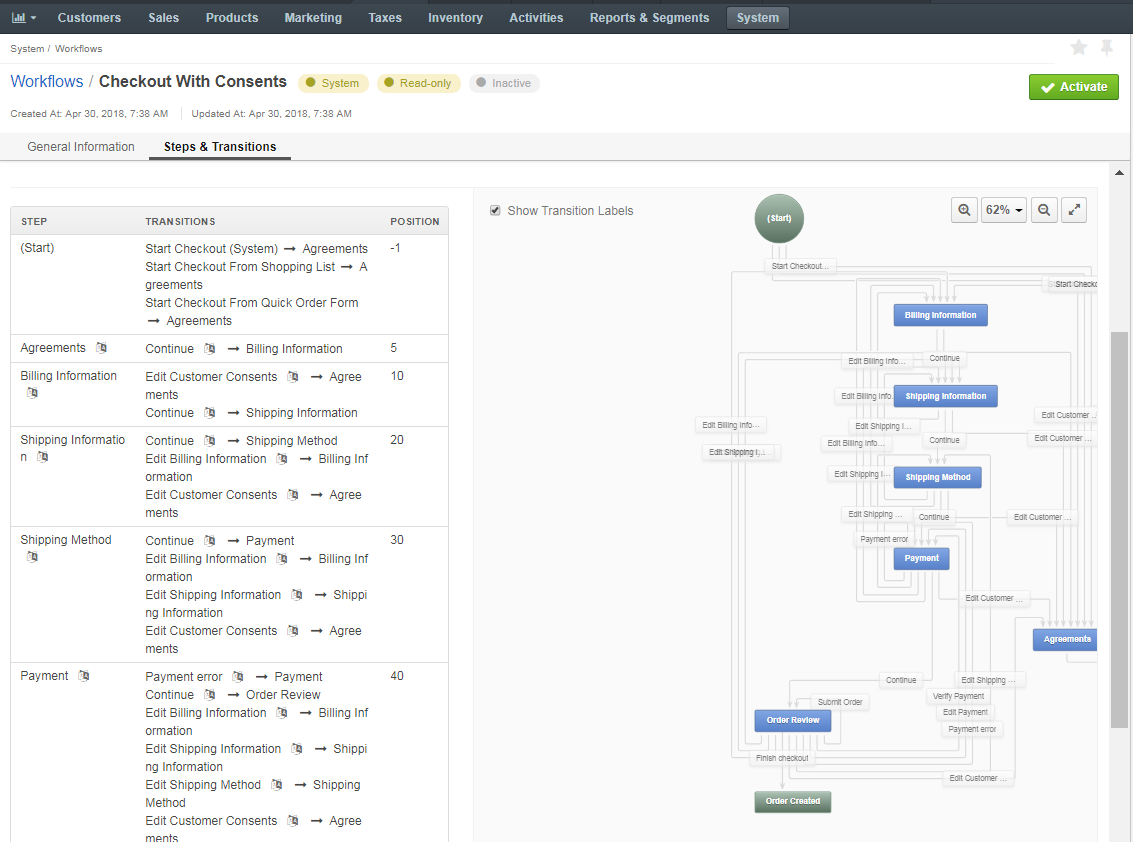
To reach the workflow:
Navigate to System > Workflows in the main menu.
Click Checkout with Consents to open the flow.

On the Checkout with Consents workflow page, you can perform the following actions:
- Deactivate the workflow - click Deactivate to deactivate the workflow.
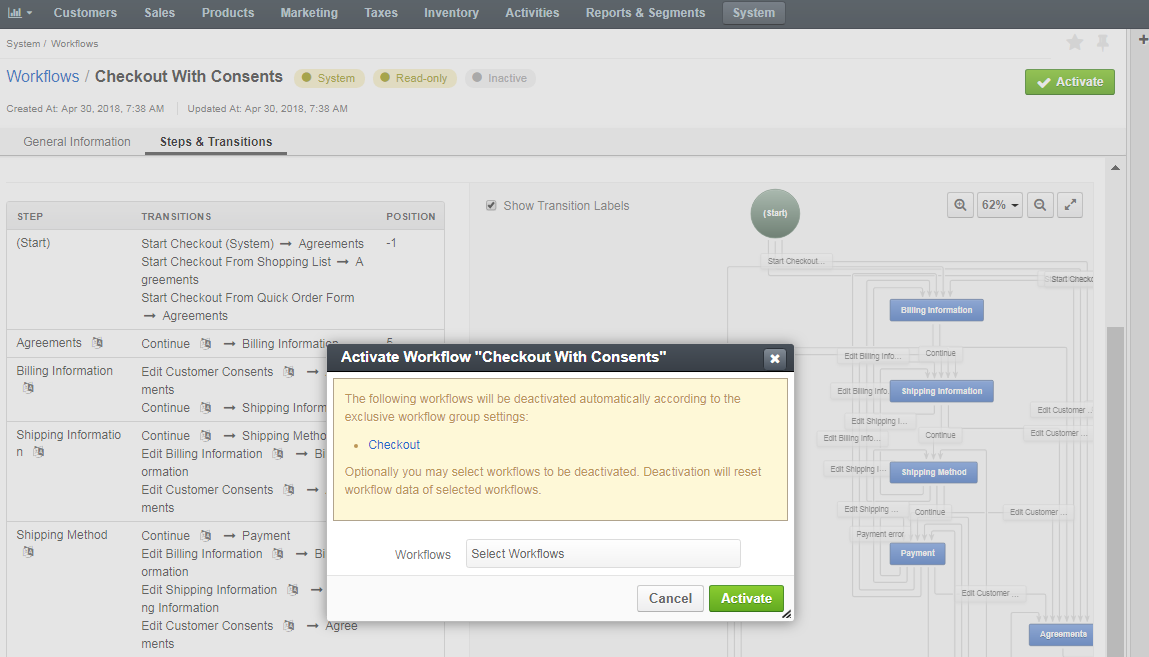
- Activate the workflow - click Activate to activate the workflow.
On the page of all workflows, you can perform the following actions to the Checkout with Consents workflow:
- View the workflow:
- Deactivate / Activate the workflow: /
- ю. image:: /user/img/workflows/checkout_with_consents/checkout_with_consents_actions_from_grid.png
alt: View, activate or deactivate the checkout with consents workflow from the table of all workflows
Note
Keep in mind that when you activate the Checkout with Consents workflow, the default checkout workflow is disabled automatically.
Sample Flow
As an illustration, we are going to proceed through the steps of the Checkout with Consents workflow to see how it works.
Several items have been added to a shopping list in the OroCommerce storefront. To proceed to the checkout, click Create Order on the bottom right of the shopping list page.
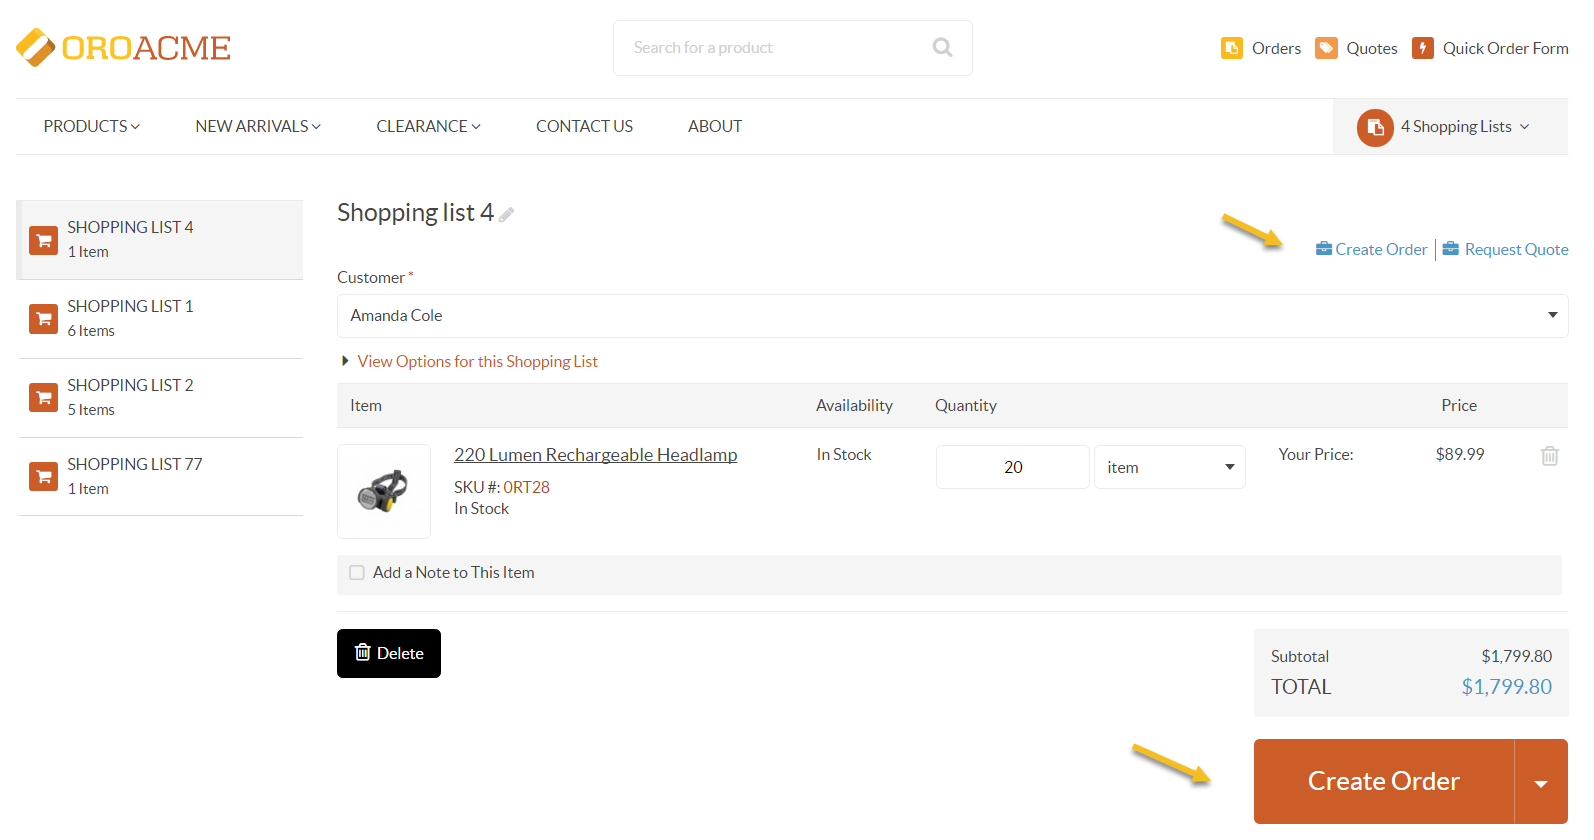
Note
The Create Order button is available if the following conditions are met:
- At least one shipping method is available
- At least one payment method is available
- There is at least one product with a price in the shopping list
- Items to be purchased are available in the inventory in the back-office
A warning message is shown if for some reason you are unable to start the checkout process.
Step 1: Agreements
At the Agreements step, you are required to accept all mandatory consents to process your personal data, if such consents have not been accepted previously. Keep in mind that if you leave the checkout after accepting a mandatory consent, this consent is considered accepted and can be revoked only through the profile management.
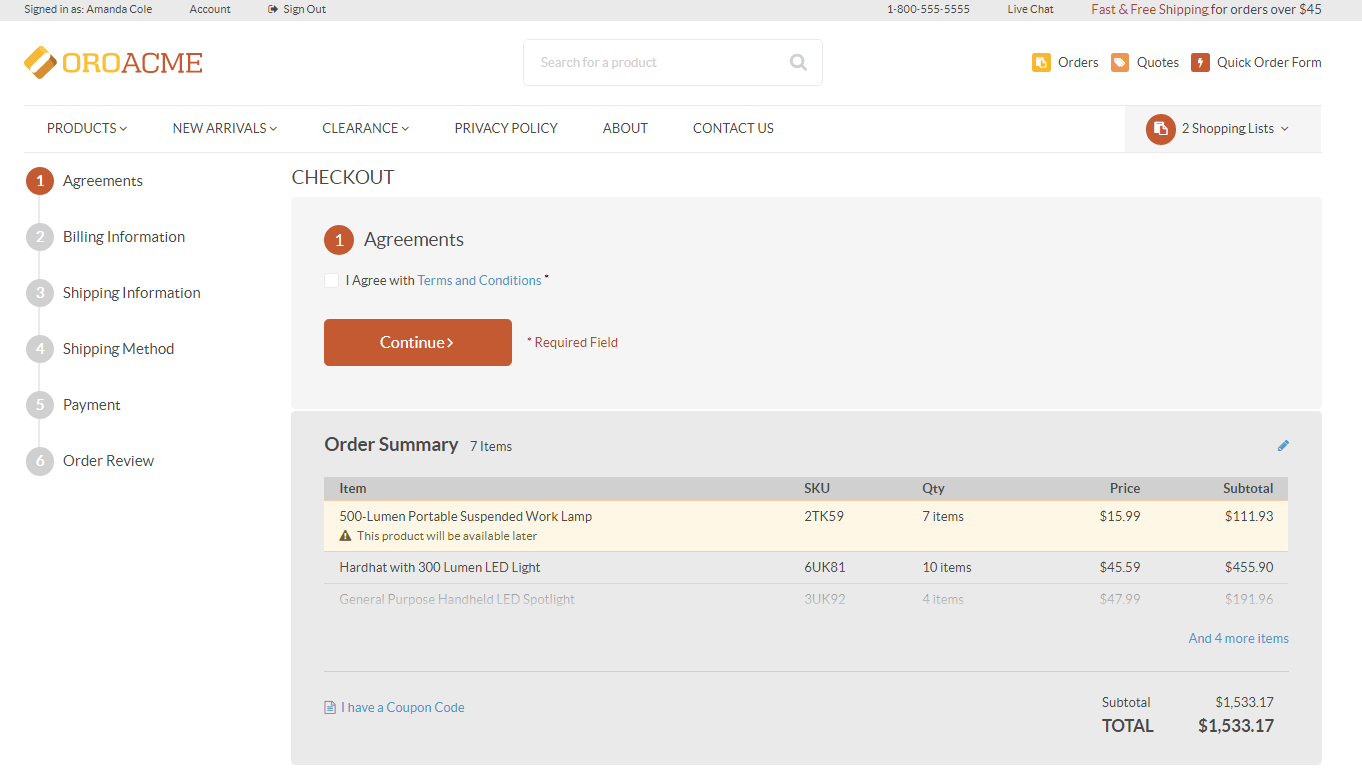
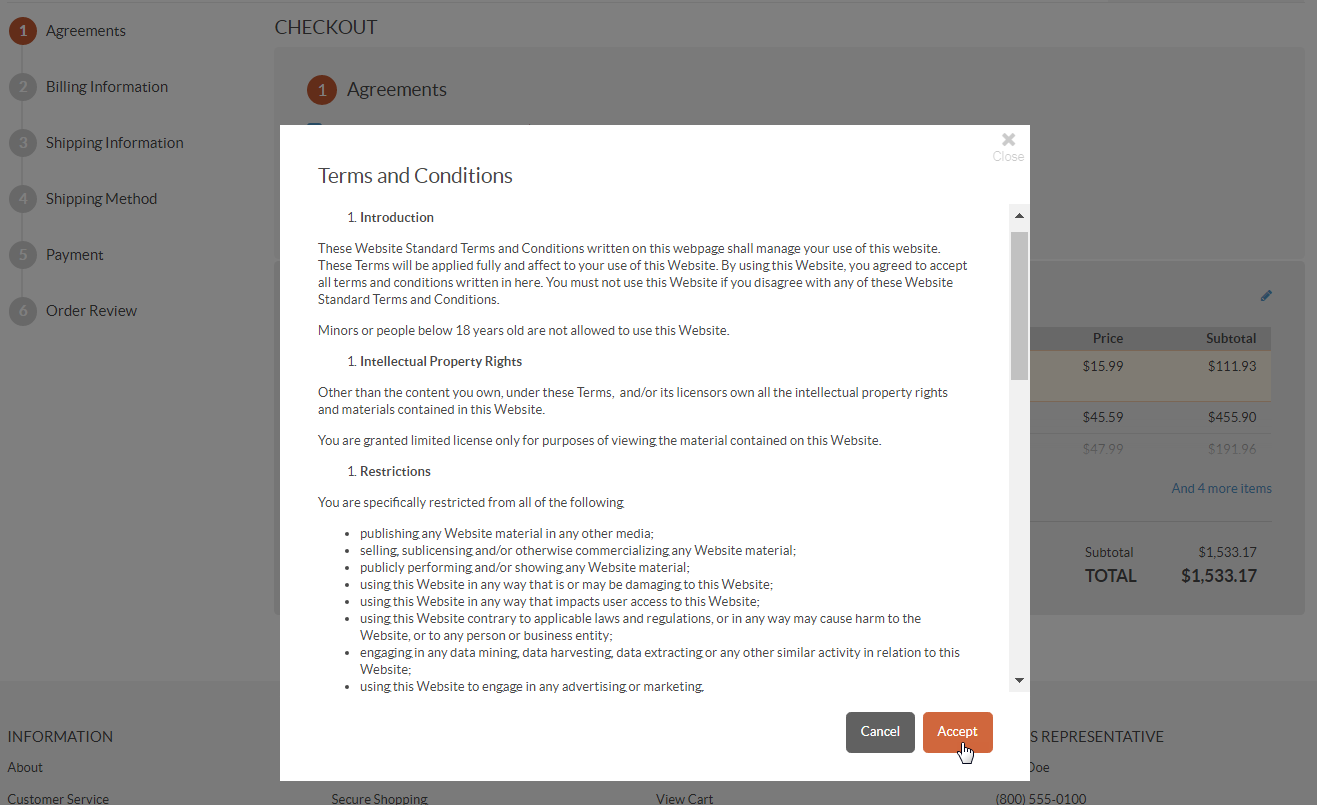
Once the consent is accepted, click Continue to proceed with the checkout.
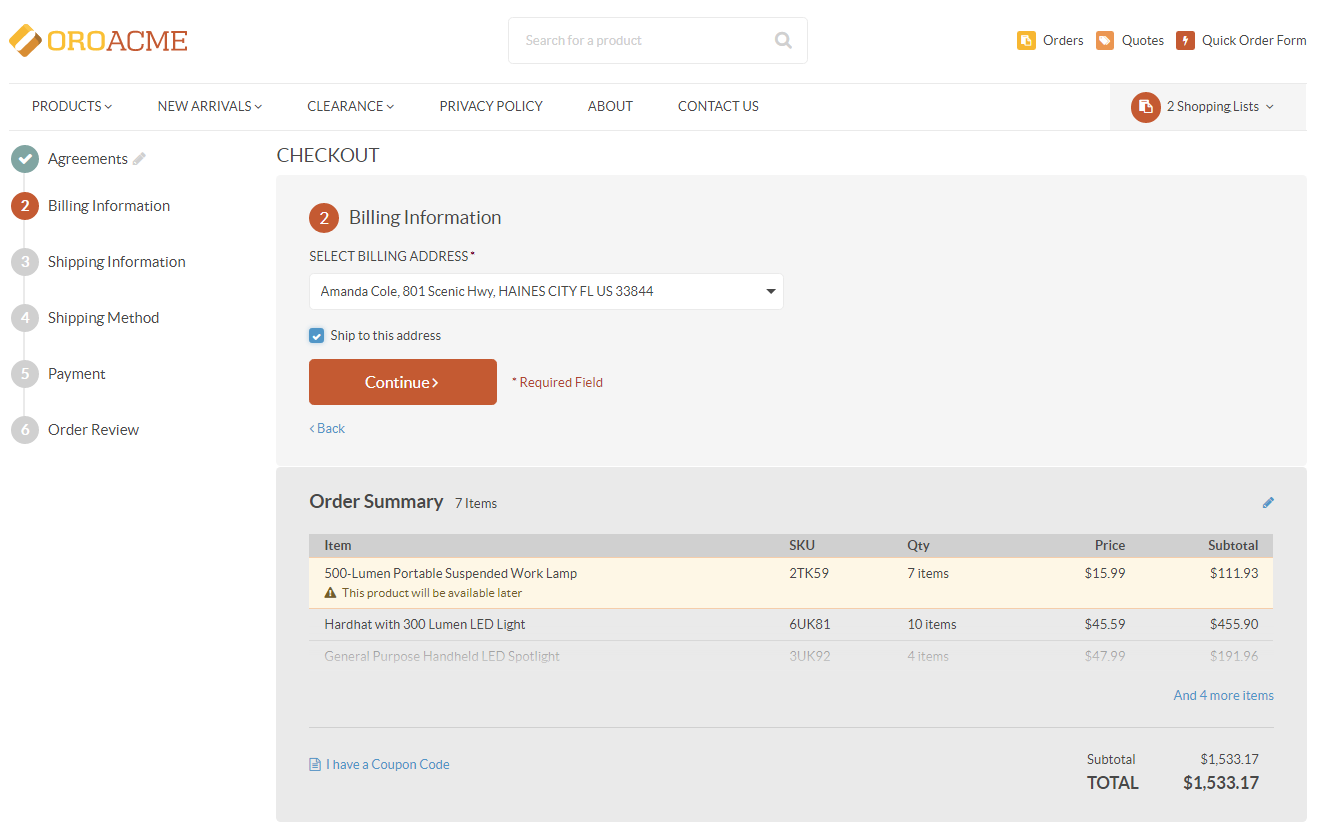
Step 2: Billing Information
The checkout is now open. The next step is to enter billing information for the order by selecting an existing address from the address book, or creating a new one.
Checking Ship to this address allows you to use the provided billing address as shipping.
Clicking Continue redirects you to the next step.
Note
You can edit the already provided information (until the order is submitted) by clicking on the left side of the page.
Step 3: Shipping Information
If the Ship to this address box has been checked at the Billing Information step, the provided address is automatically selected at the Shipping Information step.
To edit shipping information, clear the Use billing address box and provide a different shipping address for the order.
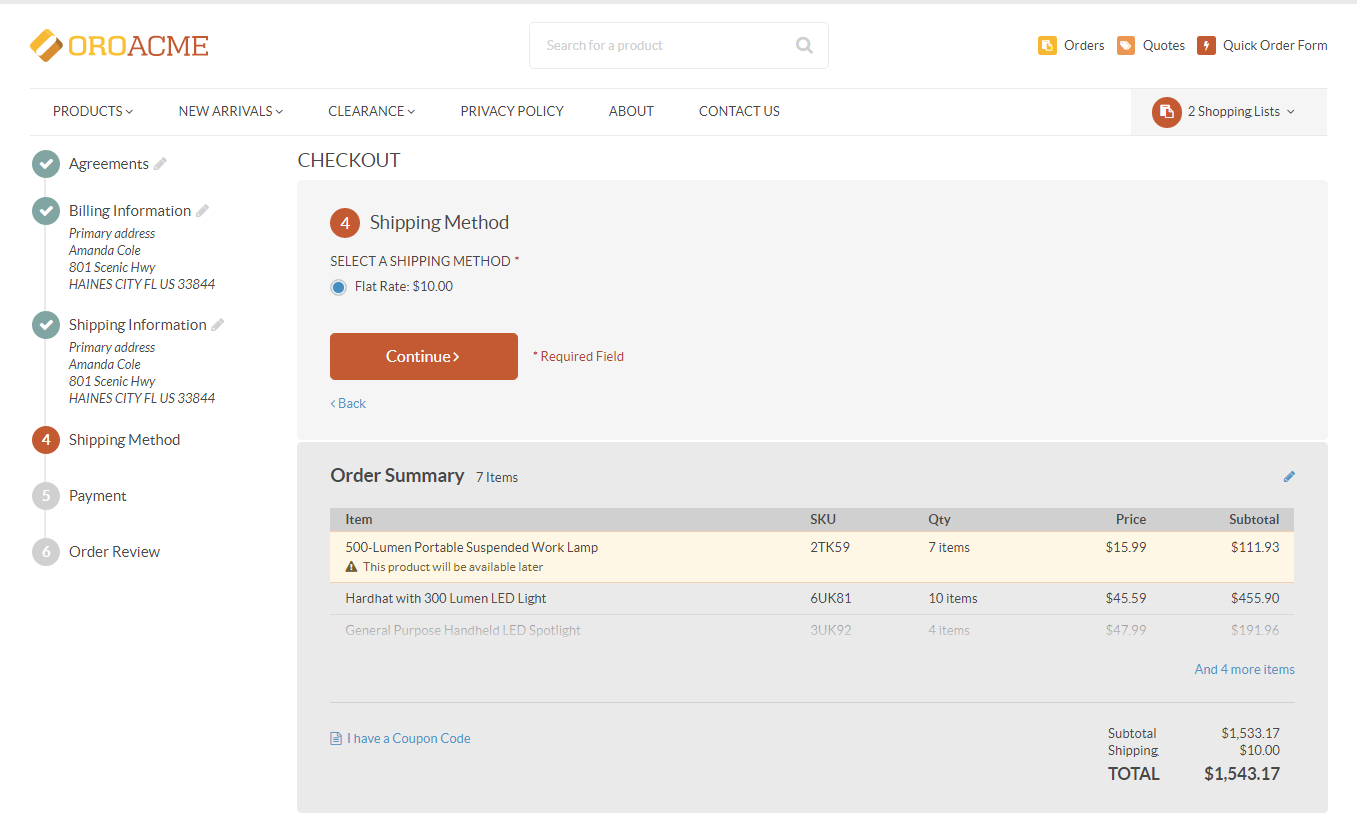
Step 4: Shipping Method
Provide a shipping method by selecting one from the list of the available methods.
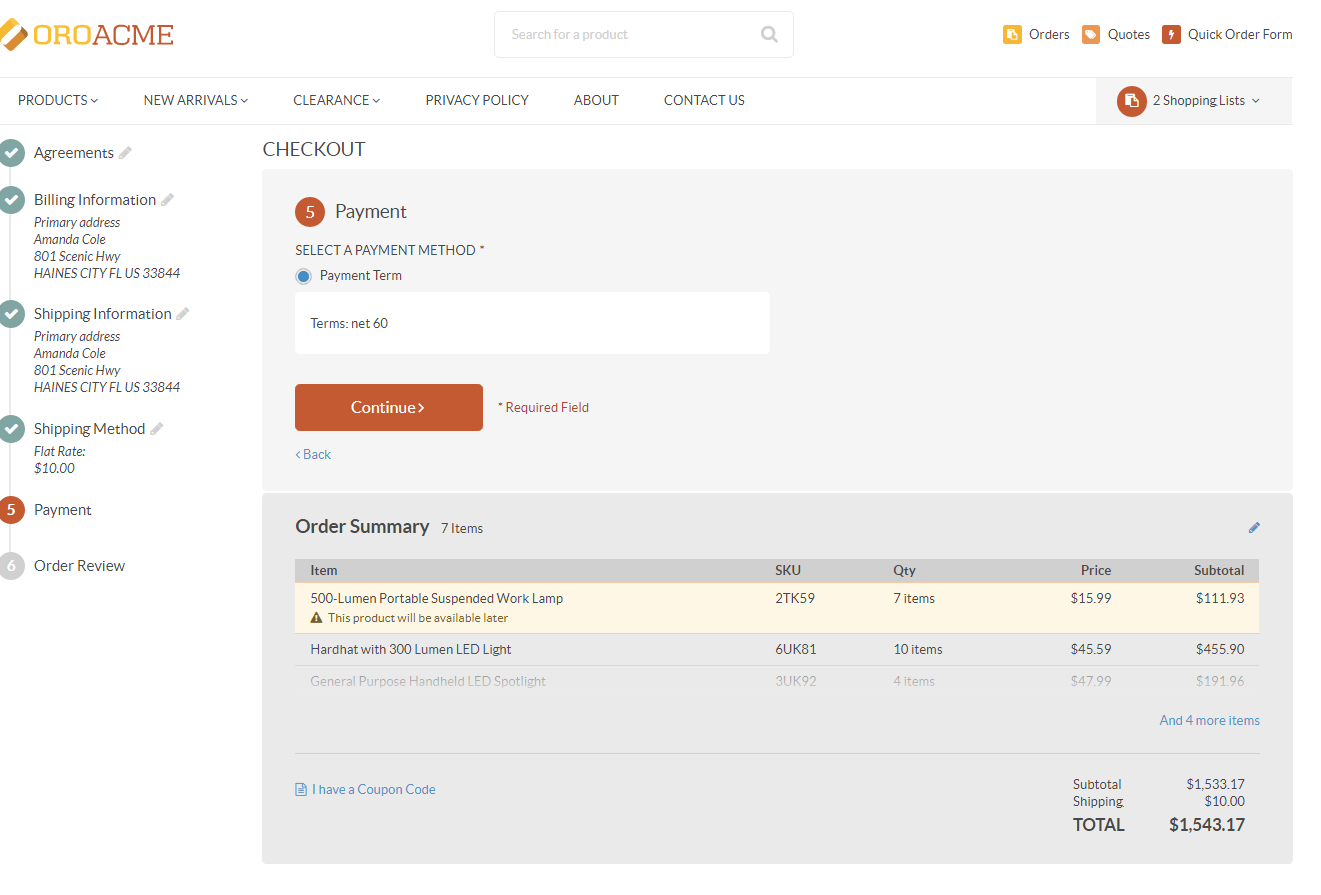
Step 5: Payment
Choose a suitable payment method by selecting it from the list of all available methods.
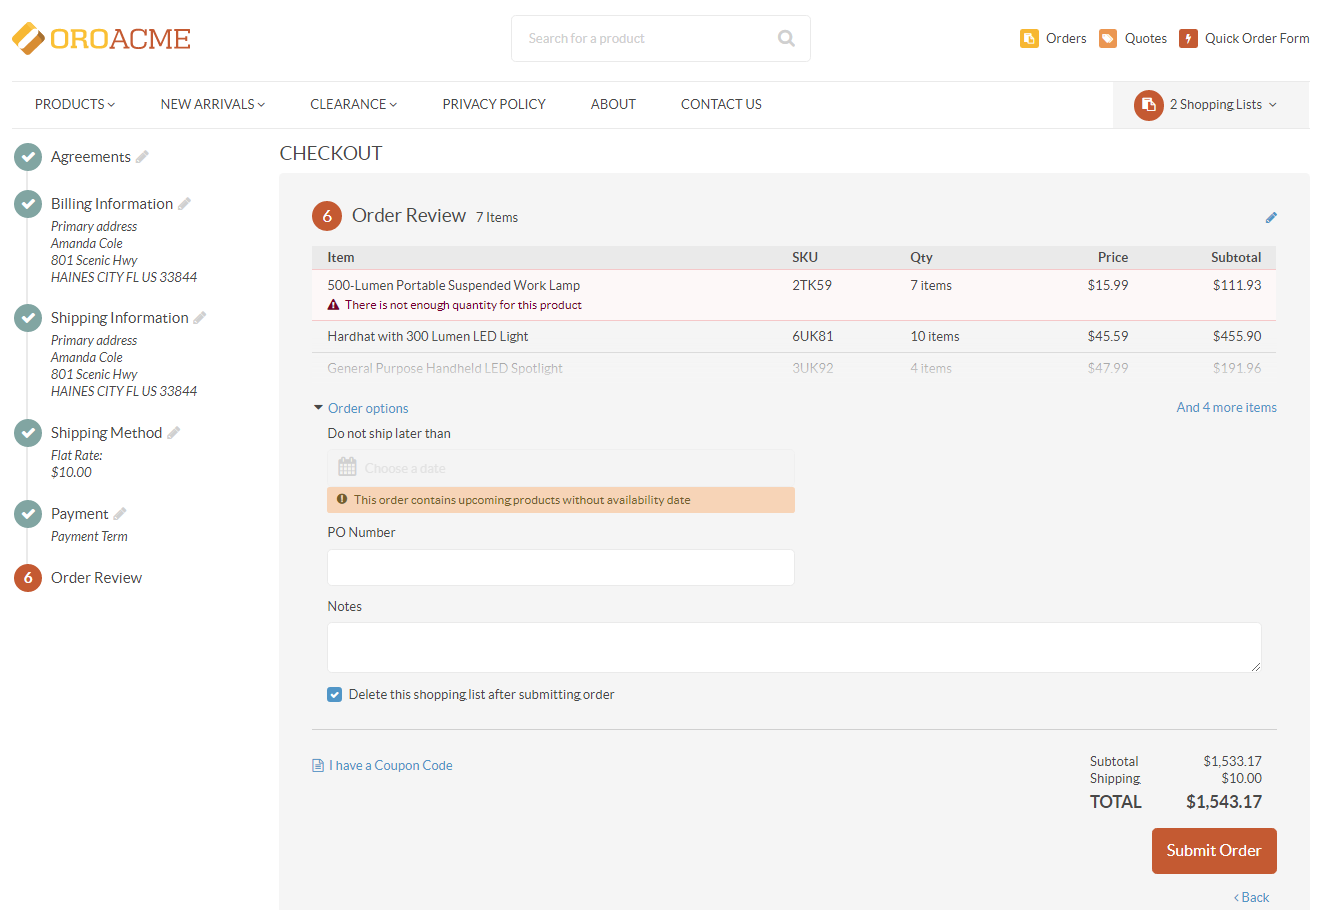
Step 6: Order Review
Once all the necessary information has been provided, you can review the order at the Order Review step:
- View Options for the order:
- Do not ship later than
- PO Number
- Notes
- Delete the shopping list
- Check quantity, price, subtotal, shipping and total cost
- Edit the Order
- Edit the already provided information by clicking on the left side of the page
To submit the order, click Submit Order at the bottom of the page.
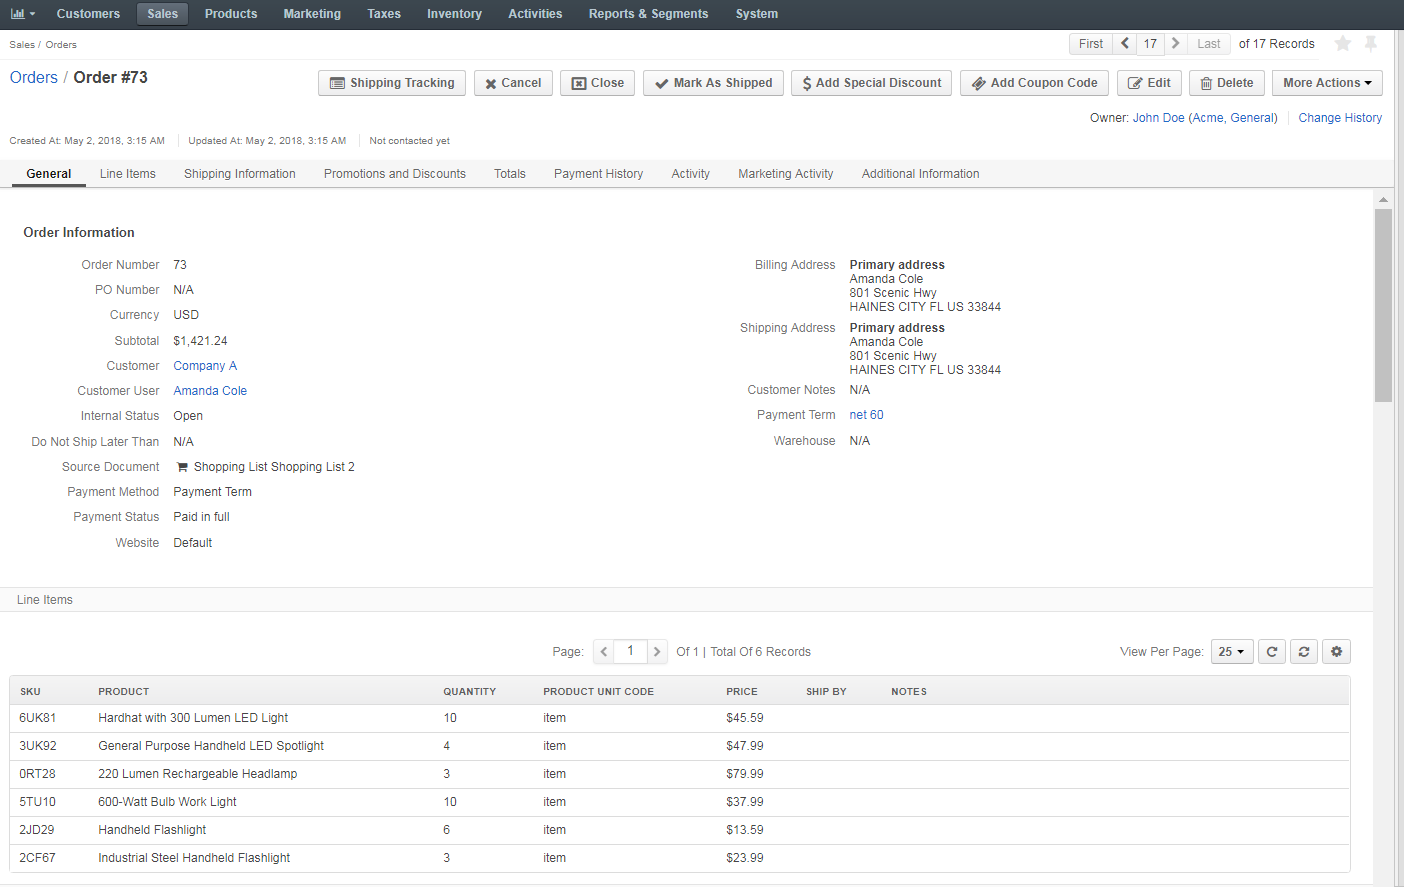
Once submitted, the order will be received and dealt with by the sales team.
Note
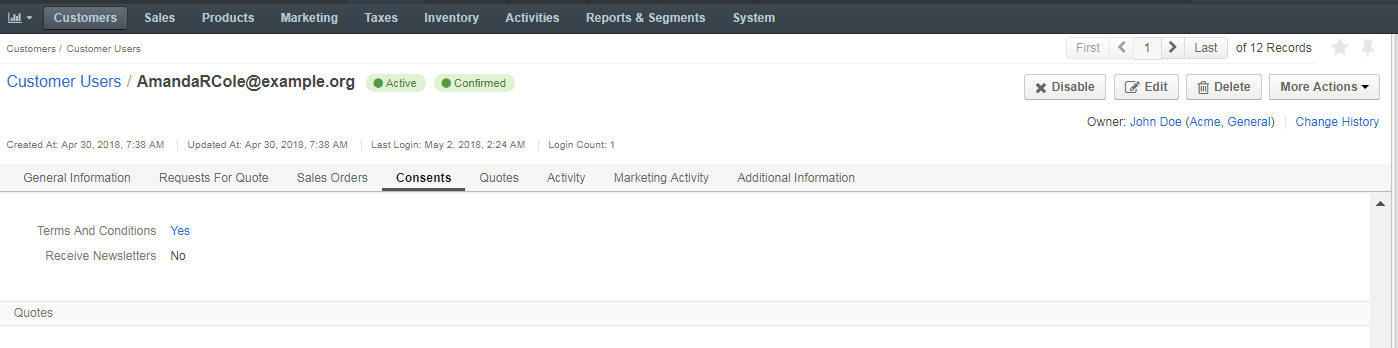
You can view consents available for your specific buyers in the Consents section of their pages in the back-office under Customers > Customer Users.