
Important
You are browsing the documentation for version 1.6 of OroCommerce, OroCRM and OroPlatform, which is no longer maintained. Read the latest LTS version of the Oro documentation to get up-to-date information.
See our Release Process documentation for more information on the currently supported and upcoming releases.
Configure All Products Page
In your Oro back-office, you can enable and configure All Products page for the OroCommerce storefront. When configured, such page should display all available products from the master catalog grouped by categories.
To configure All Products page:
Enable All Products Page in system configuration on the required level — globally or per website).
Add it to the storefront as part of either your web catalog (Marketing > Web Catalog) or a frontend menu (System > Frontend Menus) on the required level:
- Globally (System > Frontend Menus)
- Per organization (System > User Management > Organizations)
- Per website (System > Websites)
- Per customer group (Customers > Customer Group)
- Per customer (Customers > Customers)
More information on customization on each of these levels can be found in the relevant Frontend Menus guide.
Note
Please note that it is recommended to enable All Products page exclusively for small catalogs with no more than a few hundred products, otherwise browser performance might be affected.
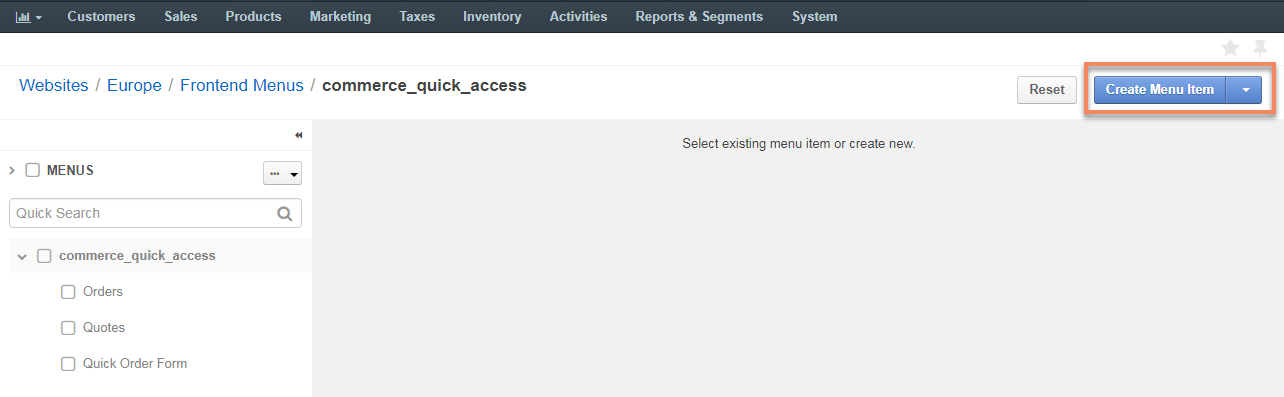
An Example of Adding All Products Page
As an illustration, let us add a sample All Products page to the storefront of the Europe website as a standalone page in the Quick Access menu.
For this, first enable All Products page in the system:
Navigate to System > Websites.
For Europe, hover over the more actions menu, and click .
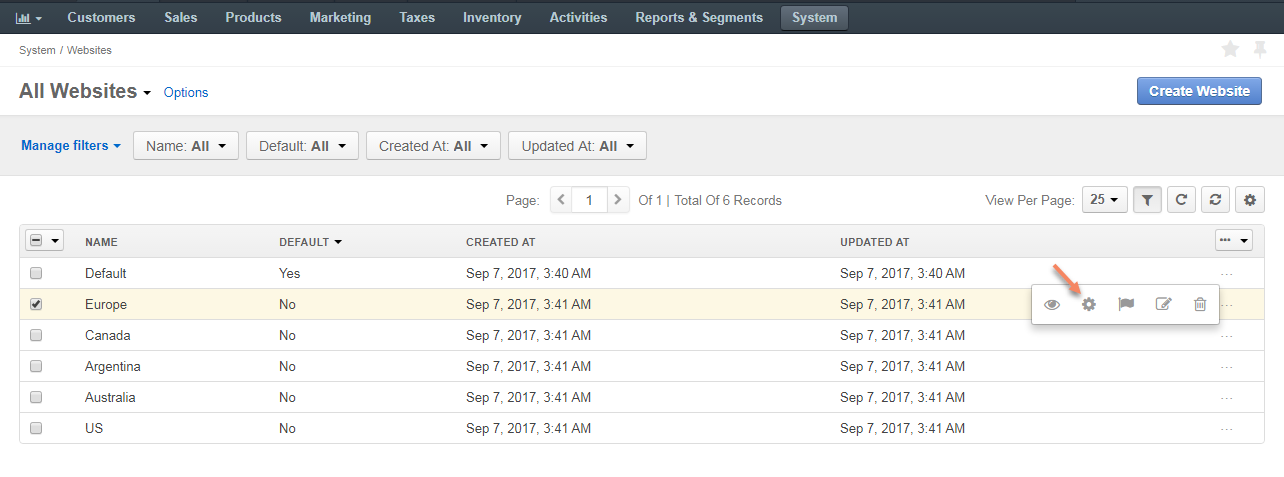
Select Commerce > Catalog > Special Pages in the panel to the left.
In the All Products section, select the Enable All Products Page check box.
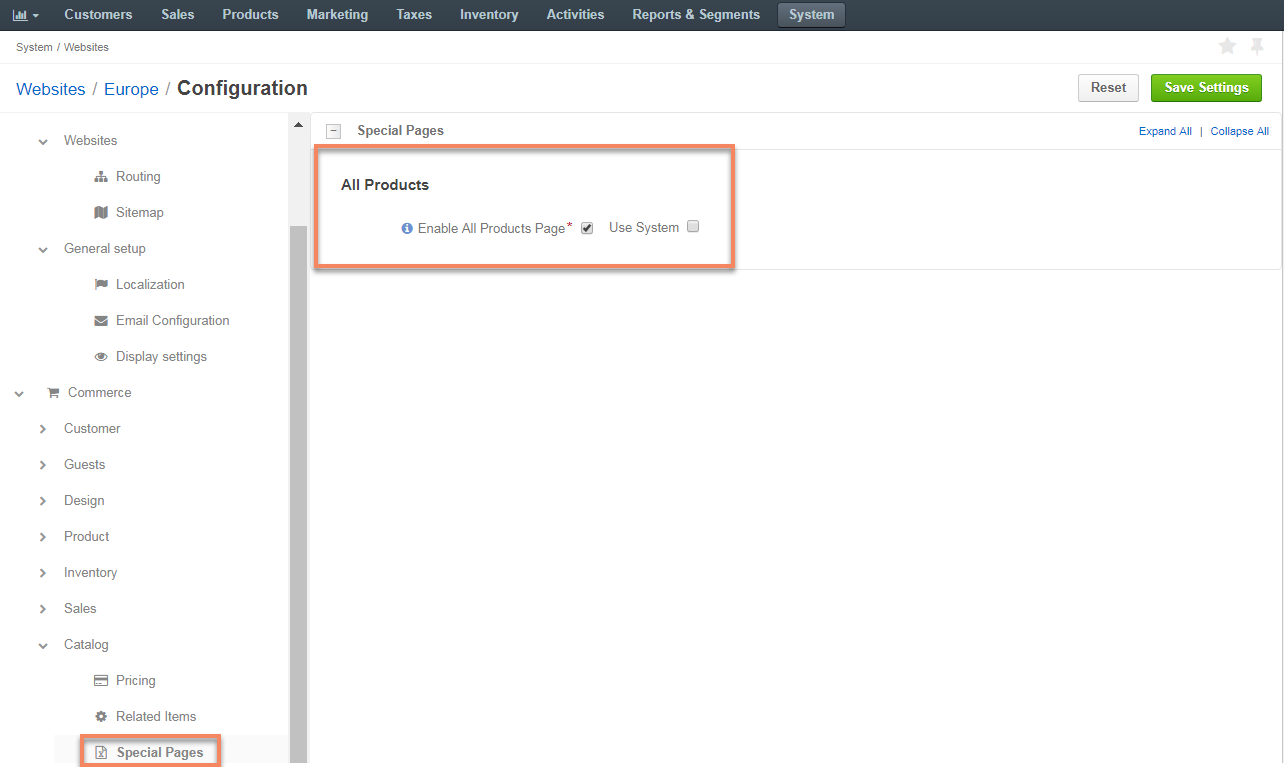
Click Save Settings.
Next, add the page to the quick access menu:
Navigate to System > Websites.
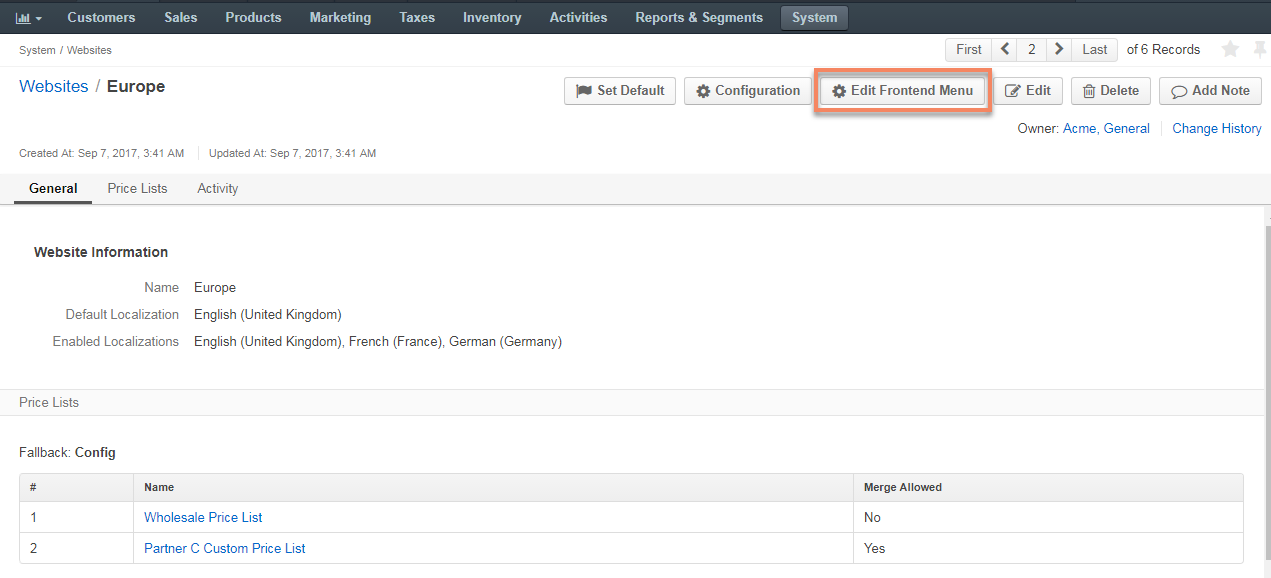
Click once on the Europe website to open its page.
On the website page, click Edit Frontend Menu to start editing the configuration.
Click once on the commerce_quick_access menu.

Click Create Menu Item on the top right.
Fill in the required fields:
- Title: All Products
- URL: /catalog/allproducts
- Select an icon from the list
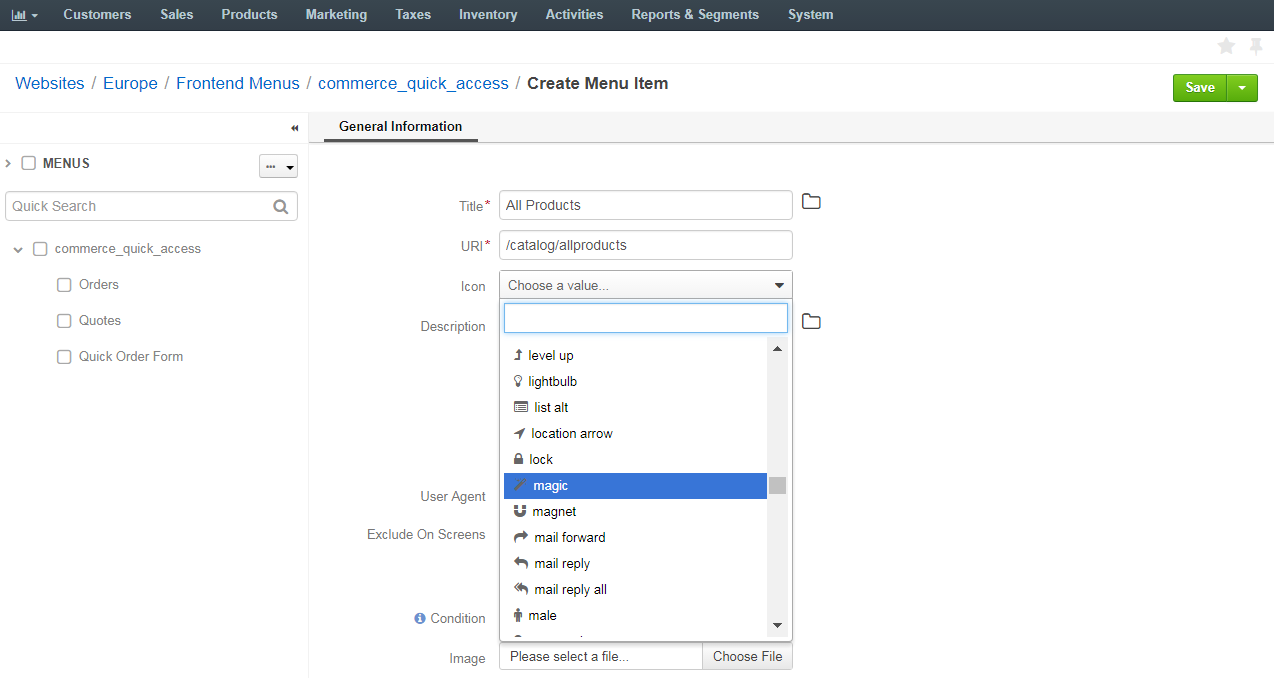
Click Save on the top right to save the changes.
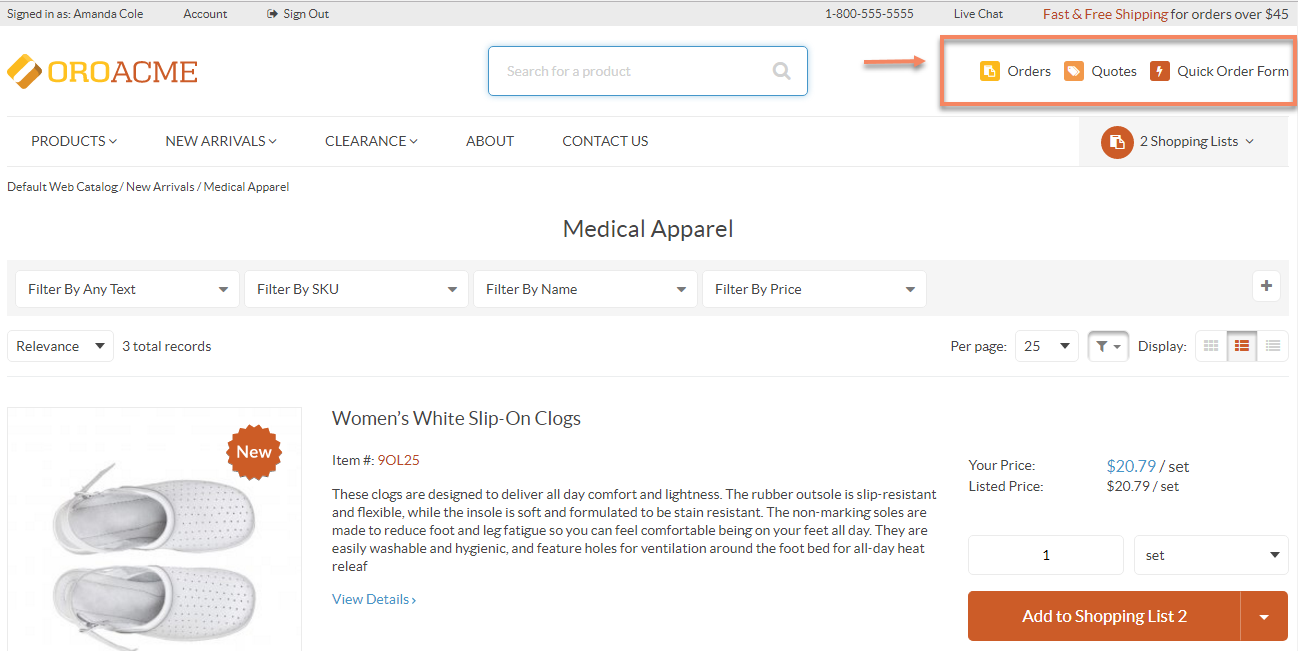
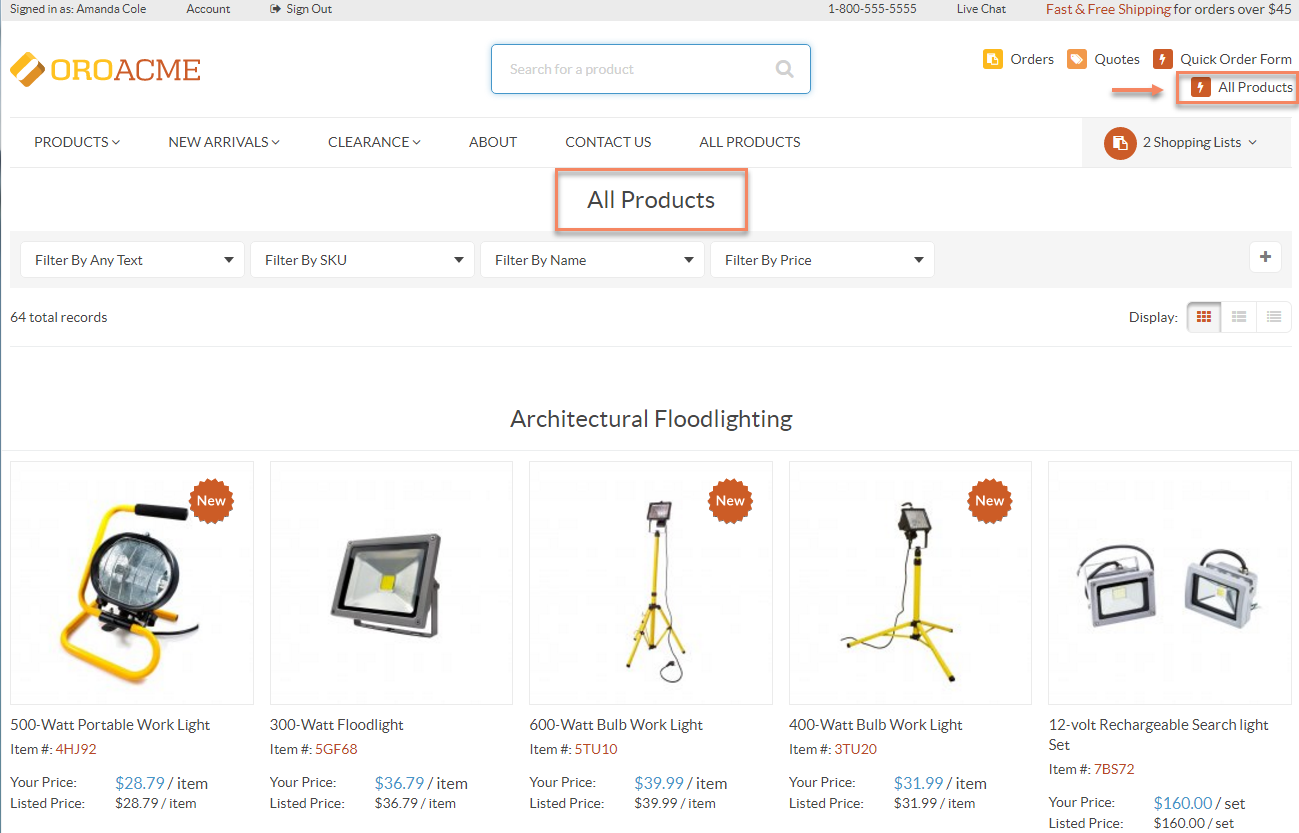
The All Products page should now be available as part of the Quick Access menu in the storefront of the Europe website.
Note
Please note, that the products unassigned to a category will be listed first, followed by those which belong to a category.
Similarly, you can add All Products page to the menus of your choice.
Related Topics