
Important
You are browsing the documentation for version 1.6 of OroCommerce, OroCRM and OroPlatform, which is no longer maintained. Read the latest LTS version of the Oro documentation to get up-to-date information.
See our Release Process documentation for more information on the currently supported and upcoming releases.
Create a Quote From Scratch
To create a new quote from scratch:
Navigate to Sales > Quotes in the main menu.
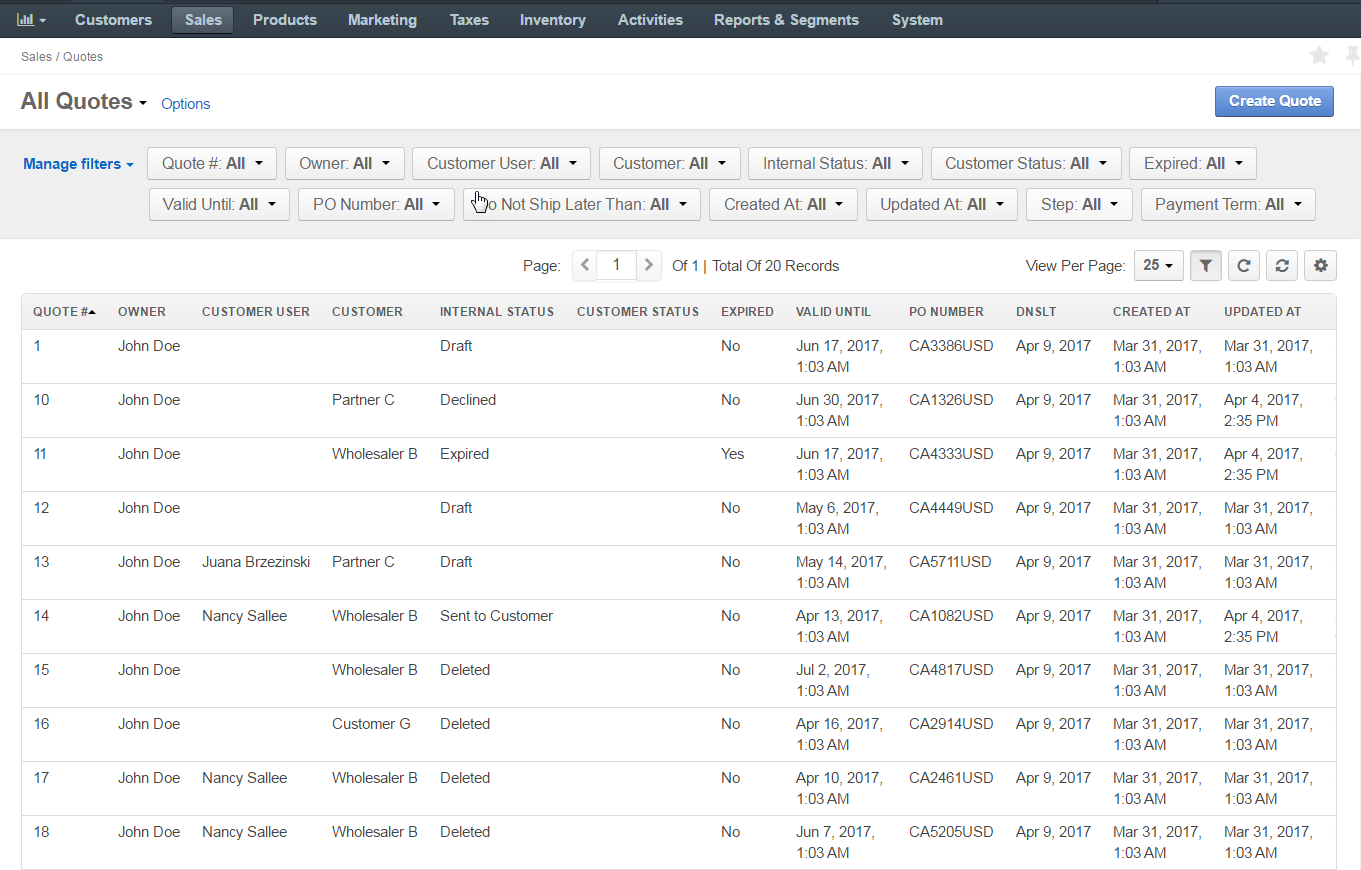
Click Create Quote.
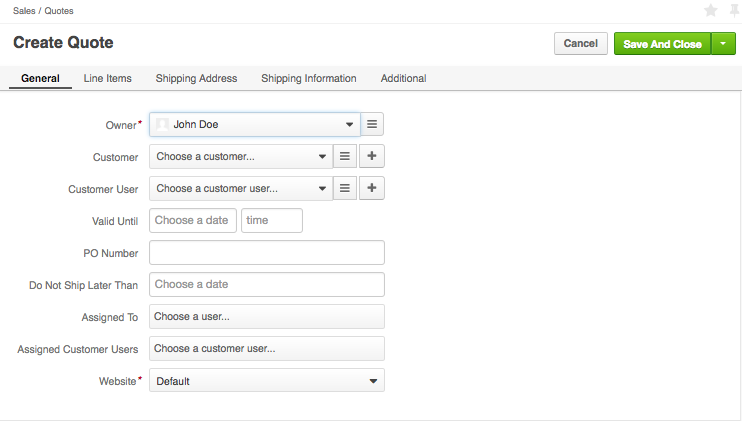
In the General section:
- Select a Customer and Customer User to create a quote for.
- Enter the quote expiration information in the Valid Until date and time boxes.
- Optionally, enter a PO Number for the customer reference.
- If necessary, set the Do Not Ship Later Than date, to limit the order validity based on the information from the customer.
- Select an order fulfilment officer in the Assigned To box.
- Select the assigned customer user that will receive the order delivery in the Assigned Customer box.
- Select a Website to make this quote visible only on the specified website.
In the Line Items section:
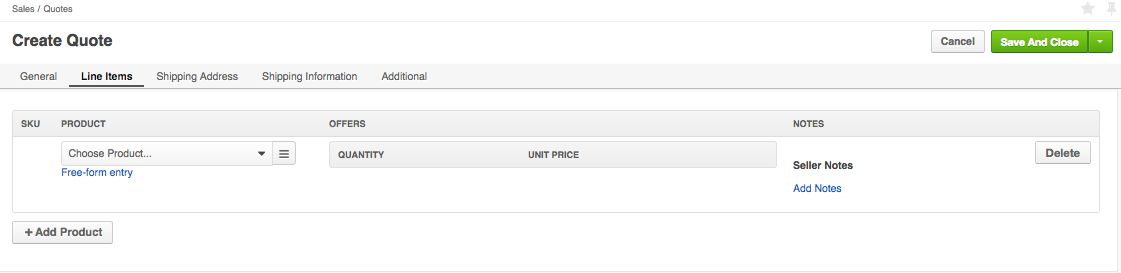
Add products as quote line items.
Use Select Product and Free-form entry link to switch between the following product entry modes:
Select a Product: Select the product using search (v) or from the product list (=).
Free-Form Entry: Type in the SKU and/or Product Name.
Fill in the offer:
- Provide quantity and select a product unit measurement.
- Check or more to allow the customer to increase the quantity in the order.
- Type in the unit price and select a currency.
To offer alternative quantity and prices, use + Add Offer.
Add notes to the quote line, if necessary: click Add notes in the Seller Notes section.
Note
To delete any quote line, click Delete on the right of the line item information group.
Add more products, if necessary, by clicking + Add Products below the existing product lines.
In the Shipping Address section, enter the shipping address, organization name and name of the person the future order should be shipped to.
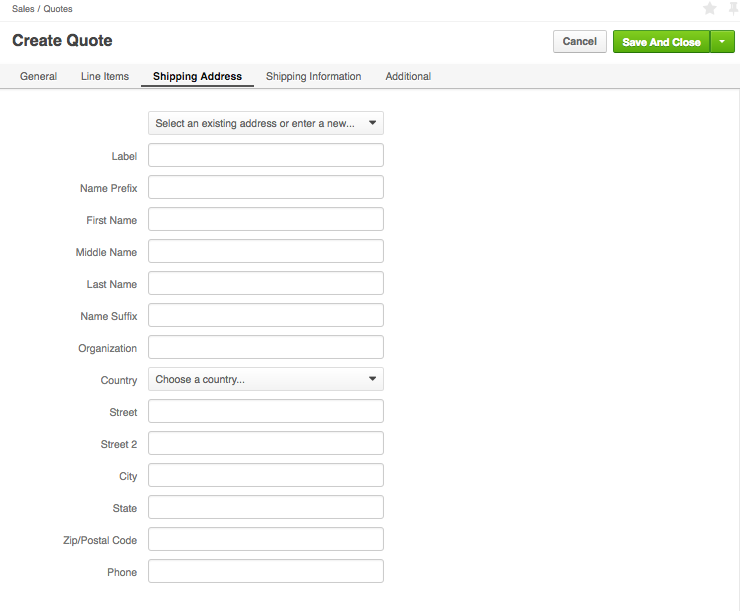
Note
Keep in mind that the shipping address you enter when creating a quote will be the only option available for the customer on the checkout.
In the Shipping Information section, configure the recommended shipping options for the customer:
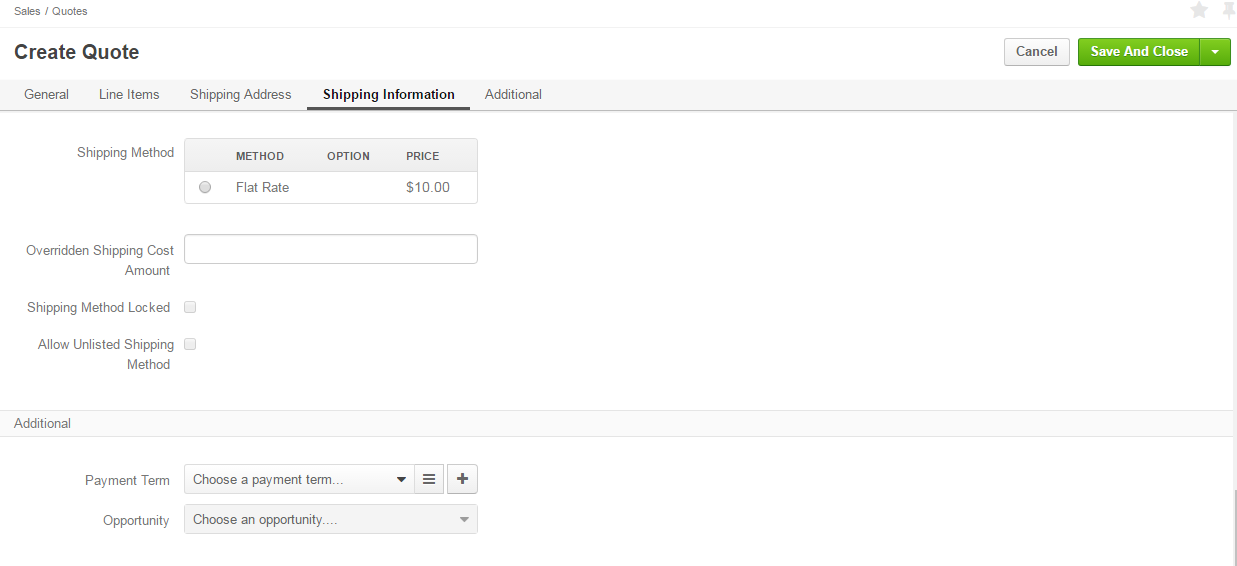
- In the Shipping Method list, select the recommended (default) shipping method that will be pre-selected when the customer gets to the shipping configuration on the checkout.
- Optionally, enter the Overridden Shipping Cost Amount, USD - a custom shipping cost that will be used instead of the one dynamically generated based on the shipping method selection.
- To enforce using only the default Shipping method selected earlier, enable the Shipping Method Locked flag. When the shipping method is locked, the buyer does not see any other payment options but the default one.
- Tick the Allow Unlisted Shipping Methods box to allow using the shipping method that is already selected as a default one, even if it is disabled by the shipping rule configuration.
Optionally, select a Payment Term as an available payment method.
Note
Be aware that although opportunity relation can be displayed on the quote page, it is not possible to manage it. When there is no opportunity relation available for a quote, inactive Opportunity field is displayed. More information on the relationship between opportunities and quotes is available in the relevant OroCommerce Opportunity Flow topic.
Click Save.